2009 MITSUBISHI ASX child lock
[x] Cancel search: child lockPage 61 of 368
Seat adjustment
E00400300271
Adjust
the driver’s seat so that you are comfortable
and that you can reach the pedals, steering wheel,
switches etc. while retaining a clear field of vision. WARNING
l Do
not attempt to adjust the seat while
driving. This can cause loss of vehicle con-
trol and result in an accident. After ad-
justments are made, ensure the seating is
locked in position by attempting to move
the seat forward and rearward without us-
ing the adjusting mechanism.
l Do not let children or adults ride in areas
of the vehicle that are not equipped with
seats or seat belts. Also, make sure that
all occupants are sitting in their seats and
wearing their seat belts, and that children
are sitting in child restraints.
l To minimize the risk of personal injury
in the event of a collision or sudden brak-
ing, the seatbacks should always be in the
almost upright position while the vehicle
is in motion. The protection provided by
the seat belts may be reduced significant-
ly when the seatback is reclined. There is
greater risk that the passenger will slide
under the seat belt, resulting in serious in-
jury, when the seatback is reclined. CAUTION
l
Make
sure the seat is adjusted by an
adult or with adult supervision for cor-
rect and safe operation.
l Do not place a cushion or the like be-
tween your back and the seatback while
driving. The effectiveness of the head re-
straints will be reduced in the event of an
accident.
l When sliding the seat rearward, be care-
ful not to catch your hand or foot. Front seat
E00400400142
To adjust forward or backward E00400500462
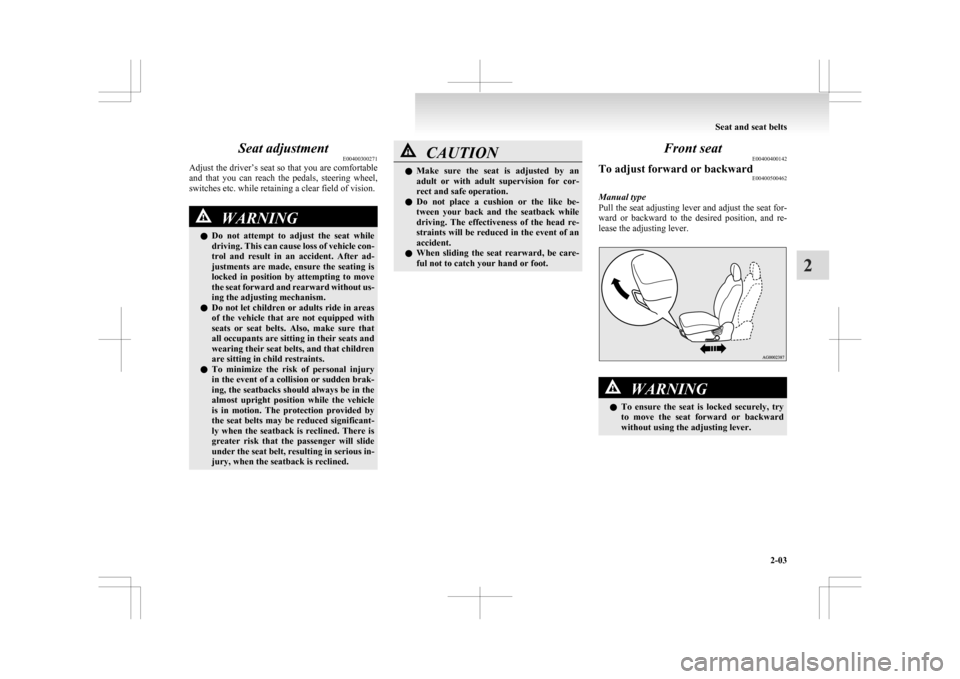
Manual type
Pull
the seat adjusting lever and adjust the seat for-
ward or backward to the desired position, and re-
lease the adjusting lever. WARNING
l To
ensure the seat is locked securely, try
to move the seat forward or backward
without using the adjusting lever. Seat and seat belts
2-03 2
Page 64 of 368

Heated seats*
E00401100960
The
heated seats can be operated with the ignition
switch or the operation mode in ON. The indica-
tion lamp (A) will illuminate while the heater is on. 1 (HI) - Heater high (for quick heating).
2 - Heater off.
3 (LO) - Heater low (to keep the seat warm).
CAUTION
l
Switch off seat heaters when not in use.
l Operate
in the high position for quick heat-
ing. Once the seat is warm, set the heater
to low to keep it warm. Slight variations
in seat temperature may be felt while us-
ing the heated seats. This is caused by the
operation of the heater’s internal thermo-
stat and does not indicate a malfunction.
l If the following types of persons use the
heated seats, they might become too hot CAUTION
or receive minor burns (red skin, heat blis-
ters, etc.):
•
Children, elderly or ill people
• People with sensitive skin
• Excessively tired people
• People under the influence of alcohol or sleep inducing medication (cold
medicine, etc.)
l Do not place heavy objects on the seat or
stick pins, needles, or other pointed ob-
jects into it.
l Do not use a blanket, cushion, or other ma-
terial with high heat insulation properties
on the seat while using the heater; this
might cause the heater element to overheat
l Do not use benzine, kerosene, petrol, alco-
hol or other organic solvents when clean-
ing the seats. Doing so could damage not
only the seat cover, but also the heater el-
ement.
l If water or any other liquid is spilled on
the seat, allow it to dry thoroughly before
attempting to use the heater.
l Turn the heater off immediately if it ap-
pears to be malfunctioning during use. Rear seat
E00401300294 WARNING
l When
a person sits in the rear seat, pull
up the head restraint to a height at which
it locks in position. Be sure to make this
adjustment before starting to drive. Seri-
ous injuries could otherwise be suffered
as the result of an impact. Refer to “Head
restraints” on page 2-07.
Armrest* E00401700650
To use the armrest, fold it down.
To
return to the original position, push it backward
level with the seat. NOTE
l Do
not climb or sit on the armrest. Doing so
could damage the armrest. Seat and seat belts
2-06
2
Page 66 of 368
Installation
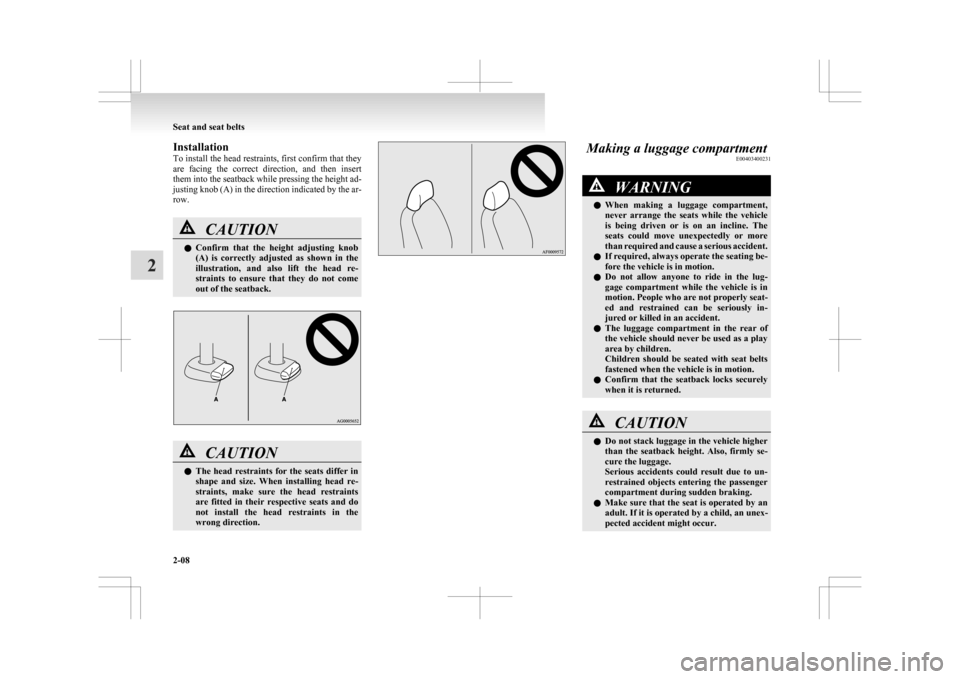
To
install the head restraints, first confirm that they
are facing the correct direction, and then insert
them into the seatback while pressing the height ad-
justing knob (A) in the direction indicated by the ar-
row. CAUTION
l
Confirm
that the height adjusting knob
(A) is correctly adjusted as shown in the
illustration, and also lift the head re-
straints to ensure that they do not come
out of the seatback. CAUTION
l
The
head restraints for the seats differ in
shape and size. When installing head re-
straints, make sure the head restraints
are fitted in their respective seats and do
not install the head restraints in the
wrong direction. Making a luggage compartment
E00403400231 WARNING
l When
making a luggage compartment,
never arrange the seats while the vehicle
is being driven or is on an incline. The
seats could move unexpectedly or more
than required and cause a serious accident.
l If required, always operate the seating be-
fore the vehicle is in motion.
l Do not allow anyone to ride in the lug-
gage compartment while the vehicle is in
motion. People who are not properly seat-
ed and restrained can be seriously in-
jured or killed in an accident.
l The luggage compartment in the rear of
the vehicle should never be used as a play
area by children.
Children should be seated with seat belts
fastened when the vehicle is in motion.
l Confirm that the seatback locks securely
when it is returned. CAUTION
l
Do
not stack luggage in the vehicle higher
than the seatback height. Also, firmly se-
cure the luggage.
Serious accidents could result due to un-
restrained objects entering the passenger
compartment during sudden braking.
l Make sure that the seat is operated by an
adult. If it is operated by a child, an unex-
pected accident might occur. Seat and seat belts
2-08
2
Page 68 of 368
Seat belts
E00404800636
To
protect you and your passengers in the event of
an accident, it is most important that the seat belts
be worn correctly while driving.
The front seat belts have a pretensioner system.
These belts are used the same way as a convention-
al seat belt.
Refer to “Seat belt pretensioner system and force
limiter system” on page 2-14. WARNING
l Always
place the shoulder belt over your
shoulder and across your chest. Never
put it behind you or under your arm.
l One seat belt should be used by only one
person. Doing otherwise can be dangerous.
l The seat belt will provide its wearer with
maximum protection if the recliner seat-
back is placed in fully upright position.
When the seatback is reclined, there is
greater risk that the passenger will slide
under the belt, especially in a forward im-
pact accident, and may be injured by the
belt or by striking the instrument panel
or seatbacks.
l Seat belts should always be worn by ev-
ery adult who drives or rides in this vehi-
cle, and by all children who are tall
enough to wear seat belts properly.
Other children should always use proper
child restraint systems.
l Remove any twists when using the belt. WARNING
l No
modifications or additions should be
made by the user which will either pre-
vent the seat belt adjusting devices from
operating to remove slack, or prevent the
seat belt assembly from being adjusted to
remove slack.
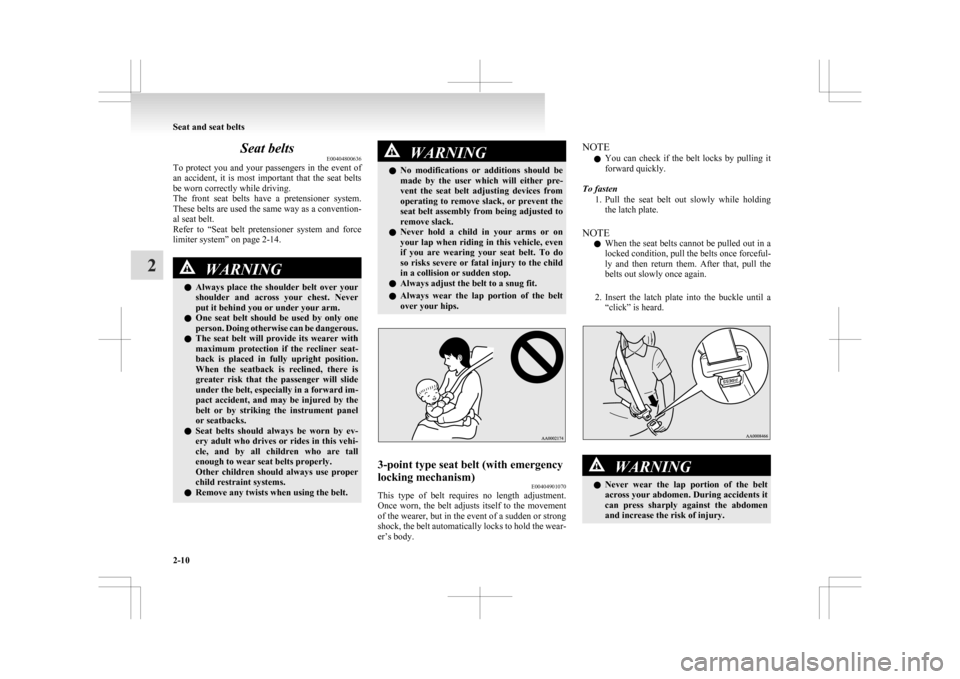
l Never hold a child in your arms or on
your lap when riding in this vehicle, even
if you are wearing your seat belt. To do
so risks severe or fatal injury to the child
in a collision or sudden stop.
l Always adjust the belt to a snug fit.
l Always wear the lap portion of the belt
over your hips. 3-point type seat belt (with emergency
locking mechanism)
E00404901070
This type of belt requires no length adjustment.
Once
worn, the belt adjusts itself to the movement
of the wearer, but in the event of a sudden or strong
shock, the belt automatically locks to hold the wear-
er’s body. NOTE
l You
can check if the belt locks by pulling it
forward quickly.
To fasten 1. Pull the seat belt out slowly while holdingthe latch plate.
NOTE l When the seat belts cannot be pulled out in a
locked condition, pull the belts once forceful-
ly and then return them. After that, pull the
belts out slowly once again.
2. Insert the latch plate into the buckle until a “click” is heard. WARNING
l Never
wear the lap portion of the belt
across your abdomen. During accidents it
can press sharply against the abdomen
and increase the risk of injury. Seat and seat belts
2-10
2
Page 81 of 368
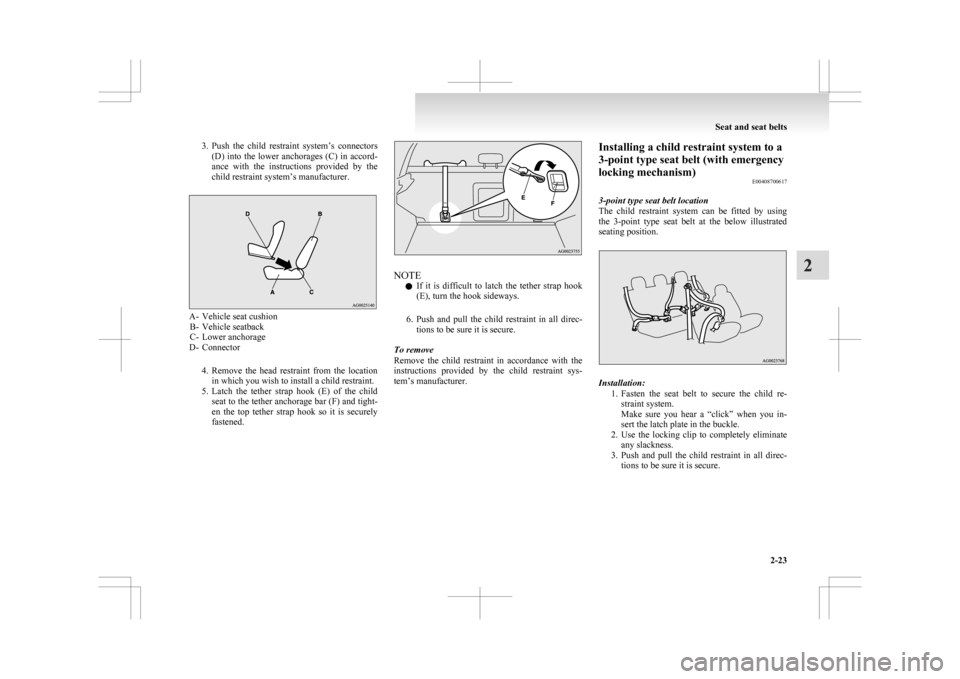
3. Push the child restraint system’s connectors
(D) into the lower anchorages (C) in accord-
ance with the instructions provided by the
child restraint system’s manufacturer. A- Vehicle seat cushion
B-
Vehicle seatback
C- Lower anchorage
D- Connector
4. Remove the head restraint from the locationin which you wish to install a child restraint.
5. Latch the tether strap hook (E) of the child seat to the tether anchorage bar (F) and tight-
en the top tether strap hook so it is securely
fastened. NOTE
l If
it is difficult to latch the tether strap hook
(E), turn the hook sideways.
6. Push and pull the child restraint in all direc- tions to be sure it is secure.
To remove
Remove the child restraint in accordance with the
instructions provided by the child restraint sys-
tem’s manufacturer. Installing a child restraint system to a
3-point type seat belt (with emergency
locking mechanism)
E00408700617
3-point type seat belt location
The
child restraint system can be fitted by using
the 3-point type seat belt at the below illustrated
seating position. Installation:
1. Fasten
the seat belt to secure the child re-
straint system.
Make sure you hear a “click” when you in-
sert the latch plate in the buckle.
2. Use the locking clip to completely eliminate any slackness.
3. Push and pull the child restraint in all direc- tions to be sure it is secure. Seat and seat belts
2-23 2
Page 82 of 368
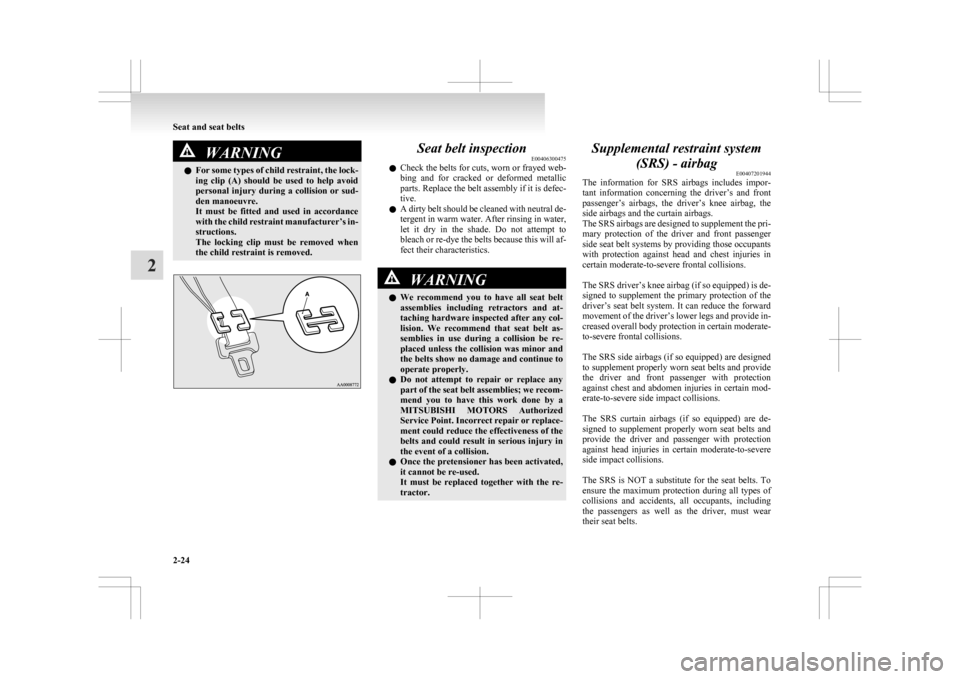
WARNING
l For some types of child restraint, the lock-
ing clip (A) should be used to help avoid
personal injury during a collision or sud-
den manoeuvre.
It must be fitted and used in accordance
with the child restraint manufacturer’s in-
structions.
The locking clip must be removed when
the child restraint is removed. Seat belt inspection
E00406300475
l Check
the belts for cuts, worn or frayed web-
bing and for cracked or deformed metallic
parts. Replace the belt assembly if it is defec-
tive.
l A dirty belt should be cleaned with neutral de-
tergent in warm water. After rinsing in water,
let it dry in the shade. Do not attempt to
bleach or re-dye the belts because this will af-
fect their characteristics. WARNING
l We
recommend you to have all seat belt
assemblies including retractors and at-
taching hardware inspected after any col-
lision. We recommend that seat belt as-
semblies in use during a collision be re-
placed unless the collision was minor and
the belts show no damage and continue to
operate properly.
l Do not attempt to repair or replace any
part of the seat belt assemblies; we recom-
mend you to have this work done by a
MITSUBISHI MOTORS Authorized
Service Point. Incorrect repair or replace-
ment could reduce the effectiveness of the
belts and could result in serious injury in
the event of a collision.
l Once the pretensioner has been activated,
it cannot be re-used.
It must be replaced together with the re-
tractor. Supplemental restraint system
(SRS) - airbag E00407201944
The
information for SRS airbags includes impor-
tant information concerning the driver’s and front
passenger’s airbags, the driver’s knee airbag, the
side airbags and the curtain airbags.
The SRS airbags are designed to supplement the pri-
mary protection of the driver and front passenger
side seat belt systems by providing those occupants
with protection against head and chest injuries in
certain moderate-to-severe frontal collisions.
The SRS driver’s knee airbag (if so equipped) is de-
signed to supplement the primary protection of the
driver’s seat belt system. It can reduce the forward
movement of the driver’s lower legs and provide in-
creased overall body protection in certain moderate-
to-severe frontal collisions.
The SRS side airbags (if so equipped) are designed
to supplement properly worn seat belts and provide
the driver and front passenger with protection
against chest and abdomen injuries in certain mod-
erate-to-severe side impact collisions.
The SRS curtain airbags (if so equipped) are de-
signed to supplement properly worn seat belts and
provide the driver and passenger with protection
against head injuries in certain moderate-to-severe
side impact collisions.
The SRS is NOT a substitute for the seat belts. To
ensure the maximum protection during all types of
collisions and accidents, all occupants, including
the passengers as well as the driver, must wear
their seat belts. Seat and seat belts
2-24
2
Page 85 of 368
NOTE
l The
labels may be in different positions de-
pending on the vehicle model.
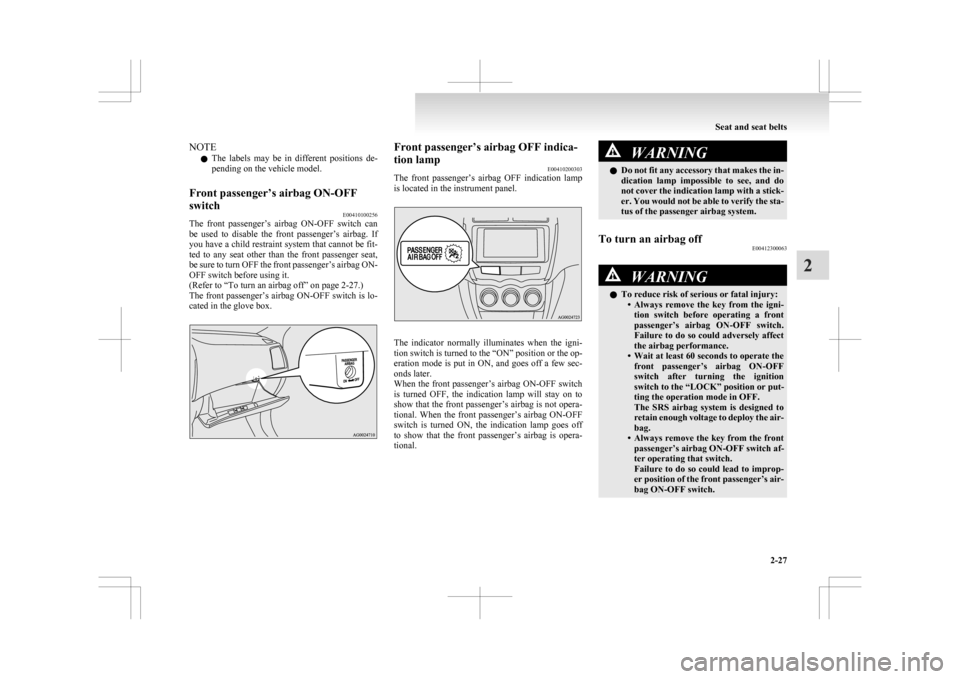
Front passenger’s airbag ON-OFF
switch E00410100256
The front passenger’s airbag ON-OFF switch can
be
used to disable the front passenger’s airbag. If
you have a child restraint system that cannot be fit-
ted to any seat other than the front passenger seat,
be sure to turn OFF the front passenger’s airbag ON-
OFF switch before using it.
(Refer to “To turn an airbag off” on page 2-27.)
The front passenger’s airbag ON-OFF switch is lo-
cated in the glove box. Front passenger’s airbag OFF indica-
tion lamp
E00410200303
The
front passenger’s airbag OFF indication lamp
is located in the instrument panel. The indicator normally illuminates when the igni-
tion
switch is turned to the “ON” position or the op-
eration mode is put in ON, and goes off a few sec-
onds later.
When the front passenger’s airbag ON-OFF switch
is turned OFF, the indication lamp will stay on to
show that the front passenger’s airbag is not opera-
tional. When the front passenger’s airbag ON-OFF
switch is turned ON, the indication lamp goes off
to show that the front passenger’s airbag is opera-
tional. WARNING
l Do
not fit any accessory that makes the in-
dication lamp impossible to see, and do
not cover the indication lamp with a stick-
er. You would not be able to verify the sta-
tus of the passenger airbag system.
To turn an airbag off E00412300063 WARNING
l To reduce risk of serious or fatal injury:
• Always
remove the key from the igni-
tion switch before operating a front
passenger’s airbag ON-OFF switch.
Failure to do so could adversely affect
the airbag performance.
• Wait at least 60 seconds to operate the front passenger’s airbag ON-OFF
switch after turning the ignition
switch to the “LOCK” position or put-
ting the operation mode in OFF.
The SRS airbag system is designed to
retain enough voltage to deploy the air-
bag.
• Always remove the key from the front passenger’s airbag ON-OFF switch af-
ter operating that switch.
Failure to do so could lead to improp-
er position of the front passenger’s air-
bag ON-OFF switch. Seat and seat belts
2-27 2
Page 222 of 368
RDS uses PI (program identification) signal and
AF
(alternative frequency) list transmitted in addi-
tion to the normal FM broadcasting programs, and
picks up the FM stations that are transmitting the
same program from the AF list and automatically
tunes to the station with the strongest signal intensi-
ty.
Therefore, you can continue listening to one pro-
gram in, for example, a long distance driving with-
out retuning to the other station transmitting the
same program when you are leaving the service
area of the currently receiving station.
The RDS radio also features the limited reception
of the program types, the break-in reception of the
traffic announcement to the EON (enhanced other
network) and emergency broadcast, and the limited/
unlimited reception of the regional programs.
AF (Alternative Frequencies) function E00720900162
The AF function finds a station broadcasting the
same
program and selects the station with the stron-
gest signal of AF lists.
The AF function is turned on at all times unless
you manually switch it off.
The AF function can be turned ON and OFF.
Refer to “Function setup mode” on page 5-16.
CT (Clock Time) function E00721000072
The clock can be set automatically by using the sig-
nal
from the local RDS stations. Refer to “Digital
clock” on page 5-39.
REG (Regional) function E00721100116
REG function limits to receive the stations broad-
casting regional programs. Regional programming and regional networks are
organized
differently depending on the country or
area (they may be changed according to the hour,
state, or broadcast area), so if you don’t want to re-
ceive the regional programs automatically, you can
set up REG ON not to receive regional programs.
The REG function can be turned ON and OFF.
Refer to “Function setup mode” on page 5-16.
PI (Program Identification) search function E00721200218
When travelling long distance and the recalled pre-
set
station is weak, the radio searches another fre-
quency broadcasting the same programming with
the same PI code in AF list.
If there are no frequencies broadcasting the same
programming, the radio searches a frequency broad-
casting the regional programming. The radio suc-
ceeds in searching the regional programming, then
the display shows the REG indicator.
If the radio does not succeed in searching the re-
gional programming, the radio returns to the recal-
led preset station.
The PI function can be turned ON and OFF on
some vehicles.
Refer to “Function setup mode” on page 5-16.
NOTE
l While searching, the audio system is muted.
The display shows “WAIT” or “SEARCH”.
PTY (Program type) E00721300323
RDS broadcasts are classified according to pro-
gram
type (PTY) as follows. Use the TUNE/SEEK
button (3 or 4) to select your desired PTY.
1. NEWS
2.
AFFAIRS (Current affairs)
3. INFO (Information)
4. SPORT
5. EDUCATE (Education)
6. DRAMA
7. CULTURE
8. SCIENCE
9. VARIED
10. POP M (Pop music)
11. ROCK M (Rock music)
12. EASY M (Easy music)
13. LIGHT M (Light classics)
14. CLASSICS
15. OTHER M (Other music)
16. WEATHER (Weather information)
17. FINANCE
18. CHILDREN
19. SOCIAL
20. RELIGION
21. PHONE IN
22. TRAVEL
23. LEISURE
24. JAZZ
25. COUNTRY
26. NATION M (National music)
27. OLDIES
28. FOLK M (Folk music)
29. DOCUMENT
To search for a broadcast of desired program type: 1. Press the PTY button.
2. Press the TUNE switch or press a memory se-lect button to select your desired PTY.
3. Two seconds after a desired PTY has been se- lected, the radio will begin to search for a
broadcast of your selected PTY. During
search, the selected PTY on the display blinks. For pleasant driving
5-14
5