2009 MITSUBISHI ASX alarm
[x] Cancel search: alarmPage 55 of 368

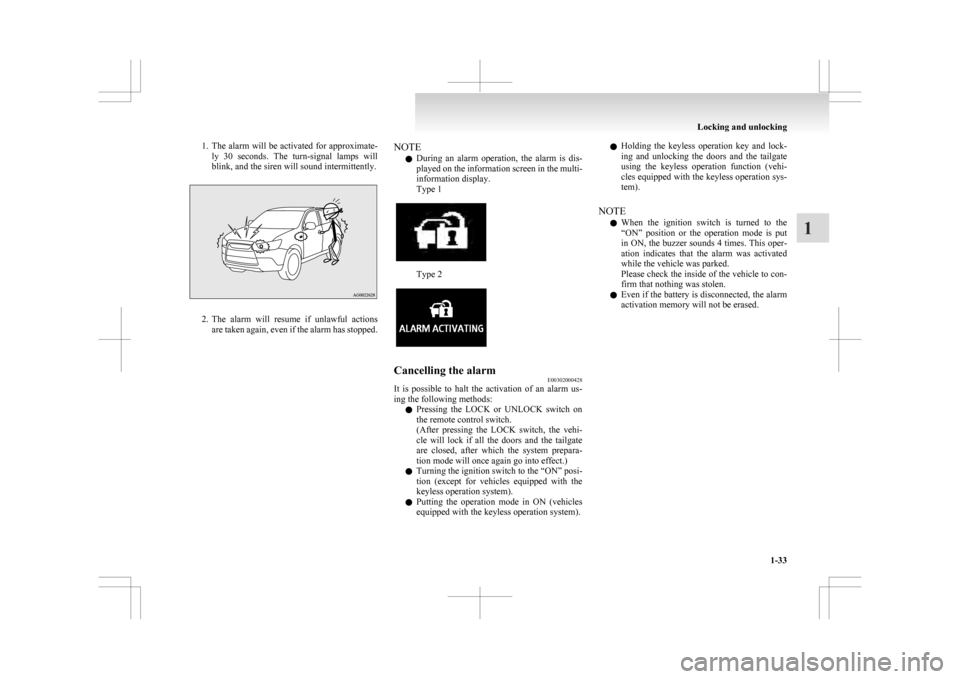
1. The alarm will be activated for approximate-
ly 30 seconds. The turn-signal lamps will
blink, and the siren will sound intermittently. 2. The
alarm will resume if unlawful actions
are taken again, even if the alarm has stopped. NOTE
l During
an alarm operation, the alarm is dis-
played on the information screen in the multi-
information display.
Type 1 Type 2
Cancelling the alarm
E00302000428
It is possible to halt the activation of an alarm us-
ing the following methods:
l Pressing
the LOCK or UNLOCK switch on
the remote control switch.
(After pressing the LOCK switch, the vehi-
cle will lock if all the doors and the tailgate
are closed, after which the system prepara-
tion mode will once again go into effect.)
l Turning the ignition switch to the “ON” posi-
tion (except for vehicles equipped with the
keyless operation system).
l Putting the operation mode in ON (vehicles
equipped with the keyless operation system). l
Holding
the keyless operation key and lock-
ing and unlocking the doors and the tailgate
using the keyless operation function (vehi-
cles equipped with the keyless operation sys-
tem).
NOTE l When the ignition switch is turned to the
“ON” position or the operation mode is put
in ON, the buzzer sounds 4 times. This oper-
ation indicates that the alarm was activated
while the vehicle was parked.
Please check the inside of the vehicle to con-
firm that nothing was stolen.
l Even if the battery is disconnected, the alarm
activation memory will not be erased. Locking and unlocking
1-33 1
Page 116 of 368

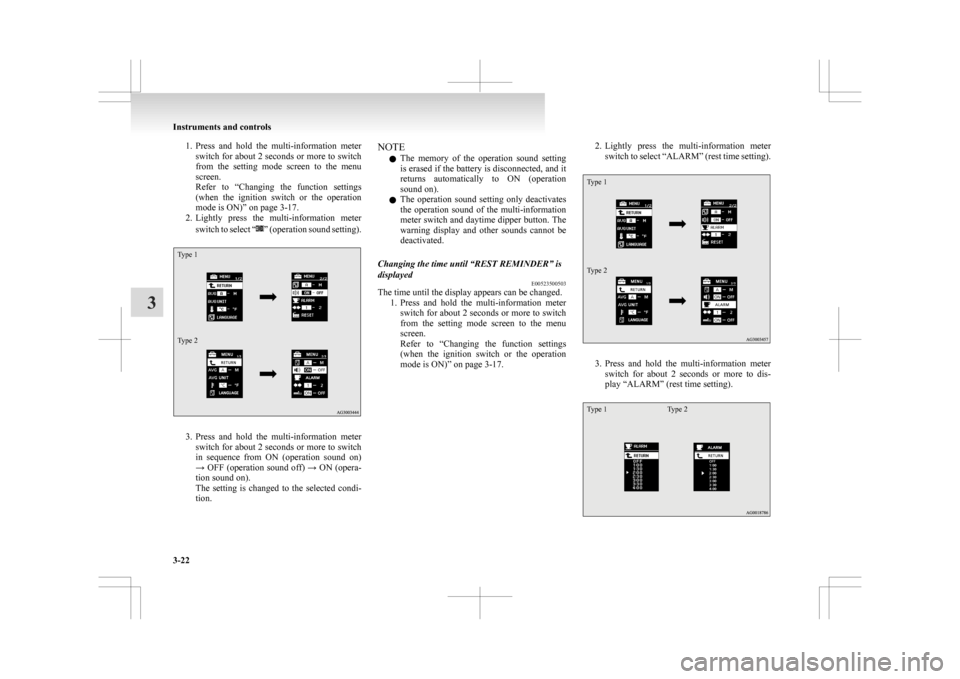
1. Press and hold the multi-information meter
switch for about 2 seconds or more to switch
from the setting mode screen to the menu
screen.
Refer to “Changing the function settings
(when the ignition switch or the operation
mode is ON)” on page 3-17.
2. Lightly press the multi-information meter
switch to select “ ”
(operation sound setting).
Type 1
Type 2
3. Press
and hold the multi-information meter
switch for about 2 seconds or more to switch
in sequence from ON (operation sound on)
→ OFF (operation sound off) → ON (opera-
tion sound on).
The setting is changed to the selected condi-
tion. NOTE
l The
memory of the operation sound setting
is erased if the battery is disconnected, and it
returns automatically to ON (operation
sound on).
l The operation sound setting only deactivates
the operation sound of the multi-information
meter switch and daytime dipper button. The
warning display and other sounds cannot be
deactivated.
Changing the time until “REST REMINDER” is
displayed E00523500503
The time until the display appears can be changed.
1. Press
and hold the multi-information meter
switch for about 2 seconds or more to switch
from the setting mode screen to the menu
screen.
Refer to “Changing the function settings
(when the ignition switch or the operation
mode is ON)” on page 3-17. 2. Lightly
press the multi-information meter
switch to select “ALARM” (rest time setting).
Type 1
Type 2 3. Press
and hold the multi-information meter
switch for about 2 seconds or more to dis-
play “ALARM” (rest time setting).
Type 1 Type 2Instruments and controls
3-22
3
Page 121 of 368

Warning display list (when the ignition switch or the operation mode is OFF)
E00524000622Screen type 1 Screen type 2 Cause Solution (Reference)
l
You have forgotten to turn off
the lamps. Refer to “Lamps (headlamps, fog
lamp, etc.) auto-cutout function” on
page 3-44. l
The
security alarm system is op-
erating. Refer to “Security alarm system” on
page 1-28. Instruments and controls
3-27 3
Page 224 of 368

The traffic information program standby function
is
turned on (with the TP indicator shown on the dis-
play) and after about 45 seconds since the RDS in-
dicator turns off due to weak signal or the tuning
station is changed over from a TP station to a sta-
tion which does not broadcast traffic information,
the sound will beep 5 times and seeks out a TP sta-
tion in all frequencies automatically.
The TP search function can be turned ON and OFF.
Refer to “Function setup mode” on page 5-16.
Emergency broadcasts E00721700242 If an emergency broadcast is caught while receiv-
ing
a FM broadcast or playing back a compact disc
with the ignition switch or the operation mode is in
ON or ACC, the display will show “ALARM” and
the emergency broadcast will interrupt the current
program. The volume level is set separately for lis-
tening to normal audio programs and for listening
to emergency broadcasts. The volume level will
therefore change automatically to that set when an
emergency broadcast or traffic information broad-
cast was last received. When the emergency broad-
cast is over, the radio will return to the previously
received program and to the corresponding volume
level.
Function setup mode E00722500423
It is possible to change the following functions:
l AF
l CT
l REG
l TP-S
l PI-S
l Language of PTY display
l SCV 1. Press the TUNE switch for 2 seconds or lon-
ger to select the function setup mode. 2. Press
the TUNE switch repeatedly to select
the mode you wish to change.
The order is: AF → CT → REG → TP-S →
PI-S → Language of PTY display → SCV
→ PHONE → Function setup mode OFF.
NOTE l Although “PHONE” appears on the display,
the PHONE function is inoperative. For pleasant driving
5-16
5
Page 310 of 368

NOTE
l If
this does not close the bonnet, release it
from a slightly higher position.
l Do not press down the bonnet hard with a
hand as it may damage the bonnet.
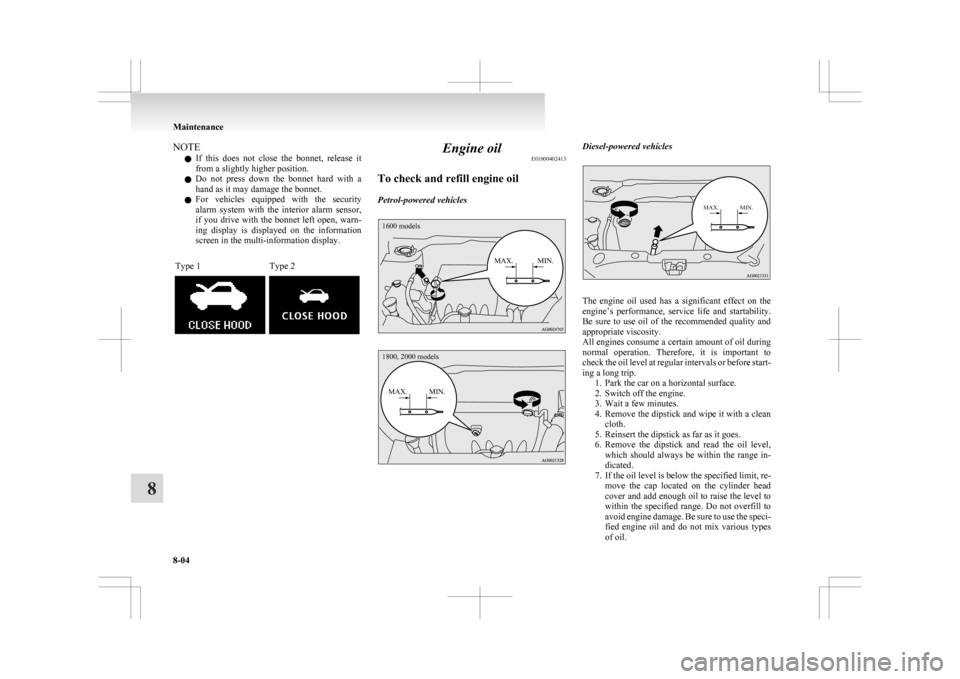
l For vehicles equipped with the security
alarm system with the interior alarm sensor,
if you drive with the bonnet left open, warn-
ing display is displayed on the information
screen in the multi-information display.
Type 1 Type 2 Engine oil
E01000402413
To check and refill engine oil
Petrol-powered vehicles
1600 models
MAX. MIN.
1800, 2000 models
MAX. MIN. Diesel-powered vehicles
MAX. MIN.
The engine oil used has a significant effect on the
engine’s
performance, service life and startability.
Be sure to use oil of the recommended quality and
appropriate viscosity.
All engines consume a certain amount of oil during
normal operation. Therefore, it is important to
check the oil level at regular intervals or before start-
ing a long trip. 1. Park the car on a horizontal surface.
2. Switch off the engine.
3. Wait a few minutes.
4. Remove the dipstick and wipe it with a cleancloth.
5. Reinsert the dipstick as far as it goes.
6. Remove the dipstick and read the oil level, which should always be within the range in-
dicated.
7. If the oil level is below the specified limit, re- move the cap located on the cylinder head
cover and add enough oil to raise the level to
within the specified range. Do not overfill to
avoid engine damage. Be sure to use the speci-
fied engine oil and do not mix various types
of oil. Maintenance
8-04
8
Page 359 of 368

Bulb capacity 8-24
Mirror Inside rear-view mirror 4-08
Outside rear-view mirrors 4-09
Modification/alterations
to the electrical or fuel sys-
tems 05
Multi-information display 3-03
OOil
Engine oil 8-04
Manual transmission oil 9-14
Rear differential oil
9-14
Transfer oil 9-14
Operation mode 1-12
Operation under adverse driving conditions 6-22
Outside rear-view mirrors 4-09
Overheating 6-04
PParking 4-07
Parking brake 4-06
Parking brake break-in 8-15
Position lamps Bulb capacity
8-24
Replacement 8-27
Power steering Fluid 9-14
Precautions to observe when using wipers and wash-
ers 3-56
Pregnant women restraint 2-14
Puncture Tyre changing 6-12
Tyre repair kit 6-07 RRear combination lamps
Bulb capacity
8-24
Replacement 8-31
Rear differential oil 9-14
Rear fog lamp Bulb capacity 8-24
Replacement 8-31
Switch 3-51
Rear room lamp Bulb capacity 8-24
Rear shelf panel 5-69
Rear turn-signal lamps Bulb capacity 8-24
Replacement 8-31
Rear window demister switch 3-57
Rear-view camera 4-50
Rear-view mirror Inside 4-08
Outside 4-09
Refill capacities 9-14
Replacement of lamp bulbs 8-23
Reversing lamps Bulb capacity 8-24
Replacement 8-31
Reversing sensor system 4-47
Roof carrier precaution 4-53
Room lamp (front) 5-62
Room lamp (rear) 5-63
Running-in recommendations 4-04
S Safe driving techniques 4-03
Seat belt 2-10
Adjustable seat belt anchor
2-12
Child restraint 2-15 Force limiter 2-15
Inspection 2-24
Pregnant women restraint
2-14
Pretensioner 2-14
Seat Adjustment 2-03
Front seat 2-03
Head restraints 2-07
Heated seats 2-06
Making a luggage compartment 2-08
Rear seat 2-06
Security alarm system 1-28
Service precaution 8-02
Side turn-signal lamp Bulb capacity 8-24
Side turn-signal lamps Replacement 8-29
Snow tyres 8-14
Spare wheel 6-13
Spark plug 9-11
Specifications 9-02
Starting 4-13
Starting and stopping the engine 1-15
Steering Power steering fluid 9-14
Steering wheel height and reach adjust-
ment 4-08
Steering wheel lock 1-14,4-12
Stop and tail lamps Replacement 8-31
Stop lamps Bulb capacity 8-23
Storage spaces 5-65
Sun visors 5-59
Sunshade 1-36
Sunshade illumination 5-64
Supplemental restraint system 2-24 Servicing 2-34 Alphabetical index
3