Page 56 of 172

Everything under control
54
Current fuel consumption
Displays the current fuel consumption to allow
you to see whether your current driving style is
conducive to fuel economy with minimum
exhaust emissions.
Average speed
Periods with the vehicle parked and the engine
switched off are not included in the calculations
of average speed.
To reset average speed: press the button in the
turn indicator lever for approx. 2 seconds.
Current vehicle speed
To have the current speed shown in the upper
display otherwise serving for the outside tem-
perature display and clock.
1.Press the button in the turn indicator lever
repeatedly until the current speed appears
in the lower display.
2.Wait for the speed display to automatically
move to the upper display.
The outside temperature then appears in the
lower display of the computer.
Always Open Timer*
If driving the MINI Convertible with its soft top
down, the driving times are displayed digitally
on the tachometer.
The following driving times are displayed:
>"Trip": actual driving time
>Total driving time
Reset "Trip" display: push button on turn signal
lever or "Resetting the trip odometer" for
approx. 2 seconds, refer to page12.
Similar to Always Open Timer
The Always Open Timer measures the time while
driving with the soft top down.
1LED hour display
2Minute dispaly
Page 57 of 172
REFERENCEAT A GLANCE CONTROLS DRIVING TIPS MOBILITY
55
Settings and information
Operating principle
Certain settings and information are only avail-
able when the ignition is switched on, the vehi-
cle is at a standstill and the doors are closed.
1Button for:
>Selecting display
>Setting values
>Confirming selected display or set values
>Calling up computer information53
2Calling up Check Control60
3Displaying vehicle check60
4Initializing the Flat Tire Monitor65
Resetting the Tire Pressure Monitor67
5Setting formats and units of measure, reset-
ting to factory settings576Adjusting settings
>Confirmation signals when locking and
unlocking the vehicle20
>Response during unlocking
procedure19
>Automatic locking23
>Pathway lighting73
>Daytime running lamps74
>Triple turn signal activation47
7Setting the time59
8Setting the date59
9Exiting the menu
Page 58 of 172

Everything under control
56
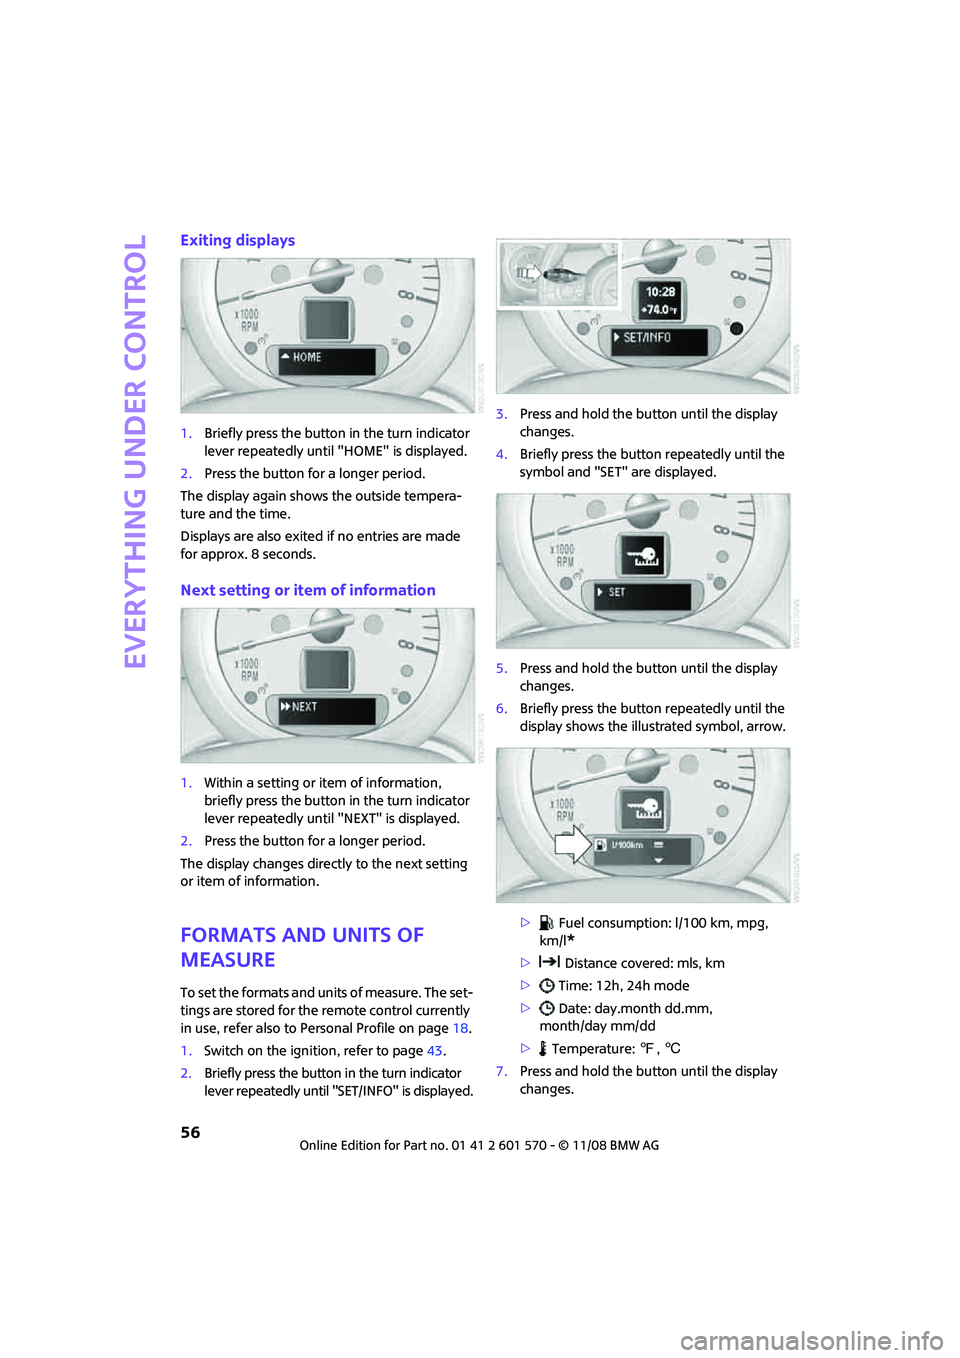
Exiting displays
1.Briefly press the button in the turn indicator
lever repeatedly until "HOME" is displayed.
2.Press the button for a longer period.
The display again shows the outside tempera-
ture and the time.
Displays are also exited if no entries are made
for approx. 8 seconds.
Next setting or item of information
1.Within a setting or item of information,
briefly press the button in the turn indicator
lever repeatedly until "NEXT" is displayed.
2.Press the button for a longer period.
The display changes directly to the next setting
or item of information.
Formats and units of
measure
To set the formats and units of measure. The set-
tings are stored for the remote control currently
in use, refer also to Personal Profile on page18.
1.Switch on the ignition, refer to page43.
2.Briefly press the button in the turn indicator
lever repeatedly until "SET/INFO" is displayed.3.Press and hold the button until the display
changes.
4.Briefly press the button repeatedly until the
symbol and "SET" are displayed.
5.Press and hold the button until the display
changes.
6.Briefly press the button repeatedly until the
display shows the illustrated symbol, arrow.
> Fuel consumption: l/100 km, mpg,
km/l
*
> Distance covered: mls, km
> Time: 12h, 24h mode
> Date: day.month dd.mm,
month/day mm/dd
> Temperature: 7, 6
7.Press and hold the button until the display
changes.
Page 59 of 172

REFERENCEAT A GLANCE CONTROLS DRIVING TIPS MOBILITY
57
8.Press the button briefly to change the for-
mat or unit of measure.
9.Press and hold the button until the display
changes.
The settings are stored.
Resetting to factory settings
The settings for formats and units of measure
can be reset to the factory settings. The settings
are stored for the remote control currently in
use, refer also to Personal Profile on page18.
1.Briefly press the button in the turn indicator
lever repeatedly until "SET/INFO" is dis-
played.
2.Press and hold the button until the display
changes.
3.Briefly press the button repeatedly until the
symbol and "SET" are displayed.
4.Press and hold the button until the display
changes.5.Briefly press the button repeatedly until
"RESET" is displayed.
6.Press and hold the button until the display
changes to the first setting.
The settings are reset.
Service requirements
The remaining driving distance and the date of
the next scheduled service are briefly displayed
immediately after you start the engine or switch
on the ignition.
The extent of service work required can be
read out from the remote control by your
MINI Dealer.<
Displaying vehicle check
For certain maintenance operations, you can
view the respective distance remaining or due
date individually in the tachometer.
Page 60 of 172
Everything under control
58
1.Switch on the ignition, refer to page43.
2.Briefly press the button in the turn indicator
lever repeatedly until "SET/INFO" is dis-
played.
3.Press and hold the button until the display
changes.4.Briefly press the button repeatedly until the
corresponding symbol and "SERVICE-INFO"
are displayed.
5.Press and hold the button until the display
changes.
6.Briefly press the button to display the indi-
vidual service items, refer to the following
information.
Possible displays
1Button for selecting information
2Engine oil
3Front brakes
4Rear brakes
5Vehicle check
6Roadworthiness test
7Brake fluid8Exit display56
9Next setting or item of information56
Page 61 of 172

REFERENCEAT A GLANCE CONTROLS DRIVING TIPS MOBILITY
59
More information on the MINI Maintenance Sys-
tem can be found on page117.
Clock
Setting the time
To set the 12h/24h mode, refer to Formats and
units of measure on page56.
1.Briefly press the button in the turn indicator
lever repeatedly until "SET/INFO" is dis-
played.
2.Press and hold the button until the display
changes.
3.Briefly press the button repeatedly until the
symbol and "SET" are displayed.
4.Press and hold the button until the display
changes.
5.Press the button to set the hours.
6.Wait for the display to change to minutes.
7.Press the button to set the minutes.8.Wait for the display to change.
The settings are stored.Date
Setting the date
To set the dd/mm or mm/dd date format, refer
to Formats and units of measure on page56.
1.Briefly press the button in the turn indicator
lever repeatedly until "SET/INFO" is dis-
played.
2.Press and hold the button until the display
changes.
3.Briefly press the button repeatedly until the
symbol and "SET" are displayed.
4.Press and hold the button until the display
changes.
5.Press the button to set the day of the month.
Page 62 of 172

Everything under control
60
6.Wait for the display to change to month.
7.Set the month and year in the same way.
8.Wait for the display to change.
The settings are stored.
Check Control
The concept
The Check Control monitors vehicle functions
and alerts you to any malfunctions in the sys-
tems monitored. Check Control messages
involve indicator or warning lamps in the dis-
plays and, in some circumstances, an acoustic
signal. To adjust the volume of the signal, refer
to the Owner's Manual for Radio.
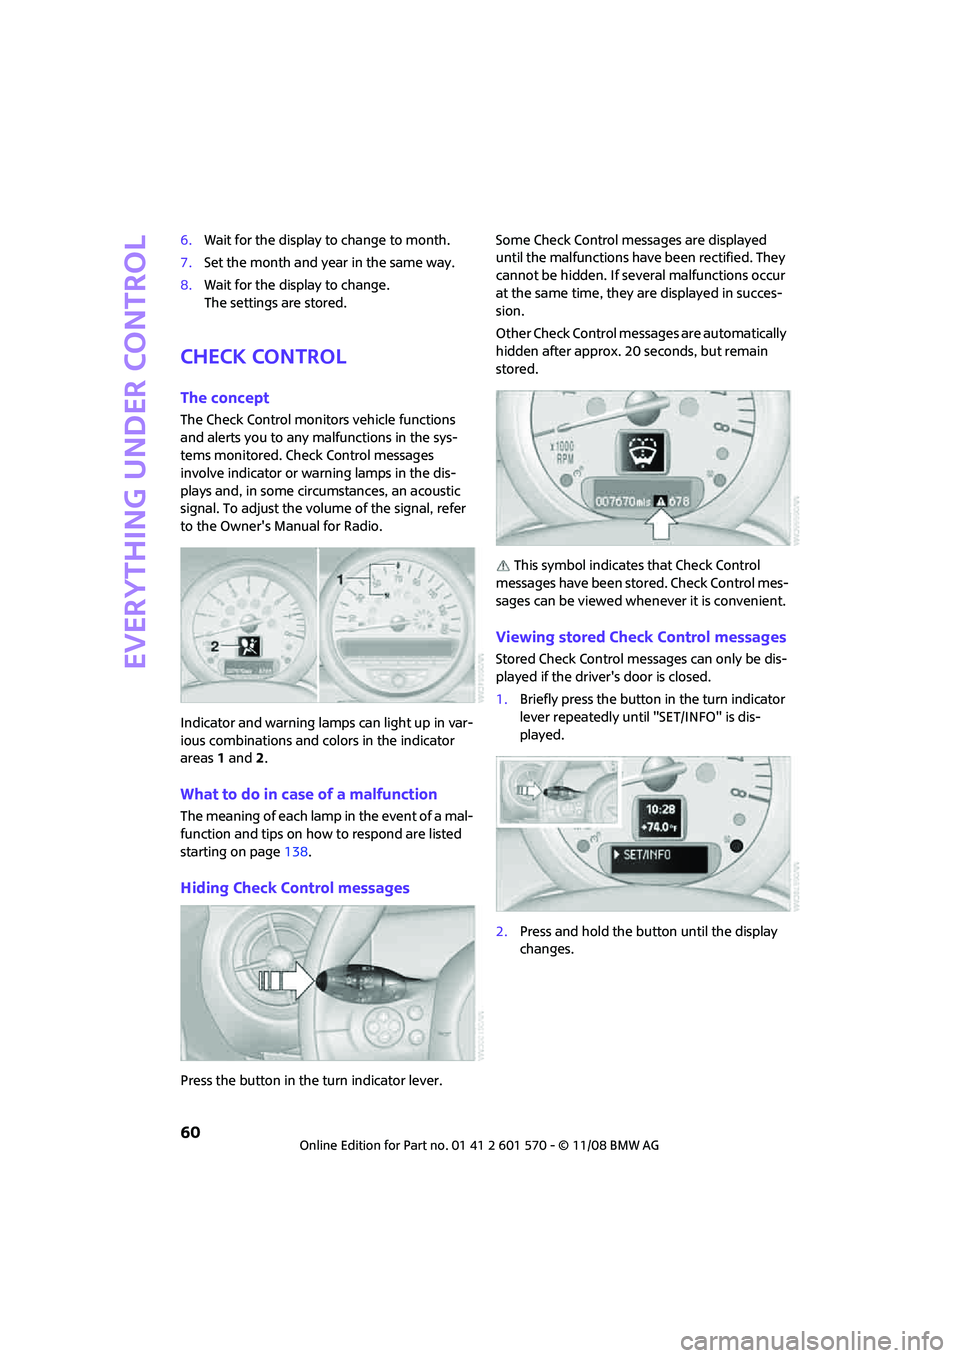
Indicator and warning lamps can light up in var-
ious combinations and colors in the indicator
areas 1 and2.
What to do in case of a malfunction
The meaning of each lamp in the event of a mal-
function and tips on how to respond are listed
starting on page138.
Hiding Check Control messages
Press the button in the turn indicator lever.Some Check Control messages are displayed
until the malfunctions have been rectified. They
cannot be hidden. If several malfunctions occur
at the same time, they are displayed in succes-
sion.
Other Check Control messages are automatically
hidden after approx. 20 seconds, but remain
stored.
This symbol indicates that Check Control
messages have been stored. Check Control mes-
sages can be viewed whenever it is convenient.
Viewing stored Check Control messages
Stored Check Control messages can only be dis-
played if the driver's door is closed.
1.Briefly press the button in the turn indicator
lever repeatedly until "SET/INFO" is dis-
played.
2.Press and hold the button until the display
changes.
Page 63 of 172
REFERENCEAT A GLANCE CONTROLS DRIVING TIPS MOBILITY
61
3.Press the button repeatedly until the display
shows the corresponding symbol and
"CHECK INFO".
4.Hold the button down.
"CHECK OK" appears if there are no Check
Control messages.
If a Check Control message has been stored,
the corresponding message is displayed.
5.Briefly press the button to check for other
messages.