Page 14 of 158
Cockpit
12
Displays
1Tachometer46
with indicator and warning lamps13
2Display for
>Clock46
>Outside temperature46
>Current vehicle speed46
>Indicator and warning lamps13
3Resetting the trip odometer464Display for
>Position of automatic transmission
*39
>Computer
*47
>Date of next scheduled service, and
remaining distance to be driven51
>Odometer and trip odometer46
>Initializing the Flat Tire Monitor
*58
>Resetting the Tire Pressure Monitor
*60
>Settings and information48
>Personal Profile settings18
5Instrument lighting68
6Speedometer
with indicator and warning lamps13
7Fuel gauge47
8Radio display, refer to separate
Owner's Manual
9Radio, refer to separate Owner's Manual
Page 55 of 158

REFERENCEAT A GLANCE CONTROLS DRIVING TIPS MOBILITY
53
6.Wait for the display to change to minutes.
7.Press the button to set the minutes.
8.Wait for the display to change.
The settings are stored.
Date
Setting the date
To set the dd/mm or mm/dd date format, refer
to Formats and units of measure on page49.
1.Briefly press the button in the turn indicator
lever repeatedly until "SET/INFO" is dis-
played.
2.Press and hold the button until the display
changes.
3.Briefly press the button repeatedly until the
symbol and "SET" are displayed.
4.Press and hold the button until the display
changes.
5.Press the button to set the day of the month.
6.Wait for the display to change to month.
7.Set the month and year in the same way.
8.Wait for the display to change.
The settings are stored.
Check Control
The concept
The Check Control monitors vehicle functions
and alerts you to any malfunctions in the sys-
tems monitored. Check Control messages
involve indicator or warning lamps in the dis-
plays and, in some circumstances, an acoustic
signal. To adjust the volume of the signal, refer
to the Owner's Manual for Radio.
Indicator and warning lamps can light up in var-
ious combinations and colors in the indicator
areas 1 and2.
What to do in case of a malfunction
The meaning of each lamp in the event of a mal-
function and tips on how to respond are listed
starting on page126.
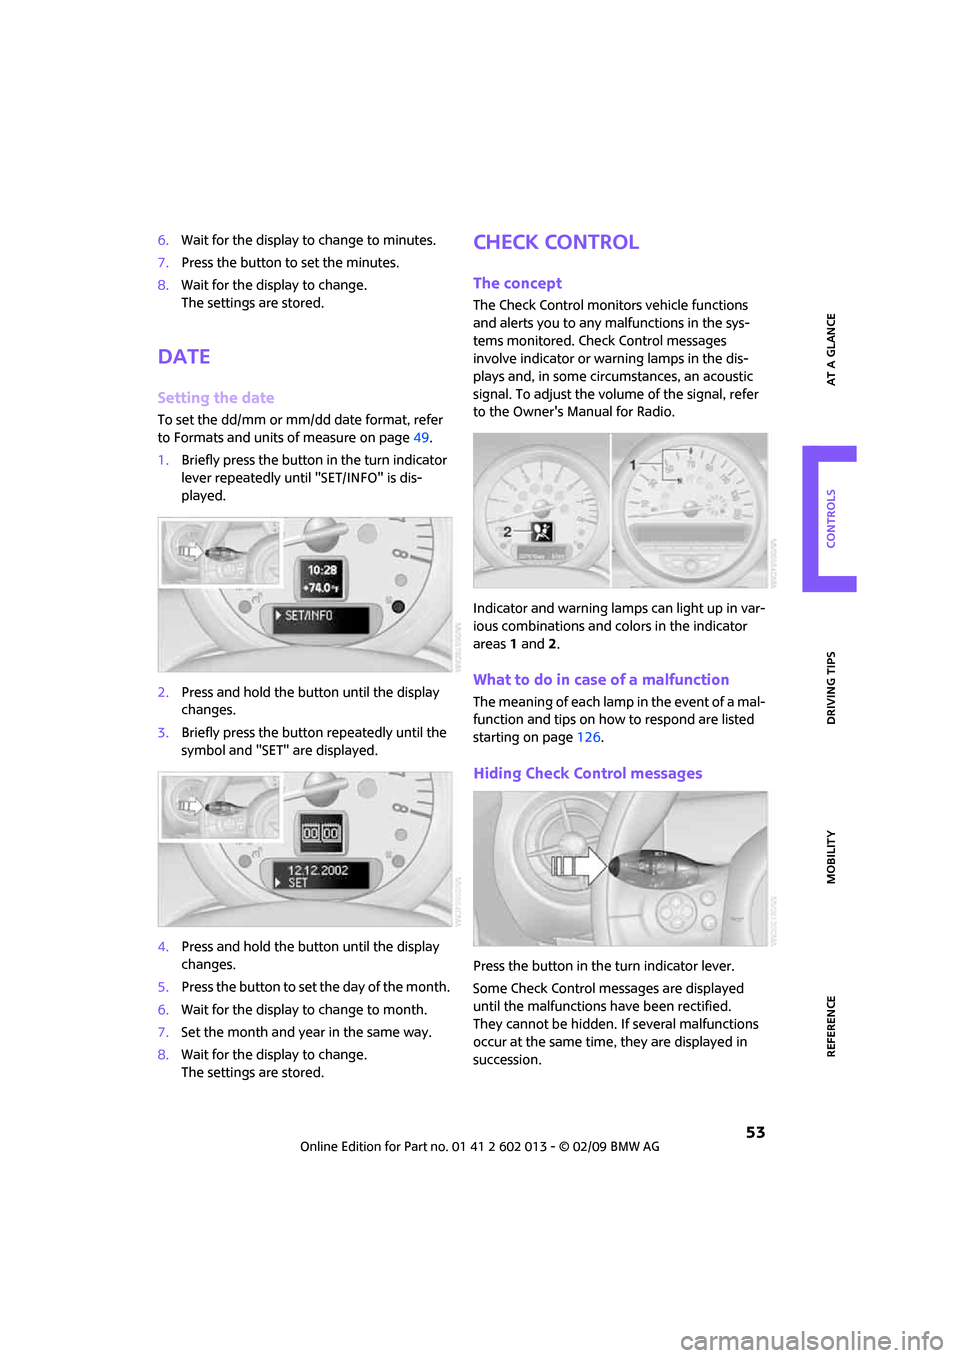
Hiding Check Control messages
Press the button in the turn indicator lever.
Some Check Control messages are displayed
until the malfunctions have been rectified.
They cannot be hidden. If several malfunctions
occur at the same time, they are displayed in
succession.
Page 122 of 158

Replacing components
120
of any kind. To do so could cause accidents and
personal injury.<
1.Place the jack at the jacking point closest to
the wheel.
The jack base must be perpendicular to the
surface beneath the jacking point.
2.During jacking up, insert the jack head in the
square recess of the jacking point.
3.Jack the vehicle up until the wheel you are
changing is raised off the ground.
Mounting the space-saver spare tire
1.Unscrew the lug bolts and remove
the wheel.
2.Remove accumulations of mud or dirt from
the mounting surfaces of the wheel and
hub. Clean the lug bolts.
3.Lift the new wheel into place.
4.Screw at least two lug bolts finger-tight into
opposite bolt holes.
5.Screw in the remaining bolts.
6.Tighten all the lug bolts firmly in a diagonal
pattern.
7.Lower the vehicle.
8.Remove the jack.
Tightening the lug bolts
Tighten the lug bolts in a diagonal pattern.
Immediately have the wheels checked
with a calibrated torque wrench to ensure
that the lug bolts are firmly seated. Otherwise,
incorrectly tightened lug bolts can present a
safety hazard.<
Tightening torque: 103.3 lb ft or 140 Nm.Replace the defective tire as soon as possible
and have the new wheel/tire assembly bal-
anced.
Vehicle battery
Have any work on the battery, including
battery replacement, carried out only by a
MINI Dealer or a workshop that has specially
trained personnel working in accordance with
the specifications of the MINI manufacturer.<
Battery care
The battery is 100 % maintenance-free, the
electrolyte will last for the life of the battery
when the vehicle is operated in a temperate
climate.
Charging the battery
Only charge the battery in the vehicle when the
engine is off. Connections, refer to Jump starting
on page122.
Disposal
After replacing old batteries, return the
used batteries to your MINI Dealer or to a
recycling point. Maintain the battery in an
upright position for transport and storage.
Always secure the battery against tipping over
during transport.<
Power failure
After a temporary power loss, some equipment
may not be fully functional and may require ini-
tialization. Individual settings are also lost and
must be reprogrammed:
>Time and date
These values must be updated, page52.
>Radio
Stations must be stored again, refer to the
separate Owner's Manual for Radio.
>Glass sunroof, electric
It may only be possible to raise the sunroof,
if applicable. The system must be initialized.
Contact your nearest MINI Dealer.