2009 MINI Clubman change time
[x] Cancel search: change timePage 21 of 218

MOBILITYAT A GLANCE CONTROLS DRIVING TIPS ENTERTAINMENT
19
NAVIGATION REFERENCE
Operating principle at a glance
The following is a general description of opera-
tions using the onboard monitor.For an exemplary step-by-step application, refer
to Setting the time, page63.
1Highlighting a menu item:
>Turn the MINI joystick; the highlight
marker moves
>Menu items that are displayed in color on
the Control Display can be highlighted
2Confirming a menu item:
>Press the MINI joystick
>New menu items are displayed or the
function is executed
>Select a function by highlighting and con-
firming it
3Highlighting a menu item: refer to14Switching between fields:
>Briefly move the MINI joystick to the left,
right, forward or backward
>Release the MINI joystick
5Adjusting settings:
>Turn the MINI joystick
>Graphic display, numerical value or text
displays can be changed
>Confirm by switching to another field
Page 33 of 218

MOBILITYAT A GLANCE CONTROLS DRIVING TIPS ENTERTAINMENT
31
NAVIGATION REFERENCE
Clubdoor
Opening
The Clubdoor can only be opened using the han-
dle on the inside. The right-hand front door must
be open when opening the Clubdoor.
Closing
First close the Clubdoor, followed by the right-
hand front door.
Splitdoor
To avoid damage, make sure there is suf-
ficient clearance before opening the split-
door.<
Opening
In some national-market versions, the
splitdoor cannot be unlocked using the
remote control unless the vehicle is unlocked
first.
Only drive with the splitdoor fully closed, other-
wise the tail lamps will be obscured and driving
safety will be compromised.<
Press the button in the handle or the but-
ton of the remote control for an extended time. The splitdoor is unlocked.
Using the button in the handle, fully open first
the right side, arrow1, and then the left side of
the splitdoor, arrow2.
Closing
Make sure that the closing path of the
splitdoor is clear, otherwise injuries may
occur.<
Close the left side, arrow1, and then the right
side of the splitdoor, arrow2.
Alarm system*
The principle
The alarm system, when activated, reacts if:
>A door, the engine compartment lid or the
tailgate is opened
>There is movement inside the car
>The car's inclination changes, for instance if
an attempt is made to jack it up and steal the
wheels or to raise it prior to towing away
>There is an interruption in the power supply
from the battery
The alarm system briefly indicates unauthorized
entry or tampering by means of:
>An acoustic alarm
>Switching on the hazard warning flashers
Arming and disarming
Whenever the car is locked or unlocked, the
alarm system is armed or disarmed.
Even when the alarm system is armed, you can
open the tailgate by means of the button
Page 53 of 218

MOBILITYAT A GLANCE CONTROLS DRIVING TIPS ENTERTAINMENT
51
NAVIGATION REFERENCE
5.Select "Lighting".
6.Select "Triple turn signal".
Triple turn signaling is activated.
Wiper system
1Switching on wipers
2Switching off wipers or brief wipe
3Activating/deactivating intermittent mode
or rain sensor
*
4Cleaning windshield and headlamps*
Switching on wipers
Press the lever upward, arrow1.
The lever automatically returns to its initial posi-
tion when released.
Normal wiper speed
Press once.
The system switches to intermittent operation
when the vehicle is stationary.
Fast wiper speed
Press twice or press beyond the resistance point.
The system switches to normal speed when the
vehicle is stationary.
Intermittent wipe or rain sensor*
If the car is not equipped with a rain sensor, the
intermittent-wipe time is preset.
If the car is equipped with a rain sensor, the time
between wipes is controlled automatically and
depends on the intensity of the rainfall. The rain
sensor is mounted on the windshield, directly in
front of the interior rearview mirror.
Activating intermittent wipe or
rain sensor
Press button, arrow3.
Deactivate the rain sensor before entering
an automatic car wash. Failure to do so
could result in damage caused by undesired
wiper activation.<
Adjusting the sensitivity of the
rain sensor
1.Switch on the ignition, refer to page46.
2.Briefly press the button in the turn indicator
lever repeatedly until "SET/INFO" is dis-
played.
3.Press and hold the button until the display
changes.
4.Briefly press the button repeatedly until the
symbol and "SET" are displayed.
Page 58 of 218

Everything under control
56
tion, a message will appear on the Control
Display.
Check coolant level, refer to page169.
Fuel gauge
Fuel tank capacity
Approx. 13.2 US gallons/50 liters.
You can find information on refueling on
page156.
If the tilt of the vehicle varies for a longer period,
when you are driving in mountainous areas, for
example, the indicator may fluctuate slightly.
Reserve
Once the fuel level has fallen to the reserve zone
of approx. 2.1 US gallons/8 liters the remaining
indicator lamps change from orange to red,
arrow, and a message is displayed briefly on the
Control Display. The tachometer
displays the
remaining cruising range. When the range is less
than approx. 30 miles/50 km, the message
remains in the Control Display.
If the range displayed is less than
30 miles/50 km, be sure to refuel; other-
wise engine functions are not guaranteed and
damage could occur.<
Computer*
Displays in tachometer
Press the button in the turn indicator lever
repeatedly to call up various items of informa-
tion.
The following items of information are displayed
in the order listed:
>Cruising range
>Average fuel consumption
>Current fuel consumption
>Average speed
>Current vehicle speed
To set the corresponding units of measure, refer
to Units of measure on page60.
Cruising range
Displays the estimated cruising range available
with the remaining fuel. The range is calculated
on the basis of the way the car has been driven
over the last 18 miles/30 km and the amount of
fuel currently in the tank.
If the range displayed is less than
30 miles/50 km, be sure to refuel; other-
wise engine functions are not guaranteed and
damage could occur.<
Average fuel consumption
Calculated for the time the engine has been
running.
With the trip computer, page58, you can have
the average consumption for another trip dis-
played.
Page 65 of 218

MOBILITYAT A GLANCE CONTROLS DRIVING TIPS ENTERTAINMENT
63
NAVIGATION REFERENCE
Clock
In the tachometer
Setting the time
1.Briefly press the button in the turn indicator
lever repeatedly until "SET/INFO" is dis-
played.
2.Press and hold the button until the display
changes.
3.Briefly press the button repeatedly until the
symbol and "SET" are displayed.
4.Press and hold the button until the display
changes.
5.Press the button to set the hours.
6.Wait for the display to change to minutes.
7.Press the button to set the minutes.
8.Wait for the display to change.
The settings are stored.
On the onboard monitor
Setting the time
1.Press the button once or twice until the
start menu appears.
2.Move the MINI joystick to highlight "Setup"
and press the MINI joystick.
3.Turn the MINI joystick until "Settings" is
selected and press the MINI joystick.
4.Turn the MINI joystick until "Time / Date" is
selected and press the MINI joystick.
Page 66 of 218

Everything under control
64
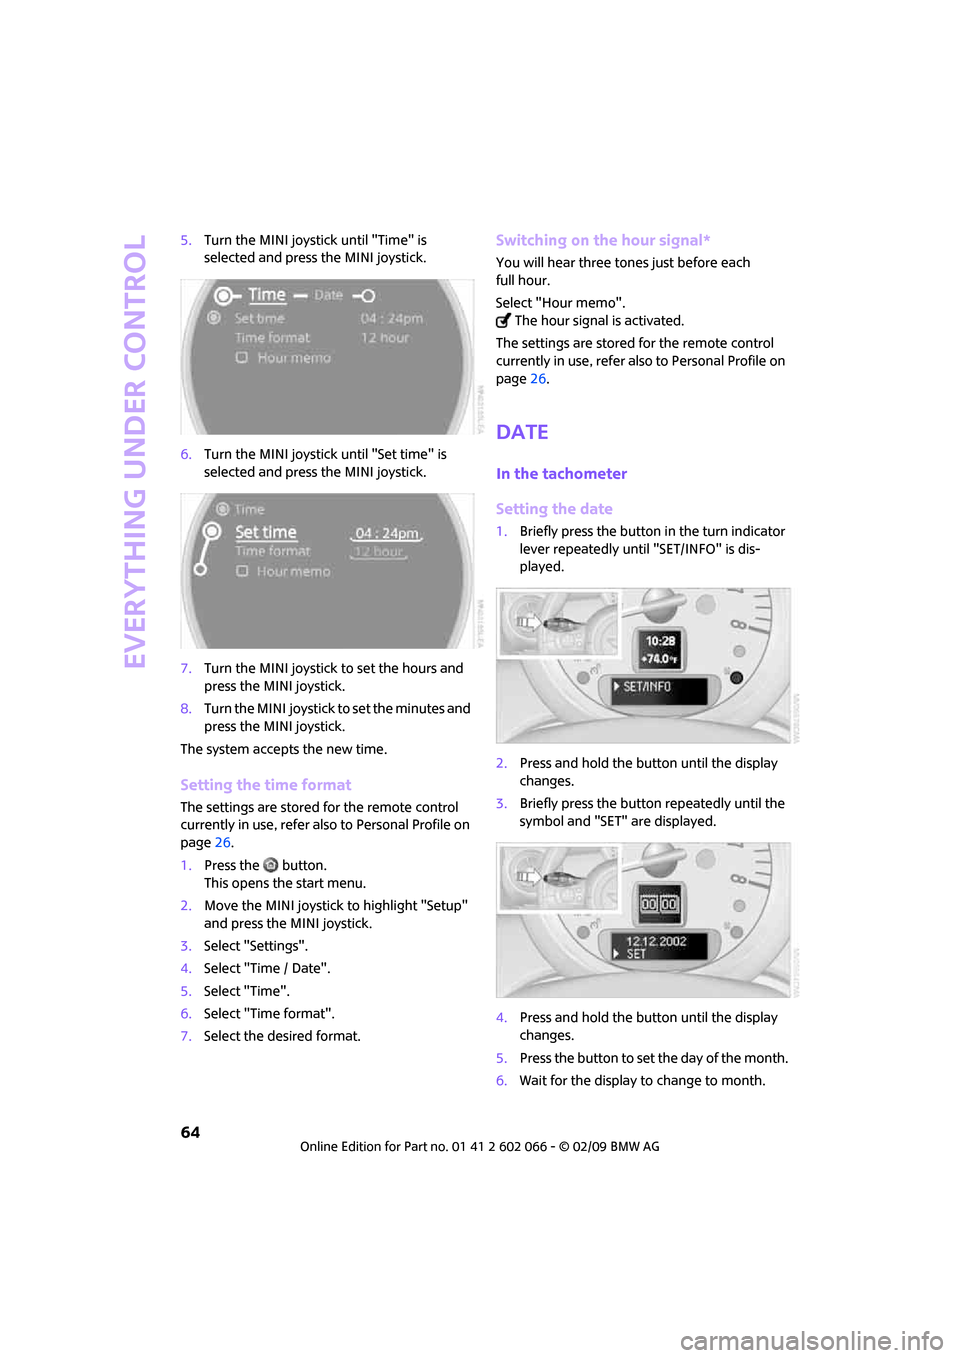
5.Turn the MINI joystick until "Time" is
selected and press the MINI joystick.
6.Turn the MINI joystick until "Set time" is
selected and press the MINI joystick.
7.Turn the MINI joystick to set the hours and
press the MINI joystick.
8.Turn the MINI joystick to set the minutes and
press the MINI joystick.
The system accepts the new time.
Setting the time format
The settings are stored for the remote control
currently in use, refer also to Personal Profile on
page26.
1.Press the button.
This opens the start menu.
2.Move the MINI joystick to highlight "Setup"
and press the MINI joystick.
3.Select "Settings".
4.Select "Time / Date".
5.Select "Time".
6.Select "Time format".
7.Select the desired format.
Switching on the hour signal*
You will hear three tones just before each
full hour.
Select "Hour memo".
The hour signal is activated.
The settings are stored for the remote control
currently in use, refer also to Personal Profile on
page26.
Date
In the tachometer
Setting the date
1.Briefly press the button in the turn indicator
lever repeatedly until "SET/INFO" is dis-
played.
2.Press and hold the button until the display
changes.
3.Briefly press the button repeatedly until the
symbol and "SET" are displayed.
4.Press and hold the button until the display
changes.
5.Press the button to set the day of the month.
6.Wait for the display to change to month.
Page 67 of 218

MOBILITYAT A GLANCE CONTROLS DRIVING TIPS ENTERTAINMENT
65
NAVIGATION REFERENCE
7.Set the month and year in the same way.
8.Wait for the display to change.
The settings are stored.
On the onboard monitor
Setting the date
1.Press the button.
This opens the start menu.
2.Move the MINI joystick to highlight "Setup"
and press the MINI joystick.
3.Select "Settings".
4.Select "Time / Date".
5.Select "Date".
6.Select "Set date".
7.Turn the MINI joystick to make the adjust-
ment.
8.Press the MINI joystick to apply the setting.
The next setting is highlighted.
9.Make the remaining adjustments. After the
last adjustment, the date is stored.
Setting the date format
The settings are stored for the remote control
currently in use, refer also to Personal Profile on
page26.
1.Press the button.
This opens the start menu.
2.Move the MINI joystick to highlight "Setup"
and press the MINI joystick.
3.Select "Settings".
4.Select "Time / Date".
5.Select "Date".
6.Select "Date format".7.Select the desired format.
Check Control
The concept
The Check Control monitors vehicle functions
and alerts you to any malfunctions in the sys-
tems monitored. Check Control messages
involve indicator and warning lamps in the dis-
play and, in some circumstances, an acoustic
signal as well as text messages at the bottom of
the Control Display.
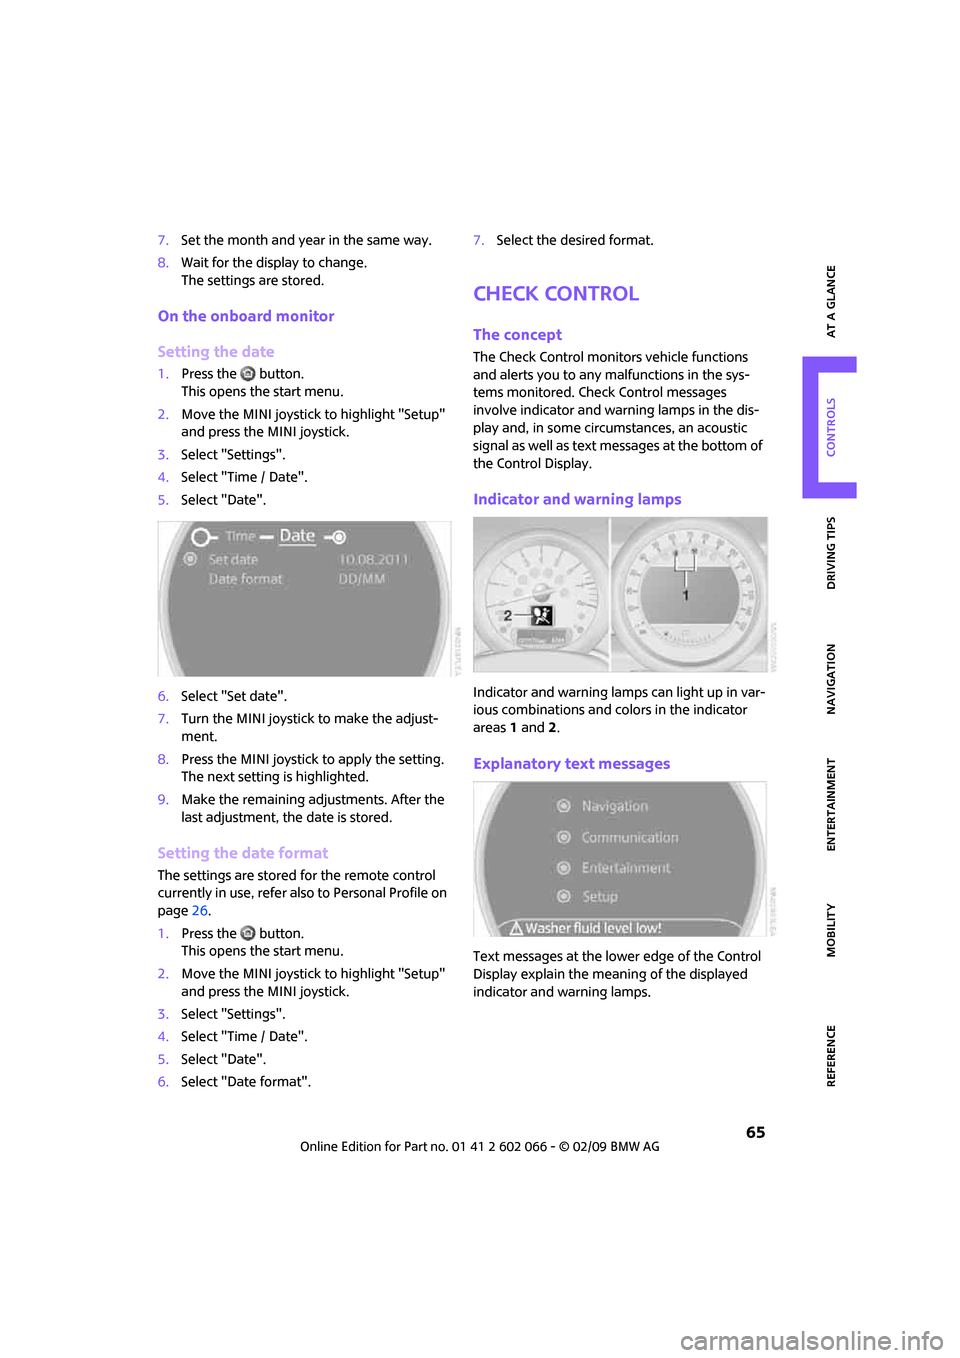
Indicator and warning lamps
Indicator and warning lamps can light up in var-
ious combinations and colors in the indicator
areas 1 and2.
Explanatory text messages
Text messages at the lower edge of the Control
Display explain the meaning of the displayed
indicator and warning lamps.
Page 68 of 218

Everything under control
66
For most Check Control messages, you can view
more information later, e.g. regarding the cause
of a malfunction and how to respond, refer to
page67.
In urgent cases, this information will be shown
as soon as the corresponding lamp comes on.
To exit the displayed information:
Select the arrow.
Hiding Check Control messages
Press the button in the turn indicator lever.
Some Check Control messages are displayed
until the malfunctions have been rectified. They
cannot be hidden. If several malfunctions occur
at the same time, they are displayed in suc-
cession.
They are marked with the symbol
shown here.Other Check Control messages are automatically
hidden after approx. 20 seconds, but remain
stored.
They are marked with the symbol
shown here.
This symbol indicates that Check Control
messages have been stored. Check Control mes-
sages can be viewed whenever it is convenient.
Viewing stored Check Control messages
Stored Check Control messages can only be dis-
played if the driver's door is closed.
1.Briefly press the button in the turn indicator
lever repeatedly until "SET/INFO" is dis-
played.
2.Press and hold the button until the display
changes.