Page 356 of 426
356 Practical hintsWhere will I find ...?First aid kit
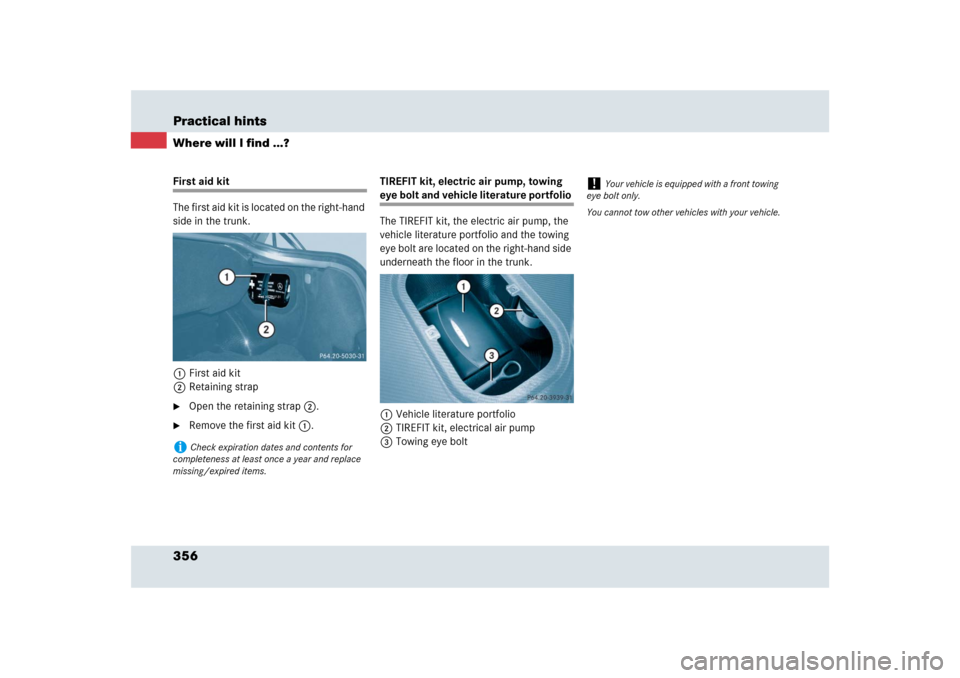
The first aid kit is located on the right-hand
side in the trunk.
1First aid kit
2Retaining strap�
Open the retaining strap2.
�
Remove the first aid kit1.TIREFIT kit, electric air pump, towing
eye bolt and vehicle literature portfolio
The TIREFIT kit, the electric air pump, the
vehicle literature portfolio and the towing
eye bolt are located on the right-hand side
underneath the floor in the trunk.
1Vehicle literature portfolio
2TIREFIT kit, electrical air pump
3Towing eye bolt
i
Check expiration dates and contents for
completeness at least once a year and replace
missing/expired items.
!
Your vehicle is equipped with a front towing
eye bolt only.
You cannot tow other vehicles with your vehicle.
Page 357 of 426
357 Practical hints
Unlocking in an emergency
�Unlocking in an emergency
Unlocking the vehicle
Unlocking the trunk
If you cannot unlock the trunk with the
SmartKey, open the trunk with the
mechanical key.
The handle is located above the rear
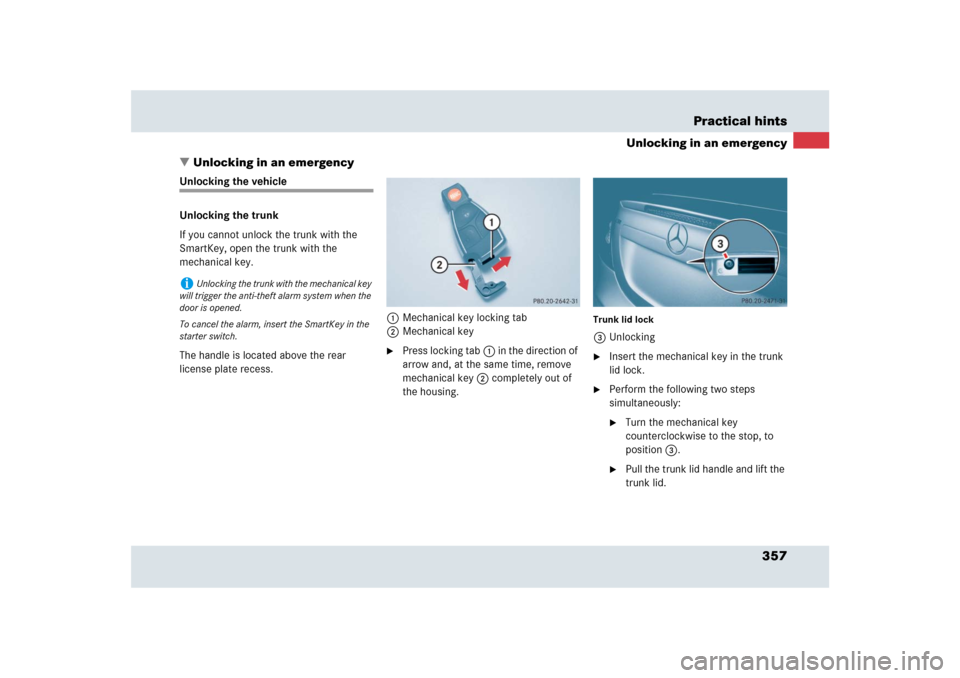
license plate recess.1Mechanical key locking tab
2Mechanical key
�
Press locking tab1 in the direction of
arrow and, at the same time, remove
mechanical key2 completely out of
the housing.
Trunk lid lock3Unlocking�
Insert the mechanical key in the trunk
lid lock.
�
Perform the following two steps
simultaneously:�
Turn the mechanical key
counterclockwise to the stop, to
position3.
�
Pull the trunk lid handle and lift the
trunk lid.
i
Unlocking the trunk with the mechanical key
will trigger the anti-theft alarm system when the
door is opened.
To cancel the alarm, insert the SmartKey in the
starter switch.
Page 358 of 426
358 Practical hintsUnlocking in an emergencyUnlocking the driver’s door
If you can no longer lock or unlock the
doors using the SmartKey, unlock the
driver’s door using the emergency release
catch.The emergency release catch is located on
the left side in the trunk.
1Emergency release catch
�
Unlock the trunk (
�page 357).
�
Pull emergency release catch1.
The door is unlocked.
�
Open the door in the normal way.
�
Contact an authorized Mercedes-Benz
Center.
i
Unlocking the driver’s door with the emer-
gency release catch will trigger the anti-theft
alarm system.
To cancel the alarm, insert the SmartKey in the
starter switch.
i
If it still is not possible to unlock the door,
pull more firmly on the emergency release catch.
Page 365 of 426

365 Practical hints
Flat tire
�Flat tire
The vehicle is equipped with the TIREFIT
kit.Preparing the vehicle�
Park the vehicle in a safe distance from
moving traffic on a hard, flat surface
when possible.
�
Turn on the hazard warning flashers.
�
Turn the steering wheel so that the
front wheels are in a straight ahead
position.
�
Set the parking brake.
�
Move the gear selector lever to park
positionP.
�
Turn off the engine (
�page 56).
�
Remove the SmartKey from the starter
switch.
�
Have any passenger exit the vehicle at
a safe distance from the roadway.
Sealing tires with TIREFIT
Small tire punctures, particularly those in
the tread, can be sealed with TIREFIT.
TIREFIT can be used in ambient tempera-
tures down to -4°F (-20°C).
�
Foreign objects (e.g. screws or nails)
should not be removed from the tire.
�
Take TIREFIT, the sticker, and the
electric air pump out of the trunk.
!
A wheel change should only be carried out
at an authorized Mercedes-Benz Center. Other-
wise there is a danger of damaging the vehicle by
jacking it up incorrectly.
i
Open door only when conditions are safe to
do so.
Warning!
G
TIREFIT is a limited repair device. TIREFIT
cannot be used for cuts or punctures larger
than approximately 0.16 in (4 mm) and tire
damage caused by driving with extremely
low tire inflation pressure, or on a flat tire, or
a damaged wheel.
Do not drive the vehicle under such
circumstances.
Contact your nearest Mercedes-Benz
Center for assistance or call Roadside
Assistance. !
After using TIREFIT, the tire inflation
pressure sensor may have to be replaced.
��
Page 368 of 426
, press0 on electric
air pump switch8.
The electric air pump should now be
switched off.
�
Turn the SmartK")
368 Practical hintsFlat tire�
After attaining a tire inflation pressure
of 26 psi (1.8 bar), press0 on electric
air pump switch8.
The electric air pump should now be
switched off.
�
Turn the SmartKey in the starter switch
to position0 (
�page 40).
�
Detach the electric air pump.
The air hose may still be hot. Please
exercise appropriate caution.
�
Store the electrical plug and the air
hose behind the flap and place the
electrical air pump back in the trunk.
�
Close the trunk lid.
�
Drive off immediately.
The TIREFIT sealant will distribute itself
evenly inside the tire.
�
After driving vehicle for an initial
10 minutes, check tire inflation pres-
sure using the pressure gauge on the
air pump.
�
If tire inflation pressure is at least
20 psi (1.3 bar), inflate tire to correct
pressure (see placard on driver’s door
B-pillar) and contact a nearest qualified
workshop, e.g. an authorized
Mercedes-Benz Center, to have the
damaged tire replaced.
Recommended duration of use:
A maximum of 300 miles (500 km) at
or below 50 mph (80 km/h) with the
recommended tire inflation pressure.
Warning!
G
If a tire inflation pressure of 26 psi (1.8 bar)
is not attained, the tire is too severely
damaged for TIREFIT to provide a reliable
tire repair.
In this case, TIREFIT cannot properly seal
the tire.
Do not drive the vehicle.
Contact the nearest Mercedes-Benz Center
or call Roadside Assistance.
Warning!
G
Do not exceed vehicle speed of
50 mph (80 km/h). A TIREFIT repair is not
designed to operate at higher speeds.
The sticker must be attached on the instru-
ment cluster where it will be easily seen by
the driver.
Vehicle handling characteristics may
change. Adapt your driving accordingly.
Warning!
G
If tire inflation pressure has fallen below
20 psi (1.3 bar), do not continue to drive the
vehicle.
Park your vehicle safely away from the road-
way and contact the nearest authorized
Mercedes-Benz Center or Roadside
Assistance.
Have the damaged tire replaced.
��
Page 370 of 426

�
The battery for electrical consumers
(located in the trunk)
Warning!
G
Failu")
370 Practical hintsBatteries Your vehicle is equipped with two batter-
ies:�
The starter battery (located in the
trunk)
�
The battery for electrical consumers
(located in the trunk)
Warning!
G
Failure to follow these instructions can
result in severe injury or death.
Never lean over batteries while connecting,
you might get injured.
Observe all safety instructions and precau-
tions when handling automotive batteries
(�page 256).
Battery fluid contains sulfuric acid. Do not
allow this fluid to come in contact with eyes,
skin or clothing. In case it does, immediately
flush affected area with water and seek
medical help if necessary.
A battery will also produce hydrogen gas,
which is flammable and explosive. Keep
flames or sparks away from battery, avoid
improper connection of jumper cables,
smoking, etc.
!
You must not jump start the vehicle, other-
wise the vehicle electrical systems could be
damaged.
Only use the battery charge unit tested and ap-
proved by Mercedes-Benz for use on the SLR to
charge the battery or maintain the battery
charge. Using other battery chargers may cause
damage to the vehicle and/or personal injury.
Information on charging the batteries
(
�page 371).
Have the batteries checked regularly by an
authorized Mercedes-Benz Center. Refer to
Maintenance Booklet for maintenance intervals
or contact an authorized Mercedes-Benz Center
for further information.
If it is necessary to replace the batteries, contact
an authorized Mercedes-Benz Center.Warning!
G
Do not place metal objects on the battery as
this could result in a short circuit.
Use leak-proof batteries only to avoid the
risk of acid burns in the event of an
accident.
Page 372 of 426

372 Practical hintsBatteriesCharging with the battery charger
Only use the battery charge unit approved
by Mercedes-Benz and supplied with your
vehicle. This charger is designed to auto-
matically control the charge rate, and
charge the battery or maintain the existing
charge in the battery while the vehicle is
parked and not being driven for long
periods of time (on average approximately
3 weeks or more). Not driving the vehicle
for such extended periods may cause the
charge in the vehicle battery to drop. Using the charging point
The charging point for the battery charger
is located next to the CD-changer on the
left-hand side in the trunk.
1Charging point
�
Remove the SmartKey from the starter
switch.
�
Open the cover of the charging
point1.
�
Connect the battery charger with the
charging point 1.
�
Observe and follow the separate
operating instructions for the battery
charger.
�
Charge up the battery.
The battery charger switches off
automatically when the battery is
sufficiently charged.
Page 392 of 426
392 Technical dataWeights
Mercedes-Benz SLR McLaren Roadster
Mercedes-Benz SLR McLaren Roadster 722 S
Trunk load max.
165lb (75kg)
165 lb (75 kg)


165 lb (75 kg)")