2009 MERCEDES-BENZ E-CLASS SALOON instrument cluster
[x] Cancel search: instrument clusterPage 114 of 373
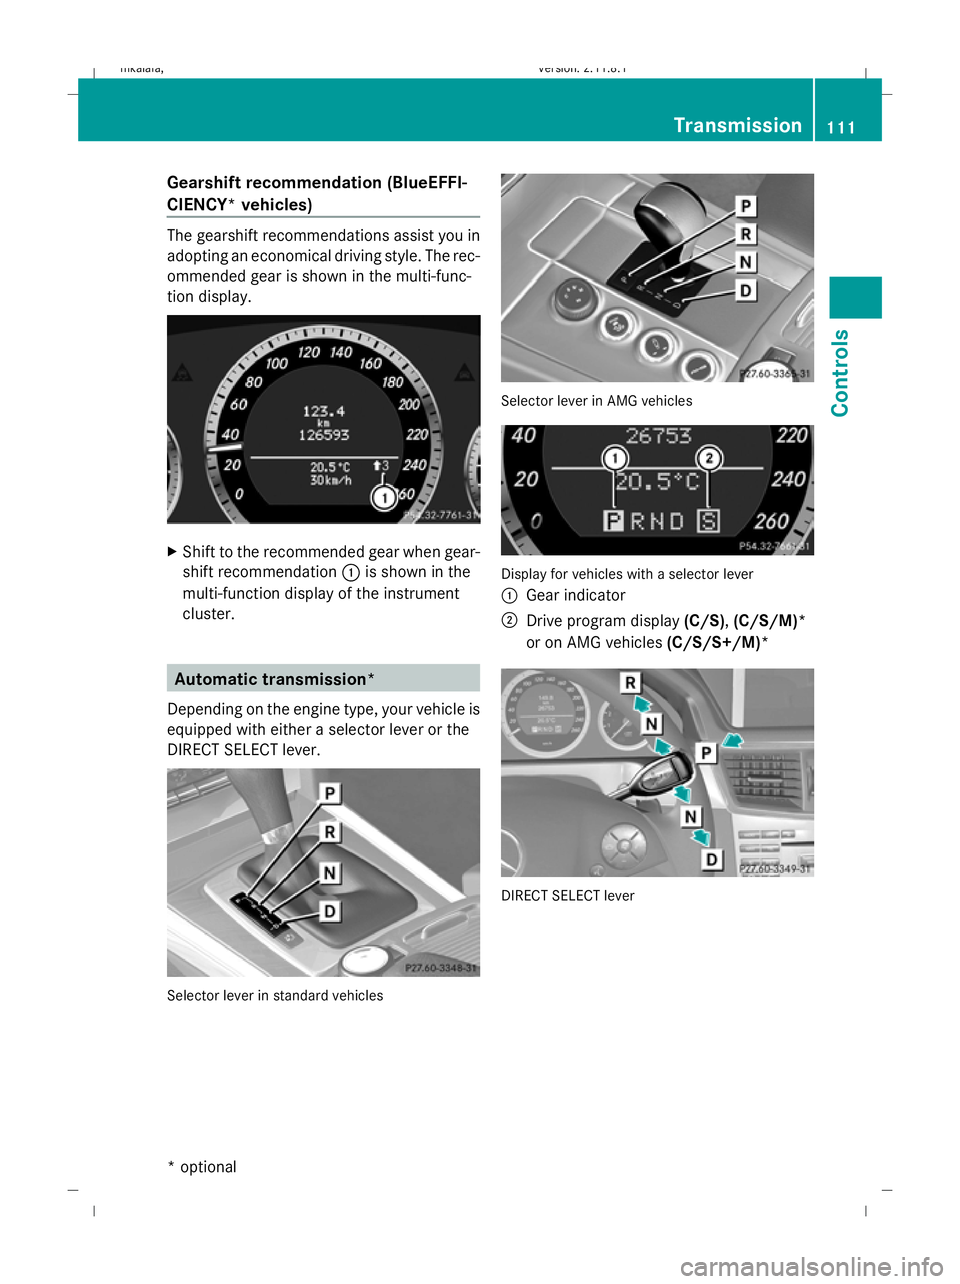
Gearshift recommendation (BlueEFFI-
CIENCY* vehicles)
The gearshift recommendations assist you in
adopting an economical driving style. The rec-
ommended gear is shown in the multi-func-
tion display.
X
Shift to the recommended gear when gear-
shift recommendation :is shown in the
multi-function display of the instrument
cluster. Automatic transmission*
Depending on the engine type, your vehicle is
equipped with either a selector lever or the
DIRECT SELECT lever. Selector lever in standard vehicles Selector lever in AMG vehicles
Display for vehicles with a selector lever
:
Gear indicator
; Drive program display (C/S),(C/S/M)*
or on AMG vehicles (C/S/S+/M)* DIRECT SELECT lever Transmission
111Controls
* optional
212_AKB; 2; 4, en-GB
mkalafa
,V ersion: 2.11.8.1
2009-05-05T14:17:16+02:00 - Seite 111 Z
Dateiname: 6515346702_buchblock.pdf; erzeugt am 07. May 2009 14:16:07; WK
Page 120 of 373
Downshifting
G
Risk of accident
Do not shift down to brake on a slippery road
surface. This could cause the drive wheels to
lose their grip, and the vehicle could skid.
X Pull the left-hand paddle ( Ypage 114).
The automatic transmission shifts down to
the next gear.
i For maximum acceleration, pull the left-
hand steering wheel gearshift paddle until
the transmission selects the optimum gear
for the current speed.
Kickdown
i On vehicles with AMG engines, it is not
possible to use kickdown in manual drive
program M. Instrument cluster
Points to remember
You will find an illustration of the instrument
cluster in the "At a glance" section
(Y page 27). G
Risk of accident
If the instrument cluster or the multi-function
display fails, then no display messages can be
shown.
You will not then be able to see information
about the vehicle status, such as speed and
outside temperature, warning and indicator
lamps, display messages or the failure of sys-
tems. The vehicle’s handling characteristics
may be affected. Adapt your driving style and
speed accordingly.
Immediately consult a qualified specialist
workshop which has the necessary specialist
knowledge and tools to carry out the work
required. Mercedes-Benz recommends that
you use a Mercedes-Benz Service Centre for
this purpose. In particular, work relevant to
safety or on safety-related systems must be
carried out at a qualified specialist workshop. Coolant temperature display
The coolant temperature gauge is in the
instrument cluster on the right-hand side.
Under normal operating conditions and with
the specified coolant level, the coolant tem-
perature may rise to 120 †. The coolant tem-
perature may rise to the top end of the scale
at high outside temperatures and on long
uphill stretches. Speedometer with segments
The segments in the speedometer indicate
which speed range is available.
Cruise control mode:
The segments light up from the stored speed
to the maximum speed.
Variable Speedtronic mode:
The segments light up from the start of the
scale to the selected limit speed.
Distronic Plus* mode:
One or two segments around the stored
speed light up. Rev counter
The red band in the rev counter indicates the
engine's overrevving range. The fuel supply is
interrupted to protect the engine when the
red band is reached.
! Do not drive in the overrevving range.
Doing so will damage the engine. Outside temperature display
G
Risk of accident
At temperatures just above freezing point, the
road could be icy, particularly in wooded areas
or on bridges. The vehicle could start skidding
if you fail to adapt your driving style. You
should therefore always adapt your driving
style and speed to suit the weather condi-
tions. Inst
rument cluster
117Controls
* optional
212_AKB; 2; 4, en-GB
mkalafa
,V ersion: 2.11.8.1
2009-05-05T14:17:16+02:00 - Seite 117 Z
Dateiname: 6515346702_buchblock.pdf; erzeugt am 07. May 2009 14:16:09; WK
Page 134 of 373
R
call up display messages (Y page 251)
R reset the tyre pressure loss warning system
(Y page 226) or check the tyre pressure
electronically* (Y page 228)
R call up the service due date (Y page 239)Settings menu
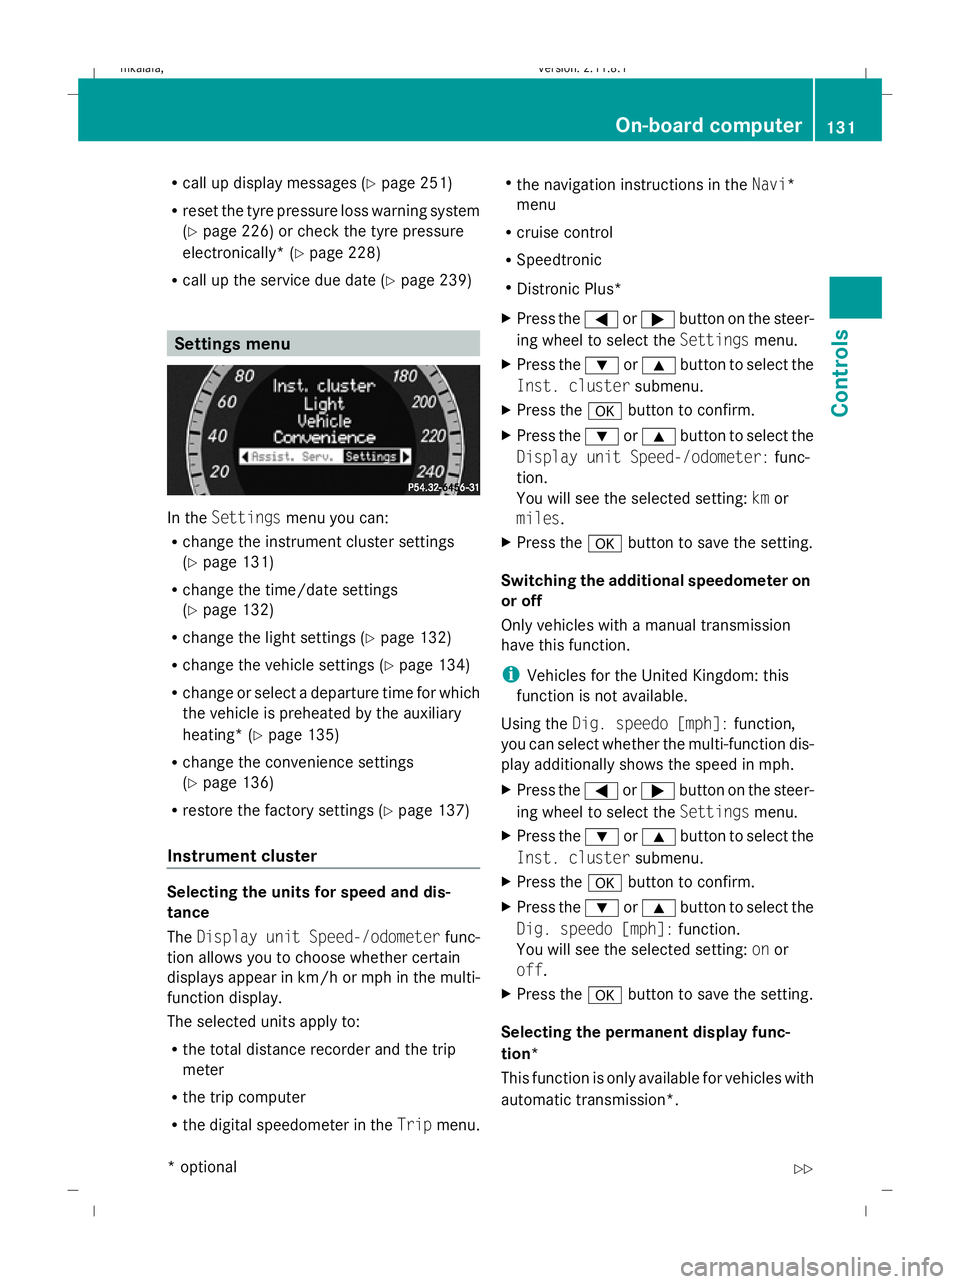
In the
Settings menu you can:
R change the instrument cluster settings
(Y page 131)
R change the time/date settings
(Y page 132)
R change the light settings ( Ypage 132)
R change the vehicle settings (Y page 134)
R change or select a departure time for which
the vehicle is preheated by the auxiliary
heating* (Y page 135)
R change the convenience settings
(Y page 136)
R restore the factory settings (Y page 137)
Instrument cluster Selecting the units for speed and dis-
tance
The
Display unit Speed-/odometer func-
tion allows you to choose whether certain
displays appear in km/h or mph in the multi-
function display.
The selected units apply to:
R the total distance recorder and the trip
meter
R the trip computer
R the digital speedometer in the Tripmenu. R
the navigation instructions in the Navi*
menu
R cruise control
R Speedtronic
R Distronic Plus*
X Press the =or; button on the steer-
ing wheel to select the Settingsmenu.
X Press the :or9 button to select the
Inst. cluster submenu.
X Press the abutton to confirm.
X Press the :or9 button to select the
Display unit Speed-/odometer: func-
tion.
You will see the selected setting: kmor
miles.
X Press the abutton to save the setting.
Switching the additional speedometer on
or off
Only vehicles with a manual transmission
have this function.
i Vehicles for the United Kingdom: this
function is not available.
Using the Dig. speedo [mph]: function,
you can select whether the multi-function dis-
play additionally shows the speed in mph.
X Press the =or; button on the steer-
ing wheel to select the Settingsmenu.
X Press the :or9 button to select the
Inst. cluster submenu.
X Press the abutton to confirm.
X Press the :or9 button to select the
Dig. speedo [mph]: function.
You will see the selected setting: onor
off.
X Press the abutton to save the setting.
Selecting the permanent display func-
tion*
This function is only available for vehicles with
automatic transmission*. On-board computer
131Controls
* optional
212_AKB; 2; 4, en-GB
mkalafa
,V ersion: 2.11.8.1
2009-05-05T14:17:16+02:00 - Seite 131 Z
Dateiname: 6515346702_buchblock.pdf; erzeugt am 07. May 2009 14:16:15; WK
Page 144 of 373

G
Risk of accident
Distronic Plus cannot take account of road
and traffic conditions. If Distronic does not
recognise or no longer recognises the vehicle
in front, do not activate Distronic or, if it is
already active, deactivate it. This is especially
the case:
R before corners
R in filter lanes
R when changing to a lane with faster moving
traffic
R in complex driving situations or where the
lanes are diverted, e.g. at motorway/road-
way construction sites
Otherwise, Distronic Plus maintains the cur-
rent speed or accelerates up to the set speed.
Distronic Plus cannot take account of weather
conditions. Deactivate, or do not activate,
Distronic Plus:
R if the roads are slippery, snow-covered or
icy. The wheels could lose their grip when
braking or accelerating. The vehicle could
start to skid.
R if the sensors are dirty or there is poor vis-
ibility, e.g. due to snow, rain or fog. Dis-
tance control may be impaired.
Always pay attention to traffic conditions
even when Distronic Plus is activated. Other-
wise, you may fail to recognise dangers in
time, cause an accident and injure yourself
and others.
The radar sensor system is automatically
deactivated near radio telescope facilities
(Y page 362).
If you want Distronic Plus to assist you, the
radar sensor system must be activated and
operational.
If no car is driving in front of you, Distronic
Plus works like cruise control in the speed
range between 30 km/h and 200 km/h. If a
vehicle is driving in front of you, Distronic Plus
works in the speed range between 0 km/h
and 200 km/h. Do not use Distronic Plus while driving on
roads with steep gradients. G
Risk of accident
Distronic Plus brakes your vehicle at a maxi-
mum of 4m/s2
depending on its speed. This
corresponds to approximately 40% of your
vehicle's maximum brake force. You must
also apply the brakes yourself if this braking
power is not sufficient.
If Distronic Plus detects a risk of collision with
a vehicle in front, an intermittent warning tone
sounds. In addition, the ·distance warn-
ing lamp in the instrument cluster lights up.
Brake to avoid a collision.
Cruise control lever With the cruise control lever you can operate
Distronic Plus and variable Speedtronic.
The LIM indicator lamp on the cruise control
lever indicates which system you have selec-
ted:
R
LIM indicator lamp off:
Distronic Plus is selected.
R LIM indicator lamp lit:
Variable Speedtronic is selected. :
To store the current speed or a higher
speed
; To adjust the specified distance
= LIM indicator lamp
? To store the current speed or call up the
last stored speed
A To store the current speed or a lower
speed Driving systems
141Controls
212_AKB; 2; 4, en-GB
mkalafa,V ersion: 2.11.8.1
2009-05-05T14:17:16+02:00 - Seite 141 Z
Dateiname: 6515346702_buchblock.pdf; erzeugt am 07. May 2009 14:16:17; WK
Page 145 of 373

B
To switch between Distronic Plus and var-
iable Speedtronic
C To deactivate Distronic Plus
Selecting Distronic Plus X
Check whether LIM indicator lamp =is off.
If it is off, Distronic Plus is already selected.
If it is not, press the cruise control lever in
the direction of arrow B.
LIM indicator lamp =in the cruise control
lever goes off. Distronic Plus is selected.
Switching on Distronic, storing the cur-
rent speed and maintaining it G
Risk of accident
The vehicle can be braked when Distronic Plus
is activated. For this reason, deactivate Dis-
tronic Plus if the vehicle is to be set in motion
by other means (e.g. in a car wash or by tow-
ing).
You can activate Distronic Plus in the follow-
ing circumstances:
R after the engine has been running for about
two minutes
R if the parking brake is not applied
R if ESP ®
is activated
R if the automatic transmission* is in position
D
R if the bonnet is closed
R if the driver's door is closed and you switch
from Pto Dor your seat belt is fastened.
R if the front-passenger door and the rear
doors are closed
Activating while driving
When driving at speeds below 30 km/h, you
can only activate Distronic Plus if the vehicle
in front has been detected and is shown in the
multi-function display. If the vehicle in front is
not shown in the multi-function display and is
no longer being detected, because it has changed lanes, for example, Distronic Plus is
deactivated and a tone sounds.
X
Briefly pull the cruise control lever towards
you ?or press it up :or down Ato the
pressure point.
Distronic Plus is selected.
X Keep the cruise control lever pressed
up : or down Auntil the desired speed
is set.
X Remove your foot from the accelerator
pedal.
Your vehicle adapts its speed to that of the
vehicle in front, but only up to the stored
speed.
i If you do not fully release the accelerator
pedal, the DISTRONIC PLUS suspended
message appears in the multi-function dis-
play. The set distance to a slower-moving
vehicle in front will then not be maintained.
You will be driving at the speed you deter-
mine by the position of the accelerator
pedal.
Activating when driving towards a sta-
tionary vehicle
If the vehicle in front of you is stationary, you
can only activate Distronic Plus once your
vehicle is stationary as well.
X Briefly pull the cruise control lever towards
you ?.
Distronic Plus is selected.
i Distronic Plus can only be activated at
under 30 km/hi f a vehicle in front has been
detected. Therefore, the Distronic Plus dis-
tance display in the instrument cluster
should be activated.
X Keep the cruise control lever pressed
up : or down Auntil the desired speed
is set.
i You can use the cruise control lever to set
the stored speed and the thumbwheel on
the cruise control lever to set the specified
minimum distance (Y page 145).142
Driving systemsControls
* optional
212_AKB; 2; 4, en-GB
mkalafa,
Version: 2.11.8.1 2009-05-05T14:17:16+02:00 - Seite 142
Dateiname: 6515346702_buchblock.pdf; erzeugt am 07. May 2009 14:16:17; WK
Page 163 of 373
G
Risk of injury
Make sure that no persons or animals are in
the manoeuvring range. Otherwise, they
could be injured.
When PARKTRONIC is deactivated, Parking
Guidance is also unavailable.
Use Parking Guidance for parking spaces:
R that are parallel to the direction of travel
R that are on straight roads, not bends
R that are on the same level as the road, i.e.
not on the pavement
Parking tips:
R On narrow roads, drive as close to the park-
ing space as possible.
R Parking spaces which are littered, over-
grown or partially occupied by trailer draw-
bars might be identified incorrectly or not
at all.
R Snowfall or heavy rain may lead to a parking
space being measured inaccurately.
R Pay attention to the PARKTRONIC warning
messages during the parking procedure
(Y page 157).
R When transporting a load which protrudes
from your vehicle, you must not use Parking
Guidance.
R Never use Parking Guidance with snow
chains or an emergency spare wheel* fit-
ted.
R The way your vehicle is positioned in the
parking space after parking is dependent
on various factors. These include the posi-
tion and shape of the vehicles parked in
front and behind it and the conditions of the
location. In some cases, Parking Guidance
may guide you too far or not far enough into
a parking space. In some cases, it may also
lead you across or onto the kerb. If neces-
sary, cancel the parking procedure with
Parking Guidance. !
If unavoidable, you should drive over
obstacles such as kerbs slowly and not at
a sharp angle. Otherwise, you may damage
the wheels or tyres.
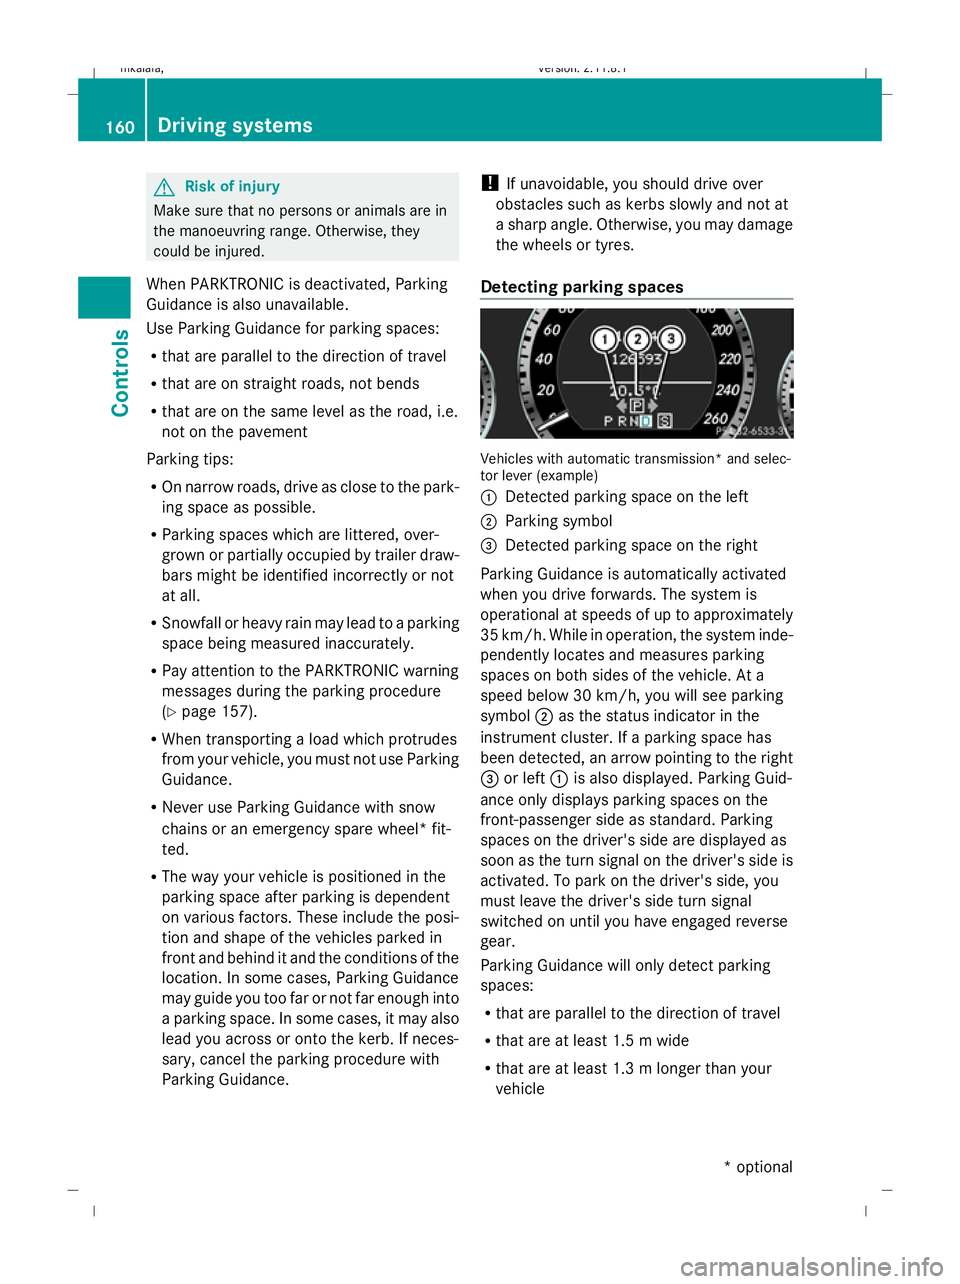
Detecting parking spaces Vehicles with automatic transmission* and selec-
tor lever (example)
:
Detected parking space on the left
; Parking symbol
= Detected parking space on the right
Parking Guidance is automatically activated
when you drive forwards. The system is
operational at speeds of up to approximately
35 km/h. While in operation, the system inde-
pendently locates and measures parking
spaces on both sides of the vehicle. At a
speed below 30 km/h, you will see parking
symbol ;as the status indicator in the
instrument cluster. If a parking space has
been detected, an arrow pointing to the right
= or left :is also displayed. Parking Guid-
ance only displays parking spaces on the
front-passenger side as standard. Parking
spaces on the driver's side are displayed as
soon as the turn signal on the driver's side is
activated. To park on the driver's side, you
must leave the driver's side turn signal
switched on until you have engaged reverse
gear.
Parking Guidance will only detect parking
spaces:
R that are parallel to the direction of travel
R that are at least 1.5 m wide
R that are at least 1.3 m longer than your
vehicle 160
Driving systemsControls
* optional
212_AKB; 2; 4, en-GB
mkalafa
,V ersion: 2.11.8.1
2009-05-05T14:17:16+02:00 - Seite 160
Dateiname: 6515346702_buchblock.pdf; erzeugt am 07. May 2009 14:16:24; WK
Page 164 of 373
A parking space is displayed while you are
driving past it, and until you are approx-
imately 15 m away from it.
Parking G
Risk of accident
PARKTRONIC and Parking Guidance are
merely parking aids and may not detect all
obstacles. They do not relieve you of the
responsibility of paying attention.
You are always responsible for safety and
must continue to pay attention to your imme-
diate surroundings when parking and
manoeuvring. You could otherwise endanger
yourself and others.
X Stop the vehicle when the parking space
symbol shows the desired parking space in
the instrument cluster.
X Vehicles with manual transmission: shift to
reverse gear.
Vehicles with automatic transmission*:
move the selector lever to R.
The multi-function display shows the
Check vehicle surroundings Con‐
firm with OK message.
X Press aon the multi-function steering
wheel to confirm.
The multi-function display switches to
Parking Guidance.
Depending on your distance from the park-
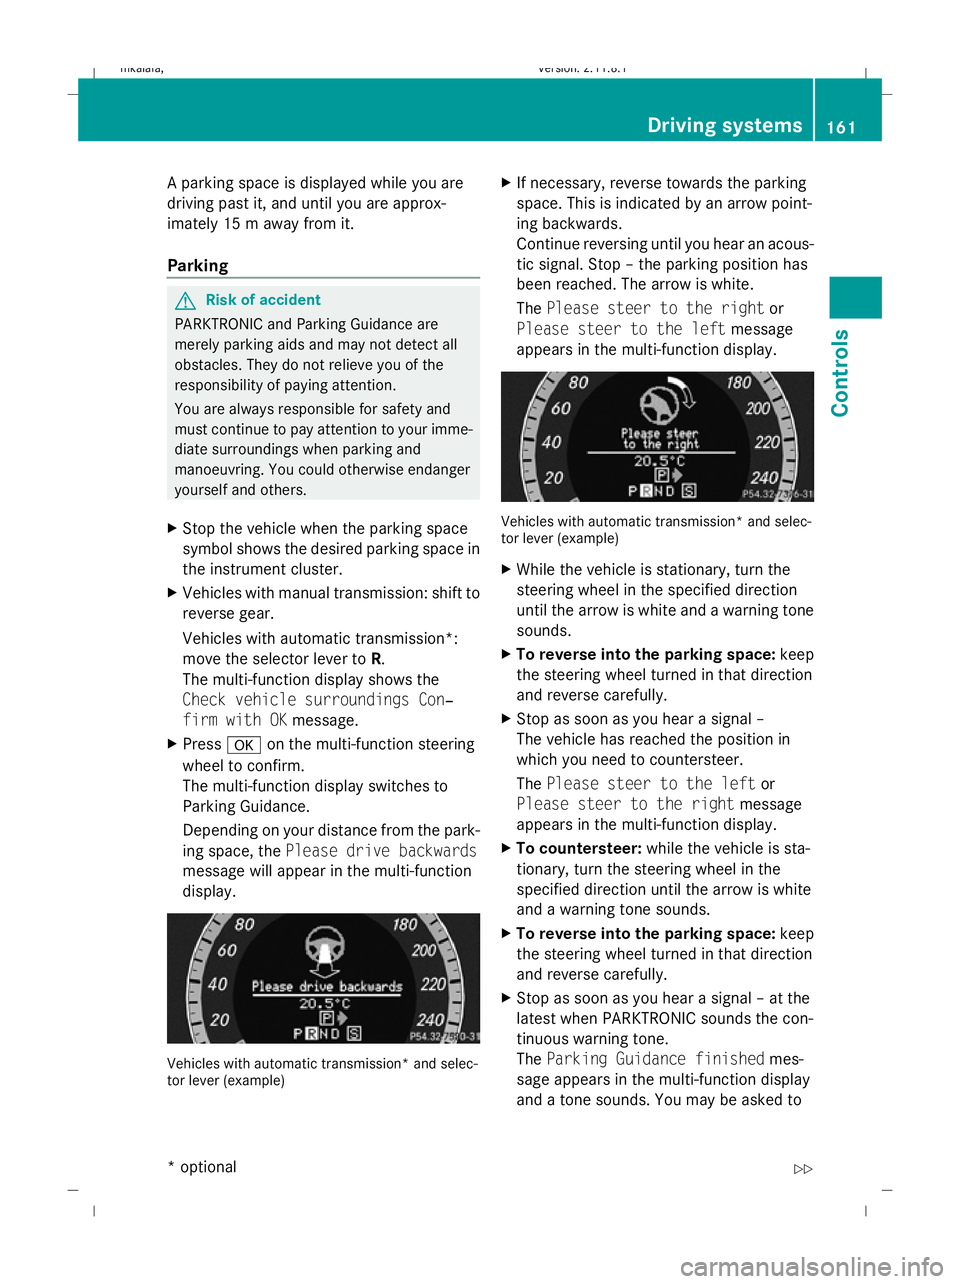
ing space, the Please drive backwards
message will appear in the multi-function
display. Vehicles with automatic transmission* and selec-
tor lever (example) X
If necessary, reverse towards the parking
space. This is indicated by an arrow point-
ing backwards.
Continue reversing until you hear an acous-
tic signal. Stop – the parking position has
been reached. The arrow is white.
The Please steer to the right or
Please steer to the left message
appears in the multi-function display. Vehicles with automatic transmission* and selec-
tor lever (example)
X
While the vehicle is stationary, turn the
steering wheel in the specified direction
until the arrow is white and a warning tone
sounds.
X To reverse into the parking space: keep
the steering wheel turned in that direction
and reverse carefully.
X Stop as soon as you hear a signal –
The vehicle has reached the position in
which you need to countersteer.
The Please steer to the left or
Please steer to the right message
appears in the multi-function display.
X To countersteer: while the vehicle is sta-
tionary, turn the steering wheel in the
specified direction until the arrow is white
and a warning tone sounds.
X To reverse into the parking space: keep
the steering wheel turned in that direction
and reverse carefully.
X Stop as soon as you hear a signal – at the
latest when PARKTRONIC sounds the con-
tinuous warning tone.
The Parking Guidance finished mes-
sage appears in the multi-function display
and a tone sounds. You may be asked to Driving systems
161Controls
* optional
212_AKB; 2; 4, en-GB
mkalafa,
Version: 2.11.8.1 2009-05-05T14:17:16+02:00 - Seite 161 Z
Dateiname: 6515346702_buchblock.pdf; erzeugt am 07. May 2009 14:16:24; WK
Page 199 of 373
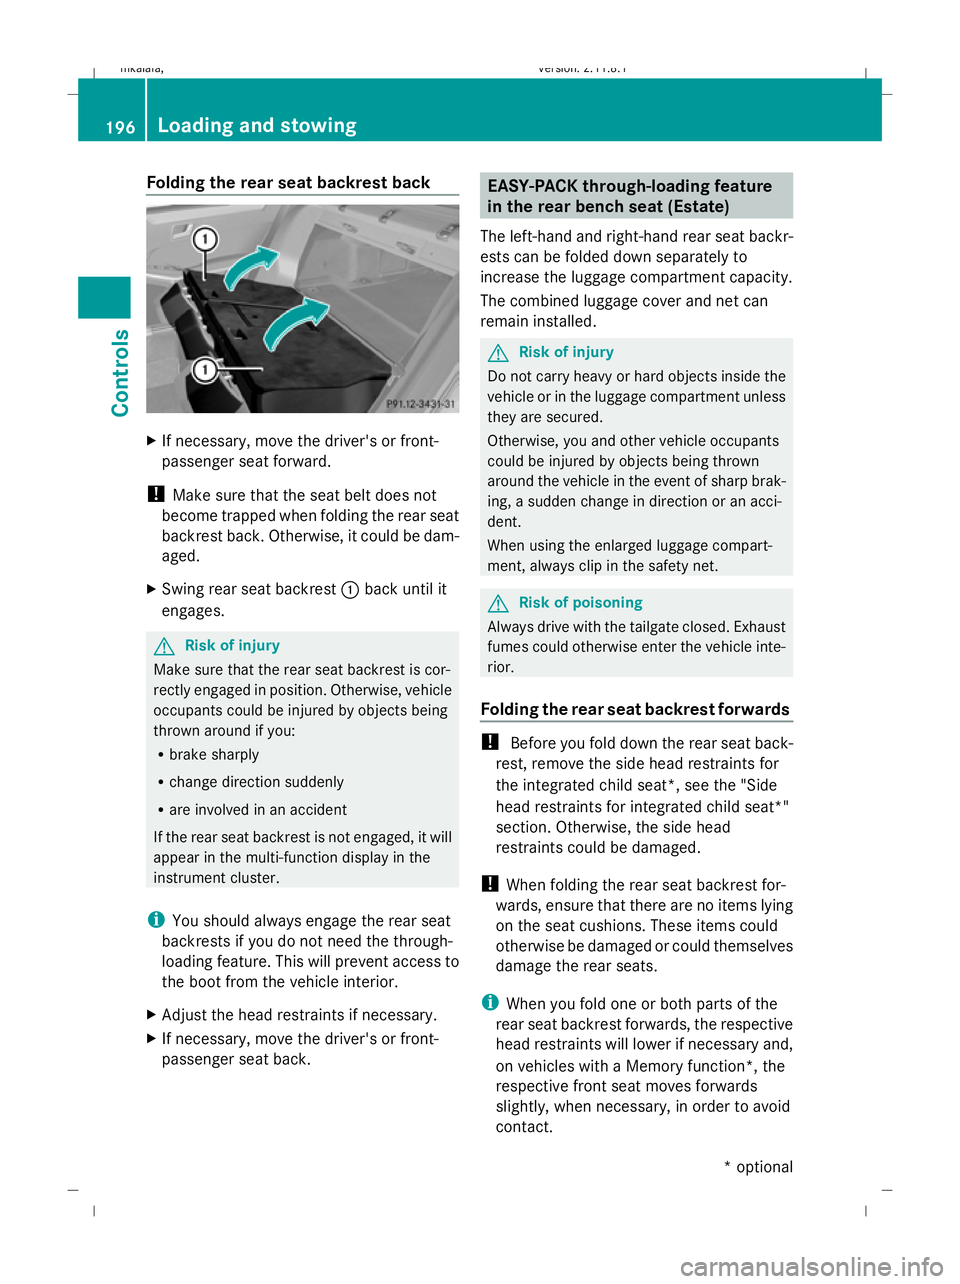
Folding the rear seat backrest back
X
If necessary, move the driver's or front-
passenger seat forward.
! Make sure that the seat belt does not
become trapped when folding the rear seat
backrest back. Otherwise, it could be dam-
aged.
X Swing rear seat backrest :back until it
engages. G
Risk of injury
Make sure that the rear seat backrest is cor-
rectly engaged in position. Otherwise, vehicle
occupants could be injured by objects being
thrown around if you:
R brake sharply
R change direction suddenly
R are involved in an accident
If the rear seat backrest is not engaged, it will
appear in the multi-function display in the
instrument cluster.
i You should always engage the rear seat
backrests if you do not need the through-
loading feature. This will prevent access to
the boot from the vehicle interior.
X Adjust the head restraints if necessary.
X If necessary, move the driver's or front-
passenger seat back. EASY-PACK through-loading feature
in the rear bench seat (Estate)
The left-hand and right-hand rear seat backr-
ests can be folded down separately to
increase the luggage compartment capacity.
The combined luggage cover and net can
remain installed. G
Risk of injury
Do not carry heavy or hard objects inside the
vehicle or in the luggage compartment unless
they are secured.
Otherwise, you and other vehicle occupants
could be injured by objects being thrown
around the vehicle in the event of sharp brak-
ing, a sudden change in direction or an acci-
dent.
When using the enlarged luggage compart-
ment, always clip in the safety net. G
Risk of poisoning
Always drive with the tailgate closed. Exhaust
fumes could otherwise enter the vehicle inte-
rior.
Folding the rear seat backrest forwards !
Before you fold down the rear seat back-
rest, remove the side head restraints for
the integrated child seat*, see the "Side
head restraints for integrated child seat*"
section. Otherwise, the side head
restraints could be damaged.
! When folding the rear seat backrest for-
wards, ensure that there are no items lying
on the seat cushions. These items could
otherwise be damaged or could themselves
damage the rear seats.
i When you fold one or both parts of the
rear seat backrest forwards, the respective
head restraints will lower if necessary and,
on vehicles with a Memory function*, the
respective front seat moves forwards
slightly, when necessary, in order to avoid
contact. 196
Loading and stowingCont
rols
* optional
212_AKB; 2; 4, en-GB
mkalafa
,V ersion: 2.11.8.1
2009-05-05T14:17:16+02:00 - Seite 196
Dateiname: 6515346702_buchblock.pdf; erzeugt am 07. May 2009 14:16:40; WK