2009 MERCEDES-BENZ E-CLASS SALOON boot
[x] Cancel search: bootPage 69 of 373

The alarm is not switched off even if you close
a door again. X
To prime: lock the vehicle using the key.
Vehicles with KEYLESS GO* can also be
locked by touching the door handle on the
outside.
Indicator lamp :flashes. The alarm sys-
tem is primed after approximately 15 sec-
onds.
X To deactivate: unlock the vehicle using the
key. Vehicles with KEYLESS GO* can also
be unlocked by opening the door/boot lid/
tailgate.
Deactivating the alarm X
With the key: insert the key into the igni-
tion lock.
The alarm is deactivated.
or
X Press the %or& button on the key.
The alarm is deactivated.
X With KEYLESS GO*: grasp the outside
door handle. The key must be outside the
vehicle.
The alarm is deactivated.
or
X Press the Start/Stop button on the dash-
board. The key must be inside the vehicle.
The alarm is deactivated. Tow-away protection*
An audible and visual alarm is triggered if the
vehicle's angle of inclination is altered while
tow-away protection is primed. For example,
this occurs if the vehicle is jacked up on one
side.
Priming tow-away protection X
Lock the vehicle using the key. Vehicles
with KEYLESS GO* can also be locked by
touching the door handle on the outside.
Tow-away protection is primed after
approximately 30 seconds.
Deactivating tow-away protection When you unlock your vehicle using the key
or KEYLESS GO*, tow-away protection is
automatically deactivated.
Deactivate tow-away protection manually to
prevent a false alarm if your vehicle:
R is being transported
R is being loaded, e.g. onto a ferry or car
transporter
R is parked on a movable surface, e.g. split-
level garages 66
Anti-theft systemsSafety
* optional
212_AKB; 2; 4, en-GB
mkalafa,
Version: 2.11.8.1 2009-05-05T14:17:16+02:00 - Seite 66
Dateiname: 6515346702_buchblock.pdf; erzeugt am 07. May 2009 14:15:44; WK
Page 72 of 373
Opening and closing
...........................70
Boot/luggage compartment ..............72
Key positions ....................................... 75
Seats .................................................... 76
Steering wheel .................................... 84
Mirrors ................................................. 86
Memory functions* .............................87
Seat belts ............................................. 89
Lights ................................................... 93
Windscreen wipers .............................99
Side windows .................................... 100
Driving and parking ..........................103
Transmission ..................................... 110
Instrument cluster ............................117
On-board computer ..........................118
Driving systems ................................ 137
Air conditioning ................................. 171
Sliding sunroof .................................. 184
Loading and stowing ........................187
Features ............................................. 207 69Controls
212_AKB; 2; 4, en-GB
mkalafa,
Version: 2.11.8.1 2009-05-05T14:17:16+02:00 - Seite 69
Dateiname: 6515346702_buchblock.pdf; erzeugt am 07. May 2009 14:15:46; WK
Page 73 of 373

Opening and closing
Key
The key centrally locks/unlocks:
R the doors
R the boot lid/tailgate
R the fuel filler flap G
Risk of accident
If children are left unsupervised in the vehicle,
they could:
R open a door from the inside at any time,
even if it has been locked
R start the vehicle using a key which has been
left in the vehicle
R release the parking brake
They could thereby endanger themselves and
others. Never leave children unsupervised in
the vehicle. Always take the key with you
when leaving the vehicle, even if you are only
leaving it for a short time. :
& Locks the vehicle
; F Unlocks the boot lid/tailgate
= % Unlocks the vehicle
? Battery check lamp
When unlocking, the turn signals flash once.
When locking, they flash three times.
When it is dark, the surround lighting also
comes on if it is activated in the on-board
computer. If you do not open either a door or the boot
lid/tailgate after you have unlocked the vehi-
cle, it will automatically relock. The time until
it locks is approximately 40 seconds.
KEYLESS GO* You can start, lock or unlock the vehicle using
the KEYLESS GO key. To do this, you only
need carry the key with you. When you touch
the surface of the sensors on the vehicle's
door handles, KEYLESS GO establishes a
radio connection between the vehicle and the
key.
The distance to the door handle from which
you wish to lock or unlock the vehicle must
not be greater than 1 m.
When starting the engine and whilst driving,
KEYLESS GO also checks whether a valid key
is in the vehicle by periodically establishing
radio contact. X
To unlock the vehicle: touch the inner
surface of the door handle.
X To lock the vehicle: touch sensor sur-
face :.
If you pull on the handle of the boot lid/tail-
gate, only the boot/luggage compartment of
the vehicle is unlocked.
i If the vehicle has been parked for a long
time, the sensor surfaces are deactivated
automatically.
Pull on the door handle to unlock the door
and switch on the ignition once to reacti-
vate the sensors. 70
Opening and closingControls
* optional
212_AKB; 2; 4, en-GB
mkalafa,
Version: 2.11.8.1 2009-05-05T14:17:16+02:00 - Seite 70
Dateiname: 6515346702_buchblock.pdf; erzeugt am 07. May 2009 14:15:46; WK
Page 75 of 373
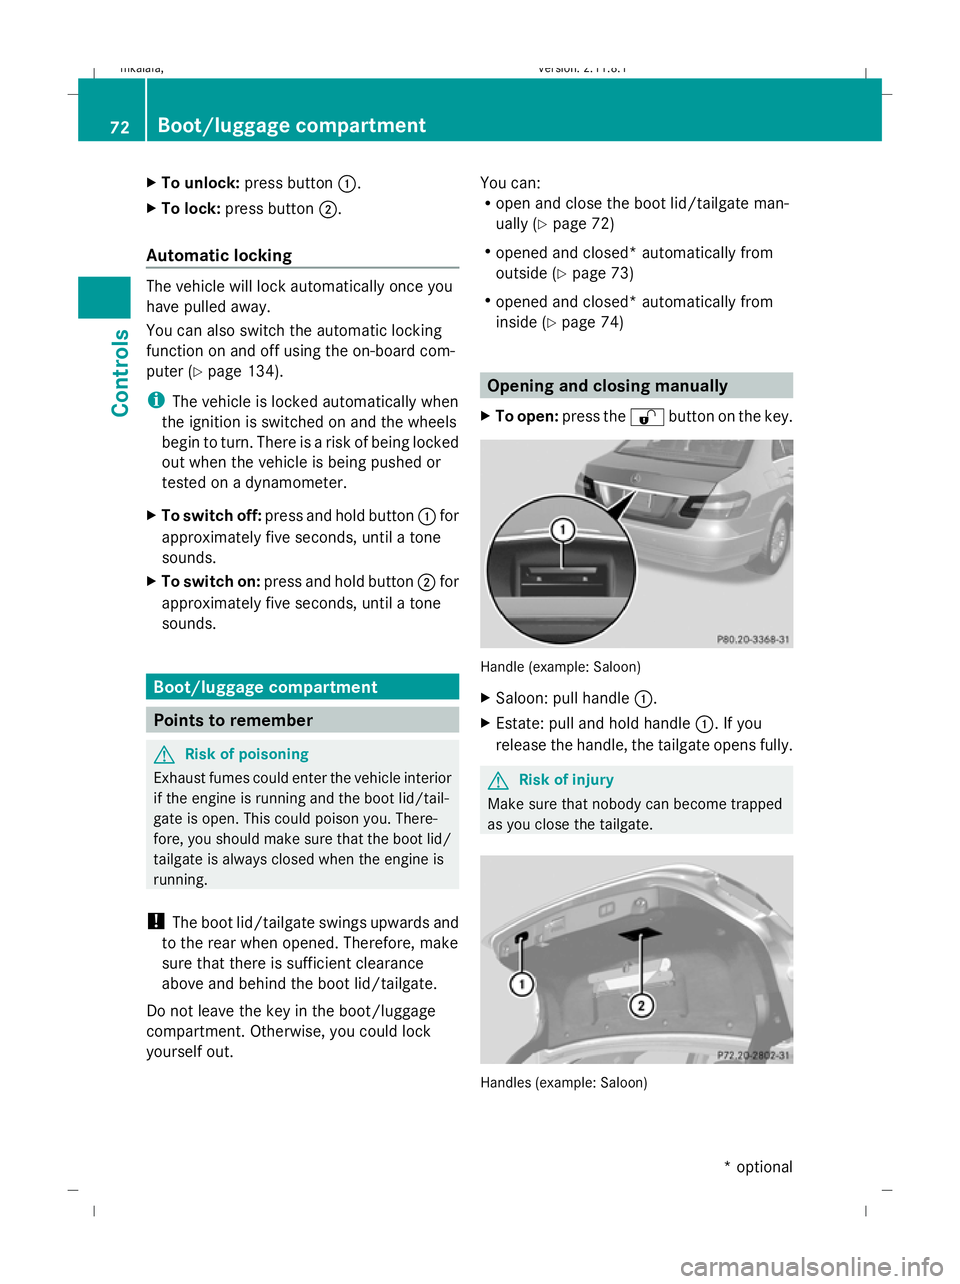
X
To unlock: press button :.
X To lock: press button ;.
Automatic locking The vehicle will lock automatically once you
have pulled away.
You can also switch the automatic locking
function on and off using the on-board com-
puter (Y page 134).
i The vehicle is locked automatically when
the ignition is switched on and the wheels
begin to turn. There is a risk of being locked
out when the vehicle is being pushed or
tested on a dynamometer.
X To switch off: press and hold button :for
approximately five seconds, until a tone
sounds.
X To switch on: press and hold button ;for
approximately five seconds, until a tone
sounds. Boot/luggage compartment
Points to remember
G
Risk of poisoning
Exhaust fumes could enter the vehicle interior
if the engine is running and the boot lid/tail-
gate is open. This could poison you. There-
fore, you should make sure that the boot lid/
tailgate is always closed when the engine is
running.
! The boot lid/tailgate swings upwards and
to the rear when opened. Therefore, make
sure that there is sufficient clearance
above and behind the boot lid/tailgate.
Do not leave the key in the boot/luggage
compartment. Otherwise, you could lock
yourself out. You can:
R
open and close the boot lid/tailgate man-
ually (Y page 72)
R opened and closed* automatically from
outside (Y page 73)
R opened and closed* automatically from
inside (Y page 74) Opening and closing manually
X To open: press the %button on the key. Handle (example: Saloon)
X
Saloon: pull handle :.
X Estate: pull and hold handle :. If you
release the handle, the tailgate opens fully. G
Risk of injury
Make sure that nobody can become trapped
as you close the tailgate. Handles (example: Saloon)72
Boot/luggage compartmentControls
* optional
212_AKB; 2; 4, en-GB
mkalafa,
Version: 2.11.8.1 2009-05-05T14:17:16+02:00 - Seite 72
Dateiname: 6515346702_buchblock.pdf; erzeugt am 07. May 2009 14:15:47; WK
Page 76 of 373
X
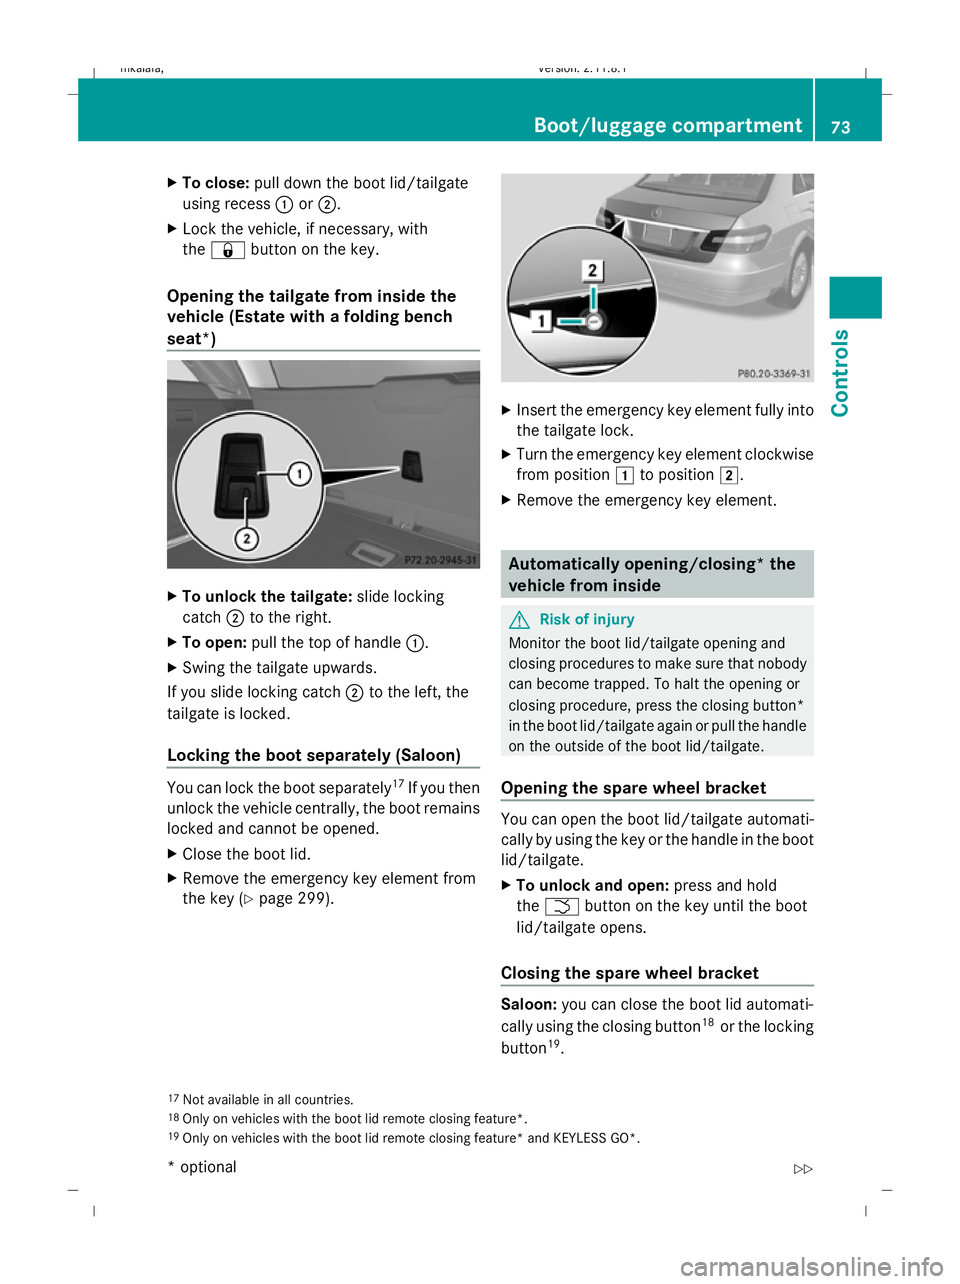
To close: pull down the boot lid/tailgate
using recess :or;.
X Lock the vehicle, if necessary, with
the & button on the key.
Opening the tailgate from inside the
vehicle (Estate with a folding bench
seat*) X
To unlock the tailgate: slide locking
catch ;to the right.
X To open: pull the top of handle :.
X Swing the tailgate upwards.
If you slide locking catch ;to the left, the
tailgate is locked.
Locking the boot separately (Saloon) You can lock the boot separately
17
If you then
unlock the vehicle centrally, the boot remains
locked and cannot be opened.
X Close the boot lid.
X Remove the emergency key element from
the key (Y page 299). X
Insert the emergency key element fully into
the tailgate lock.
X Turn the emergency key element clockwise
from position 1to position 2.
X Remove the emergency key element. Automatically opening/closing* the
vehicle from inside
G
Risk of injury
Monitor the boot lid/tailgate opening and
closing procedures to make sure that nobody
can become trapped. To halt the opening or
closing procedure, press the closing button*
in the boot lid/tailgate again or pull the handle
on the outside of the boot lid/tailgate.
Opening the spare wheel bracket You can open the boot lid/tailgate automati-
cally by using the key or the handle in the boot
lid/tailgate.
X
To unlock and open: press and hold
the F button on the key until the boot
lid/tailgate opens.
Closing the spare wheel bracket Saloon:
you can close the boot lid automati-
cally using the closing button 18
or the locking
button 19
.
17 Not available in all countries.
18 Only on vehicles with the boot lid remote closing feature*.
19 Only on vehicles with the boot lid remote closing feature* and KEYLESS GO*. Boot/luggage compartment
73Controls
* optional
212_AKB; 2; 4, en-GB
mkalafa,
Version: 2.11.8.1 2009-05-05T14:17:16+02:00 - Seite 73 Z
Dateiname: 6515346702_buchblock.pdf; erzeugt am 07. May 2009 14:15:47; WK
Page 77 of 373
Estate:
you can close the tailgate automati-
cally using either the closing button or the
locking button 20
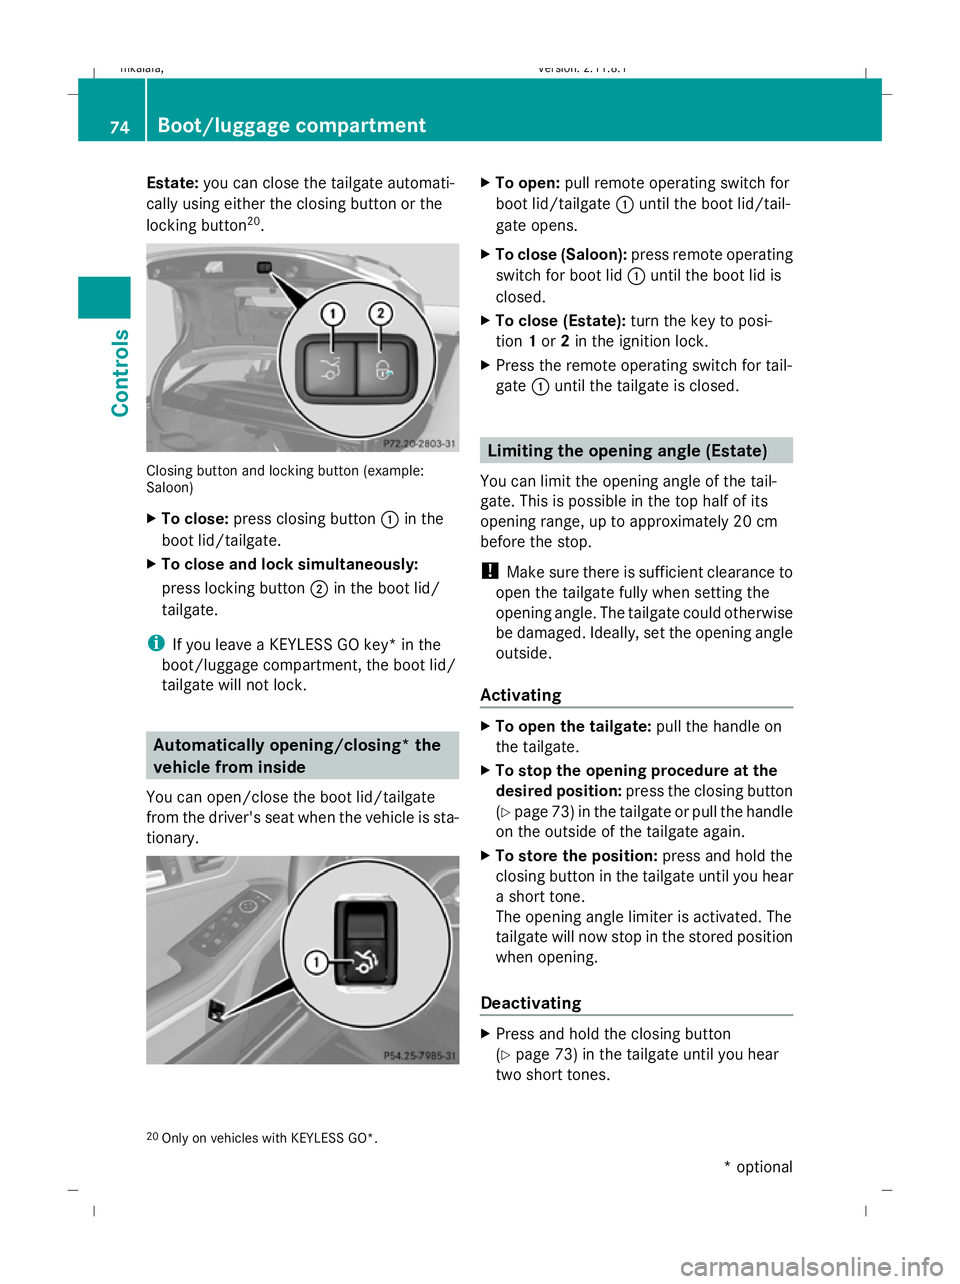
. Closing button and locking button (example:
Saloon)
X To close: press closing button :in the
boot lid/tailgate.
X To close and lock simultaneously:
press locking button ;in the boot lid/
tailgate.
i If you leave a KEYLESS GO key* in the
boot/luggage compartment, the boot lid/
tailgate will not lock. Automatically opening/closing* the
vehicle from inside
You can open/close the boot lid/tailgate
from the driver's seat when the vehicle is sta-
tionary. X
To open: pull remote operating switch for
boot lid/tailgate :until the boot lid/tail-
gate opens.
X To close (Saloon): press remote operating
switch for boot lid :until the boot lid is
closed.
X To close (Estate): turn the key to posi-
tion 1or 2in the ignition lock.
X Press the remote operating switch for tail-
gate :until the tailgate is closed. Limiting the opening angle (Estate)
You can limit the opening angle of the tail-
gate. This is possible in the top half of its
opening range, up to approximately 20 cm
before the stop.
! Make sure there is sufficient clearance to
open the tailgate fully when setting the
opening angle. The tailgate could otherwise
be damaged. Ideally, set the opening angle
outside.
Activating X
To open the tailgate: pull the handle on
the tailgate.
X To stop the opening procedure at the
desired position: press the closing button
(Y page 73 )in the tailgate or pull the handle
on the outside of the tailgate again.
X To store the position: press and hold the
closing button in the tailgate until you hear
a short tone.
The opening angle limiter is activated. The
tailgate will now stop in the stored position
when opening.
Deactivating X
Press and hold the closing button
(Y page 73) in the tailgate until you hear
two short tones.
20 Only on vehicles with KEYLESS GO*. 74
Boot/luggage compartmentControls
* optional
212_AKB; 2; 4, en-GB
mkalafa,
Version: 2.11.8.1 2009-05-05T14:17:16+02:00 - Seite 74
Dateiname: 6515346702_buchblock.pdf; erzeugt am 07. May 2009 14:15:48; WK
Page 101 of 373

Motorway mode
Motorway mode increases the range of the
beam.
Active:
R if you are driving at speeds above
110 km/h and do not make any large steer-
ing movements for 1,000 m.
R if you are driving at speeds above
130 km/h.
Motorway mode remains active unless your
speed drops speeds below 80 km/h.
Not active: if you are driving at speeds below
80 km/h.
Extended range foglamps The extended range foglamps reduce the
glare experienced by the driver and improve
the illumination of the edge of the carriage-
way.
Active: if you are driving at speeds below
70 km/h and switch on the rear foglamp.
If your speed does not exceed 100 km/h, the
extended foglamp function remains active. Not active:
if you are driving at speeds above
100 km/h or you switch off the rear foglamp.
Adjusting the headlamp range (halogen
headlamps) Headlamp range control
g
Driver's seat and front-passenger seat
occupied
1 Driver's seat, front-passenger seat and
rear seats occupied
2 Driver's seat, front-passenger seat and
rear seats occupied, luggage compart-
ment/boot laden
3 Driver's and front-passenger seats occu-
pied and maximum permissible rear axle
load utilised, e.g. when towing a trailer
The headlamp range control allows you to
adjust the cone of light from the headlamps
to suit the vehicle load.
X Start the engine.
X Turn the headlamp range control to the cor-
responding position. Headlamp cleaning system*
The headlamps are cleaned automatically if
the "Wipe with washer fluid" function is oper-
ated while the lights are on and the engine is
running. The headlamps are cleaned again
every tenth time the windscreen is wiped with
washer fluid. When you switch off the ignition,
the automatic headlamp cleaning system is
reset and counting is resumed from 0. 98
LightsControls
* optional
212_AKB; 2; 4, en-GB
mkalafa,
Version: 2.11.8.1 2009-05-05T14:17:16+02:00 - Seite 98
Dateiname: 6515346702_buchblock.pdf; erzeugt am 07. May 2009 14:16:01; WK
Page 165 of 373
steer in a different direction and then
change gear. In this case, further displays
in the multi-function display will direct you
to the final position.
X Manoeuvre, if necessary.
X Always observe the warning messages dis-
played by PARKTRONIC (Y page 157).
Cancelling Parking Guidance X
Press the PARKTRONIC button on the
centre console (Y page 157).
Parking Guidance is cancelled immediately
and PARKTRONIC is deactivated.
Parking Guidance is cancelled automatically
if it is no longer possible to guide you into the
parking space, or if a malfunction occurs.
The parking space symbol disappears and the
Parking Guidance cancelled message
appears in the multi-function display.
Trailer towing* For vehicles with a trailer coupling, the mini-
mum length for parking spaces is slightly
increased.
If you have attached a trailer to your vehicle,
you should not use Parking Guidance. When
the electrical connection is established
between your vehicle and the trailer, Parking
Guidance ceases to be available. PARK-
TRONIC is deactivated for the rear area. Reversing camera*
The reversing camera is an optical aid. It
shows the area behind your vehicle in the
COMAND APS display. G
Risk of injury
Make sure that no persons or animals are in
the manoeuvring range. Otherwise, they
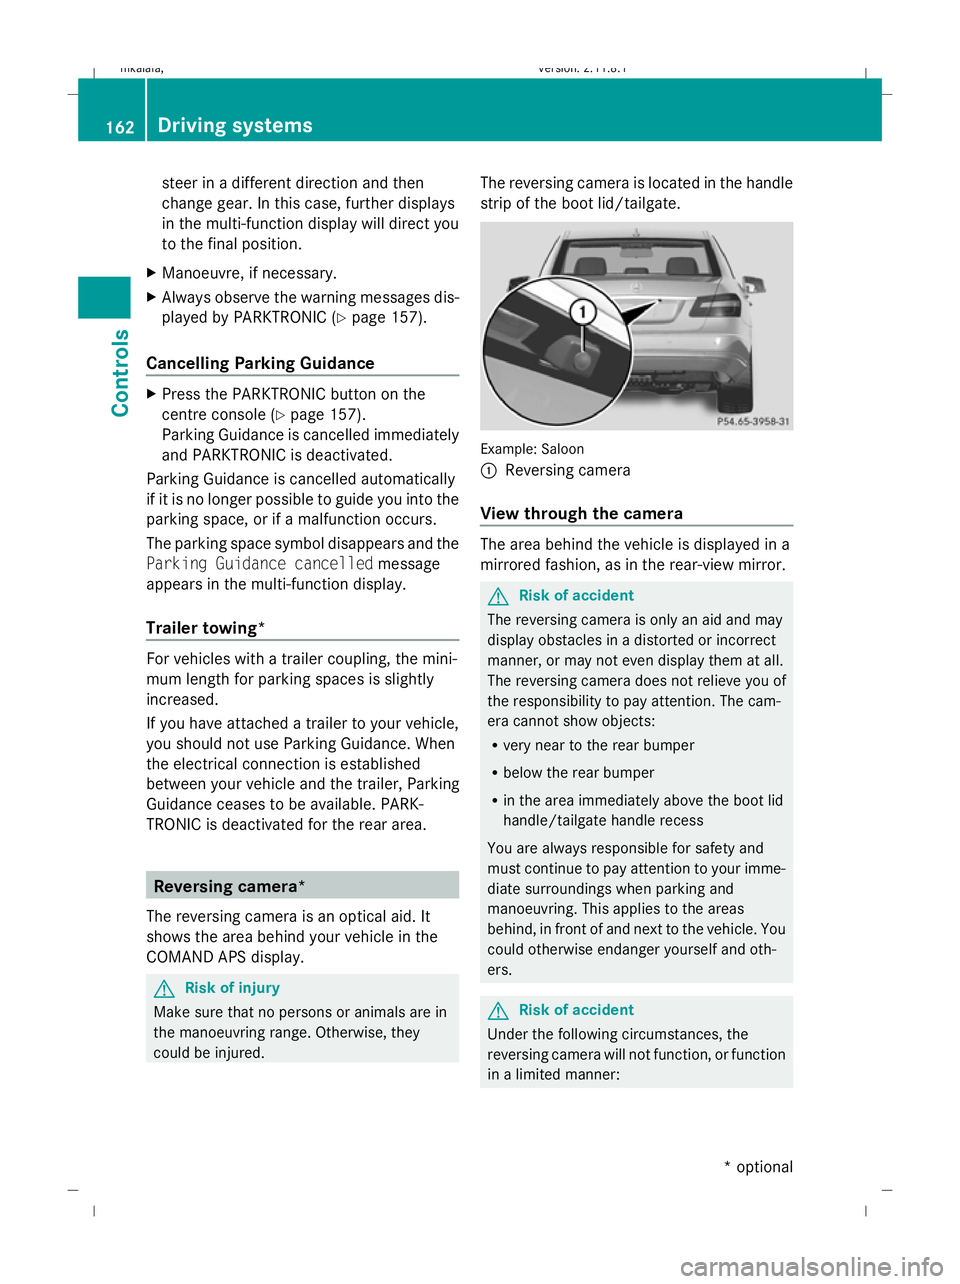
could be injured. The reversing camera is located in the handle
strip of the boot lid/tailgate.
Example: Saloon
:
Reversing camera
View through the camera The area behind the vehicle is displayed in a
mirrored fashion, as in the rear-view mirror.
G
Risk of accident
The reversing camera is only an aid and may
display obstacles in a distorted or incorrect
manner, or may not even display them at all.
The reversing camera does not relieve you of
the responsibility to pay attention. The cam-
era cannot show objects:
R very near to the rear bumper
R below the rear bumper
R in the area immediately above the boot lid
handle/tailgate handle recess
You are always responsible for safety and
must continue to pay attention to your imme-
diate surroundings when parking and
manoeuvring. This applies to the areas
behind, in front of and next to the vehicle. You
could otherwise endanger yourself and oth-
ers. G
Risk of accident
Under the following circumstances, the
reversing camera will not function, or function
in a limited manner: 162
Driving systemsControls
* optional
212_AKB; 2; 4, en-GB
mkalafa,
Version: 2.11.8.1 2009-05-05T14:17:16+02:00 - Seite 162
Dateiname: 6515346702_buchblock.pdf; erzeugt am 07. May 2009 14:16:24; WK