2009 MERCEDES-BENZ E-CLASS ESTATE steering
[x] Cancel search: steeringPage 91 of 373
X
Adjust the seat ( Ypage 76).
X On the driver's side, also adjust the steer-
ing wheel (Y page 84) and the mirrors
(Y page 86).
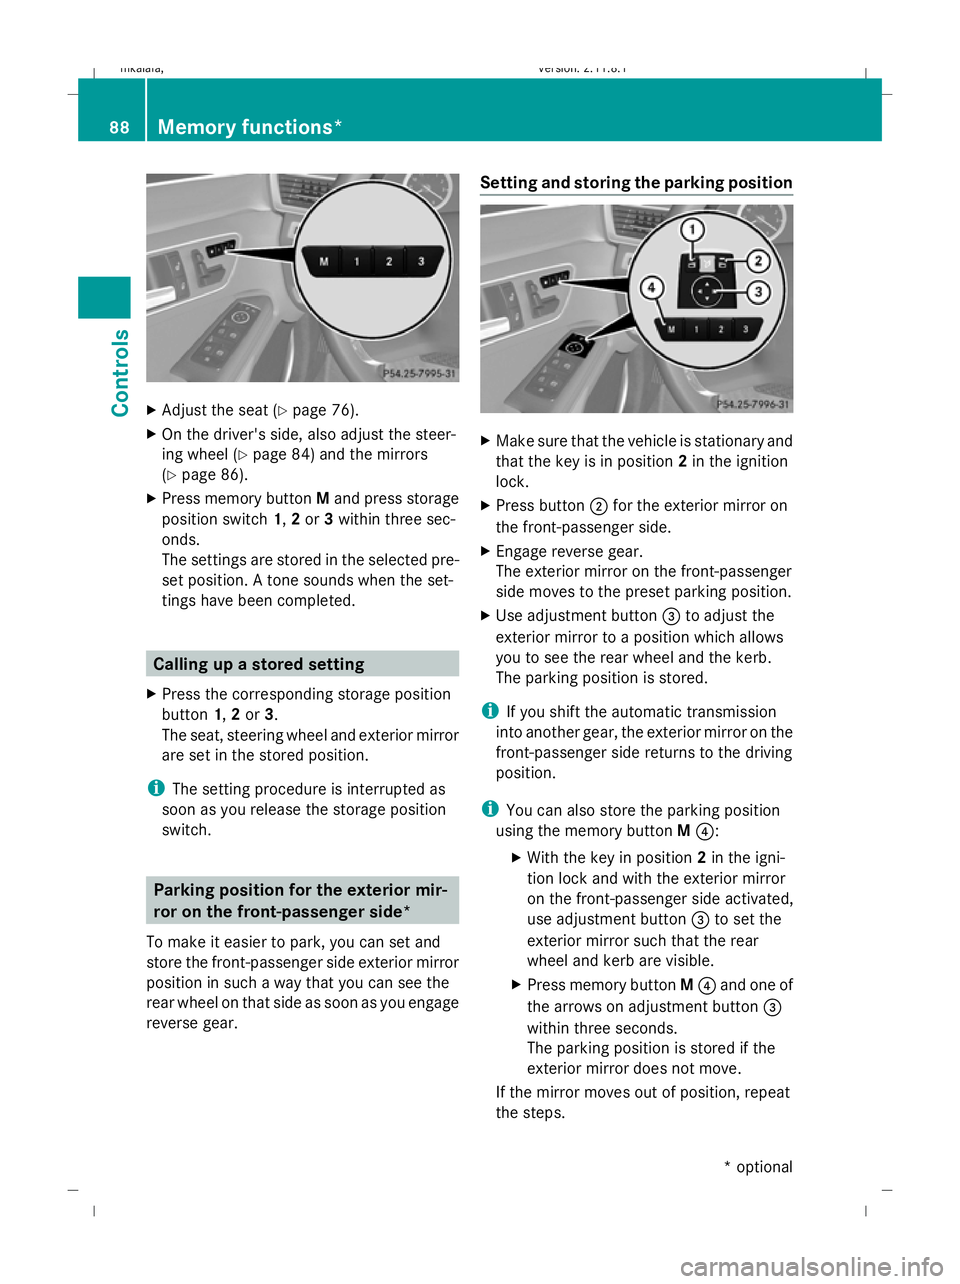
X Press memory button Mand press storage
position switch 1,2or 3within three sec-
onds.
The settings are stored in the selected pre-
set position. A tone sounds when the set-
tings have been completed. Calling up a stored setting
X Press the corresponding storage position
button 1,2or 3.
The seat, steering wheel and exterior mirror
are set in the stored position.
i The setting procedure is interrupted as
soon as you release the storage position
switch. Parking position for the exterior mir-
ror on the front-passenger side*
To make it easier to park, you can set and
store the front-passenger side exterior mirror
position in such a way that you can see the
rear wheel on that side as soon as you engage
reverse gear. Setting and storing the parking position
X
Make sure that the vehicle is stationary and
that the key is in position 2in the ignition
lock.
X Press button ;for the exterior mirror on
the front-passenger side.
X Engage reverse gear.
The exterior mirror on the front-passenger
side moves to the preset parking position.
X Use adjustment button =to adjust the
exterior mirror to a position which allows
you to see the rear wheel and the kerb.
The parking position is stored.
i If you shift the automatic transmission
into another gear, the exterior mirror on the
front-passenger side returns to the driving
position.
i You can also store the parking position
using the memory button M?:
X With the key in position 2in the igni-
tion lock and with the exterior mirror
on the front-passenger side activated,
use adjustment button =to set the
exterior mirror such that the rear
wheel and kerb are visible.
X Press memory button M? and one of
the arrows on adjustment button =
within three seconds.
The parking position is stored if the
exterior mirror does not move.
If the mirror moves out of position, repeat
the steps. 88
Memory functions*Controls
* optional
212_AKB; 2; 4, en-GB
mkalafa,
Version: 2.11.8.1 2009-05-05T14:17:16+02:00 - Seite 88
Dateiname: 6515346702_buchblock.pdf; erzeugt am 07. May 2009 14:15:57; WK
Page 95 of 373
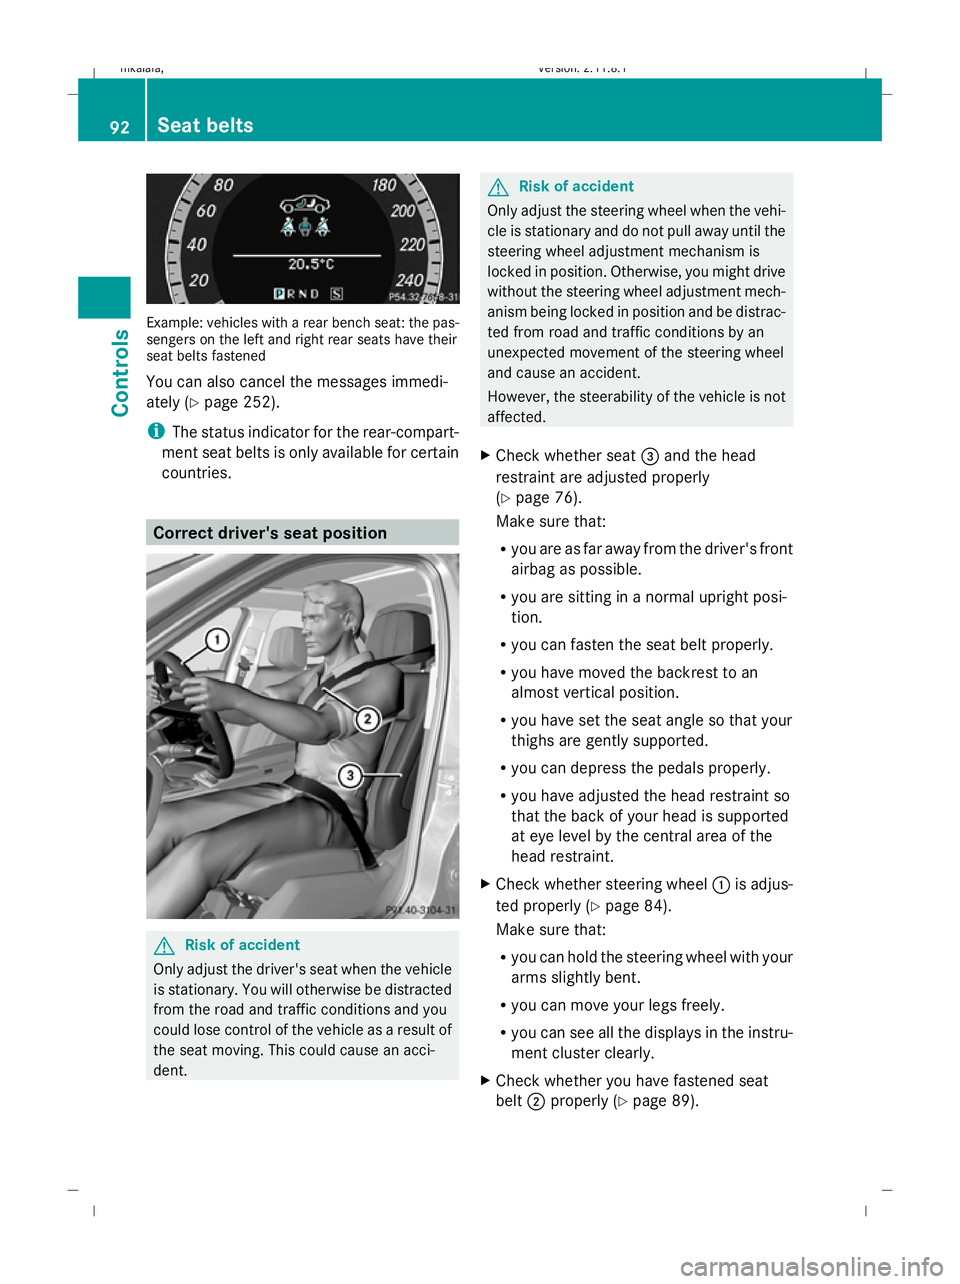
Example: vehicles with a rear bench seat: the pas-
sengers on the left and right rear seats have their
seat belts fastened
You can also cancel the messages immedi-
ately (Y page 252).
i The status indicator for the rear-compart-
ment seat belts is only available for certain
countries. Correct driver's seat position
G
Risk of accident
Only adjust the driver's seat when the vehicle
is stationary. You will otherwise be distracted
from the road and traffic conditions and you
could lose control of the vehicle as a result of
the seat moving. This could cause an acci-
dent. G
Risk of accident
Only adjust the steering wheel when the vehi-
cle is stationary and do not pull away until the
steering wheel adjustment mechanism is
locked in position. Otherwise, you might drive
without the steering wheel adjustment mech-
anism being locked in position and be distrac-
ted from road and traffic conditions by an
unexpected movement of the steering wheel
and cause an accident.
However, the steerability of the vehicle is not
affected.
X Check whether seat =and the head
restraint are adjusted properly
(Y page 76).
Make sure that:
R you are as far away from the driver's front
airbag as possible.
R you are sitting in a normal upright posi-
tion.
R you can fasten the seat belt properly.
R you have moved the backrest to an
almost vertical position.
R you have set the seat angle so that your
thighs are gently supported.
R you can depress the pedals properly.
R you have adjusted the head restraint so
that the back of your head is supported
at eye level by the central area of the
head restraint.
X Check whether steering wheel :is adjus-
ted properly (Y page 84).
Make sure that:
R you can hold the steering wheel with your
arms slightly bent.
R you can move your legs freely.
R you can see all the displays in the instru-
ment cluster clearly.
X Check whether you have fastened seat
belt ;properly (Y page 89). 92
Seat beltsControls
212_AKB; 2; 4, en-GB
mkalafa,
Version: 2.11.8.1 2009-05-05T14:17:16+02:00 - Seite 92
Dateiname: 6515346702_buchblock.pdf; erzeugt am 07. May 2009 14:15:58; WK
Page 100 of 373

X
To switch on: press button:.
All turn signals flash.
X To switch on the hazard warning lamps
on one side: also push the combination
switch beyond the pressure point in the
direction of arrow EorG (Ypage 94).
The indicator lamp on the corresponding
side flashes.
X To switch off: press button:.
The hazard warning lamp switches off auto-
matically after full brake application if the
vehicle then reaches a speed of over
10 km/h again.
Intelligent Light System* (bi-xenon
headlamps*) The Intelligent Light System is a system which
adjusts the headlamps automatically to suit
the prevailing driving and weather conditions.
The bi-xenon headlamps offer enhanced func-
tions to improve illumination of the road sur-
face, e.g. depending on the vehicle speed or
weather conditions. The system includes the
active light function, cornering light function,
motorway mode and extended range fog-
lamps. The system is only active when it is
dark.
You can activate or deactivate the "Intelligent
Light System" using the on-board computer
(Y page 132).
Active light function The active light function is a system that
moves the headlamps according to the steer-
ing movements of the front wheels. In this way, relevant areas remain illuminated while
driving. This allows you to recognise pedes-
trians, cyclists and animals.
Cornering light function
The cornering light function improves the illu-
mination of the road surface in the broad
direction you are turning, e.g. making it easier
to see in tight corners. It can only be activated
when the dipped-beam headlamps are
switched on.
Active:
R
if you are driving at speeds below
40 km/h, the cornering light function is
activated either by the turn signal or by the
steering wheel being turned.
R if you are driving at speeds between
40 km/h and 70 km/h, the cornering light
function is activated by the steering wheel
being turned.
Not active: if you are driving at speeds above
70 km/h or you switch off the turn signal or
move the steering wheel to the straight-
ahead position.
The cornering lamp may remain lit for a short
time, but is automatically switched off after
no more than three minutes. Lights
97Controls
* optional
212_AKB; 2; 4, en-GB
mkalafa,
Version: 2.11.8.1 2009-05-05T14:17:16+02:00 - Seite 97 Z
Dateiname: 6515346702_buchblock.pdf; erzeugt am 07. May 2009 14:16:00; WK
Page 110 of 373
Parking
G
Risk of accident
Only remove the key from the ignition lock
when the vehicle is stationary, as you cannot
steer the vehicle with the key removed.
Never leave children unsupervised in the vehi-
cle. They could release the parking brake. This
could lead to a serious or fatal accident. G
Risk of fire
Make sure that the exhaust system does not
under any circumstances come into contact
with easily ignitable material such as dry grass
or petrol. Otherwise, the flammable material
may ignite and set the vehicle on fire.
To ensure that the vehicle is secured against
rolling away unintentionally:
R the parking brake must be applied
R on vehicles with manual transmission,
engage first gear or reverse gear
R on vehicles with automatic transmission*,
the transmission must be in position Pand
the key must be removed from the ignition
lock
R on steep uphill or downhill gradients, turn
the front wheels towards the kerb
Parking brake X
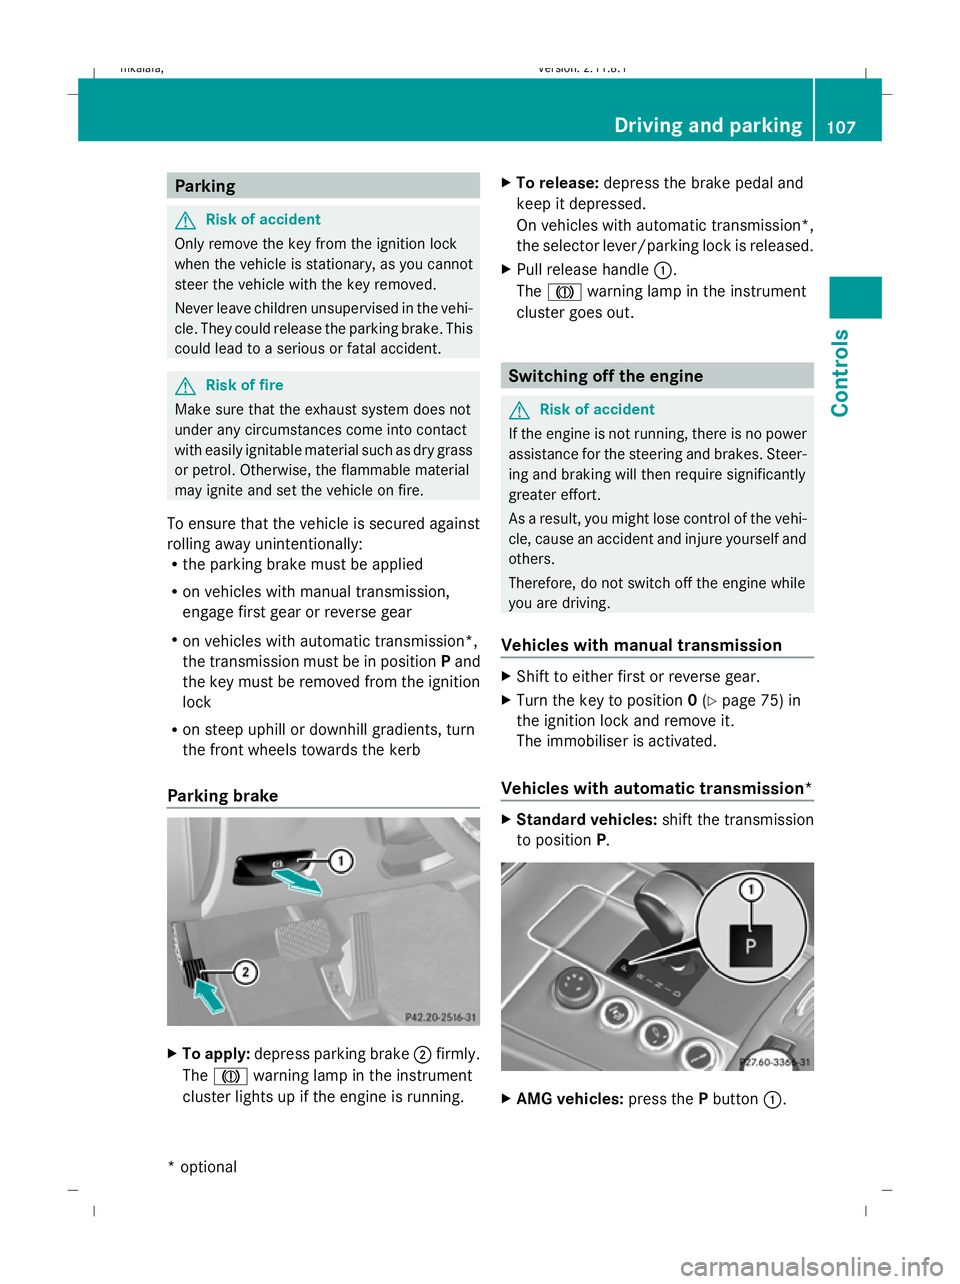
To apply: depress parking brake ;firmly.
The J warning lamp in the instrument
cluster lights up if the engine is running. X
To release: depress the brake pedal and
keep it depressed.
On vehicles with automatic transmission*,
the selector lever/parking lock is released.
X Pull release handle :.
The J warning lamp in the instrument
cluster goes out. Switching off the engine
G
Risk of accident
If the engine is not running, there is no power
assistance for the steering and brakes. Steer-
ing and braking will then require significantly
greater effort.
As a result, you might lose control of the vehi-
cle, cause an accident and injure yourself and
others.
Therefore, do not switch off the engine while
you are driving.
Vehicles with manual transmission X
Shift to either first or reverse gear.
X Turn the key to position 0(Y page 75) in
the ignition lock and remove it.
The immobiliser is activated.
Vehicles with automatic transmission* X
Standard vehicles: shift the transmission
to position P. X
AMG vehicles: press thePbutton :. Driving and parking
107Controls
* optional
212_AKB; 2; 4, en-GB
mkalafa,
Version: 2.11.8.1 2009-05-05T14:17:16+02:00 - Seite 107 Z
Dateiname: 6515346702_buchblock.pdf; erzeugt am 07. May 2009 14:16:05; WK
Page 115 of 373
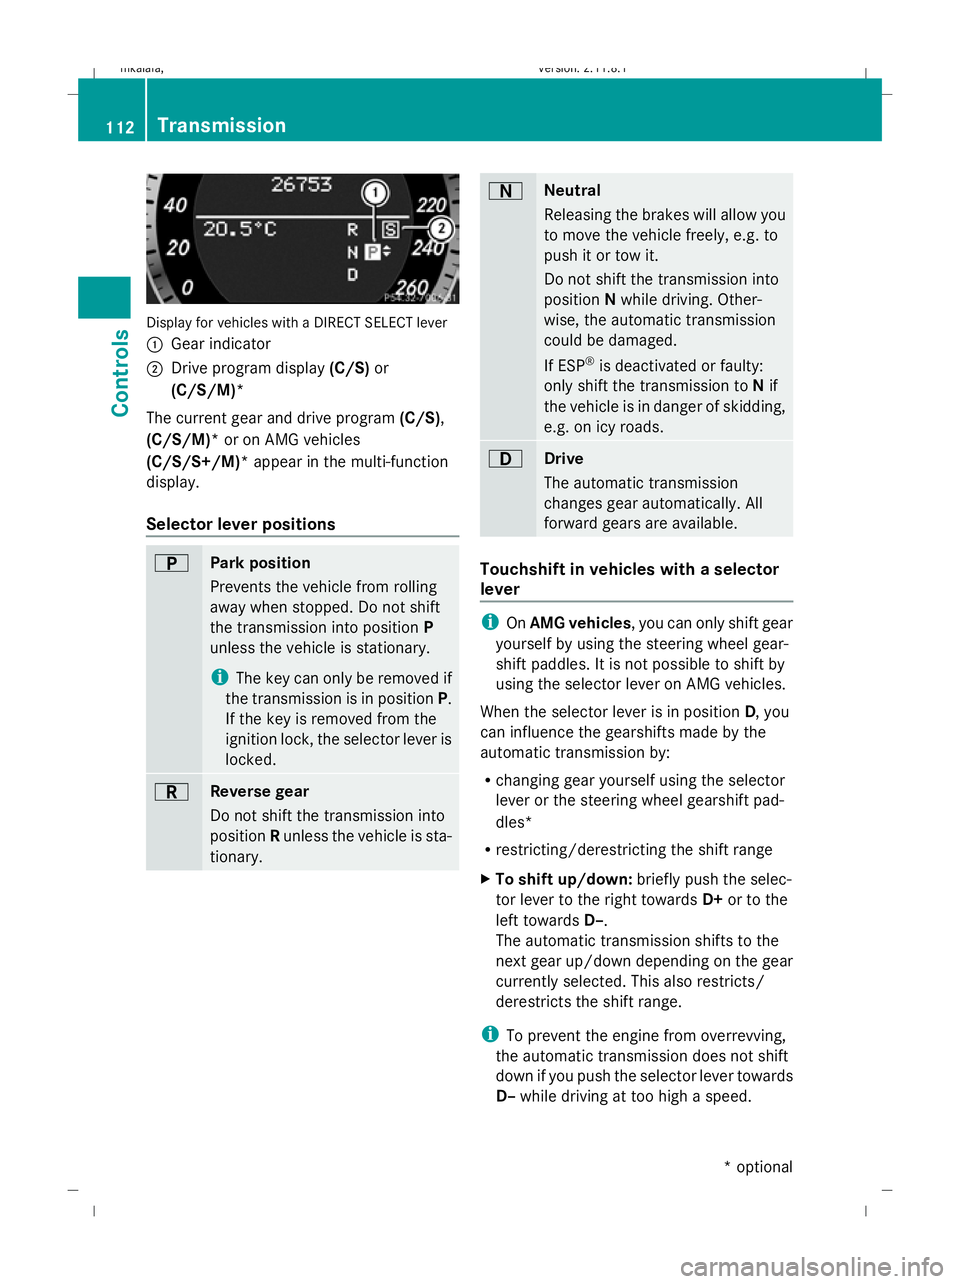
Display for vehicles with a DIRECT SELECT lever
: Gear indicator
; Drive program display (C/S)or
(C/S/M)*
The current gear and drive program (C/S),
(C/S/M)* or on AMG vehicles
(C/S/S+/M)* appear in the multi-function
display.
Selector lever positions B
Park position
Prevents the vehicle from rolling
away when stopped. Do not shift
the transmission into position P
unless the vehicle is stationary.
i The key can only be removed if
the transmission is in position P.
If the key is removed from the
ignition lock, the selector lever is
locked. C
Reverse gear
Do not shift the transmission into
position Runless the vehicle is sta-
tionary. A
Neutral
Releasing the brakes will allow you
to move the vehicle freely, e.g. to
push it or tow it.
Do not shift the transmission into
position
Nwhile driving. Other-
wise, the automatic transmission
could be damaged.
If ESP ®
is deactivated or faulty:
only shift the transmission to Nif
the vehicle is in danger of skidding,
e.g. on icy roads. 7
Drive
The automatic transmission
changes gear automatically. All
forward gears are available.
Touchshift in vehicles with a selector
lever
i
OnAMG vehicles , you can only shift gear
yourself by using the steering wheel gear-
shift paddles. It is not possible to shift by
using the selector lever on AMG vehicles.
When the selector lever is in position D, you
can influence the gearshifts made by the
automatic transmission by:
R changing gear yourself using the selector
lever or the steering wheel gearshift pad-
dles*
R restricting/derestricting the shift range
X To shift up/down: briefly push the selec-
tor lever to the right towards D+or to the
left towards D–.
The automatic transmission shifts to the
next gear up/down depending on the gear
currently selected. This also restricts/
derestricts the shift range.
i To prevent the engine from overrevving,
the automatic transmission does not shift
down if you push the selector lever towards
D– while driving at too high a speed. 112
TransmissionControls
* optional
212_AKB; 2; 4, en-GB
mkalafa,
Version: 2.11.8.1 2009-05-05T14:17:16+02:00 - Seite 112
Dateiname: 6515346702_buchblock.pdf; erzeugt am 07. May 2009 14:16:07; WK
Page 116 of 373
X
To derestrict the shift range: press and
hold the selector lever towards D+until D
is shown once more in the multi-function
display.
The automatic transmission shifts from the
current shift range directly to D.
X To select the most effective shift
range: press and hold the selector lever to
the left towards D–.
The automatic transmission shifts to a
range which allows ideal acceleration and
deceleration. To do this, the automatic
transmission shifts down one or more
gears.
Shift ranges i
OnAMG vehicles andvehicles with
steering wheel gearshift paddles*, you
can restrict or derestrict the shift range in
the same way as with Touchshift
(Y page 112).
When the automatic transmission is in posi-
tion D, it is possible to restrict or derestrict
the shift range.
X Briefly push the selector lever to the left/
right towards D+/D–.
The shift range selected is shown in the
multi-function display. The automatic
transmission shifts only as far as the selec-
ted gear.
i If the maximum engine speed for the shift
range is reached and you continue to accel-
erate, the automatic transmission shifts up
in order to prevent the engine from over-
revving, even if the shift range is restricted. Driving situations
=
The braking effect of the engine can
be used in this position 5
To use the braking effect of the
engine on downhill gradients and
for driving:
R
on steep mountain roads
R in mountainous terrain
R in arduous conditions 4
To use the braking effect of the
engine on extremely steep downhill
gradients and long downhill
stretches
Program selector button
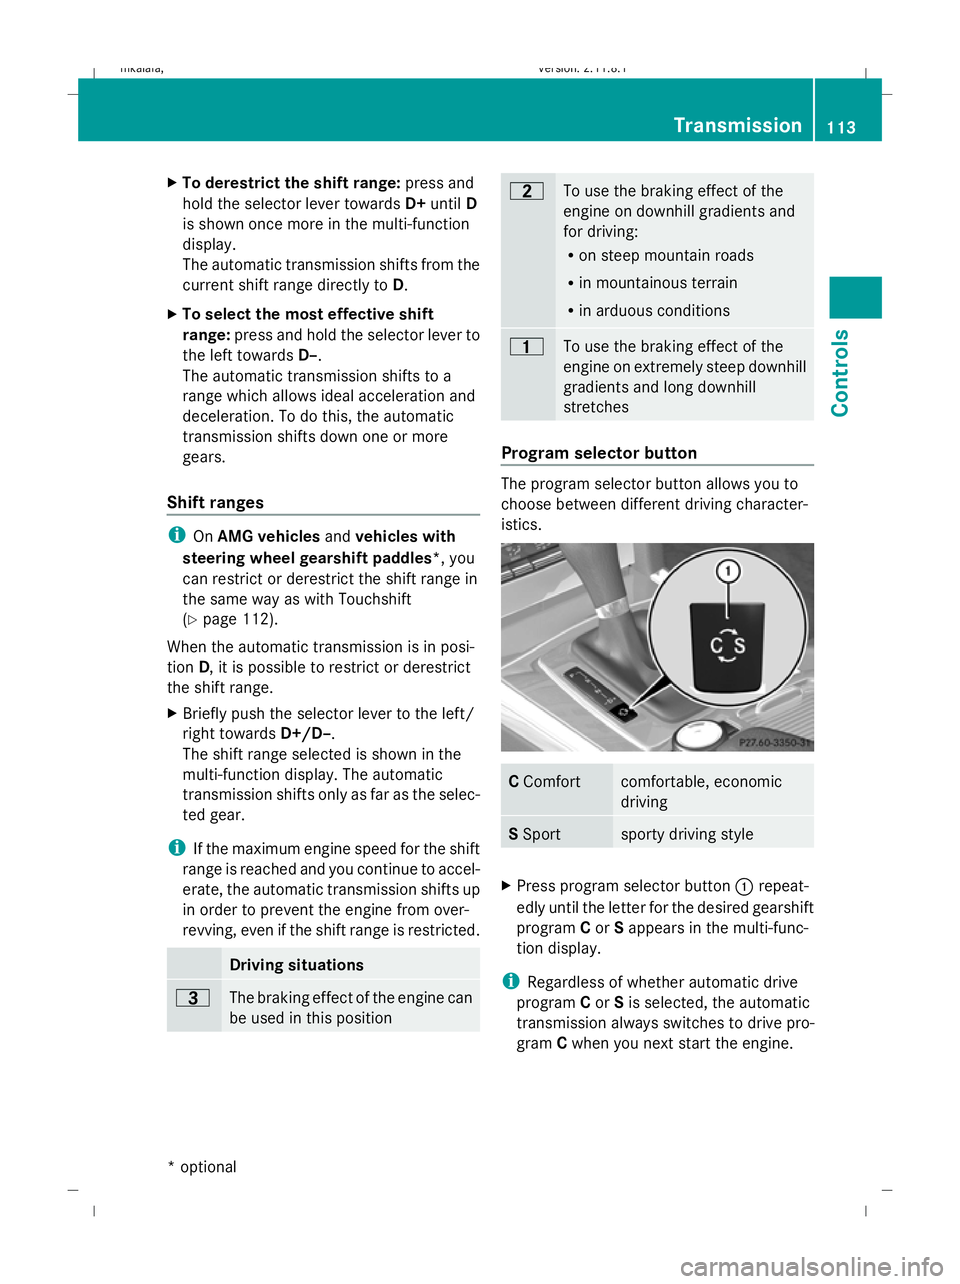
The program selector button allows you to
choose between different driving character-
istics.
C
Comfort comfortable, economic
driving
S
Sport sporty driving style
X
Press program selector button :repeat-
edly until the letter for the desired gearshift
program Cor Sappears in the multi-func-
tion display.
i Regardless of whether automatic drive
program Cor Sis selected, the automatic
transmission always switches to drive pro-
gram Cwhen you next start the engine. Transmission
113Controls
* optional
212_AKB; 2; 4, en-GB
mkalafa,
Version: 2.11.8.1 2009-05-05T14:17:16+02:00 - Seite 113 Z
Dateiname: 6515346702_buchblock.pdf; erzeugt am 07. May 2009 14:16:08; WK
Page 117 of 373
Drive program
Cis characterised by the fol-
lowing:
R comfort-oriented engine and suspension
settings
R optimal fuel consumption resulting from
the automatic transmission shifting up
sooner
R the vehicle pulling away more gently in
forward and reverse gears, unless the
accelerator pedal is depressed fully
R increased sensitivity. This improves driving
stability on slippery road surfaces, for
example
R the automatic transmission shifting up
sooner, which results in the vehicle being
driven at lower engine speeds and the
wheels being less likely to spin
Drive program Sis characterised by the fol-
lowing:
R sporty engine and suspension configura-
tion
R the vehicle pulling away in first gear
R the automatic transmission shifting up
later
R the late shift point of the automatic trans-
mission can lead to higher fuel consump-
tion
Driving tips Accelerator pedal position
Your style of driving influences how the auto-
matic transmission shifts gear:
R little throttle: early upshifts
R more throttle: late upshifts
AMG vehicles
When shifting down, the double-clutch func-
tion is active, regardless of the currently
selected drive program. The double-clutch
function reduces load change reactions and
is conducive to a sporty driving style. The sound generated by the double-clutch func-
tion depends on the drive program selected.
Kickdown
Use kickdown for maximum acceleration.
X
Depress the accelerator pedal beyond the
pressure point.
The transmission shifts to a lower gear
depending on the engine speed.
X Ease off the accelerator pedal once the
desired speed is reached.
The automatic transmission shifts back up.
Trailer towing
X When driving up gradients, keep to the mid-
dle of the engine speed range.
X Shift down to shift range 3or
2 (Y page 113) depending on the incline of
the uphill or downhill gradient, even if
cruise control is activated. Steering wheel gearshift paddles*
and manual drive program*
G
Risk of accident
Do not shift down to brake on a slippery road
surface. This could cause the drive wheels to
lose their grip, and the vehicle could skid.
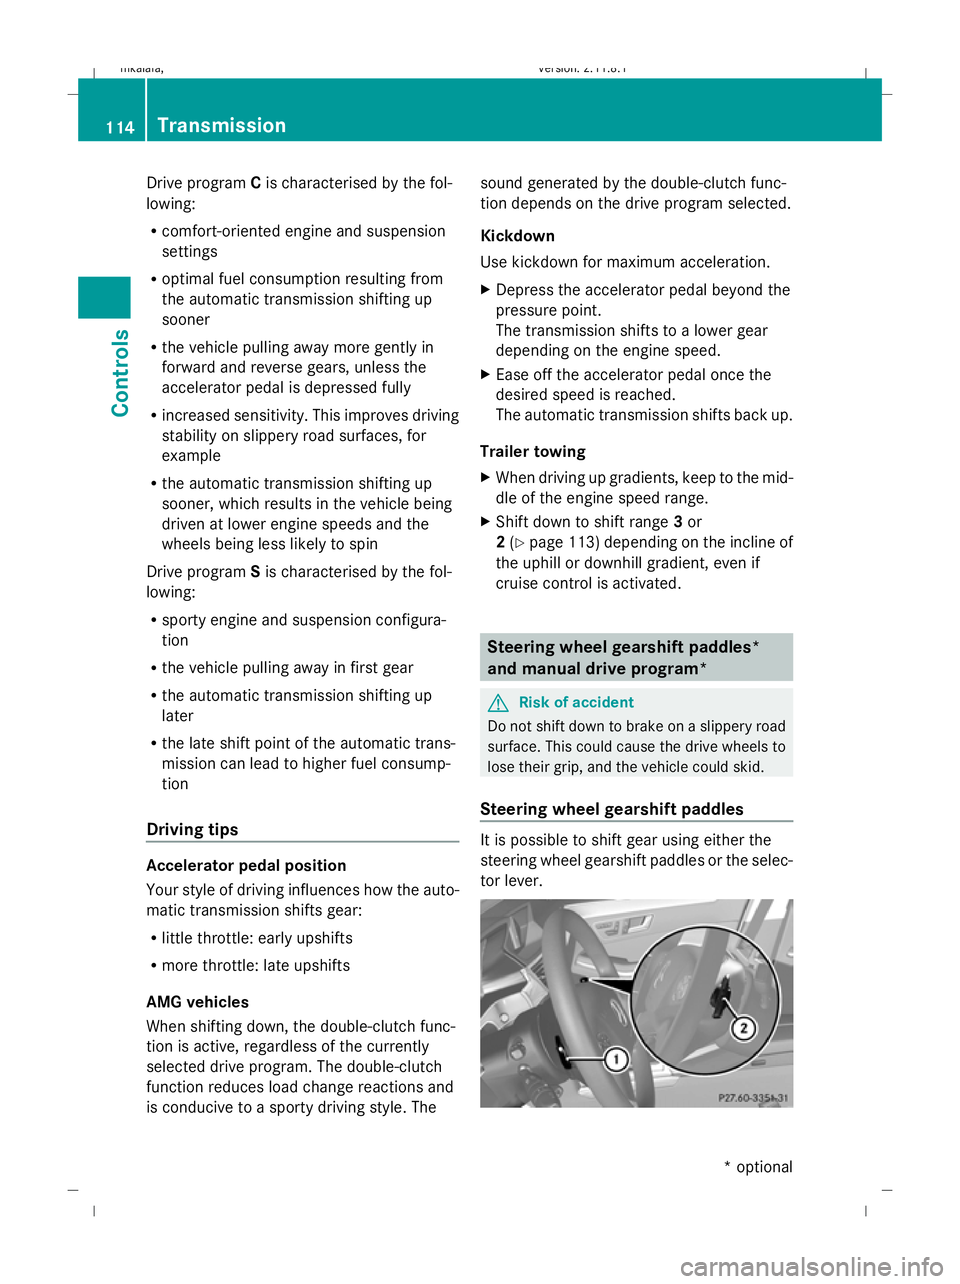
Steering wheel gearshift paddles It is possible to shift gear using either the
steering wheel gearshift paddles or the selec-
tor lever.114
TransmissionControls
* optional
212_AKB; 2; 4, en-GB
mkalafa
,V ersion: 2.11.8.1
2009-05-05T14:17:16+02:00 - Seite 114
Dateiname: 6515346702_buchblock.pdf; erzeugt am 07. May 2009 14:16:08; WK
Page 118 of 373
i
When the transmission is in position P,
N or R, you cannot change gear using the
steering wheel gearshift paddles.
Upshifting
X Pull right-hand paddle ;.
The automatic transmission shifts up to the
next gear.
If you are not driving in manual drive pro-
gram M, then the shift range will be deres-
tricted.
Downshifting
X Pull left-hand paddle :.
The automatic transmission shifts down to
the next gear.
If you are not driving in manual drive pro-
gram M, then the shift range will be restric-
ted.
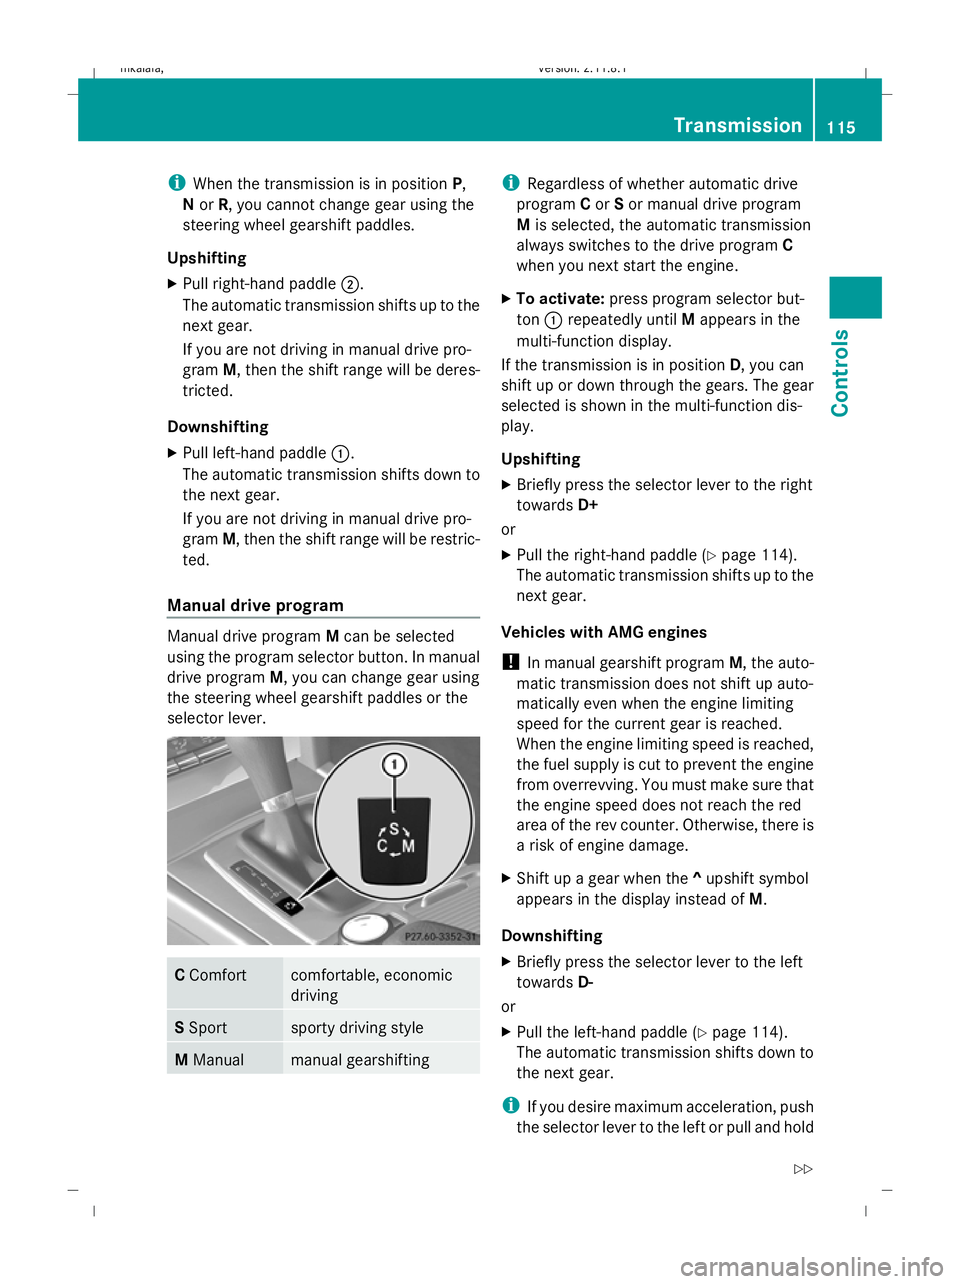
Manual drive program Manual drive program
Mcan be selected
using the program selector button. In manual
drive program M, you can change gear using
the steering wheel gearshift paddles or the
selector lever. C
Comfort comfortable, economic
driving
S
Sport sporty driving style
M
Manual manual gearshifting i
Regardless of whether automatic drive
program Cor Sor manual drive program
M is selected, the automatic transmission
always switches to the drive program C
when you next start the engine.
X To activate: press program selector but-
ton :repeatedly until Mappears in the
multi-function display.
If the transmission is in position D, you can
shift up or down through the gears. The gear
selected is shown in the multi-function dis-
play.
Upshifting
X Briefly press the selector lever to the right
towards D+
or
X Pull the right-hand paddle ( Ypage 114).
The automatic transmission shifts up to the
next gear.
Vehicles with AMG engines
! In manual gearshift program M, the auto-
matic transmission does not shift up auto-
matically even when the engine limiting
speed for the current gear is reached.
When the engine limiting speed is reached,
the fuel supply is cut to prevent the engine
from overrevving. You must make sure that
the engine speed does not reach the red
area of the rev counter. Otherwise, there is
a risk of engine damage.
X Shift up a gear when the ^upshift symbol
appears in the display instead of M.
Downshifting
X Briefly press the selector lever to the left
towards D-
or
X Pull the left-hand paddle ( Ypage 114).
The automatic transmission shifts down to
the next gear.
i If you desire maximum acceleration, push
the selector lever to the left or pull and hold Transmission
115Controls
212_AKB; 2; 4, en-GB
mkalafa, Version: 2.11.8.1 2009-05-05T14:17:16+02:00 - Seite 115 Z
Dateiname: 6515346702_buchblock.pdf; erzeugt am 07. May 2009 14:16:08; WK