2009 LINCOLN TOWN CAR ECU
[x] Cancel search: ECUPage 136 of 280
4. Insert the belt tongue into the proper buckle for the center seating
position until you hear a snap and feel it latch. Make sure the tongue is
securely fastened to the buckle by pulling on the tongue.
5. Push down on the child seat while pulling on the loose end of the lap
belt webbing to tighten the belt.
6. Before placing the child into the child seat, forcibly tilt the child seat
from side to side and in forward direction to make sure that the seat is
securely held in place. To check this, grab the seat at the belt path and
attempt to move it side to side and forward and back. There should be
no more than one inch (2.5 cm) of movement for proper installation.
7. Ford recommends checking with a NHTSA Certified Child Passenger
Safety Technician (CPST) to make certain the child restraint is properly
installed.
Note:There is no top tether anchor for the front center seating position.
SeeAttaching child safety seats with tether strapslater in this chapter.
Attaching child safety seats with LATCH
(Lower Anchors and Tethers for CHildren) attachments
The LATCH system is composed of three vehicle anchor points: two (2)
lower anchors located where the vehicle seat back and seat cushion meet
(called the “seat bight”) and one (1) top tether anchor located behind
that seating position.
LATCH compatible child safety seats have two rigid or webbing mounted
attachments that connect to the two lower anchors at the LATCH
equipped seating positions in your vehicle. This type of attachment
method eliminates the need to use safety belts to attach the child seat,
however the safety belt can still be used to attach the child seat. For
forward-facing child seats, the top tether strap must also be attached to
the proper top tether anchor, if a top tether strap has been provided
with your child seat. Ford Motor Company recommends the use of a
child safety seat having a top tether strap. SeeAttaching child safety
seats with tether strapsandRecommendations for attaching safety
restraints for childrenin this chapter for more information.
2009 Town Car(tow)
Owners Guide, 1st Printing
USA(fus)
Seating and Safety Restraints
136
Page 138 of 280
Use of inboard lower anchors from the outboard seating positions
(center seating use)
The lower anchors at the center of the second row rear seat are spaced
570 mm (22.4 inches) apart. The standardized spacing for LATCH lower
anchors is 280 mm (11 inches) center to center. A child seat with rigid
LATCH attachments cannot be installed at the center seating position.
LATCH compatible child seats (with attachments on belt webbing) can
only be used at this seating position provided that the child seat
manufacturer’s instructions permit use with the anchor spacing stated.
Do not attach a child seat to any lower anchor if an adjacent child seat is
attached to that anchor.
WARNING:The standardized spacing for LATCH lower anchors
is 280 mm (11 inches) center to center. Do not use LATCH
lower anchors for the center seating position unless the child seat
manufacturer’s instructions permit and specify using anchors spaced at
least as far apart as those in this vehicle.
If you install a child seat with rigid LATCH attachments, and have
attached the top tether strap to the proper top tether anchor, do not
tighten the tether strap enough to lift the child seat off the vehicle seat
cushion when the child is seated in it. Keep the tether strap just snug
without lifting the front of the child seat. Keeping the child seat just
touching the vehicle seat gives the best protection in a severe crash.
Each time you use the safety seat, check that the seat is properly
attached to the lower anchors and tether anchor, if applicable. Tug the
child seat from side to side and forward and back where it is secured to
the vehicle. The seat should move less than one inch when you do this
for a proper installation.
If the safety seat is not anchored properly, the risk of a child being
injured in a crash greatly increases.
Combining safety belt and LATCH lower anchors for attaching
child safety seats
When used in combination, either the safety belt or the LATCH lower
anchors may be attached first, provided a proper installation is achieved.
Attach the tether strap afterward, if included with the child seat. Refer
toRecommendations for attaching safety restraints for childrenin
this chapter.
2009 Town Car(tow)
Owners Guide, 1st Printing
USA(fus)
Seating and Safety Restraints
138
Page 140 of 280
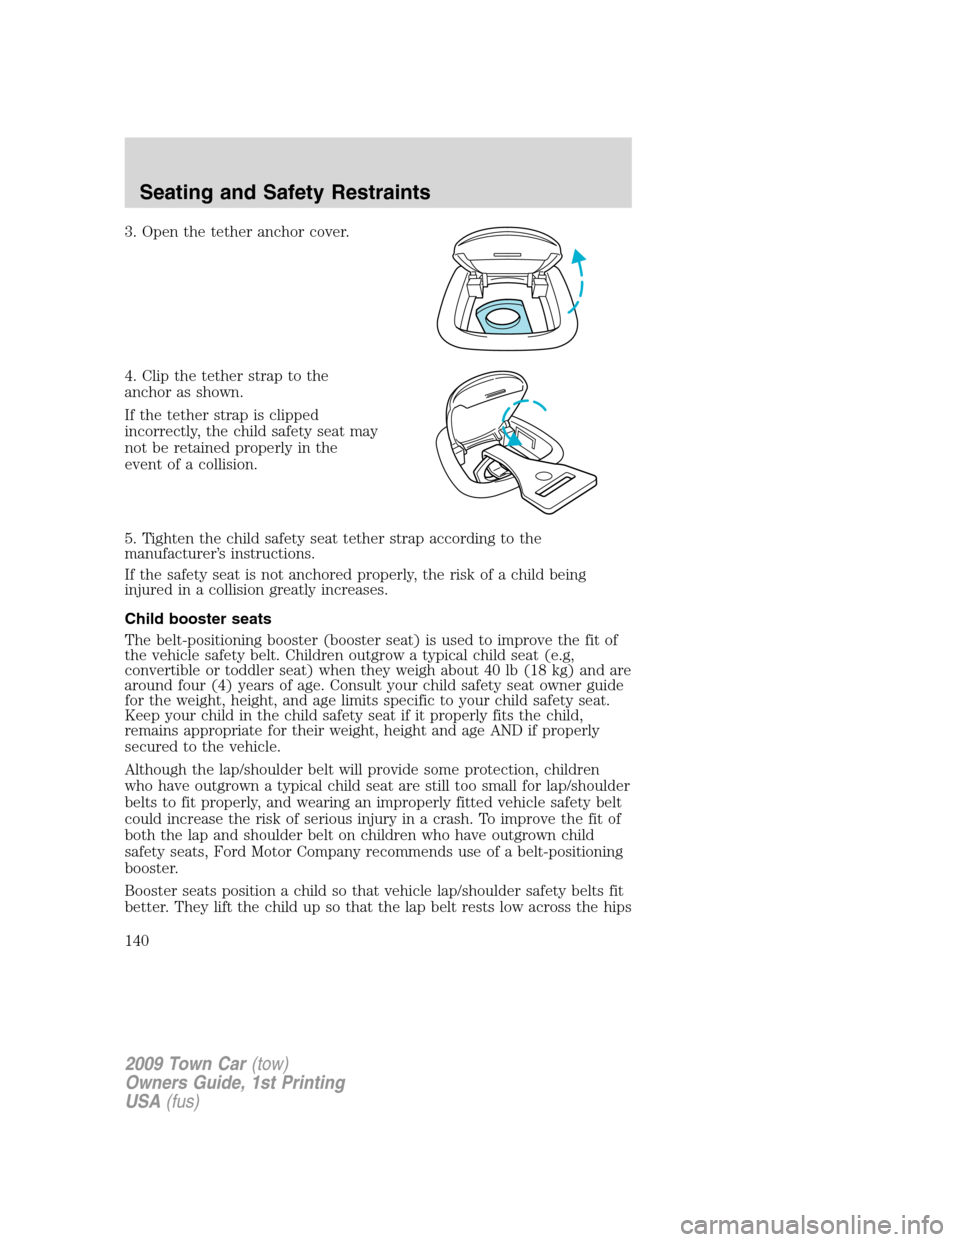
3. Open the tether anchor cover.
4. Clip the tether strap to the
anchor as shown.
If the tether strap is clipped
incorrectly, the child safety seat may
not be retained properly in the
event of a collision.
5. Tighten the child safety seat tether strap according to the
manufacturer’s instructions.
If the safety seat is not anchored properly, the risk of a child being
injured in a collision greatly increases.
Child booster seats
The belt-positioning booster (booster seat) is used to improve the fit of
the vehicle safety belt. Children outgrow a typical child seat (e.g,
convertible or toddler seat) when they weigh about 40 lb (18 kg) and are
around four (4) years of age. Consult your child safety seat owner guide
for the weight, height, and age limits specific to your child safety seat.
Keep your child in the child safety seat if it properly fits the child,
remains appropriate for their weight, height and age AND if properly
secured to the vehicle.
Although the lap/shoulder belt will provide some protection, children
who have outgrown a typical child seat are still too small for lap/shoulder
belts to fit properly, and wearing an improperly fitted vehicle safety belt
could increase the risk of serious injury in a crash. To improve the fit of
both the lap and shoulder belt on children who have outgrown child
safety seats, Ford Motor Company recommends use of a belt-positioning
booster.
Booster seats position a child so that vehicle lap/shoulder safety belts fit
better. They lift the child up so that the lap belt rests low across the hips
2009 Town Car(tow)
Owners Guide, 1st Printing
USA(fus)
Seating and Safety Restraints
140
Page 165 of 280
ON, visually check each tire to verify that no tire is flat. (If one or more
tires are flat, repair as necessary.) Check air pressure in the road tires. If
any tire is under-inflated, carefully drive the vehicle to the nearest
location where air can be added to the tires. Inflate all the tires to the
recommended inflation pressure.
SNOW TIRES AND CHAINS
WARNING:Snow tires must be the same size, load index, speed
rating as those originally provided by Ford. Use of any tire or
wheel not recommended by Ford can affect the safety and
performance of your vehicle, which could result in an increased risk of
loss of vehicle control, vehicle rollover, personal injury and death.
Additionally, the use of non-recommended tires and wheels could
cause steering, suspension, axle or transfer case/power transfer unit
failure.
The tires on your vehicle have all weather treads to provide traction in
rain and snow. However, in some climates, you may need to use snow
tires and chains. If you need to use chains, it is recommended that steel
wheels (of the same size and specifications) be used, as chains may chip
aluminum wheels.
Follow these guidelines when using snow tires and chains:
•Use only cable type chains offered by Ford Motor Company as an
accessory or equivalent. Using SAE class S or other conventional link
type chains may cause damage to the vehicle’s wheel house and/or
body.
•Install chains securely, verifying that the chains do not touch any
wiring, brake lines or fuel lines.
•Drive cautiously. If you hear the chains rub or bang against your
vehicle, stop and re-tighten the chains. If this does not work, remove
the chains to prevent damage to your vehicle.
•If possible, avoid fully loading your vehicle.
•Remove the tire chains when they are no longer needed. Do not use
tire chains on dry roads.
•The suspension insulation and bumpers will help prevent vehicle
damage. Do not remove these components from your vehicle when
using snow tires and chains.
•Do not exceed 30 mph (48 km/h) with tire cables on our vehicle.
VEHICLE LOADING – WITH AND WITHOUT A TRAILER
This section will guide you in the proper loading of your vehicle and/or
trailer, to keep your loaded vehicle weight within its design rating
2009 Town Car(tow)
Owners Guide, 1st Printing
USA(fus)
Tires, Wheels and Loading
165
Page 175 of 280
STARTING
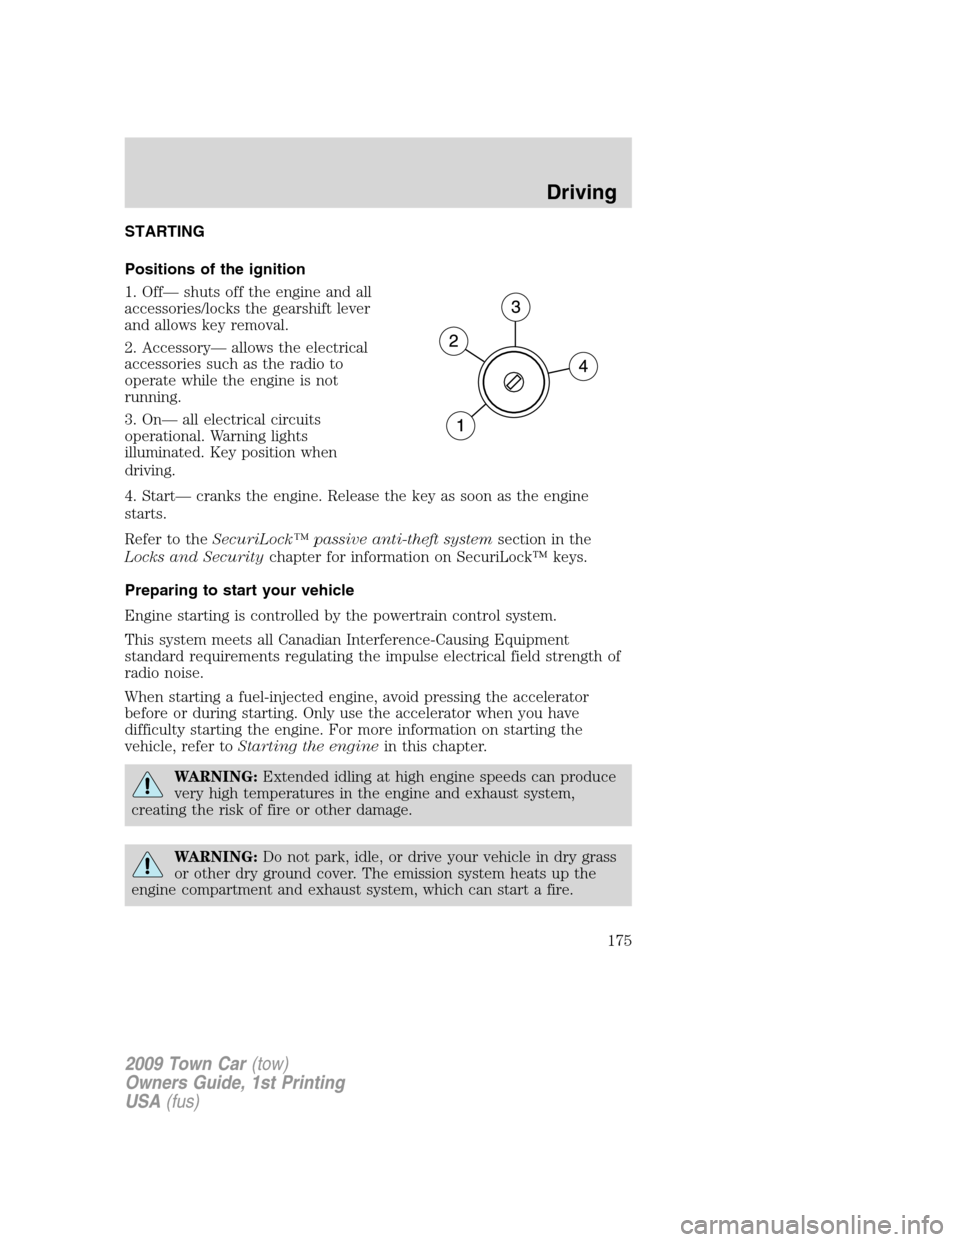
Positions of the ignition
1. Off— shuts off the engine and all
accessories/locks the gearshift lever
and allows key removal.
2. Accessory— allows the electrical
accessories such as the radio to
operate while the engine is not
running.
3. On— all electrical circuits
operational. Warning lights
illuminated. Key position when
driving.
4. Start— cranks the engine. Release the key as soon as the engine
starts.
Refer to theSecuriLock™ passive anti-theft systemsection in the
Locks and Securitychapter for information on SecuriLock™ keys.
Preparing to start your vehicle
Engine starting is controlled by the powertrain control system.
This system meets all Canadian Interference-Causing Equipment
standard requirements regulating the impulse electrical field strength of
radio noise.
When starting a fuel-injected engine, avoid pressing the accelerator
before or during starting. Only use the accelerator when you have
difficulty starting the engine. For more information on starting the
vehicle, refer toStarting the enginein this chapter.
WARNING:Extended idling at high engine speeds can produce
very high temperatures in the engine and exhaust system,
creating the risk of fire or other damage.
WARNING:Do not park, idle, or drive your vehicle in dry grass
or other dry ground cover. The emission system heats up the
engine compartment and exhaust system, which can start a fire.
2009 Town Car(tow)
Owners Guide, 1st Printing
USA(fus)
Driving
175
Page 187 of 280
Driving with a 4–speed automatic transmission
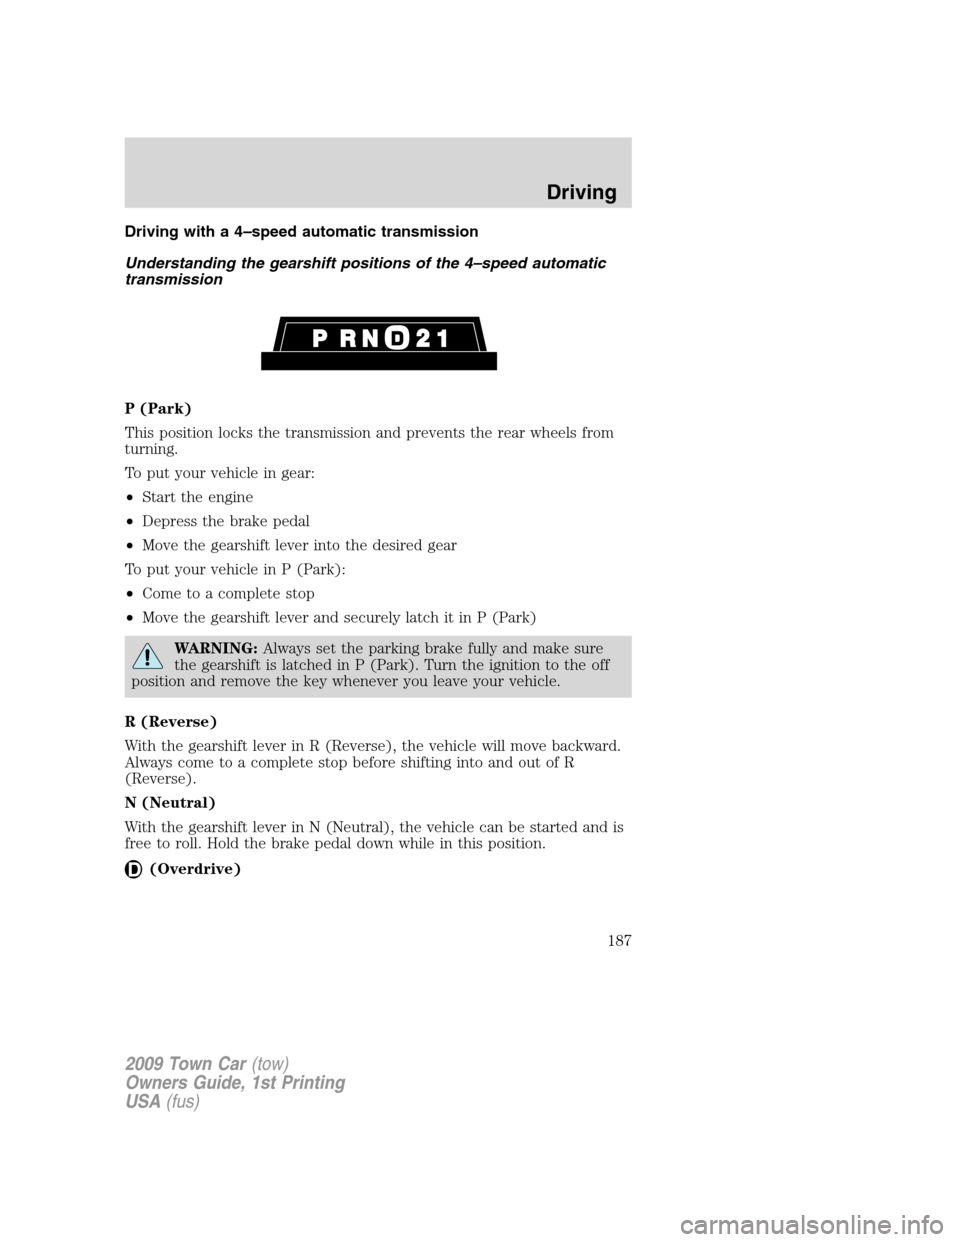
Understanding the gearshift positions of the 4–speed automatic
transmission
P (Park)
This position locks the transmission and prevents the rear wheels from
turning.
To put your vehicle in gear:
•Start the engine
•Depress the brake pedal
•Move the gearshift lever into the desired gear
To put your vehicle in P (Park):
•Come to a complete stop
•Move the gearshift lever and securely latch it in P (Park)
WARNING:Always set the parking brake fully and make sure
the gearshift is latched in P (Park). Turn the ignition to the off
position and remove the key whenever you leave your vehicle.
R (Reverse)
With the gearshift lever in R (Reverse), the vehicle will move backward.
Always come to a complete stop before shifting into and out of R
(Reverse).
N (Neutral)
With the gearshift lever in N (Neutral), the vehicle can be started and is
free to roll. Hold the brake pedal down while in this position.
(Overdrive)
2009 Town Car(tow)
Owners Guide, 1st Printing
USA(fus)
Driving
187
Page 194 of 280
•towing of your disabled vehicle
•emergency travel expense reimbursement
•travel planning benefits
In Canada, for uninterrupted Roadside Assistance coverage, you may
purchase extended coverage prior to your Basic Warranty’s Roadside
Assistance expiring. For more information and enrollment, contact
1–877–294–2582 or visit our website at www.ford.ca.
Using roadside assistance
Complete the roadside assistance identification card and place it in your
wallet for quick reference. In the United States, this card is found in the
Owner Guide portfolio in the glove compartment. In Canada, the card is
found in theCustomer Information Guidein the glove compartment.
U.S. Ford, Mercury and Lincoln vehicle customers who require Roadside
Assistance, call 1-800-241-3673.
Canadian customers who require roadside assistance, call
1-800-665-2006.
If you need to arrange roadside assistance for yourself, Ford Motor
Company will reimburse a reasonable amount for towing to the nearest
dealership within 35 miles. To obtain reimbursement information, U.S.
Ford, Mercury and Lincoln vehicle customers call 1-800-241-3673.
Customers will be asked to submit their original receipts.
Canadian customers who need to obtain reimbursement information, call
1–800–665–2006.
HAZARD FLASHER CONTROL
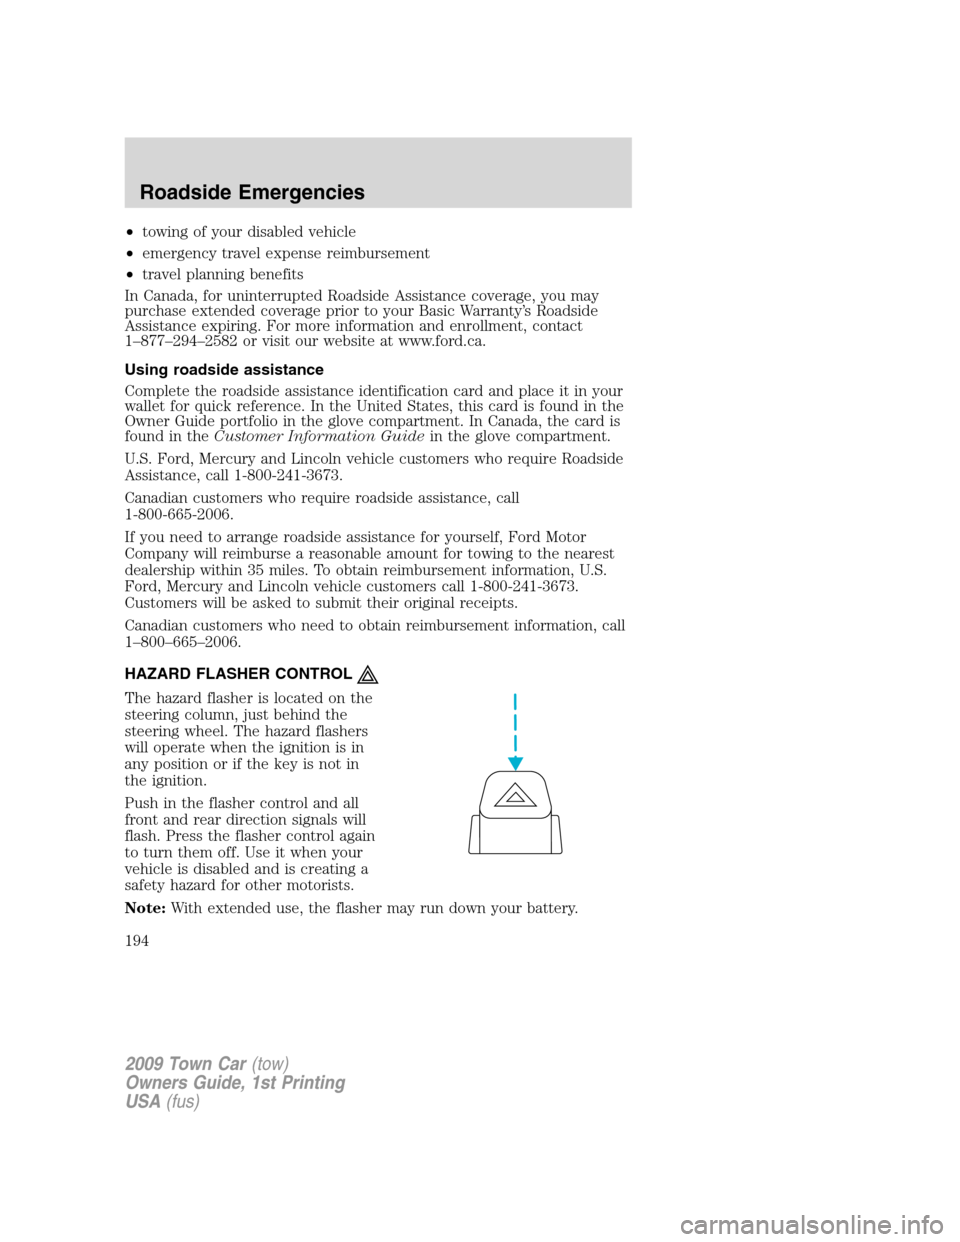
The hazard flasher is located on the
steering column, just behind the
steering wheel. The hazard flashers
will operate when the ignition is in
any position or if the key is not in
the ignition.
Push in the flasher control and all
front and rear direction signals will
flash. Press the flasher control again
to turn them off. Use it when your
vehicle is disabled and is creating a
safety hazard for other motorists.
Note:With extended use, the flasher may run down your battery.
2009 Town Car(tow)
Owners Guide, 1st Printing
USA(fus)
Roadside Emergencies
194
Page 210 of 280
WHEEL LUG NUT TORQUE SPECIFICATIONS
Retighten the lug nuts to the specified torque within 100 miles (160 km)
after any wheel disturbance (tire rotation, changing a flat tire, wheel
removal, etc.).
Bolt size Wheel lug nut torque*
lb.ft. N•m
1�2x 20 100 135
* Torque specifications are for nut and bolt threads free of dirt and
rust. Use only Ford recommended replacement fasteners.
WARNING:When a wheel is installed, always remove any
corrosion, dirt or foreign materials present on the mounting
surfaces of the wheel or the surface of the wheel hub, brake drum or
brake disc that contacts the wheel. Ensure that any fasteners that
attach the rotor to the hub are secured so they do not interfere with
the mounting surfaces of the wheel. Installing wheels without correct
metal-to-metal contact at the wheel mounting surfaces can cause the
wheel nuts to loosen and the wheel to come off while the vehicle is in
motion, resulting in loss of control.
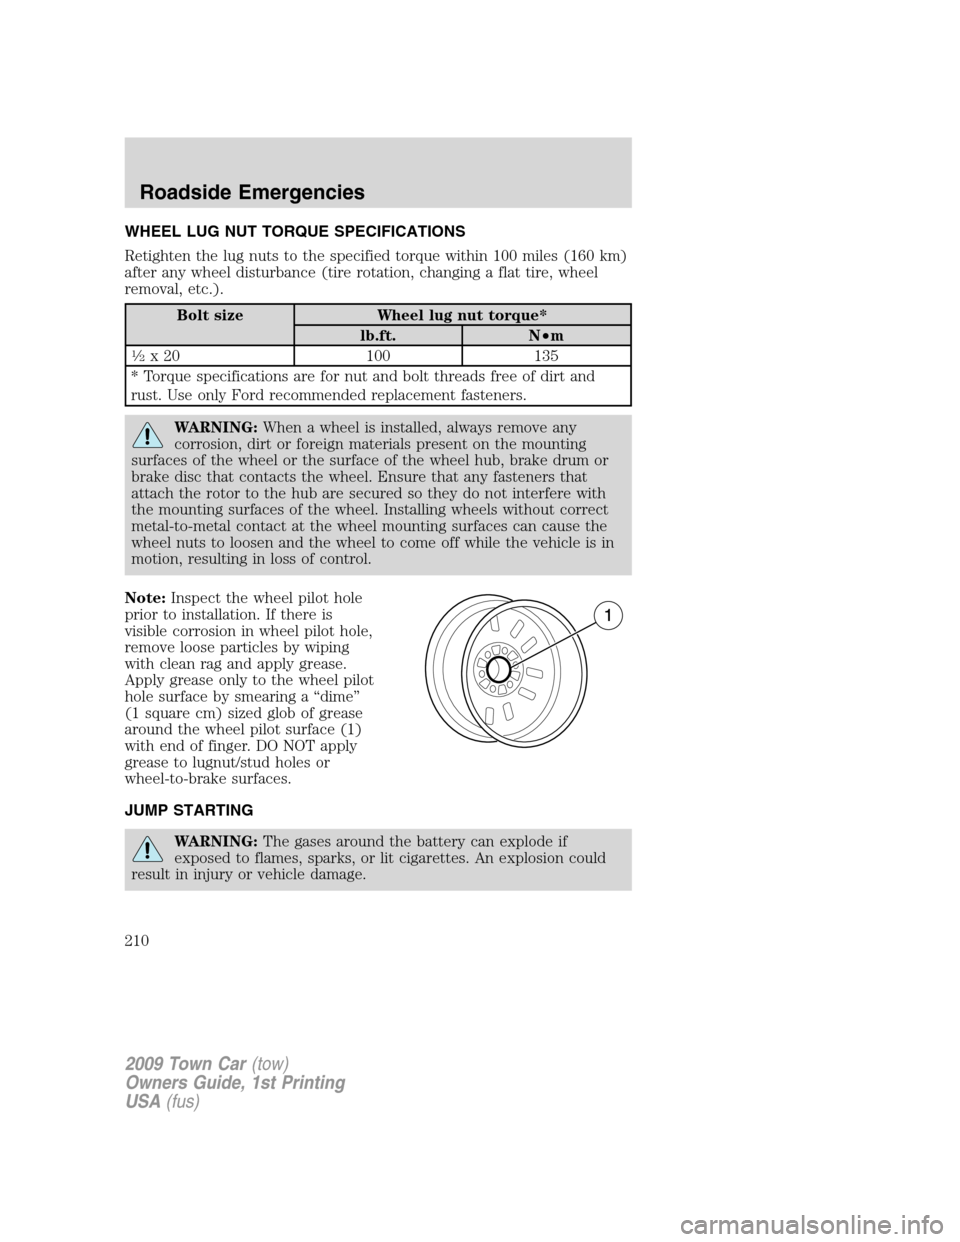
Note:Inspect the wheel pilot hole
prior to installation. If there is
visible corrosion in wheel pilot hole,
remove loose particles by wiping
with clean rag and apply grease.
Apply grease only to the wheel pilot
hole surface by smearing a “dime”
(1 square cm) sized glob of grease
around the wheel pilot surface (1)
with end of finger. DO NOT apply
grease to lugnut/stud holes or
wheel-to-brake surfaces.
JUMP STARTING
WARNING:The gases around the battery can explode if
exposed to flames, sparks, or lit cigarettes. An explosion could
result in injury or vehicle damage.
2009 Town Car(tow)
Owners Guide, 1st Printing
USA(fus)
Roadside Emergencies
210