2009 LINCOLN TOWN CAR service
[x] Cancel search: servicePage 158 of 280
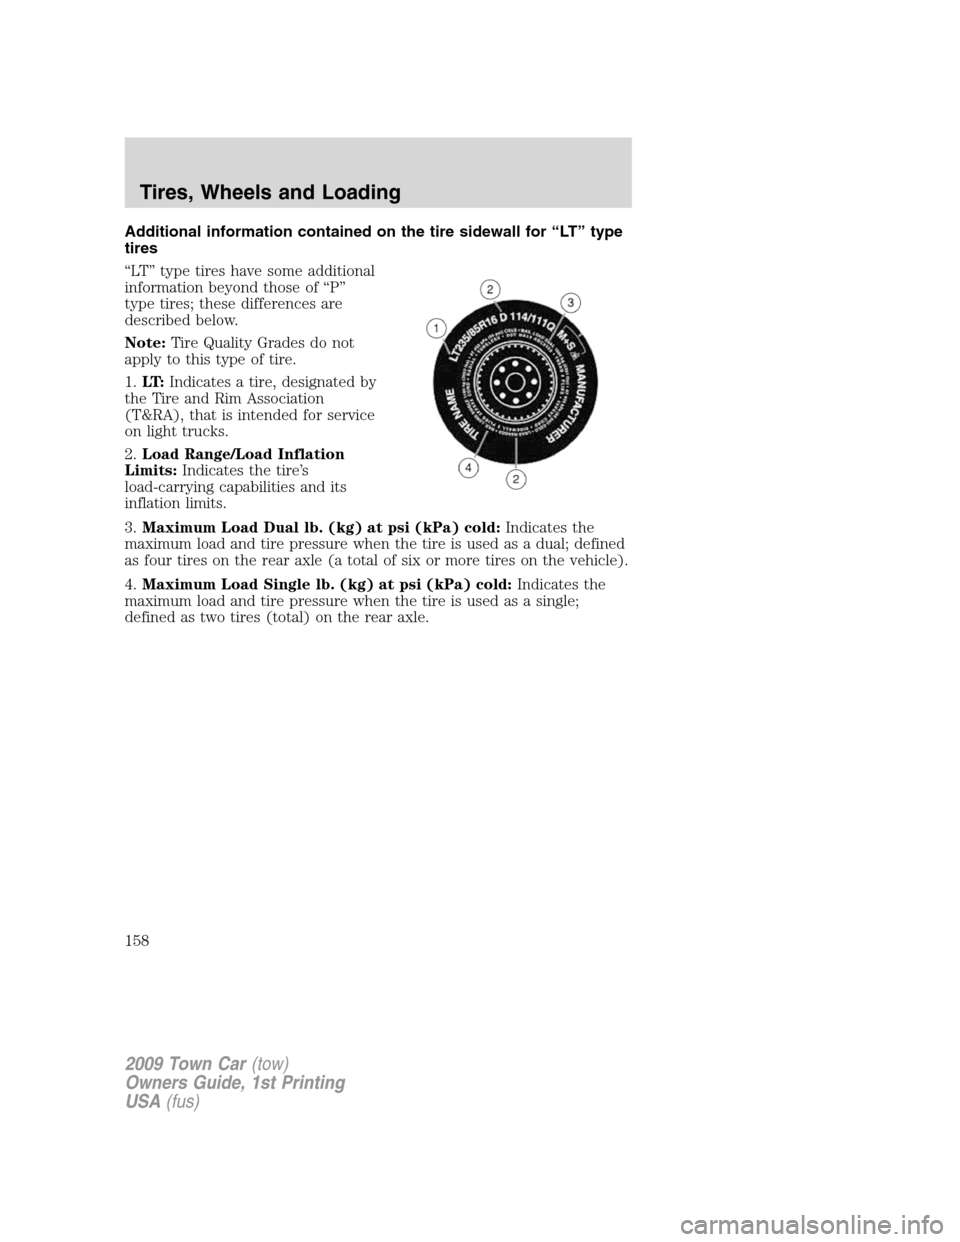
Additional information contained on the tire sidewall for “LT” type
tires
“LT” type tires have some additional
information beyond those of “P”
type tires; these differences are
described below.
Note:Tire Quality Grades do not
apply to this type of tire.
1.LT:Indicates a tire, designated by
the Tire and Rim Association
(T&RA), that is intended for service
on light trucks.
2.Load Range/Load Inflation
Limits:Indicates the tire’s
load-carrying capabilities and its
inflation limits.
3.Maximum Load Dual lb. (kg) at psi (kPa) cold:Indicates the
maximum load and tire pressure when the tire is used as a dual; defined
as four tires on the rear axle (a total of six or more tires on the vehicle).
4.Maximum Load Single lb. (kg) at psi (kPa) cold:Indicates the
maximum load and tire pressure when the tire is used as a single;
defined as two tires (total) on the rear axle.
2009 Town Car(tow)
Owners Guide, 1st Printing
USA(fus)
Tires, Wheels and Loading
158
Page 159 of 280
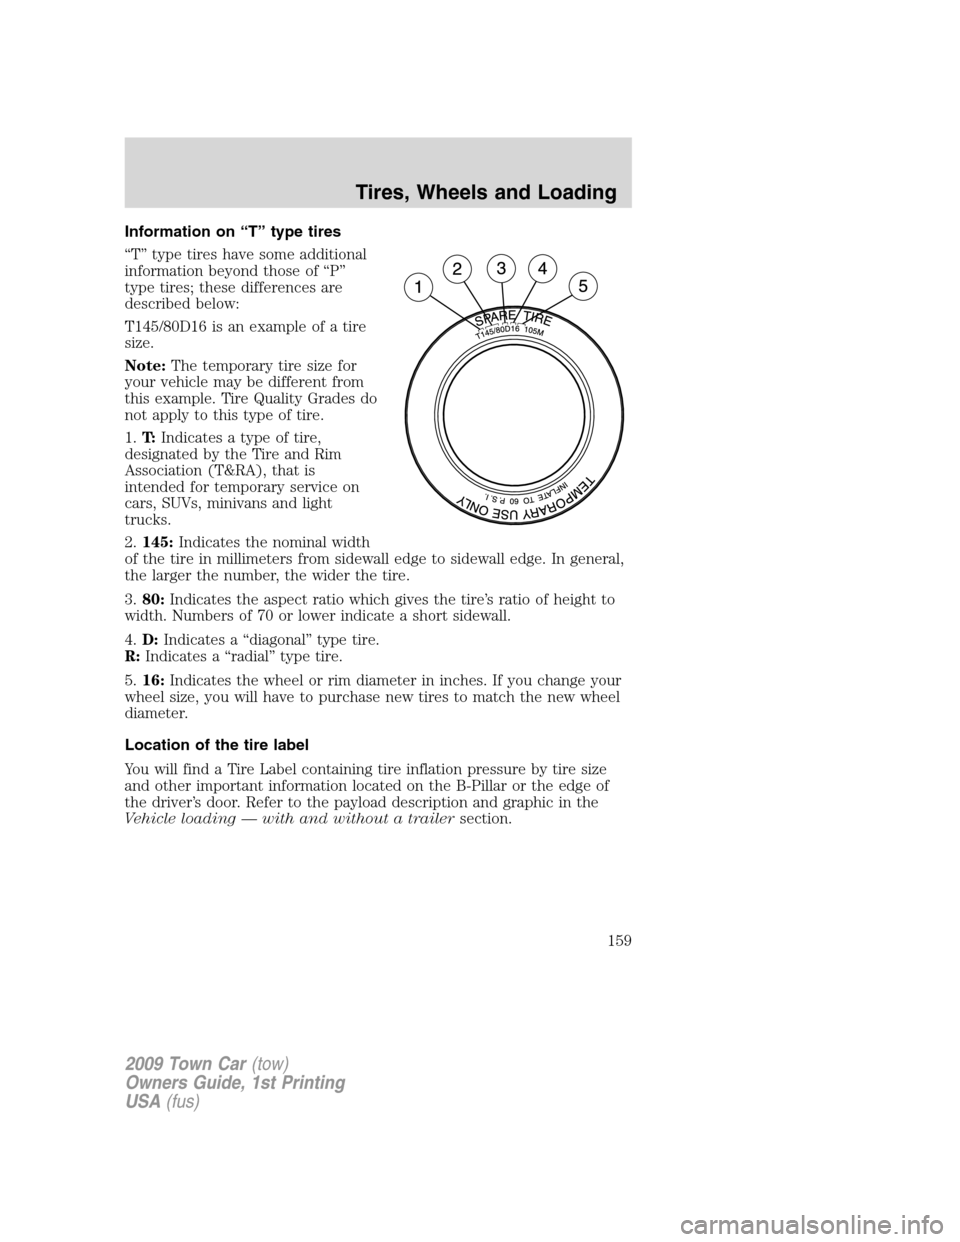
Information on “T” type tires
“T” type tires have some additional
information beyond those of “P”
type tires; these differences are
described below:
T145/80D16 is an example of a tire
size.
Note:The temporary tire size for
your vehicle may be different from
this example. Tire Quality Grades do
not apply to this type of tire.
1.T:Indicates a type of tire,
designated by the Tire and Rim
Association (T&RA), that is
intended for temporary service on
cars, SUVs, minivans and light
trucks.
2.145:Indicates the nominal width
of the tire in millimeters from sidewall edge to sidewall edge. In general,
the larger the number, the wider the tire.
3.80:Indicates the aspect ratio which gives the tire’s ratio of height to
width. Numbers of 70 or lower indicate a short sidewall.
4.D:Indicates a “diagonal” type tire.
R:Indicates a “radial” type tire.
5.16:Indicates the wheel or rim diameter in inches. If you change your
wheel size, you will have to purchase new tires to match the new wheel
diameter.
Location of the tire label
You will find a Tire Label containing tire inflation pressure by tire size
and other important information located on the B-Pillar or the edge of
the driver’s door. Refer to the payload description and graphic in the
Vehicle loading — with and without a trailersection.
2009 Town Car(tow)
Owners Guide, 1st Printing
USA(fus)
Tires, Wheels and Loading
159
Page 161 of 280
following two conditions: (1) This device may not cause harmful
interference, and (2) This device must accept any interference received,
including interference that may cause undesired operation.
WARNING:The Tire Pressure Monitoring System is NOT a
substitute for manually checking tire pressure. The tire pressure
should be checked periodically (at least monthly) using a tire gauge,
seeInflating your tiresin this chapter. Failure to properly maintain
your tire pressure could increase the risk of tire failure, loss of control,
vehicle rollover and personal injury.
Changing tires with TPMS
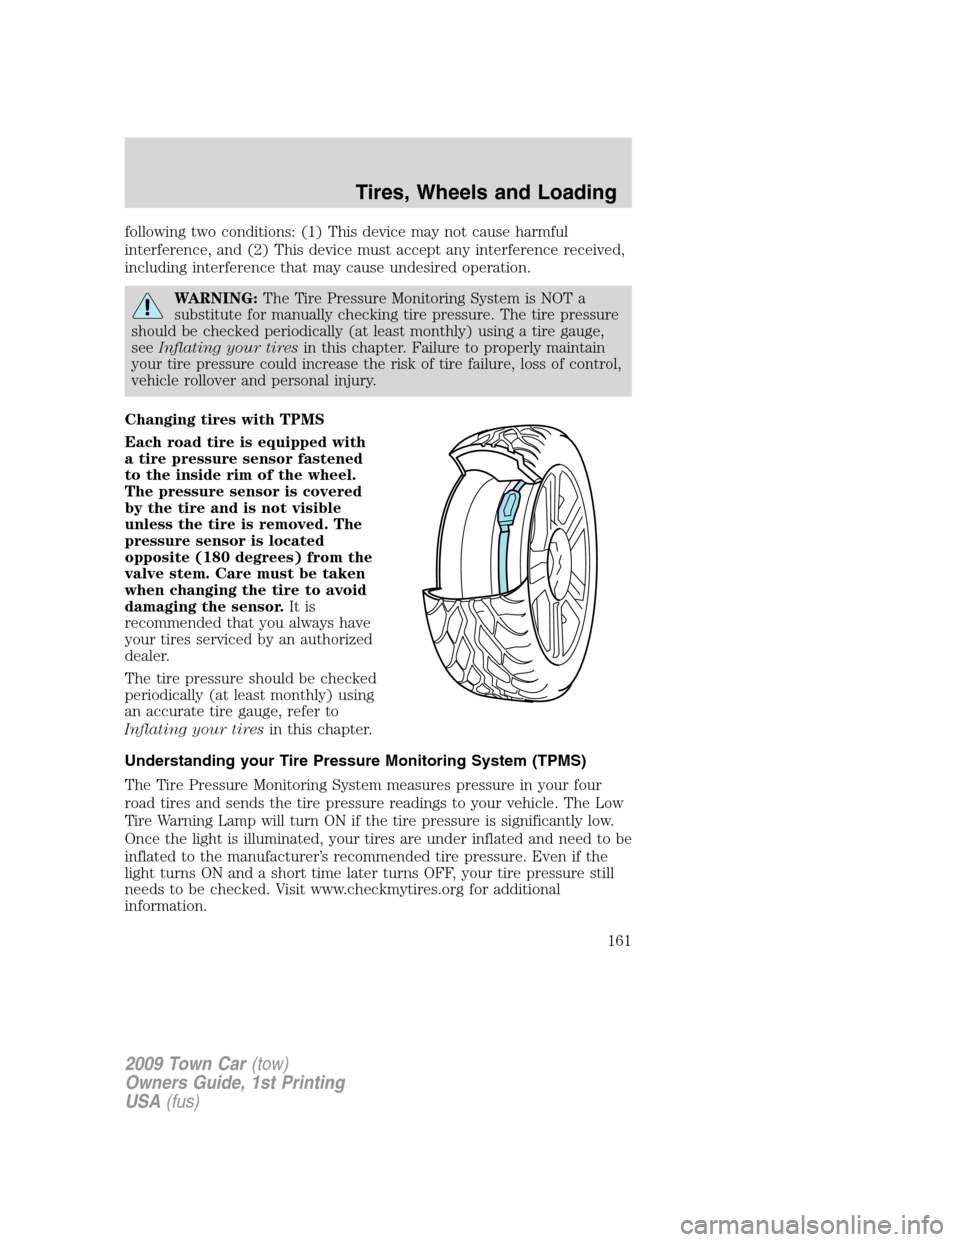
Each road tire is equipped with
a tire pressure sensor fastened
to the inside rim of the wheel.
The pressure sensor is covered
by the tire and is not visible
unless the tire is removed. The
pressure sensor is located
opposite (180 degrees) from the
valve stem. Care must be taken
when changing the tire to avoid
damaging the sensor.It is
recommended that you always have
your tires serviced by an authorized
dealer.
The tire pressure should be checked
periodically (at least monthly) using
an accurate tire gauge, refer to
Inflating your tiresin this chapter.
Understanding your Tire Pressure Monitoring System (TPMS)
The Tire Pressure Monitoring System measures pressure in your four
road tires and sends the tire pressure readings to your vehicle. The Low
Tire Warning Lamp will turn ON if the tire pressure is significantly low.
Once the light is illuminated, your tires are under inflated and need to be
inflated to the manufacturer’s recommended tire pressure. Even if the
light turns ON and a short time later turns OFF, your tire pressure still
needs to be checked. Visit www.checkmytires.org for additional
information.
2009 Town Car(tow)
Owners Guide, 1st Printing
USA(fus)
Tires, Wheels and Loading
161
Page 173 of 280
•Turn off the speed control. The speed control may shut off
automatically when you are towing on long, steep grades.
•Consult your local motor vehicle speed regulations for towing a trailer.
•To eliminate excessive shifting, use a lower gear. This will also assist
in transmission cooling. For additional information, refer toAutomatic
transmission operationin theDrivingchapter.
•Anticipate stops and brake gradually.
•Do not exceed the GCWR rating or transmission damage may occur.
Servicing after towing
If you tow a trailer for long distances, your vehicle will require more
frequent service intervals. Refer to yourscheduled maintenance
informationfor more information.
Trailer towing tips
•Practice turning, stopping and backing up before starting on a trip to
get the feel of the vehicle trailer combination. When turning, make
wider turns so the trailer wheels will clear curbs and other obstacles.
•Allow more distance for stopping with a trailer attached.
•If you are driving down a long or steep hill, shift to a lower gear. Do
not apply the brakes continuously, as they may overheat and become
less effective.
•The trailer tongue weight should be 10–15% of the loaded trailer
weight.
•If you will be towing a trailer frequently in hot weather, hilly
conditions, at GCWR, or any combination of these factors, consider
refilling your rear axle with synthetic gear lube if not already so
equipped. Refer to theMaintenance and Specificationschapter for
the lubricant specification. Remember that regardless of the rear axle
lube used, do not tow a trailer for the first 1,000 miles (1,600 km) of a
new vehicle, and that the first 500 miles (800 km) of towing be done
at no faster than 70 mph (113 km/h) with no full throttle starts.
•After you have traveled 50 miles (80 km), thoroughly check your
hitch, electrical connections and trailer wheel lug nuts.
•To aid in engine/transmission cooling and A/C efficiency during hot
weather while stopped in traffic, place the gearshift lever in P (Park).
•Vehicles with trailers should not be parked on a grade. If you must
park on a grade, place wheel chocks under the trailer’s wheels.
2009 Town Car(tow)
Owners Guide, 1st Printing
USA(fus)
Tires, Wheels and Loading
173
Page 181 of 280
Using ABS
When hard braking is required, apply continuous force on the brake
pedal; do not pump the brake pedal since this will reduce the
effectiveness of the ABS and will increase your vehicle’s stopping
distance. The ABS will be activated immediately, allowing you to retain
steering control during hard braking and on slippery surfaces. However,
the ABS does not decrease stopping distance.
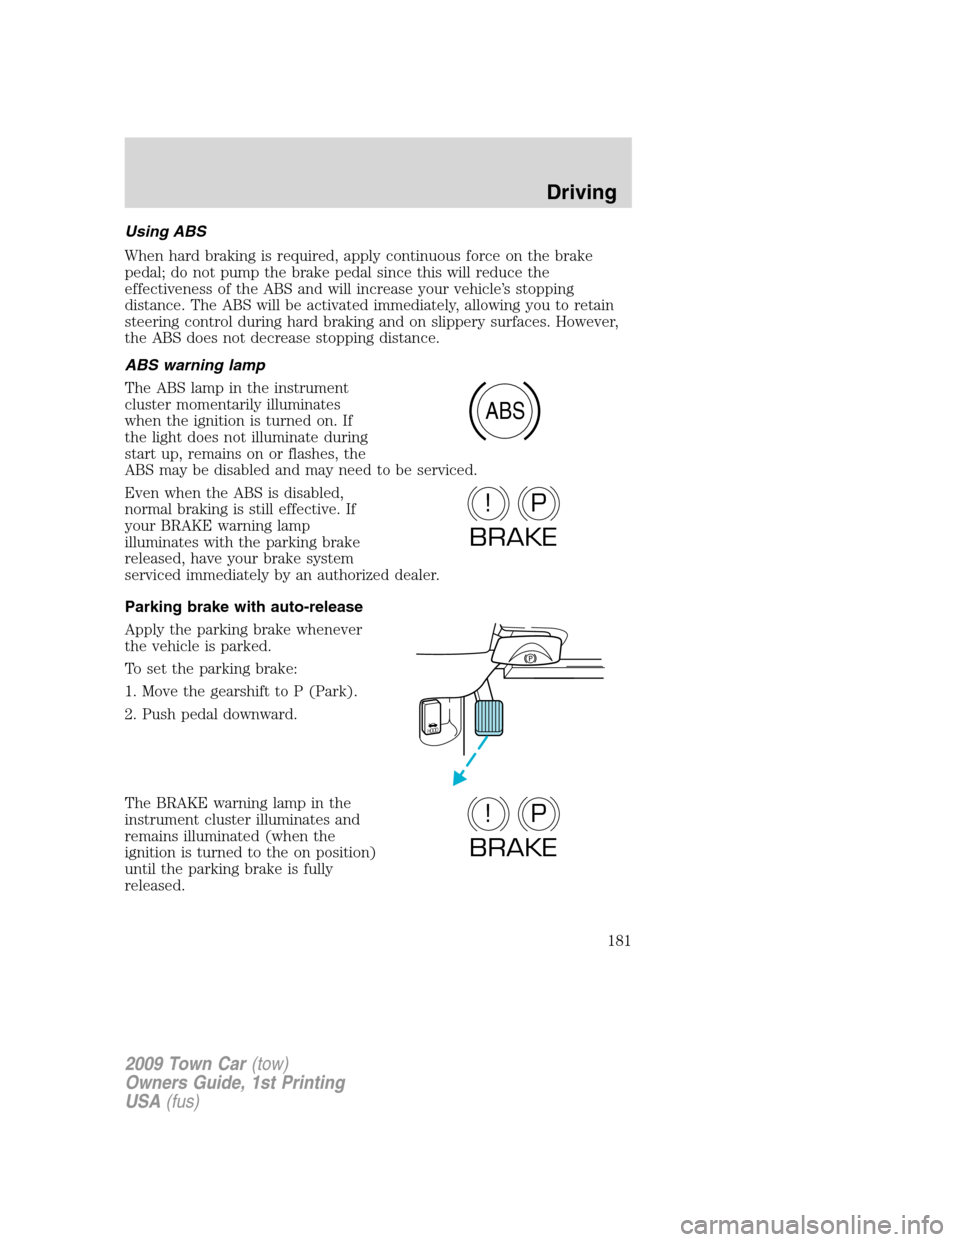
ABS warning lamp
The ABS lamp in the instrument
cluster momentarily illuminates
when the ignition is turned on. If
the light does not illuminate during
start up, remains on or flashes, the
ABS may be disabled and may need to be serviced.
Even when the ABS is disabled,
normal braking is still effective. If
your BRAKE warning lamp
illuminates with the parking brake
released, have your brake system
serviced immediately by an authorized dealer.
Parking brake with auto-release
Apply the parking brake whenever
the vehicle is parked.
To set the parking brake:
1. Move the gearshift to P (Park).
2. Push pedal downward.
The BRAKE warning lamp in the
instrument cluster illuminates and
remains illuminated (when the
ignition is turned to the on position)
until the parking brake is fully
released.
ABS
P!
BRAKE
HOOD
P!
BRAKE
2009 Town Car(tow)
Owners Guide, 1st Printing
USA(fus)
Driving
181
Page 183 of 280
During Traction Control™ operation, you may hear an electric motor
type of sound coming from the engine compartment and the engine will
not “rev-up” when you push further on the accelerator. This is normal
system behavior and should be no reason for concern.
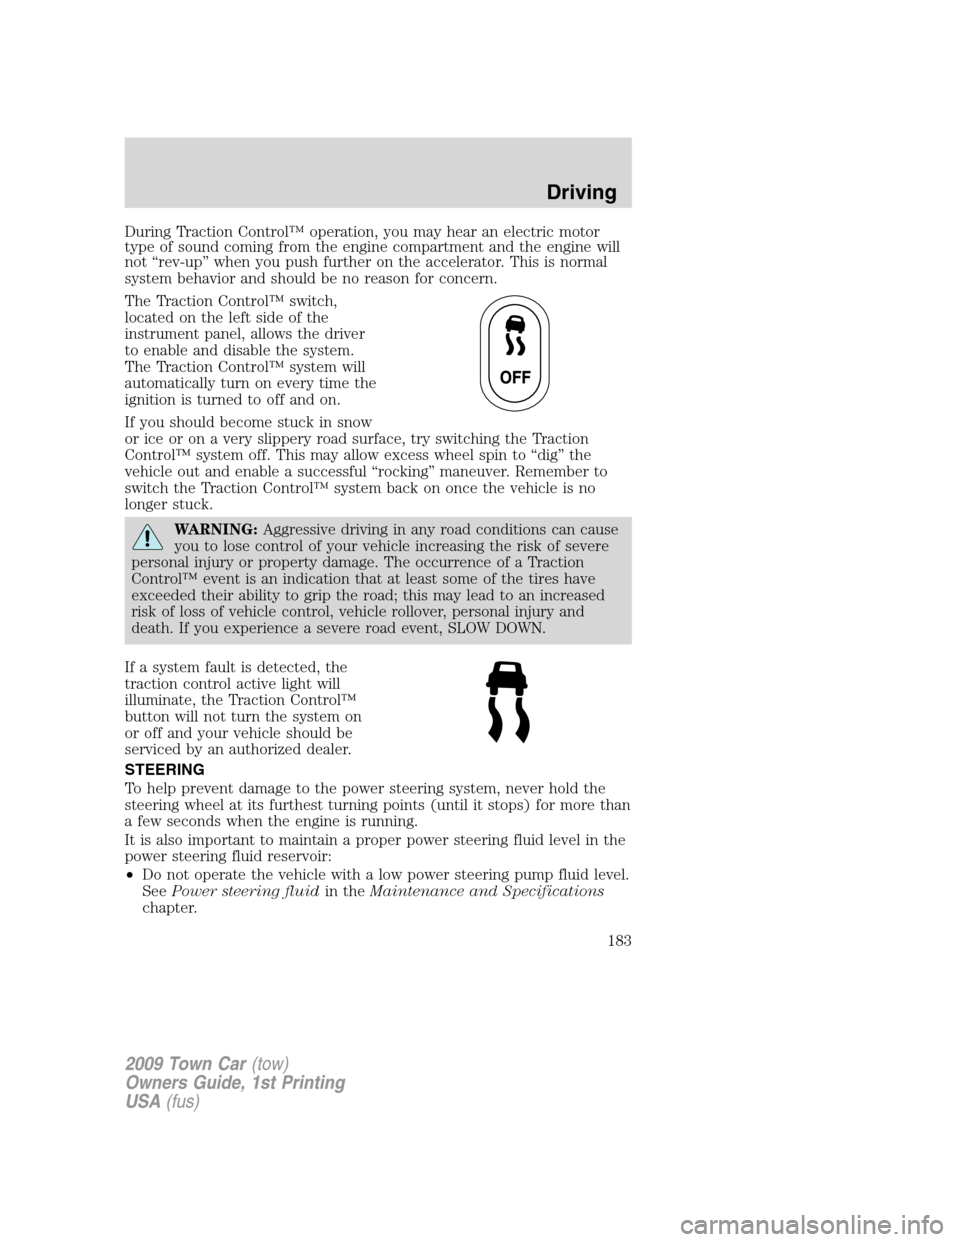
The Traction Control™ switch,
located on the left side of the
instrument panel, allows the driver
to enable and disable the system.
The Traction Control™ system will
automatically turn on every time the
ignition is turned to off and on.
If you should become stuck in snow
or ice or on a very slippery road surface, try switching the Traction
Control™ system off. This may allow excess wheel spin to “dig” the
vehicle out and enable a successful “rocking” maneuver. Remember to
switch the Traction Control™ system back on once the vehicle is no
longer stuck.
WARNING:Aggressive driving in any road conditions can cause
you to lose control of your vehicle increasing the risk of severe
personal injury or property damage. The occurrence of a Traction
Control™ event is an indication that at least some of the tires have
exceeded their ability to grip the road; this may lead to an increased
risk of loss of vehicle control, vehicle rollover, personal injury and
death. If you experience a severe road event, SLOW DOWN.
If a system fault is detected, the
traction control active light will
illuminate, the Traction Control™
button will not turn the system on
or off and your vehicle should be
serviced by an authorized dealer.
STEERING
To help prevent damage to the power steering system, never hold the
steering wheel at its furthest turning points (until it stops) for more than
a few seconds when the engine is running.
It is also important to maintain a proper power steering fluid level in the
power steering fluid reservoir:
•Do not operate the vehicle with a low power steering pump fluid level.
SeePower steering fluidin theMaintenance and Specifications
chapter.
2009 Town Car(tow)
Owners Guide, 1st Printing
USA(fus)
Driving
183
Page 184 of 280
•Some noise is normal during operation. If the noise is excessive, check
for low power steering pump fluid level before seeking service by your
authorized dealer.
•Heavy or uneven steering efforts may be caused by low power steering
pump fluid level. Check for low power steering pump fluid level before
seeking service by your authorized dealer.
•Do not fill the power steering pump reservoir above the maximum
level, as this may result in leaks from the reservoir. SeePower
steering fluidin theMaintenance and Specificationschapter.
If the power steering system breaks down (or if the engine is off), you
can steer the vehicle manually, but it takes more effort.
If the steering wanders or pulls, check for:
•an improperly inflated tire
•uneven tire wear
•loose or worn suspension components
•loose or worn steering components
•improper steering alignment
AIR SUSPENSION SYSTEM
The air suspension system is designed to improve ride, handling and
general vehicle performance during:
•Certain road conditions
•Steering maneuvers
•Braking
•Accelerations
This system keeps the rear of your vehicle at a constant level by
automatically adding air or releasing air from the springs.
If you exceed the load limit, the rear air suspension may not operate.
2009 Town Car(tow)
Owners Guide, 1st Printing
USA(fus)
Driving
184
Page 193 of 280
ROADSIDE ASSISTANCE
Getting roadside assistance
To fully assist you should you have a vehicle concern, Ford Motor
Company offers a complimentary roadside assistance program. This
program is separate from the New Vehicle Limited Warranty. The service
is available:
•24–hours, seven days a week
•for the coverage period listed on the Roadside Assistance Card
included in your Owner Guide portfolio.
Roadside assistance will cover:
•a flat tire change with a good spare (except vehicles that have been
supplied with a tire inflation kit)
•battery jump start
•lock-out assistance (key replacement cost is the customer’s
responsibility)
•fuel delivery – Independent Service Contractors, if not prohibited by
state, local or municipal law shall deliver up to 2.0 gallons (7.5L) of
gasoline or 5 gallons (18.9L) of diesel fuel to a disabled vehicle. Fuel
delivery service is limited to two no-charge occurrences within a
12-month period.
•winch out – available within 100 feet (30.5 meters) of a paved or
county maintained road, no recoveries.
•towing – Ford/Mercury/Lincoln eligible vehicle towed to an authorized
dealer within 35 miles (56.3 km) of the disablement location or to the
nearest authorized dealer. If a member requests to be towed to an
authorized dealer more than 35 miles (56.3 km) from the disablement
location, the member shall be responsible for any mileage costs in
excess of 35 miles (56.3 km).
Trailers shall be covered up to $200 if the disabled eligible vehicle
requires service at the nearest authorized dealer. If the trailer is disabled,
but the towing vehicle is operational, the trailer does not qualify for any
roadside services.
Canadian customers refer to your Customer Information Guide
for information on:
•coverage period
•exact fuel amounts
2009 Town Car(tow)
Owners Guide, 1st Printing
USA(fus)
Roadside Emergencies
193