2009 LINCOLN MKS reset
[x] Cancel search: resetPage 29 of 323

Satellite radio reception factors:To receive the satellite signal, your
vehicle has been equipped with a satellite radio antenna located on the
roof of your vehicle. The vehicle roof provides the best location for an
unobstructed, open view of the sky, a requirement of a satellite radio
system. Like AM/FM, there are several factors that can affect satellite
radio reception performance:
•Antenna obstructions: For optimal reception performance, keep the
antenna clear of snow and ice build-up and keep luggage and other
material as far away from the antenna as possible.
•Terrain: Hills, mountains, tall buildings, bridges, tunnels, freeway
overpasses, parking garages, dense tree foliage and thunderstorms can
interfere with your reception.
•Station overload: When you pass a ground based broadcast repeating
tower, a stronger signal may overtake a weaker one and result in an
audio mute.
Unlike AM/FM audible static, you will hear an audio mute when there is
a satellite radio signal interference. Your radio display may display NO
SIGNAL to indicate the interference.
SIRIUS satellite radio service:SIRIUS Satellite Radio is a subscription
based satellite radio service that broadcasts music, sports, news and
entertainment programming. A service fee is required in order to receive
SIRIUS service. Vehicles that are equipped with a factory installed
SIRIUS Satellite Radio system include:
•Hardware and limited subscription term, which begins on the date of
sale or lease of the vehicle.
•Use of online media player providing access to all SIRIUS music
channels over the internet using any computer connected to the
internet (U.S. customers only)
For information on extended subscription terms, contact SIRIUS at
1–888–539–7474.
Note:SIRIUS reserves the unrestricted right to change, rearrange, add
or delete programming including canceling, moving or adding particular
channels, and its prices, at any time, with or without notice to you. Ford
Motor Company shall not be responsible for any such programming
changes.
Satellite Radio Electronic Serial Number (ESN):This 12–digit
Satellite Serial Number is needed to activate, modify or track your
satellite radio account. You will need this number when communicating
with SIRIUS. While in Satellite Radio mode, you can view this number on
the radio display by pressing AUX and Preset 1 control simultaneously.
2009 MKS(mks)
Owners Guide (post-2002-fmt)
USA(fus)
Entertainment Systems
29
Page 30 of 323

Radio Display Condition Action Required
ACQUIRING Radio requires more
than two seconds to
produce audio for the
selected channel.No action required. This
message should
disappear shortly.
SAT FAULT Internal module or
system failure
present.If this message does not
clear within a short
period of time, or with
an ignition key cycle,
your receiver may have a
fault. See your
authorized dealer for
service.
INVALID CHNL Channel no longer
available.This previously available
channel is no longer
available. Tune to
another channel. If the
channel was one of your
presets, you may choose
another channel for that
preset button.
UNSUBSCRIBED Subscription not
available for this
channel.Contact SIRIUS at
1–888–539–7474 to
subscribe to the channel
or tune to another
channel.
NO TEXT Artist information
not available.Artist information not
available at this time on
this channel. The system
is working properly.
NO TEXT Song title information
not available.Song title information
not available at this time
on this channel. The
system is working
properly.
2009 MKS(mks)
Owners Guide (post-2002-fmt)
USA(fus)
Entertainment Systems
30
Page 46 of 323

PANEL DIMMER CONTROL
Use to adjust the brightness of the
instrument panel and all applicable
switches in the vehicle during
headlamp and parking lamp
operation.
Move the control to the full upright
position, past detent, to turn on the
interior lamps.
Note:If the battery is disconnected,
discharged, or a new battery is
installed, the dimmer switch requires re-calibration. Rotate the dimmer
switch from the full dim position to the full dome/on position to reset.
This will ensure that your displays are visible under all lighting
conditions.
AIMING THE HEADLAMPS
The headlamps on your vehicle are properly aimed at the assembly plant.
If your vehicle has been in an accident, the alignment of your headlamps
should be checked by your authorized dealer.
Vertical aim adjustment
1. Park the vehicle directly in front of a wall or screen on a level surface,
approximately 25 feet (7.6 meters) away.
•(1) 8 feet (2.4 meters)
•(2) Center height of lamp to
ground
•(3) 25 feet (7.6 meters)
•(4) Horizontal reference line
2. Measure the height of the
headlamp bulb center from the
ground and mark an 8 foot
(2.4 meter) horizontal reference line
on the vertical wall or screen at this
height (a piece of masking tape works well).
3. Turn on the low beam headlamps to illuminate the wall or screen and
open the hood.
To see a clearer light pattern for adjusting, you may want to block the
light from one headlamp while adjusting the other.
2009 MKS(mks)
Owners Guide (post-2002-fmt)
USA(fus)
Lights
46
Page 65 of 323

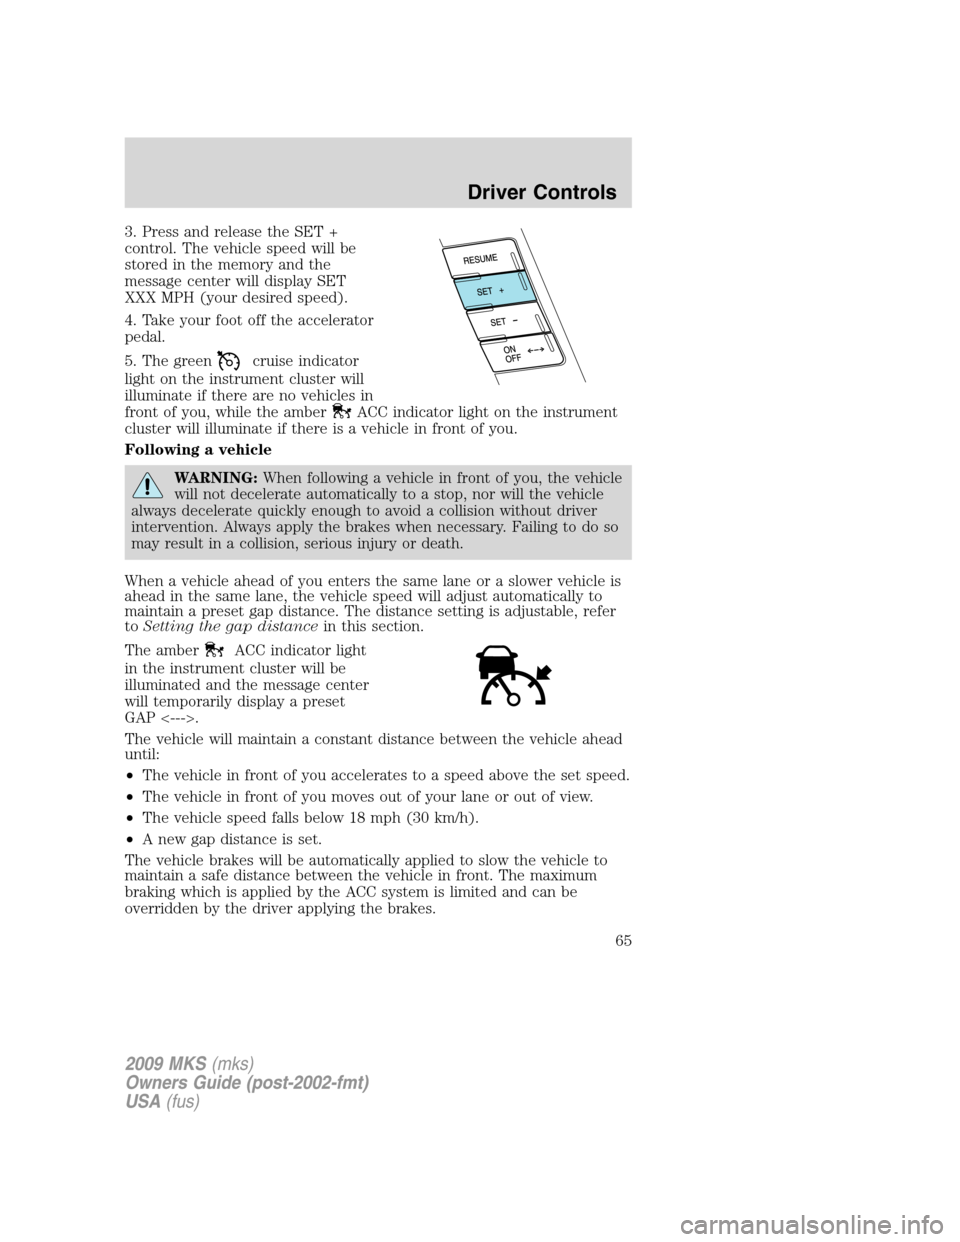
3. Press and release the SET +
control. The vehicle speed will be
stored in the memory and the
message center will display SET
XXX MPH (your desired speed).
4. Take your foot off the accelerator
pedal.
5. The green
cruise indicator
light on the instrument cluster will
illuminate if there are no vehicles in
front of you, while the amber
ACC indicator light on the instrument
cluster will illuminate if there is a vehicle in front of you.
Following a vehicle
WARNING:When following a vehicle in front of you, the vehicle
will not decelerate automatically to a stop, nor will the vehicle
always decelerate quickly enough to avoid a collision without driver
intervention. Always apply the brakes when necessary. Failing to do so
may result in a collision, serious injury or death.
When a vehicle ahead of you enters the same lane or a slower vehicle is
ahead in the same lane, the vehicle speed will adjust automatically to
maintain a preset gap distance. The distance setting is adjustable, refer
toSetting the gap distancein this section.
The amber
ACC indicator light
in the instrument cluster will be
illuminated and the message center
will temporarily display a preset
GAP <--->.
The vehicle will maintain a constant distance between the vehicle ahead
until:
•The vehicle in front of you accelerates to a speed above the set speed.
•The vehicle in front of you moves out of your lane or out of view.
•The vehicle speed falls below 18 mph (30 km/h).
•A new gap distance is set.
The vehicle brakes will be automatically applied to slow the vehicle to
maintain a safe distance between the vehicle in front. The maximum
braking which is applied by the ACC system is limited and can be
overridden by the driver applying the brakes.
2009 MKS(mks)
Owners Guide (post-2002-fmt)
USA(fus)
Driver Controls
65
Page 72 of 323

STEERING WHEEL CONTROLS
Radio control features
Press MEDIA to select:
•AM, FM1, FM2, or CD
•SAT1, SAT2 or SAT3 (Satellite
Radio mode).
•LINE IN (Auxiliary input jack)
In Radio mode:
•Press
to access the
next/previous preset station.
In CD mode:
•Press
to listen to the
next track on the disc.
In Satellite radio mode:
•Press
to advance
through preset channels.
In any mode:
•Press VOL + or VOL - to adjust
the volume.
2009 MKS(mks)
Owners Guide (post-2002-fmt)
USA(fus)
Driver Controls
72
Page 79 of 323

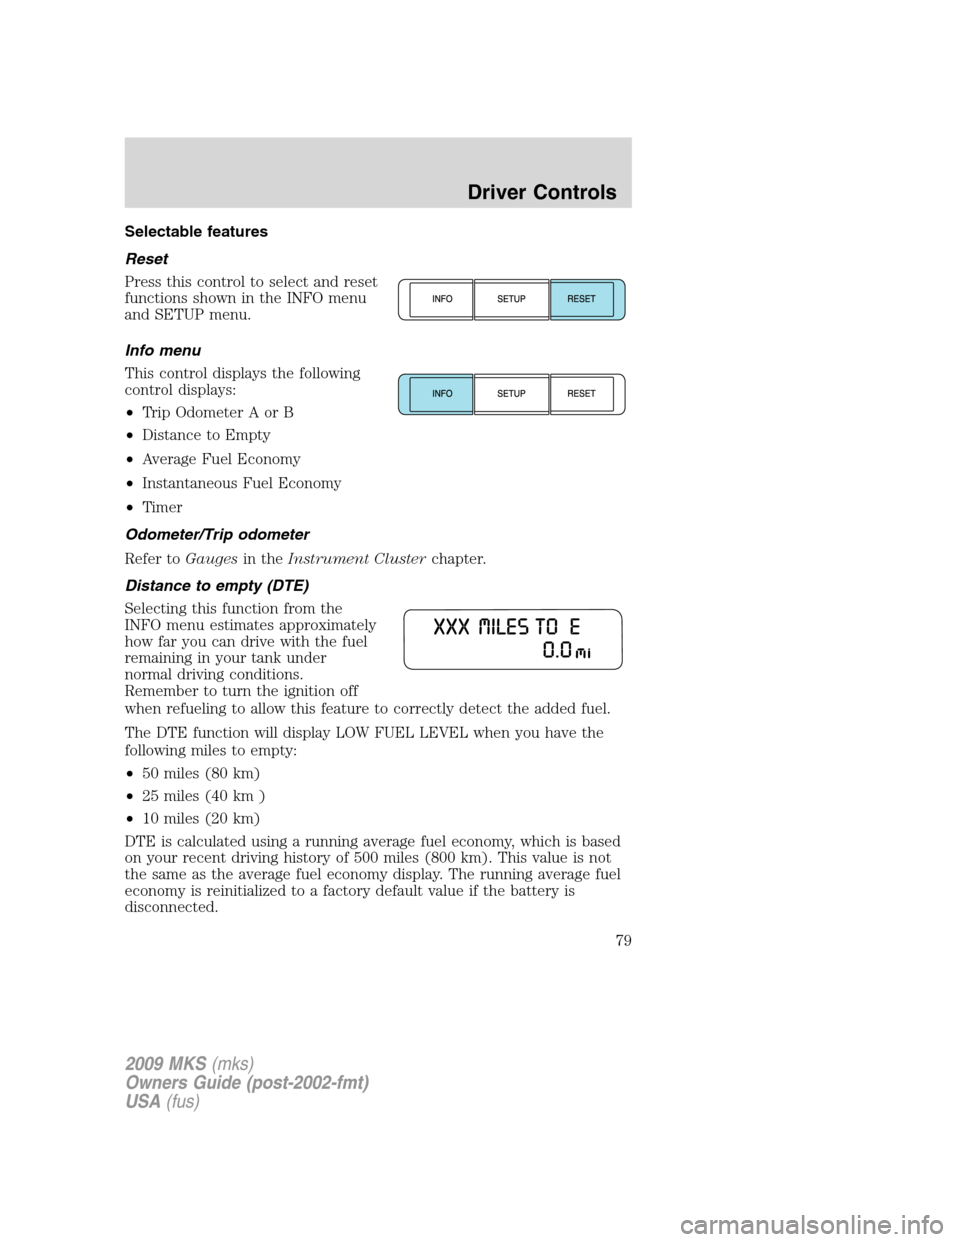
Selectable features
Reset
Press this control to select and reset
functions shown in the INFO menu
and SETUP menu.
Info menu
This control displays the following
control displays:
•Trip Odometer A or B
•Distance to Empty
•Average Fuel Economy
•Instantaneous Fuel Economy
•Timer
Odometer/Trip odometer
Refer toGaugesin theInstrument Clusterchapter.
Distance to empty (DTE)
Selecting this function from the
INFO menu estimates approximately
how far you can drive with the fuel
remaining in your tank under
normal driving conditions.
Remember to turn the ignition off
when refueling to allow this feature to correctly detect the added fuel.
The DTE function will display LOW FUEL LEVEL when you have the
following miles to empty:
•50 miles (80 km)
•25 miles (40 km )
•10 miles (20 km)
DTE is calculated using a running average fuel economy, which is based
on your recent driving history of 500 miles (800 km). This value is not
the same as the average fuel economy display. The running average fuel
economy is reinitialized to a factory default value if the battery is
disconnected.
2009 MKS(mks)
Owners Guide (post-2002-fmt)
USA(fus)
Driver Controls
79
Page 80 of 323

Average fuel economy (AFE)
Select this function from the INFO
menu to display your average fuel
economy in miles/gallon or
liters/100 km.
If you calculate your average fuel
economy by dividing 100 miles traveled by gallons of fuel used
(kilometers traveled by liters used), your figure may be different than
displayed for the following reasons:
•Your vehicle was not perfectly level during fill-up
•Differences in the automatic shut-off points on the fuel pumps at
service stations
•Variations in top-off procedure from one fill-up to another
•Rounding of the displayed values to the nearest 0.1 gallon (liter)
1. Drive the vehicle at least 5 miles (8 km) with the speed control
system engaged to display a stabilized average.
2. Record the highway fuel economy for future reference.
It is important to press the RESET control (press and hold RESET for
two seconds in order to reset the function) after setting the speed
control to get accurate highway fuel economy readings.
Instantaneous fuel economy
Select this function from the INFO
menu to display your instantaneous
fuel economy. This will display your
fuel economy as a bar graph ranging
from
poor economy to
excellent economy.
Your vehicle must be moving to calculate instantaneous fuel economy.
When your vehicle is not moving, this function shows
, one or no bars
illuminated. Instantaneous fuel economy cannot be reset.
Timer
Select this function from the INFO
menu to display a timer.
To operate the timer perform the
following:
1. Press and release RESET to start or stop the timer.
2009 MKS(mks)
Owners Guide (post-2002-fmt)
USA(fus)
Driver Controls
80
Page 81 of 323

2. Press and hold RESET for two seconds to reset the timer.
Setup menu
Press this control for the following
displays:
•System Check
•Oil Life
•Units (English/Metric)
•Auto high beam (if equipped)
•Autolamp Delay
•Autolock
•Autounlock
•Easy entry seat
•Reverse sensing system (rear park aid)
•Forward sensing system (front park aid)
•Language
System check
Selecting this function from the
SETUP menu causes the message
center to cycle through each of the
systems being monitored.
Pressing the RESET control cycles
the message center through each of the systems being monitored.
Some monitored systems show a message only if a warning is present.
The sequence of the system check report is as follows:
1. OIL LIFE
2. CHARGING SYSTEM
3. WASHER FLUID LEVEL
4. DOOR AJAR STATUS
5. TRUNK AJAR/CLOSED
6. BRAKE SYSTEM
7. TIRE PRESSURE
8. REMOVE OBJECTS NEAR PASSENGER SEAT (if present)
2009 MKS(mks)
Owners Guide (post-2002-fmt)
USA(fus)
Driver Controls
81