Page 2 of 323
Locks and Security 91
Keys 91
Locks 94
Anti-theft system 113
Seating and Safety Restraints 120
Seating 120
Safety restraints 131
Airbags 144
Child restraints 159
Tires, Wheels and Loading 176
Tire information 176
Tire inflation 178
Tire Pressure Monitoring System (TPMS) 192
Vehicle loading 198
Trailer towing 204
Recreational towing 207
Driving 208
Starting 208
Brakes 215
AdvanceTrac�221
Transmission operation 222
Forward and reverse sensing system 227
Rear-view camera system 230
All wheel drive 232
Roadside Emergencies 239
Getting roadside assistance 239
Hazard flasher switch 240
Fuses and relays 241
Changing tires 248
Wheel lug nut torque 255
Jump starting 256
Wrecker towing 262
Table of Contents
2
2009 MKS(mks)
Owners Guide (post-2002-fmt)
USA(fus)
Page 232 of 323

dark. If either of the lamps are not operating, stop using the reverse
camera system, at least in the dark, until the lamp(s) are replaced and
functioning.
Servicing
•If the image comes on while the vehicle is not in R (Reverse), have
the system inspected by your authorized dealer.
•If the image is not clear, then check if there is anything covering the
lens such as dirt, mud, ice, snow, etc. If the image is still not clear
after cleaning, have your system inspected by your authorized dealer.
ALL WHEEL DRIVE (AWD) SYSTEM (IF EQUIPPED)
Your vehicle may be equipped with a full-time All Wheel Drive (AWD)
system. The AWD system is an active system, meaning it not only
responds to wheel slip between the front and rear axles but also has the
ability to anticipate wheel slip and transfer torque to the rear wheels
before slip occurs. The AWD system is active all the time and requires no
input from the operator.
All components of the AWD system are sealed for life and require no
maintenance.
If your vehicle is equipped with AWD, a spare tire of a different size
other than the tire provided should never be used. If the spare tire is
installed, the AWD system may disable automatically and enter front
wheel drive only mode to protect driveline components. This condition
may be indicated by anAWD OFFmessage in the message center (see
Message centersection in theDriver Controlschapter for more
information). If there is anAWD OFFmessage in the message center
from using the spare tire, this indicator should turn off after reinstalling
the repaired or replaced normal road tire and driving a short distance. It
is recommended to reinstall the repaired or replaced road tire as soon as
possible. Major dissimilar tire sizes between the front and rear axles
could cause the AWD system to stop functioning and default to front
wheel drive or damage the AWD system.
Note:Your AWD vehicle is not intended for off-road use. The AWD
feature gives your vehicle some limited off-road capabilities in which
driving surfaces are relatively level, obstruction-free and otherwise
similar to normal on-road driving conditions. Operating your vehicle
under other than those conditions could subject the vehicle to excessive
stress which might result in damage which is not covered under your
warranty.
2009 MKS(mks)
Owners Guide (post-2002-fmt)
USA(fus)
Driving
232
Page 253 of 323

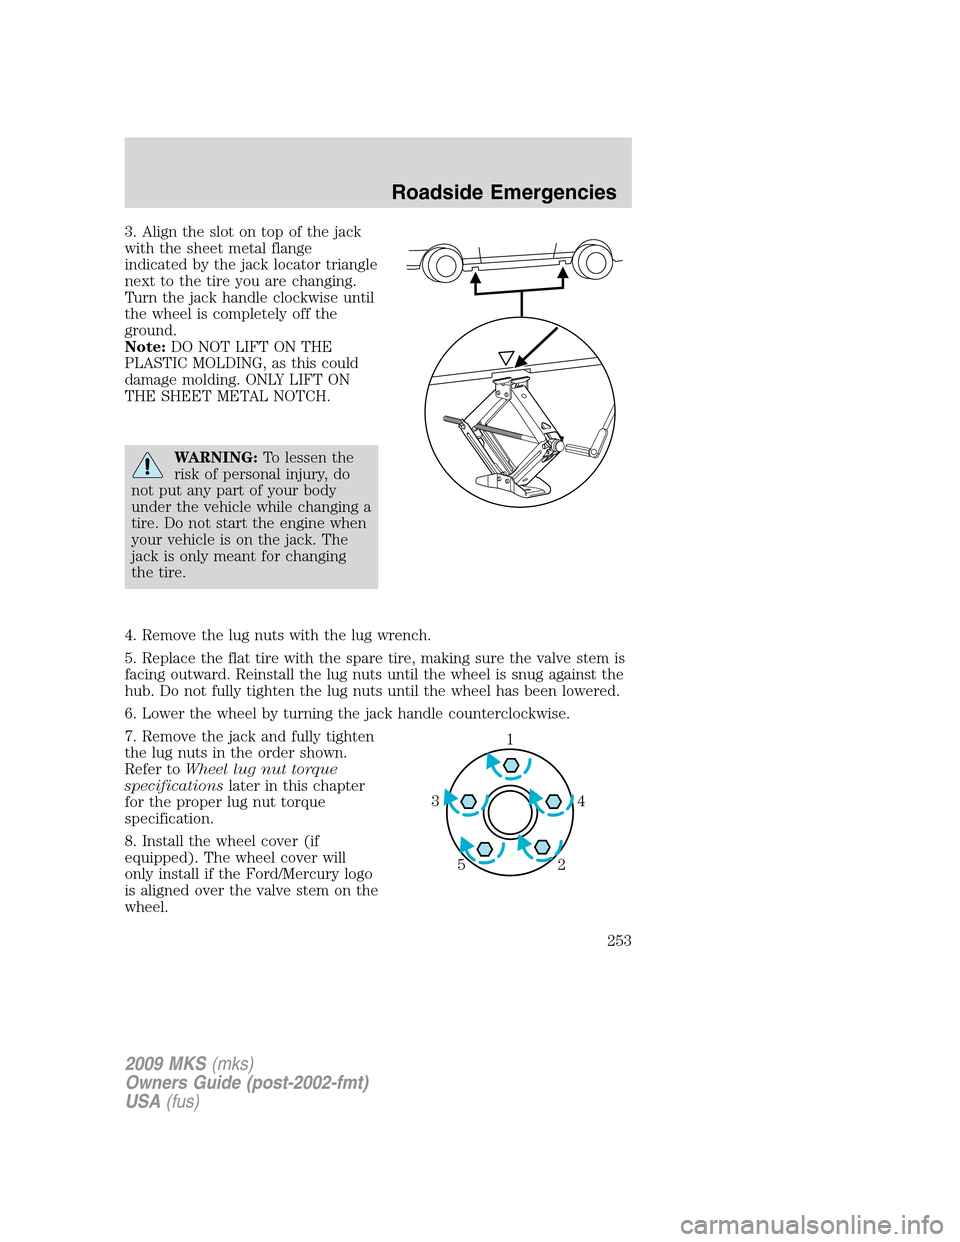
3. Align the slot on top of the jack
with the sheet metal flange
indicated by the jack locator triangle
next to the tire you are changing.
Turn the jack handle clockwise until
the wheel is completely off the
ground.
Note:DO NOT LIFT ON THE
PLASTIC MOLDING, as this could
damage molding. ONLY LIFT ON
THE SHEET METAL NOTCH.
WARNING:To lessen the
risk of personal injury, do
not put any part of your body
under the vehicle while changing a
tire. Do not start the engine when
your vehicle is on the jack. The
jack is only meant for changing
the tire.
4. Remove the lug nuts with the lug wrench.
5. Replace the flat tire with the spare tire, making sure the valve stem is
facing outward. Reinstall the lug nuts until the wheel is snug against the
hub. Do not fully tighten the lug nuts until the wheel has been lowered.
6. Lower the wheel by turning the jack handle counterclockwise.
7. Remove the jack and fully tighten
the lug nuts in the order shown.
Refer toWheel lug nut torque
specificationslater in this chapter
for the proper lug nut torque
specification.
8. Install the wheel cover (if
equipped). The wheel cover will
only install if the Ford/Mercury logo
is aligned over the valve stem on the
wheel.
1
4 3
2 5
2009 MKS(mks)
Owners Guide (post-2002-fmt)
USA(fus)
Roadside Emergencies
253
Page 255 of 323

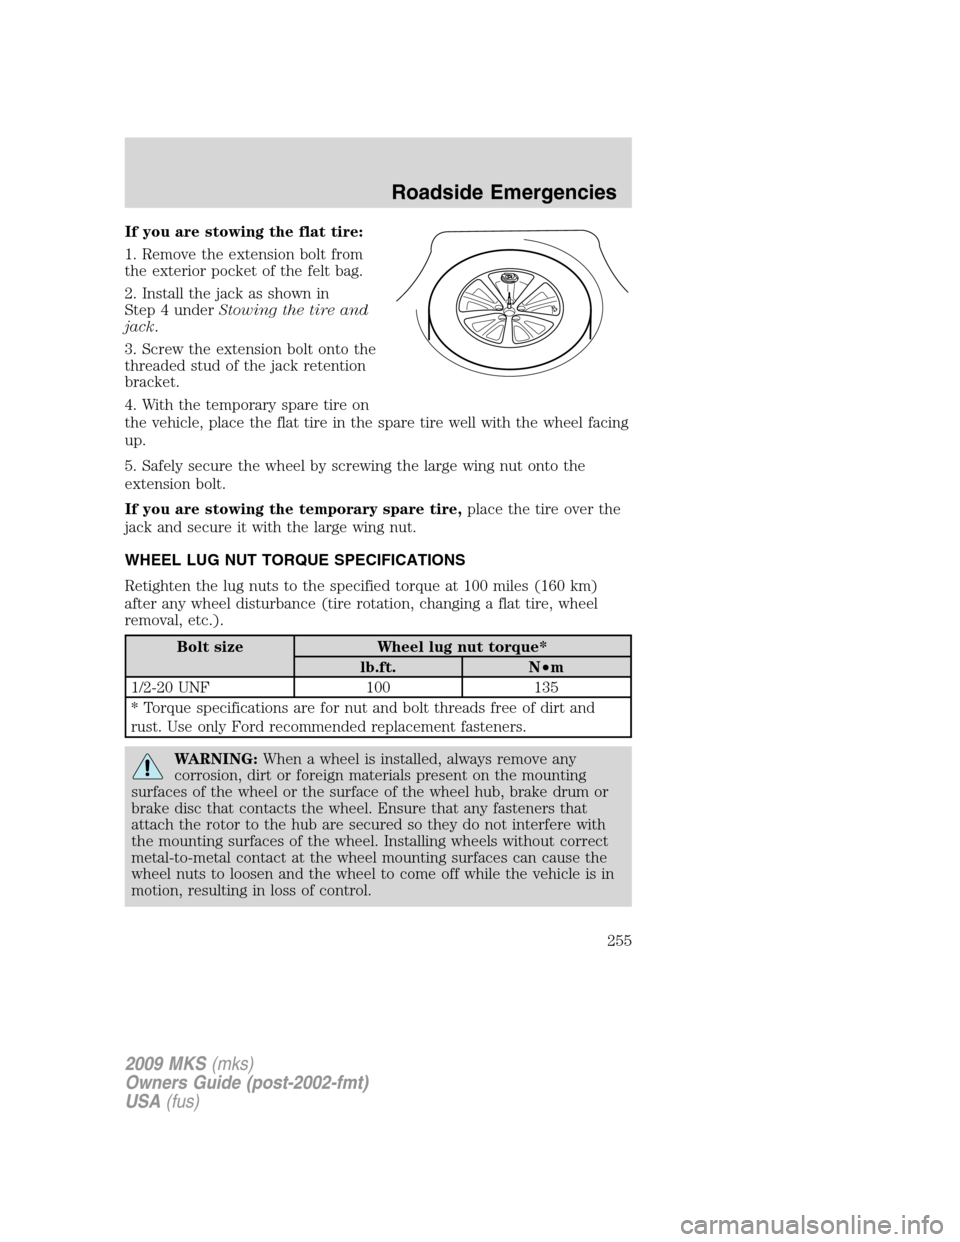
If you are stowing the flat tire:
1. Remove the extension bolt from
the exterior pocket of the felt bag.
2. Install the jack as shown in
Step 4 underStowing the tire and
jack.
3. Screw the extension bolt onto the
threaded stud of the jack retention
bracket.
4. With the temporary spare tire on
the vehicle, place the flat tire in the spare tire well with the wheel facing
up.
5. Safely secure the wheel by screwing the large wing nut onto the
extension bolt.
If you are stowing the temporary spare tire,place the tire over the
jack and secure it with the large wing nut.
WHEEL LUG NUT TORQUE SPECIFICATIONS
Retighten the lug nuts to the specified torque at 100 miles (160 km)
after any wheel disturbance (tire rotation, changing a flat tire, wheel
removal, etc.).
Bolt size Wheel lug nut torque*
lb.ft. N•m
1/2-20 UNF 100 135
* Torque specifications are for nut and bolt threads free of dirt and
rust. Use only Ford recommended replacement fasteners.
WARNING:When a wheel is installed, always remove any
corrosion, dirt or foreign materials present on the mounting
surfaces of the wheel or the surface of the wheel hub, brake drum or
brake disc that contacts the wheel. Ensure that any fasteners that
attach the rotor to the hub are secured so they do not interfere with
the mounting surfaces of the wheel. Installing wheels without correct
metal-to-metal contact at the wheel mounting surfaces can cause the
wheel nuts to loosen and the wheel to come off while the vehicle is in
motion, resulting in loss of control.
2009 MKS(mks)
Owners Guide (post-2002-fmt)
USA(fus)
Roadside Emergencies
255