2009 KIA Sportage warning lights
[x] Cancel search: warning lightsPage 191 of 371
Driving your vehicle44
4
1
2
3
4
5
6
7
8
9
2. With the engine stopped, check
the brake fluid level immediately
and add fluid as required. Then
check all brake components for
fluid leaks.
3. Do not drive the vehicle if leaks are found, the warning light
remains on or the brakes do not
operate properly. Have it towed to
any Authorized Kia Dealer for a
brake system inspection and nec-
essary repairs.
To check bulb operation, check
whether the parking brake and brake
fluid warning light illuminates when
the ignition switch is in the ON posi-
tion.
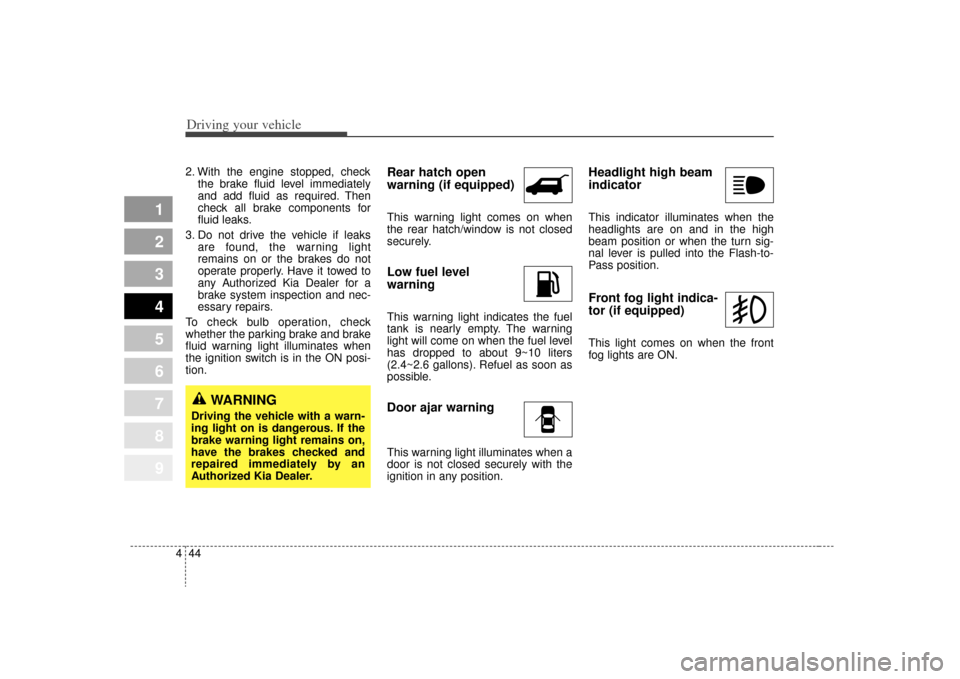
Rear hatch open
warning (if equipped)This warning light comes on when
the rear hatch/window is not closed
securely.Low fuel level
warningThis warning light indicates the fuel
tank is nearly empty. The warning
light will come on when the fuel level
has dropped to about 9~10 liters
(2.4~2.6 gallons). Refuel as soon as
possible.Door ajar warningThis warning light illuminates when a
door is not closed securely with the
ignition in any position.
Headlight high beam
indicator This indicator illuminates when the
headlights are on and in the high
beam position or when the turn sig-
nal lever is pulled into the Flash-to-
Pass position.Front fog light indica-
tor (if equipped) This light comes on when the front
fog lights are ON.
WARNING
Driving the vehicle with a warn-
ing light on is dangerous. If the
brake warning light remains on,
have the brakes checked and
repaired immediately by an
Authorized Kia Dealer.
Page 207 of 371
Driving your vehicle60
4
1
2
3
4
5
6
7
8
9
✽ ✽
NOTICE• To prevent damage to the conduc-
tors bonded to the inside surface
of the rear window, never use
sharp instruments or window
cleaners containing abrasives to
clean the window.
• To prevent the battery from being discharged, the rear window
defroster will only operate when
the engine is running.
• If you want to defrost and defog on the front windshield, refer to
“Windshield Defrosting and
Defogging” in this section. To activate the rear window
defroster, press the rear window
defroster button located in the center
console switch panel. The indicator
on the rear window defroster button
illuminates when the defroster is ON.
If there is heavy accumulation of
snow on the rear window, brush it off
before operating the rear defroster. The rear window defroster automati-
cally turns off after 20 minutes or
when the ignition switch is turned off.
To turn off the defroster, press the
rear window defroster button again.
Outside mirror heater
(if equipped)There is no control button for the out-
side mirror heater, instead the out-
side mirror heater automatically
turns on when the rear window
defroster is turned on.Front windshield deicer(if equipped)There is no control button for the
front windshield deicer, instead the
front windshield deicer automatically
turns on when the rear window
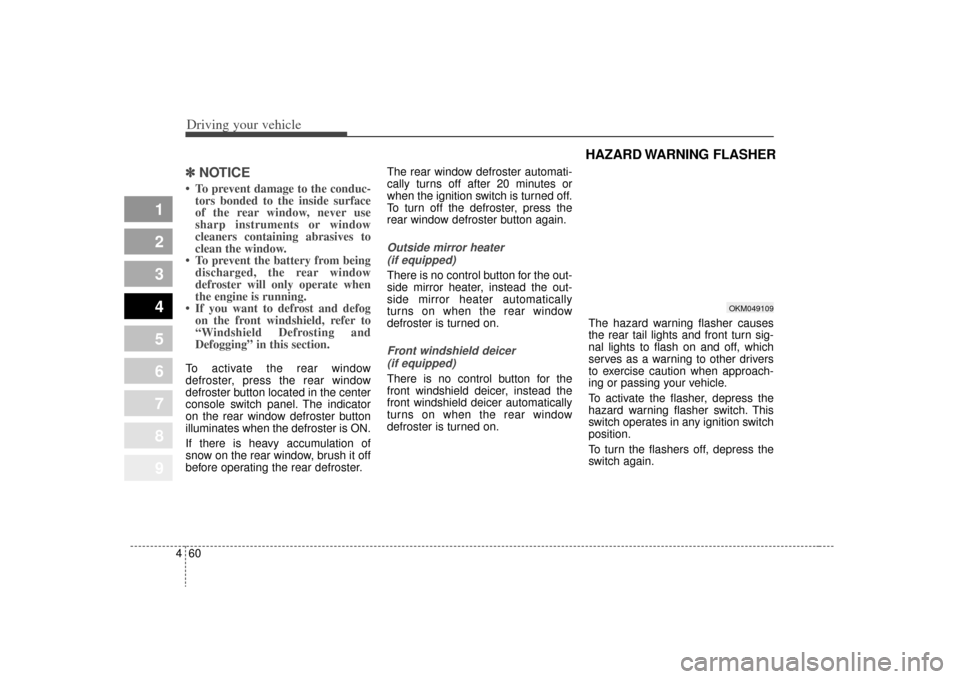
defroster is turned on. The hazard warning flasher causes
the rear tail lights and front turn sig-
nal lights to flash on and off, which
serves as a warning to other drivers
to exercise caution when approach-
ing or passing your vehicle.
To activate the flasher, depress the
hazard warning flasher switch. This
switch operates in any ignition switch
position.
To turn the flashers off, depress the
switch again.
HAZARD WARNING FLASHER
OKM049109
Page 237 of 371

55
Driving tips
BEFORE DRIVING Before entering vehicle: Be sure that all windows, outsidemirror(s), and outside lights are
clean.
Check the condition of the tires.
Check under the vehicle for any sign of leaks.
Be sure there are no obstacles behind you if you intend to back up.Necessary inspections Fluid levels, such as engine oil,
engine coolant, brake fluid, and
washer fluid should be checked on a
regular basis, with the exact interval
depending on the fluid. Further
details are provided in Section 7,
Maintenance.
Before starting Close and lock all doors.
Position the seat so that all con-trols are easily reached.
Adjust the inside and outside rearview mirrors.
Be sure that all lights work.
Check all gauges.
Check the operation of warning lights when the ignition switch is
turned to the ON position.
Release the parking brake and make sure the brake warning light
goes out.
For safe operation, be sure you are
familiar with your vehicle and its
equipment.
1
2
3
4
5
6
7
8
9
WARNING
- Driving under
the influence of alcohol or
drugs
Drinking and driving is danger-
ous. Drunk driving is the num-
ber one contributor to the high-
way death toll each year. Even a
small amount of alcohol will
affect your reflexes, perceptions
and judgement. Driving while
under the influence of drugs is
as dangerous or more danger-
ous than driving drunk.
You are much more likely to
have a serious accident if you
drink or take drugs and drive.
If you are drinking or taking
drugs, don’t drive. Do not ride
with a driver who has been
drinking or taking drugs.
Choose a designated driver or
call a cab.
Page 241 of 371
59
Driving tips
1
2
3
4
5
6
7
8
9
Driving at night Because night driving presents more
hazards than driving in the daylight,
here are some important tips to
remember:
Slow down and keep more dis-tance between you and other vehi-
cles, as it may be more difficult to
see at night, especially in areas
where there may not be any street
lights.
Adjust your mirrors to reduce the glare from other driver's head-
lights. Keep your headlights clean and
properly aimed on vehicles not
equipped with the automatic head-
light aiming feature. Dirty or
improperly aimed headlights will
make it much more difficult to see
at night.
Avoid staring directly at the head- lights of oncoming vehicles. You
could be temporarily blinded, and it
will take several seconds for your
eyes to readjust to the darkness.
WARNING
- Spinning tires
Do not spin the wheels, espe-
cially at speeds more than 56
km/h (35 mph). Spinning the
wheels at high speeds when the
vehicle is stationary could
cause a tire to overheat, explode
and injure bystanders.
Page 254 of 371
Driving tips22
5
1
2
3
4
5
6
7
8
9
Driving uphillOnce you decide you can safely
drive up the hill, you need to take
some special steps.
Use a low gear and get a firm grip
on the steering wheel.
Get a smooth start up the hill and try to maintain your speed. Don’t
use more power than you need,
because you don’t want your
wheels to start spinning or sliding.
Try to drive straight up the hill, if at all possible. If the path twists and
turns, you may have to find anoth-
er route. Slow down as you approach the
top of the hill.
Attach a flag to the vehicle to make you more visible to approaching
traffic on trails or hills.
Sound the horn as you approach the top of the hill to let opposing
traffic know you’re there.
Use your headlights even during the day. They make you more visi-
ble to other drivers.
WARNING -
Driving
across hills
Turning or driving across steep
hills can be dangerous. You
could lose traction, slide side-
ways, or just reach an area too
steep to traverse. In any case, it
could cause you to roll over. You
could be seriously or fatally
injured. When driving up hills,
always try to go as straight up
as possible.
WARNING
- Driving over hills
Driving to the top (crest) of a hill
at full speed can cause an acci-
dent and result in serious or
fatal injury. There could be a
drop-off, embankment, cliff,
another vehicle or people sitting
on the ground. As you near the
top of a hill, slow down and stay
alert.
Page 268 of 371
Driving tips36
5
1
2
3
4
5
6
7
8
9
Safety chains You should always attach chains
between your vehicle and your trail-
er. Cross the safety chains under the
tongue of the trailer so that the
tongue will not drop to the road if it
becomes separated from the hitch.
Instructions about safety chains may
be provided by the hitch manufactur-
er or by the trailer manufacturer.
Follow the manufacturer’s recom-
mendation for attaching safety
chains. Always leave just enough
slack so you can turn with your trail-
er. And, never allow safety chains to
drag on the ground.
Trailer brakes If your trailer weighs more than the
maximum trailer weight without trail-
er brakes loaded, then it needs its
own brakes and they must be ade-
quate. Be sure to read and follow the
instructions for the trailer brakes so
you’ll be able to install, adjust and
maintain them properly.
Don’t tap into your vehicle's brake
system.
Driving with a trailer Towing a trailer requires a certain
amount of experience. Before setting
out for the open road, you must get
to know your trailer. Acquaint your-
self with the feel of handling and
braking with the added weight of the
trailer. And always keep in mind that
the vehicle you are driving is now a
good deal longer and not nearly so
responsive as your vehicle is by
itself.
Before you start, check the trailer
hitch and platform, safety chains,
electrical connector(s), lights, tires
and mirror adjustment. If the trailer
has electric brakes, start your vehicle
and trailer moving and then apply the
trailer brake controller by hand to be
sure the brakes are working. This lets
you check your electrical connection
at the same time.
During your trip, check occasionally
to be sure that the load is secure,
and that the lights and any trailer
brakes are still working.
WARNING -
Trailer brakes
Do not use a trailer with its own
brakes unless you are absolute-
ly certain that you have properly
set up the brake system. This is
not a task for amateurs. Use an
experienced, competent trailer
shop for this work.
Page 286 of 371

In case of an emergency26ROAD WARNING Hazard warning flasher The hazard warning flasher serves
as a warning to other drivers to exer-
cise extreme caution when
approaching, overtaking, or passing
your vehicle. It should be used when-
ever emergency repairs are being
made or when the vehicle is stopped
near the edge of a roadway.Depress the flasher switch with the
ignition switch in any position. The
flasher switch is located in the center
console switch panel. All turn signal
lights will flash simultaneously.
• The hazard warning flasher oper-
ates whether your vehicle is run-
ning or not.
The turn signals do not work when the hazard flasher is on.
Care must be taken when using the hazard warning flasher while
the vehicle is being towed.
If the engine stalls at a cross-
road or crossingIf the engine stalls at a crossroad or
crossing, set the shift lever in the N
(Neutral) position and then push the
vehicle to a safe place.If you have a flat tire while dri-
vingIf a tire goes flat while you are dri-
ving:
1. Take your foot off the accelerator pedal and let the car slow down
while driving straight ahead. Do
not apply the brakes immediately
or attempt to pull off the road as
this may cause a loss of control.
When the car has slowed to such
a speed that it is safe to do so,
brake carefully and pull off the
road. Drive off the road as far as
possible and park on firm, level
ground.
If you are on a divided highway, do
not park in the median area
between the two traffic lanes.
1
2
3
4
5
6
7
8
9
OKM049109
IN CASE OF AN EMER-
GENCY WHILE DRIVING
Page 292 of 371
In case of an emergency86Fuse replacement ✽
✽NOTICEDo not use a screwdriver or any
other metal object to remove fuses
because it may cause a short circuit
and damage the system.
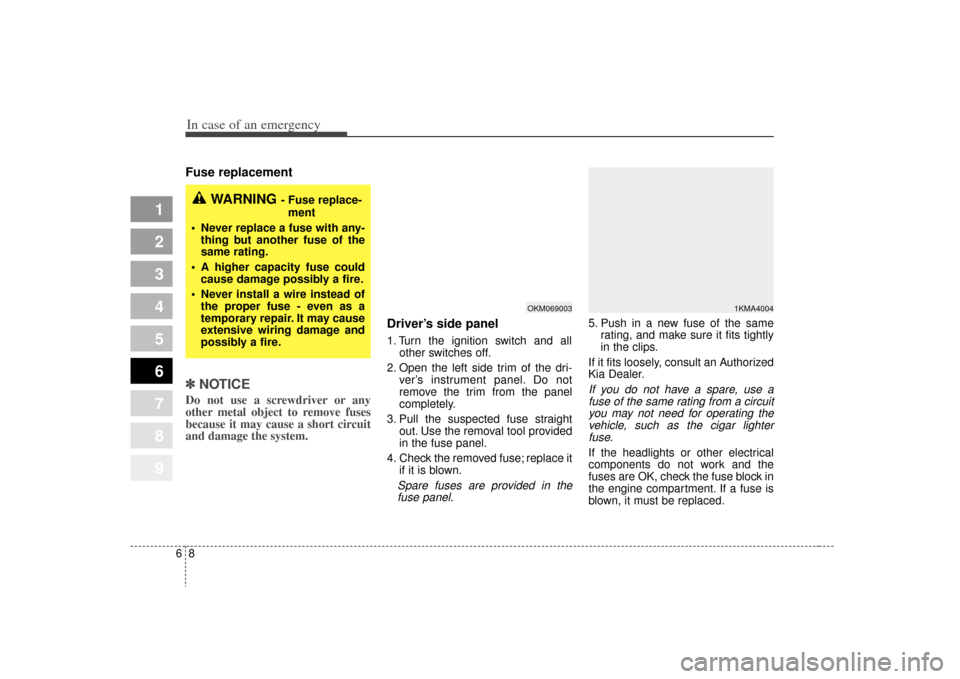
Driver’s side panel1. Turn the ignition switch and all
other switches off.
2. Open the left side trim of the dri- ver’s instrument panel. Do not
remove the trim from the panel
completely.
3. Pull the suspected fuse straight out. Use the removal tool provided
in the fuse panel.
4. Check the removed fuse; replace it if it is blown.Spare fuses are provided in thefuse panel.
5. Push in a new fuse of the same rating, and make sure it fits tightly
in the clips.
If it fits loosely, consult an Authorized
Kia Dealer.If you do not have a spare, use a fuse of the same rating from a circuityou may not need for operating thevehicle, such as the cigar lighterfuse.If the headlights or other electrical
components do not work and the
fuses are OK, check the fuse block in
the engine compartment. If a fuse is
blown, it must be replaced.
1
2
3
4
5
6
7
8
9
OKM069003
1KMA4004
WARNING
- Fuse replace-
ment
Never replace a fuse with any- thing but another fuse of the
same rating.
A higher capacity fuse could cause damage possibly a fire.
Never install a wire instead of the proper fuse - even as a
temporary repair. It may cause
extensive wiring damage and
possibly a fire.