Page 169 of 291

443
1
2
3
4
5
6
7
8
9
Driving your vehicle
Windshield wipers Operates as follows when the igni-
tion switch is turned ON.
MIST : For a single wiping cycle,
push the lever forward and
release it with the lever in the
OFF position. The wipers will
operate continuously if the
lever is pushed upward and
held. OFF : Wiper is not in operation
INT : Wiper operates intermittently
at the same wiping intervals.
Use this mode in a light rain or
mist. To vary the speed set-
ting, turn the speed control
knob (1).
LO : Normal wiper speed
HI : Fast wiper speed
✽ ✽ NOTICEIf there is heavy accumulation of
snow or ice on the windshield,
defrost the windshield for about 10
minutes, or until the snow and/or ice
is removed before using the wind-
shield wipers to ensure proper oper-
ation.
CAUTION
To prevent possible damage
to the wipers or windshield,do not operate the wiperswhen the windshield is dry.
To prevent damage to the wiper blades, do not use gaso-line, kerosene, paint thinner,or other solvents on or nearthem.
To prevent damage to the wiper arms and other compo-nents, do not attempt to movethe wipers manually.
OLD028904N
Page 170 of 291

Driving your vehicle44
4
1
2
3
4
5
6
7
8
9
Windshield washers In the OFF position, pull the lever
gently toward you to spray washer
fluid on the windshield and to run the
wipers 2-3 cycles.
Use this function when the wind-
shield is dirty.
The spray and wiper operation will
continue until you release the lever.
If the washer does not work, check
the washer fluid level. If the fluid level
is not sufficient, you will need to add
appropriate non-abrasive windshield
washer fluid to the washer reservoir.
The reservoir filler neck is located in
the front of the engine compartment
on the passenger side.
Rear window wiper and wash-
er switch (if equipped)The rear window wiper and washer
switch is located at the end of the
wiper and washer switch lever. Turn
the switch to desired position to
operate the rear wiper and washer.
- Spraying washer fluid and wip-ing
OFF - Wiper is not in operation
INT - Intermittent wiper operation (if equipped)
ON - Normal wiper opertion - Wash with brief wipes
WARNING
Do not use the washer in freez-
ing temperatures without 1st
warming the windshield with the
defrosters; the washer solution
could freeze on contact with the
windshield and obscure your
vision.
CAUTION
To prevent possible damage tothe washer pump, do not oper-ate the washer when the fluidreservoir is empty.
OLD028905N
OLD028906N
Page 171 of 291

445
1
2
3
4
5
6
7
8
9
Driving your vehicle
The defroster heats the window to
remove frost, fog and thin ice from
the interior and exterior of the rear
window, while engine is running.To activate the rear window
defroster, press the rear window
defroster button located in the center
console switch panel. The indicator
in the instrument cluster illuminates
when the defroster is ON.
If your vehicle is equipped with the
outside mirror defroster, it will be
operating at the same time when you
operate the rear window defroster.
If there is heavy accumulation of
snow on the rear window, brush it off
before operating the rear defroster.
The rear window defroster automati-
cally turns off after 20 minutes or
when the ignition switch is turned off.
To turn off the defroster, press the
rear window defroster button again.DEFROSTER
OLD029116
CAUTION
To prevent damage to the con-
ductors bonded to the insidesurface of the rear window,never use sharp instrumentsor window cleaners contain-ing abrasives to clean the win-dow.
To prevent the battery from being discharged, operate thedefroster only while theengine is running.
If you want to defrost and defog on the front windshield,refer to “Windshield Defrostingand Defogging” in this section.
Page 172 of 291
Driving your vehicle46
4
1
2
3
4
5
6
7
8
9
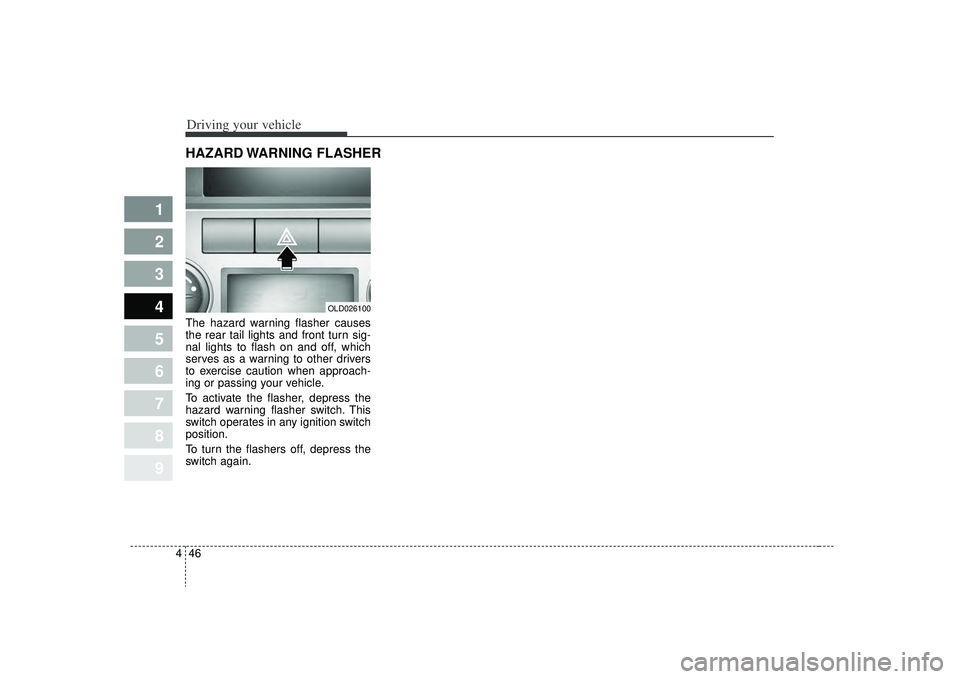
The hazard warning flasher causes
the rear tail lights and front turn sig-
nal lights to flash on and off, which
serves as a warning to other drivers
to exercise caution when approach-
ing or passing your vehicle.
To activate the flasher, depress the
hazard warning flasher switch. This
switch operates in any ignition switch
position.
To turn the flashers off, depress the
switch again.
OLD026100
HAZARD WARNING FLASHER
Page 173 of 291
447
1
2
3
4
5
6
7
8
9
Driving your vehicle
MANUAL CLIMATE CONTROL SYSTEM (IF EQUIPPED)
OLD029120
1. Fan speed control knob
2. Mode selection knob
3. Temperature control knob4. Rear window defroster button
5. Air intake control button
6. Air conditioning button (if equipped)
1
2
3
5
4
6
Page 174 of 291
Driving your vehicle48
4
1
2
3
4
5
6
7
8
9
Fan speed control knob The ignition switch must be in the ON
position for fan operation.
The fan speed control knob allows
you to control the fan speed of the air
flowing from the ventilation system.
To change the fan speed, turn the
knob to the right for higher speed or
left for lower speed.
Temperature control knobThe temperature control knob allows
you to control the temperature of the
air flowing from the ventilation sys-
tem. To change the air temperature in
the passenger compartment turn the
knob to the right for warm and hot air
or left for cooler air.
Mode selection knob The mode selection knob controls
the direction of the air flow through
the ventilation system.
OLD026124
OLD029126
OLD029202L
Page 175 of 291
449
1
2
3
4
5
6
7
8
9
Driving your vehicle
MAX/ A/C position
When you select the MAX
A/C mode while the fan
speed is on, the follwing
system settings will be
made automatically;
tem will be turned on.
tion will be selected.
selected.
If you select MAX A/C mode, you will not be able
to cancel the A/C system
operation, or change the
recirculated air mode posi-
tion.
Set the fan speed control knob to desired speed and
rotate the temperature
control knob to the
extreme left position for
maximum cooling.
(outlet port: B, D)
MAX
A/C
OLD026121
Page 176 of 291

Driving your vehicle50
4
1
2
3
4
5
6
7
8
9
Face position
Air flow is directed toward
the upper body and face.
Additionally, each outlet
can be controlled to direct
the air discharged from
the outlet.
(outlet port: B, D)
Face - floor position
Air flow is directed towardsthe face and the floor. The
air to the floor is warmer
than the air to the face
(except when the temper-
ature control is set to the
extreme cold position).
(outlet port: B, D, C, E)
Floor position
Most of the air flow is
directed to the floor, with a
small amount of the air
being directed to the wind-
shield and side window
defroster.
(outlet port: C, E, A, D)
Floor - defrost position
Most of the air flow is
directed to the floor and
the windshield with a small
amount directed to the
side window defrosters.
(outlet port: A, C, E, D)
Defrost position
Most of the air flow is
directed to the windshield
with a small amount of air
directed to the side win-
dow defrosters.
(outlet port: A, D)
Instrument panel ventsIf air flow control is not satisfactory,
check the instrument panel vents.
The outlet port (B, D) can be opened
or closed separately using the verti-
cal thumbwheel. To close the vent,
rotate it upward to the maximum
position. To open the vent, rotate it
downward.
Also, you can adjust the direction of
air delivery from these vents using
vertical or horizontal thumbwheels
as shown.
OLD026122