2009 KIA SOUL ESP
[x] Cancel search: ESPPage 120 of 328
Features of your vehicle
48
4
D330000AHM-EE
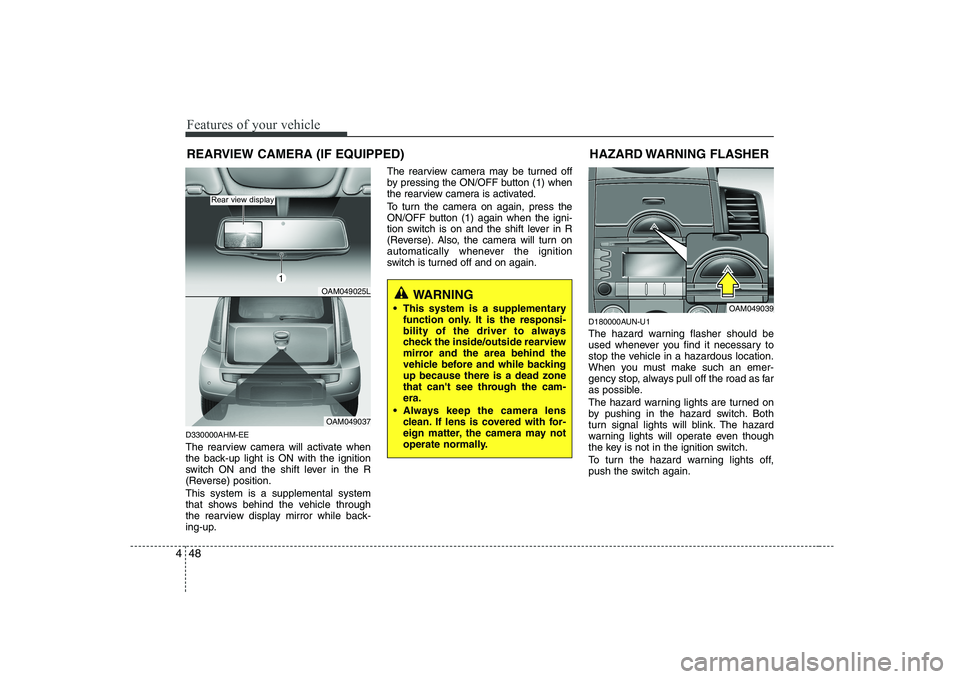
The rearview camera will activate when
the back-up light is ON with the ignition
switch ON and the shift lever in the R
(Reverse) position. This system is a supplemental system
that shows behind the vehicle through
the rearview display mirror while back-
ing-up. The rearview camera may be turned off
by pressing the ON/OFF button (1) when
the rearview camera is activated.
To turn the camera on again, press the
ON/OFF button (1) again when the igni-
tion switch is on and the shift lever in R
(Reverse). Also, the camera will turn on
automatically whenever the ignition
switch is turned off and on again.
D180000AUN-U1
The hazard warning flasher should be
used whenever you find it necessary to
stop the vehicle in a hazardous location.
When you must make such an emer-
gency stop, always pull off the road as far
as possible.
The hazard warning lights are turned on
by pushing in the hazard switch. Both
turn signal lights will blink. The hazard
warning lights will operate even though
the key is not in the ignition switch.
To turn the hazard warning lights off,
push the switch again.HAZARD WARNING FLASHER
OAM049039
WARNING
This system is a supplementary function only. It is the responsi-
bility of the driver to always
check the inside/outside rearview
mirror and the area behind the
vehicle before and while backingup because there is a dead zone
that can't see through the cam-era.
Always keep the camera lens clean. If lens is covered with for-
eign matter, the camera may not
operate normally.
REARVIEW CAMERA (IF EQUIPPED)
OAM049025L
OAM049037
Rear view display
1
Page 124 of 328
Features of your vehicle
52
4
D190800APB
Rear fog light (if equipped)
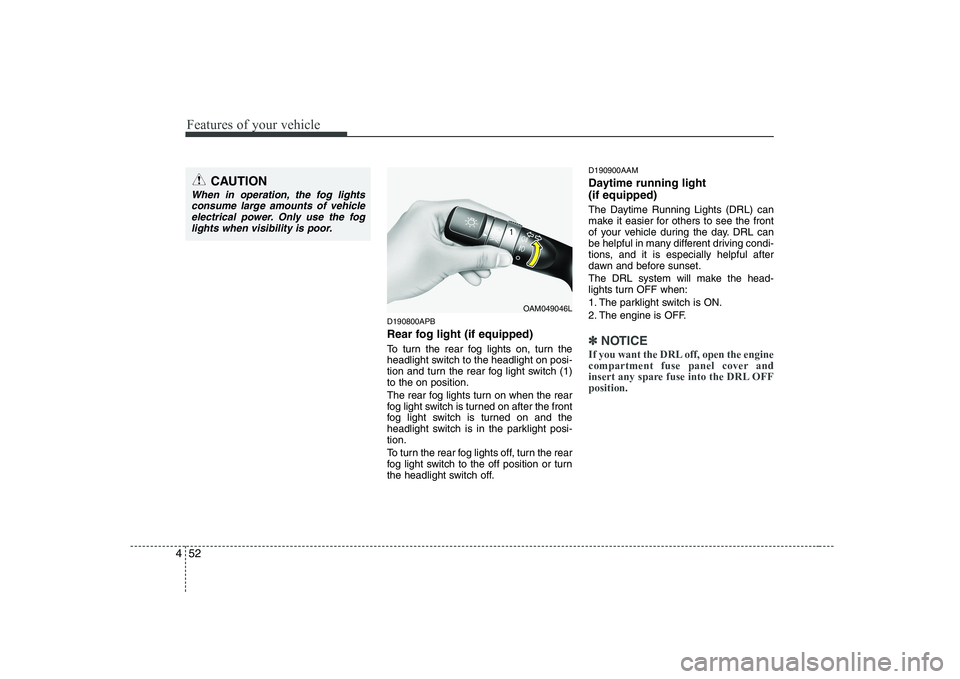
To turn the rear fog lights on, turn the
headlight switch to the headlight on posi-
tion and turn the rear fog light switch (1)to the on position.
The rear fog lights turn on when the rear
fog light switch is turned on after the front
fog light switch is turned on and the
headlight switch is in the parklight posi-tion.
To turn the rear fog lights off, turn the rear
fog light switch to the off position or turn
the headlight switch off. D190900AAM
Daytime running light (if equipped)
The Daytime Running Lights (DRL) can
make it easier for others to see the front
of your vehicle during the day. DRL can
be helpful in many different driving condi-
tions, and it is especially helpful after
dawn and before sunset.
The DRL system will make the head-
lights turn OFF when:
1. The parklight switch is ON.
2. The engine is OFF.
✽✽
NOTICE
If you want the DRL off, open the engine
compartment fuse panel cover and
insert any spare fuse into the DRL OFFposition.
CAUTION
When in operation, the fog lights consume large amounts of vehicleelectrical power. Only use the fog lights when visibility is poor.
OAM049046L
Page 140 of 328
Features of your vehicle
68
4
D250000AUN
For maximum defrosting, set the tem-
perature control to the extreme
right/hot position and the fan speedcontrol to the highest speed.
If warm air to the floor is desired while defrosting or defogging, set the modeto the floor-defrost position.
Before driving, clear all snow and ice from the windshield, rear window, out-
side rear view mirrors, and all side win-
dows.
Clear all snow and ice from the hood and air inlet in the cowl grill to improveheater and defroster efficiency and to
reduce the probability of fogging upinside of the windshield. Manual climate control system
D250101AUN-C1
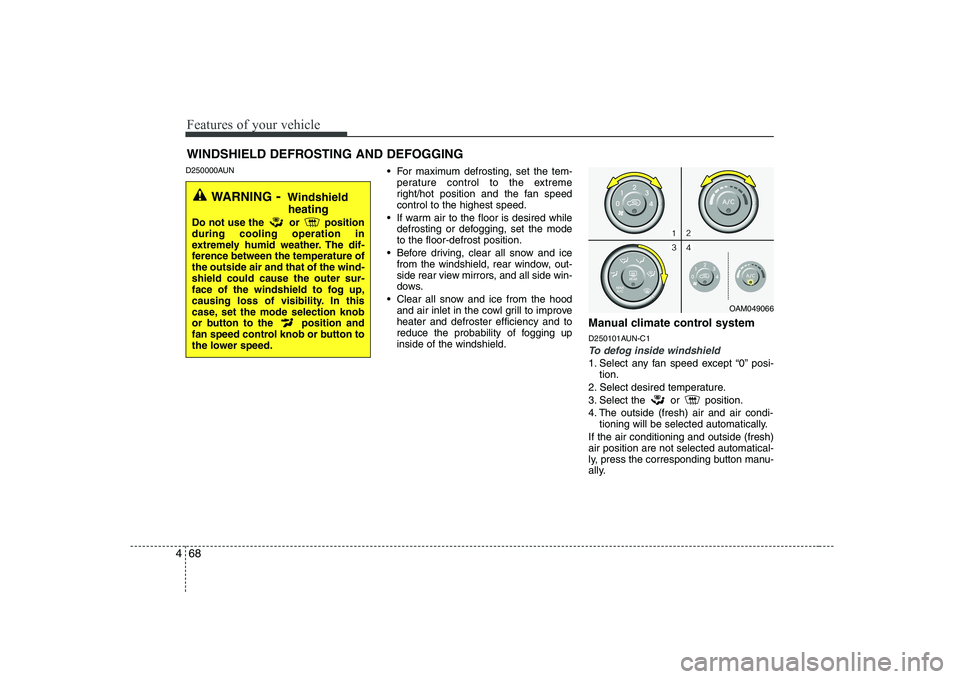
To defog inside windshield
1. Select any fan speed except “0” posi-
tion.
2. Select desired temperature.
3. Select the or position.
4. The outside (fresh) air and air condi- tioning will be selected automatically.
If the air conditioning and outside (fresh) air position are not selected automatical-
ly, press the corresponding button manu-
ally.
WINDSHIELD DEFROSTING AND DEFOGGING
OAM049066
WARNING - Windshield
heating
Do not use the or position during cooling operation in
extremely humid weather. The dif-
ference between the temperature ofthe outside air and that of the wind-shield could cause the outer sur-
face of the windshield to fog up,
causing loss of visibility. In this
case, set the mode selection knob
or button to the position and
fan speed control knob or button to
the lower speed.
Page 149 of 328
477
Features of your vehicle
EXTERIOR FEATURE
D290100BUN-BL
Roof rack (if equipped)
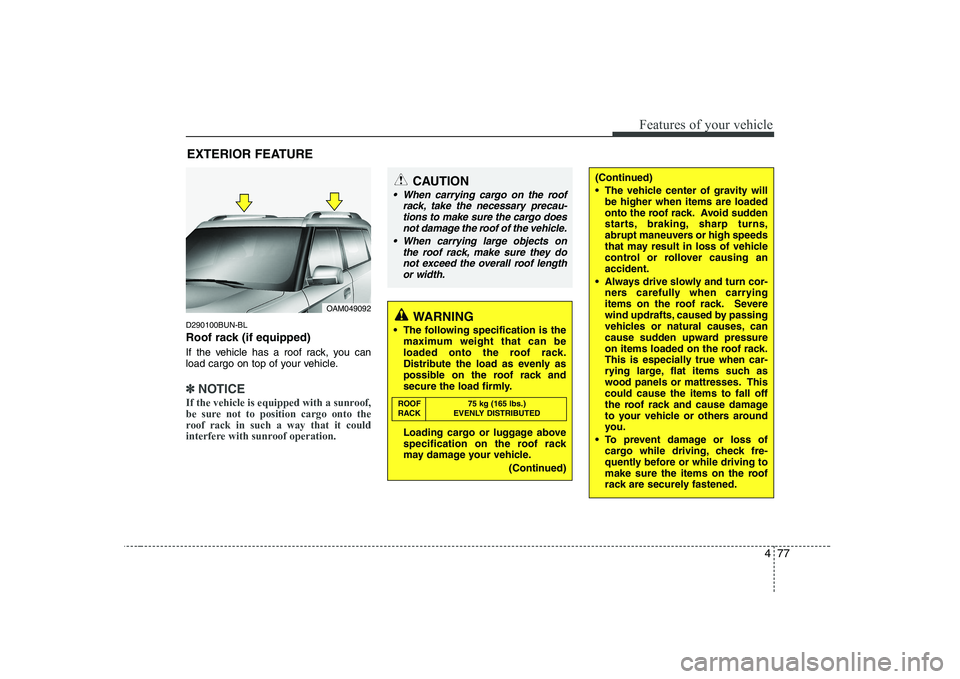
If the vehicle has a roof rack, you can
load cargo on top of your vehicle.
✽✽ NOTICE
If the vehicle is equipped with a sunroof,
be sure not to position cargo onto the
roof rack in such a way that it could
interfere with sunroof operation.
WARNING
The following specification is the maximum weight that can be
loaded onto the roof rack.
Distribute the load as evenly as
possible on the roof rack and
secure the load firmly.
Loading cargo or luggage above
specification on the roof rack
may damage your vehicle.
(Continued)
ROOF 75 kg (165 lbs.)
RACK EVENLY DISTRIBUTED
(Continued)
The vehicle center of gravity will
be higher when items are loaded
onto the roof rack. Avoid sudden
starts, braking, sharp turns,
abrupt maneuvers or high speeds
that may result in loss of vehicle
control or rollover causing anaccident.
Always drive slowly and turn cor- ners carefully when carrying
items on the roof rack. Severe
wind updrafts, caused by passing
vehicles or natural causes, can
cause sudden upward pressure
on items loaded on the roof rack.
This is especially true when car-
rying large, flat items such as
wood panels or mattresses. Thiscould cause the items to fall off
the roof rack and cause damage
to your vehicle or others around
you.
To prevent damage or loss of cargo while driving, check fre-
quently before or while driving to
make sure the items on the roof
rack are securely fastened.CAUTION
When carrying cargo on the roof
rack, take the necessary precau-tions to make sure the cargo doesnot damage the roof of the vehicle.
When carrying large objects on the roof rack, make sure they donot exceed the overall roof length or width.
OAM049092
Page 157 of 328
485
Features of your vehicle
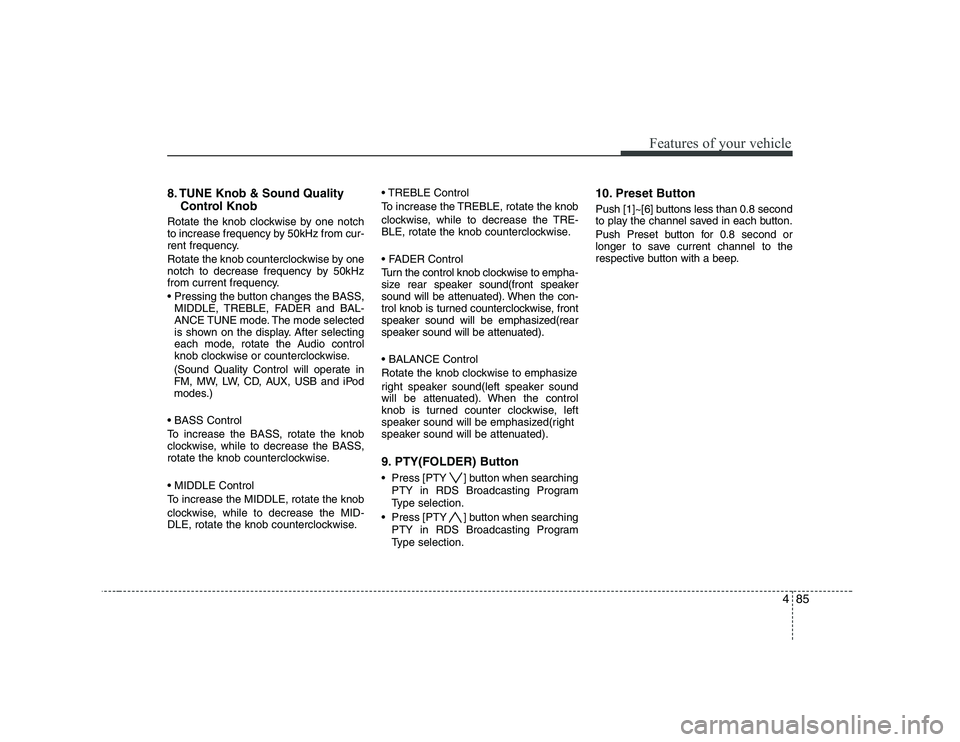
8. TUNE Knob & Sound QualityControl Knob
Rotate the knob clockwise by one notch
to increase frequency by 50kHz from cur-
rent frequency.
Rotate the knob counterclockwise by one
notch to decrease frequency by 50kHz
from current frequency.
MIDDLE, TREBLE, FADER and BAL-
ANCE TUNE mode. The mode selected
is shown on the display. After selecting
each mode, rotate the Audio control
knob clockwise or counterclockwise.
(Sound Quality Control will operate in
FM, MW, LW, CD, AUX, USB and iPod
modes.)
To increase the BASS, rotate the knob
clockwise, while to decrease the BASS,
rotate the knob counterclockwise.
To increase the MIDDLE, rotate the knob
clockwise, while to decrease the MID-
DLE, rotate the knob counterclockwise. Control
To increase the TREBLE, rotate the knob
clockwise, while to decrease the TRE-
BLE, rotate the knob counterclockwise.
Turn the control knob clockwise to empha-
size rear speaker sound(front speaker
sound will be attenuated). When the con-
trol knob is turned counterclockwise, front
speaker sound will be emphasized(rear
speaker sound will be attenuated).
Rotate the knob clockwise to emphasize
right speaker sound(left speaker sound
will be attenuated). When the control
knob is turned counter clockwise, left
speaker sound will be emphasized(right
speaker sound will be attenuated).
9. PTY(FOLDER) Button
Press [PTY ] button when searching
PTY in RDS Broadcasting Program
Type selection.
Press [PTY ] button when searching PTY in RDS Broadcasting Program
Type selection. 10. Preset Button
Push [1]~[6] buttons less than 0.8 second
to play the channel saved in each button.
Push Preset button for 0.8 second or
longer to save current channel to the
respective button with a beep.
Page 160 of 328
Features of your vehicle
88
4
8. TUNE Knob & Sound Quality
Control Knob
Rotate the knob clockwise by one notch
to increase frequency by 200kHz from
current frequency.
Rotate the knob counterclockwise by one
notch to decrease frequency by 200kHz
from current frequency.
MIDDLE, TREBLE, FADER and BAL-
ANCE TUNE mode. The mode selected
is shown on the display. After selecting
each mode, rotate the Audio control
knob clockwise or counterclockwise.
(Sound Quality Control will operate in FM,
AM, CD, AUX, USB, and iPod modes.)
To increase the BASS, rotate the knob
clockwise, while to decrease the BASS,
rotate the knob counterclockwise.
To increase the MIDDLE, rotate the knob
clockwise, while to decrease the MID-
DLE, rotate the knob counterclockwise. Control
To increase the TREBLE, rotate the knob
clockwise, while to decrease the TRE-
BLE, rotate the knob counterclockwise.
Turn the control knob clockwise to
emphasize rear speaker sound(front
speaker sound will be attenuated). When
the control knob is turned counterclock-
wise, front speaker sound will be empha-
sized(rear speaker sound will be attenu-ated).
Rotate the knob clockwise to emphasize
right speaker sound(left speaker sound
will be attenuated). When the control
knob is turned counter clockwise, left
speaker sound will be emphasized(right
speaker sound will be attenuated).
9. Preset Button
Push [1]~[6] buttons less than 0.8 second
to play the channel saved in each button.
Push Preset button for 0.8 second or
longer to save current channel to the
respective button with a beep.
Page 173 of 328
53
Driving your vehicle
E020100AUN
Before entering vehicle
• Be sure that all windows, outside mir-ror(s), and outside lights are clean.
Check the condition of the tires.
Check under the vehicle for any sign of leaks.
Be sure there are no obstacles behind you if you intend to back up.
E020200AUN
Necessary inspections
Fluid levels, such as engine oil, engine
coolant, brake fluid, and washer fluid
should be checked on a regular basis,
with the exact interval depending on the
fluid. Further details are provided in sec-
tion 7, “Maintenance”.
E020300BUN
Before starting
Close and lock all doors.
Position the seat so that all controls are easily reached.
Adjust the inside and outside rearview mirrors. Be sure that all lights work.
Check all gauges.
Check the operation of warning lights
when the ignition switch is turned to the ON position.
Release the parking brake and make sure the brake warning light goes out.
For safe operation, be sure you are famil-
iar with your vehicle and its equipment.
BEFORE DRIVING
WARNING
All passengers must be properly
belted whenever the vehicle is mov-
ing. Refer to “Seat belts” in section
3 for more information on their
proper use.
WARNING
Always check the surrounding
areas near your vehicle for people,
especially children, before putting a
car into D (Drive) or R (Reverse).
WARNING - Driving under
the influence of alcohol or drugs
Drinking and driving is dangerous.
Drunk driving is the number one
contributor to the highway death
toll each year. Even a small amount
of alcohol will affect your reflexes,
perceptions and judgment. Drivingwhile under the influence of drugs
is as dangerous or more dangerousthan driving drunk.
You are much more likely to have a
serious accident if you drink or
take drugs and drive.
If you are drinking or taking drugs,
don’t drive. Do not ride with a driv-er who has been drinking or taking
drugs. Choose a designated driveror call a cab.
WARNING
When you intend to park or stop the
vehicle with the engine on, be care-ful not to depress the accelerator
pedal for a long period of time. It
may overheat the engine or exhaust
system and cause fire.
Page 179 of 328
59
Driving your vehicle
E050200AUN-C1 Good driving practices
Never take the vehicle out of gear andcoast down a hill. This is extremely
hazardous. Always leave the vehicle in
gear.
Don't "ride" the brakes. This can cause them to overheat and malfunction.
Instead, when you are driving down a
long hill, slow down and shift to a lower
gear. When you do this, engine braking
will help slow down the vehicle.
Slow down before shifting to a lower gear. This will help avoid over-revving
the engine, which can cause damage.
Slow down when you encounter cross winds. This gives you much better con-
trol of your vehicle.
Be sure the vehicle is completely stopped before you attempt to shift into
reverse. The transaxle can be dam-
aged if you do not. To shift into reverse,
depress the clutch, move the shift lever
to neutral, then shift to the reverseposition. Exercise extreme caution when driving
on a slippery surface. Be especially
careful when braking, accelerating or
shifting gears. On a slippery surface,
an abrupt change in vehicle speed can
cause the drive wheels to lose traction
and the vehicle to go out of control.
WARNING
Always buckle-up! In a collision, an unbelted occupant is signifi-
cantly more likely to be seriously
injured or killed than a properlybelted occupant.
Avoid high speeds when corner- ing or turning.
Do not make quick steering wheel movements, such as sharp
lane changes or fast, sharp turns.
The risk of rollover is greatly increased if you lose control of
your vehicle at highway speeds.
Loss of control often occurs if two or more wheels drop off the
roadway and the driver over-
steers to reenter the roadway.
In the event your vehicle leaves the roadway, do not steer sharply.
Instead, slow down before pulling
back into the travel lanes.
Never exceed posted speed lim- its.