2009 KIA Sedona battery
[x] Cancel search: batteryPage 178 of 356

3 169
Features of your vehicle
Your new mirror comes with an integrat-
ed HomeLink Universal Transceiver,
which allows you to program the mirror to
activate your garage door(s), estate gate,
home lighting, etc. The mirror actually
learns the codes from your various exist-
ing transmitters.
ProgrammingYour vehicle may require the ignition
switch to be turned to the ACC position
for programming and/or operation of
HomeLink. It is also recommended that a
new battery be replaced in the hand-held
transmitter of the device being pro-
grammed to HomeLink for quicker train-
ing and accurate transmission of the
radio-frequency.
Follow these steps to train your
HomeLink mirror:
HOMELINK® WIRELESS CONTROL SYSTEM (IF EQUIPPED)
WARNING
When programming theHomeLink® Wireless Control
System, you may be operating a
garage door or gate operator.
Make sure that people and objects
are out of the way of the moving
door or gate to prevent potential
harm or damage.
(Continued)
(Continued)
Do not use HomeLink with anygarage door opener that lacks the
safety stop and reverse feature as
required by federal safety stan-
dards. (This includes any garage
door opener model manufactured
before April 1, 1982.) A garage
door opener which cannot detect
an object, signaling the door to
stop and reverse, does not meet
current federal safety standards.
Using a garage door opener with-
out these features increases risk
of serious injury or death. For
more information, call 1-800-355-
3515 or on the internet at
www.homelink.com.
Retain the original transmitter for future programming procedures
(i.e., new vehicle purchase). It is
also suggested that upon the sale
of the vehicle, the programmed
HomeLink buttons be erased for
security purposes (follow step 1
in the “Programming” portion of
this text).
OVQ036305N
Glare detection sensor
Indicator light
Homelink buttons
Page 188 of 356
3 179
Features of your vehicle
SunvisorUse the sunvisor to shield direct light
through the front or side windows.
To use a sunvisor, pull it downward.
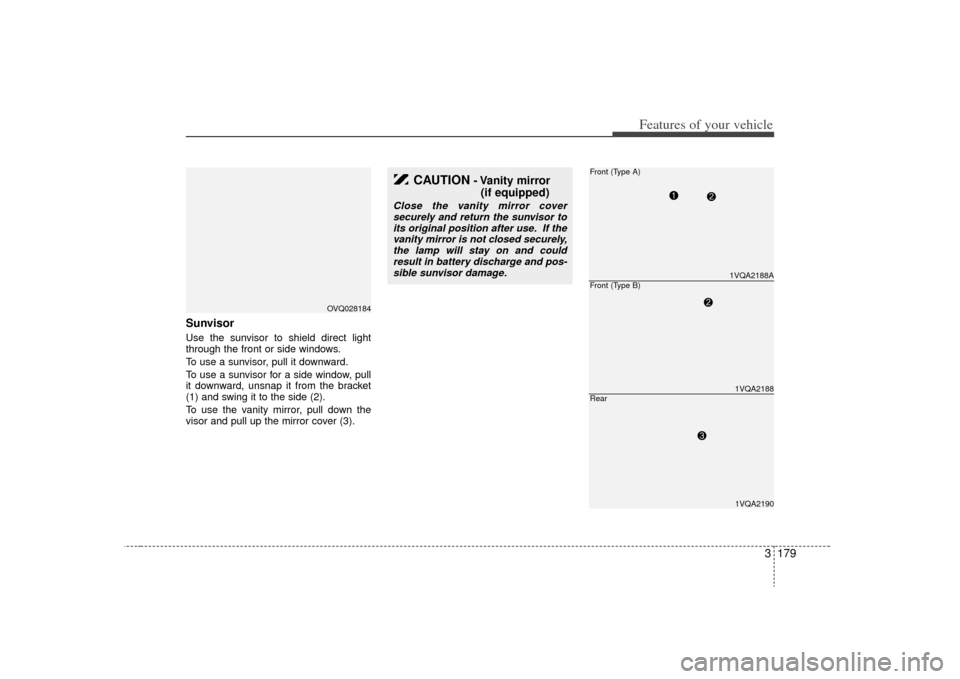
To use a sunvisor for a side window, pull
it downward, unsnap it from the bracket
(1) and swing it to the side (2).
To use the vanity mirror, pull down the
visor and pull up the mirror cover (3).
OVQ028184
CAUTION
- Vanity mirror (if equipped)
Close the vanity mirror cover
securely and return the sunvisor to its original position after use. If thevanity mirror is not closed securely,the lamp will stay on and couldresult in battery discharge and pos-sible sunvisor damage.
1VQA2188A
Front (Type A)
1VQA2188
Front (Type B)
1VQA2190
Rear
Page 189 of 356
Features of your vehicle180
3(1) : It can be used when the ignition
switch is in ACC or ON position.
(2), (3) : It can be used regardless of the ignition switch position.Power outletThe power outlets are designed to pro-
vide power for mobile telephones or
other devices designed to operate with
vehicle electrical systems. The devices
should draw less than 10 amps with the
engine running.
Digital clockWhenever the battery terminals, related
fuses are disconnected, you must reset
the time.
When the ignition switch is in the ACC or
ON position, the clock buttons operate as
follows:
CAUTION
Use power outlet only when theengine is running and remove theaccessory plug after use. Usingthe accessory plug for prolonged periods of time with the engineoff could cause the battery to dis-charge.
Only use 12V electric accessories which are less than 10A in elec-tric capacity.
Adjust the air-conditioner or heater to the lowest operatinglevel when using the power outlet.
Close the cover when not in use. Some electronic devices can cause electronic interferencewhen plugged into a vehicle’s power outlet. These devices maycause excessive audio static andmalfunctions in other electronic systems or devices used in yourvehicle.
OVQ038092N
Page 206 of 356
3197
Features of your vehicle
✽
✽NOTICE -
Using iPod device
• Some iPod models might not sup-
port the communication protocol
and the files will not be played.
(iPod models supported: Mini, 4G,
Photo, Nano, 5G)
• The order of search or playback of songs in the iPod can be different
from the order searched in the
audio system.
• If the iPod crashes due to its own trouble, reset the iPod. (Reset:
Refer to iPod manual)
• An iPod may not operate normally on low battery.
CAUTION
- Using iPod
device
You need the power cable exclu-
sive for an iPod in order to oper-ate an iPod with the buttons onthe audio system. The PC cableprovided by Apple may cause a malfunction and do not use it forvehicle use.
When connecting the device with an iPod cable, push in the jackfully to not interfere with commu-nication.
When adjusting the sound effects of an iPod and the audio system,the sound effects of both deviceswill overlap and might reduce or distort the quality of the sound.
Deactivate (turn off) the equalizer function of an iPod when adjust-ing the audio system’s volume, and turn off the equalizer of theaudio system when using the equalizer of an iPod.
(Continued)
(Continued) When the iPod cable is connected, the system can be switched to theAUX mode even without the iPod device and can cause noise.Disconnect the iPod cable when you are not using the iPod device.
When the iPod is not used for the audio system, the iPod cable hasto be separate from iPod devies. Origin display of iPod may not bedisplayed.
Page 224 of 356
3215
Features of your vehicle
✽
✽NOTICE
- Using iPod device
• Some iPod models might not support
the communication protocol and the
files will not be played. (iPod models
supported: Mini, 4G, Photo, Nano,
5G)
• The order of search or playback of songs in the iPod can be different
from the order searched in the audio
system.
• If the iPod crashes due to its own trou- ble, reset the iPod. (Reset: Refer to
iPod manual)
• An iPod may not operate normally on low battery.
CAUTION -
Using iPod
device
You need the power cable exclu-
sive for an iPod in order to oper-ate an iPod with the buttons onthe audio system. The PC cable provided by Apple may cause amalfunction and do not use it for vehicle use.
When connecting the device with an iPod cable, push in the jackfully to not to interfere with com-munication.
When adjusting the sound effects of an iPod and the audio system,the sound effects of both devices will overlap and might reduce ordistort the quality of the sound.
Deactivate (turn off) the equalizer function of an iPod when adjust-ing the audio system’s volume, and turn off the equalizer of theaudio system when using theequalizer of an iPod.
(Continued)
(Continued) When the iPod cable is connected, the system can be switched to theAUX mode even without the iPod device and can cause noise.Disconnect the iPod cable whenyou are not using the iPod device.
When the iPod is not used for the audio system, the iPod cable hasto be separate from iPod devies. Origin display of iPod may not bedisplayed.
Page 230 of 356

3221
Features of your vehicle
WelcomeThe Rear Seat Entertainment (RSE)
System is a compact, built-in, easy-to-use
entertainment system designed to provide
family fun while you are on the road. Enjoy
great quality sound from the vehicle
speakers, or have a private, quiet viewing
with the wireless headphones.
The display unit is mounted to the ceiling
in the rear passenger area of the vehicle,
allowing rear-seat passengers to play
DVD movies, video CDs or music CDs.
Users may also plug in a game platform or
VHS player. Headphones, game car-
tridges and other accessories can be kept
neatly out of the way in the 3rd-row arm-
rest compartment.System OverviewThe RSE System includes a mounted
color monitor with a built-in audio/video
control panel and a DVD player. It also
includes a remote control and two (2)
sets of battery-operated wireless head-
phones (batteries are included).
Connections / SetupThe RSE system is designed to make
your time on the road more enjoyable.
Please follow these instructions carefully
to get the most out of your RSE.
✽ ✽NOTICERSE operation is prevented during the
first 2 seconds after the ignition switch is
turned to ignition on or accessory mode.The RSE system is already set up and
ready for use. The system is always
“awake” when the vehicle's ignition is
turned on or when the vehicle is in
“accessory power mode.”
REAR SEAT ENTERTAINMENT SYSTEM (IF EQUIPPED)
CAUTION
Refrain from using food or drinks
near the RSE, the wireless head-phones or the remote control.
Direct sunlight may interfere with the headphone's operation andperformance.
Normal RSE operation cannot be guaranteed with unofficial dupli-cated discs.
In order to prevent inadvertent battery discharge, the RSE willremain in standby mode whenignition switch is turn to ignitionON or accessory mode.
Use of rear seat entertainment system without the engine run-ning will reduce battery power.
CAUTION
Disclaimer: The RSE system is pro- grammed to the regional displayformats for your region (NTSC or PAL). Please note that your RSE willnot read DVDs from a different region.
Page 232 of 356
3223
Features of your vehicle
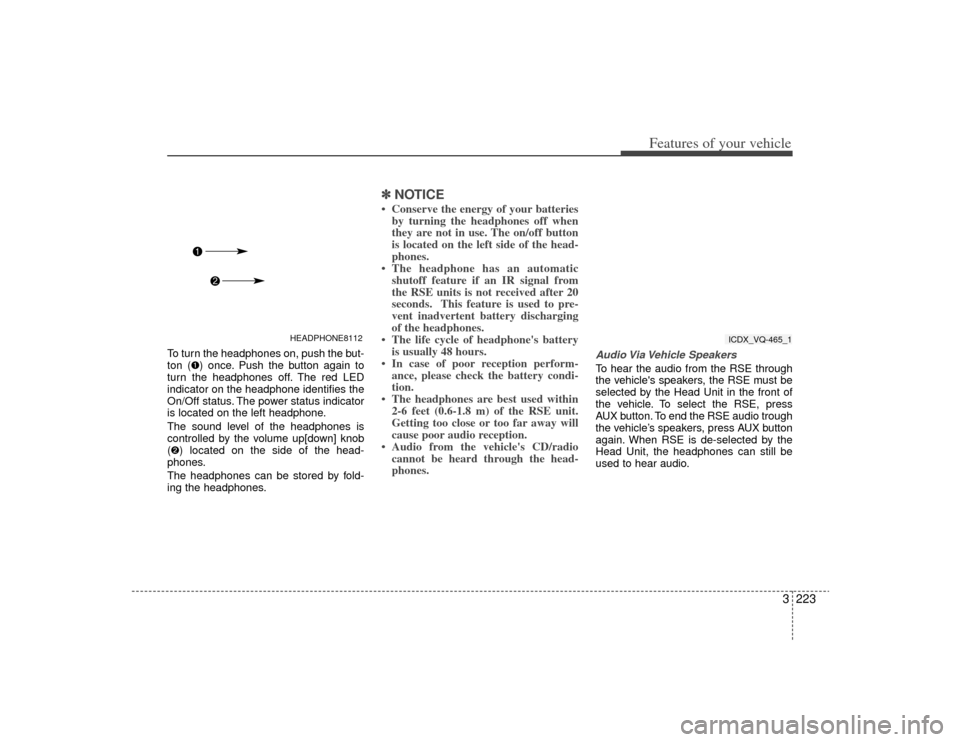
To turn the headphones on, push the but-
ton (➊) once. Push the button again to
turn the headphones off. The red LED
indicator on the headphone identifies the
On/Off status. The power status indicator
is located on the left headphone.
The sound level of the headphones is
controlled by the volume up[down] knob
(➋) located on the side of the head-
phones.
The headphones can be stored by fold-
ing the headphones.
✽ ✽ NOTICE• Conserve the energy of your batteries
by turning the headphones off when
they are not in use. The on/off button
is located on the left side of the head-
phones.
• The headphone has an automatic shutoff feature if an IR signal from
the RSE units is not received after 20
seconds. This feature is used to pre-
vent inadvertent battery discharging
of the headphones.
• The life cycle of headphone's battery is usually 48 hours.
• In case of poor reception perform- ance, please check the battery condi-
tion.
• The headphones are best used within 2-6 feet (0.6-1.8 m) of the RSE unit.
Getting too close or too far away will
cause poor audio reception.
• Audio from the vehicle's CD/radio cannot be heard through the head-
phones.
Audio Via Vehicle SpeakersTo hear the audio from the RSE through
the vehicle's speakers, the RSE must be
selected by the Head Unit in the front of
the vehicle. To select the RSE, press
AUX button. To end the RSE audio trough
the vehicle’s speakers, press AUX button
again. When RSE is de-selected by the
Head Unit, the headphones can still be
used to hear audio.
HEADPHONE8112
ICDX_VQ-465_1
Page 243 of 356

Features of your vehicle234
3Using the Remote ControlIn addition to having all the buttons and
functionality listed in the DVD and CD
Controls section, the remote control has
several other buttons that offer additional
functions. It is an infrared remote control,
and must be pointed at the face of the
RSE at a 45° angle for best results. It
requires a CR2025 battery (included).
The remote control has the following
additional buttons:✽ ✽
NOTICEThe RSE system is always “awake”
when the vehicle's ignition is turned on
or when the vehicle is in “accessory
power mode.”1. StopPressing this button once will stop DVD
or CD play. To eject a disc, you must use
the eject button on the control panel.2. Speaker Volume “+” and “-”These buttons control the volume of the
audio of a DVD or CD through the vehicle
speakers, not the volume from head-
phones. Press “+” to turn the volume up
and “-” to turn the volume down.
3. Play/PauseWhen an audio CD(VCD/DVD) is insert-
ed, the RSE will display the KIA logo,
then automatically begin playing the first
track. The track number and time elapsed
for the current track is displayed.
If a CD(VCD/DVD) is loaded and playing,
press the PLAY/PAUSE( ) button to
pause the CD(VCD/DVD). Press the but-
ton again to resume play.
If a CD(VCD/DVD) is already loaded,
stopping and playing the CD(VCD/ DVD)
by pressing PLAY/PAUSE( ) button on
the remote control; cycling the ignition and
pressing play; or changing the source will
cause the CD(VCD/DVD) to begin playing
at the point where it was stopped during
the previous play. The player will automati-
cally play this previous play position unless
the STOP/EJECT( ) button is pressed.
At the end of the CD(VCD/DVD), the
player will automatically return to the first
track and continue playing.4. DisplayWhen the player is in DVD mode, press the
DISP button to view the DVD title, chapter
number and elapsed time and other infor-
mation about the DVD currently playing. It will also display brightness. There are
“Day Time” brightness with brightest level
and “Night Time” brightness which has 70%
level of “Day Time” brightness. Adjust the
level of brightness by pressing the
REV(dimmer) or FWD(brighter) buttons.
The next time the player is turned on, it will
return to the brightness level it was adjusted
to when last used.
The RSE unit has two presets of display
brightness. When the headlamp is turned
on, the display brightness level will be
dimmed as the preset. However, when the
headlamp is turned off, the display bright-
ness will return to the daytime brightness.
Press DISP to adjust the image format. The
image format, also known as the aspect
ratio, is a ratio of the height to width of the
image on the screen. For example, a 4:3
ratio would mean an image that is 4 units by
3 units. You have two options: 4:3 (normal)
and 16:9 (widescreen). Press the display
button to select the preferred aspect ratio.
When the RSE unit receives video signals
from the AUX, the aspect ratio can be
changed to 16:9 or 4:3 by the DISP button.
The aspect ratio information will auto-
matically disappear if no button is
pressed for three seconds.