Page 22 of 521

General Information
The Sentry Key�system complies with FCC rules Part 15
and with RSS-210 of Industry Canada. Operation is
subject to the following conditions:
•This device may not cause harmful interference.
•This device must accept any interference that may be
received, including interference that may cause undes-
ired operation.
VEHICLE SECURITY ALARM
This Vehicle Security Alarm monitors the vehicle doors,
liftgate, liftgate flipper glass, and ignition for unautho-
rized operation. When the alarm is activated, the Vehicle
Security Alarm provides both audible and visible signals.
The horn, headlights, and tail lights will sound/flash
repeatedly for three minutes. If disturbance is still
present (driver’s door, passenger door, other doors, igni-
tion) after three minutes, the headlights and tail lights
will flash for an additional 15 minutes.NOTE:The Panic and Security alarms are quite differ-
ent. Please take a moment to activate the Panic and the
Security modes to hear the differences in the horn. In case
one should go off in the future, you will need to know
which mode has been activated in order to deactivate it.
Rearming The System
If something triggers the alarm, and no action is taken to
disarm it, the Vehicle Security Alarm will turn off the
horn after three minutes, turn off all of the visual signals
after 15 minutes, and then the Vehicle Security Alarm will
rearm itself.
To Set the Alarm
The alarm will set when you use the Remote Keyless
Entry (RKE) transmitter to lock the doors and liftgate, or
when you use the power door lock switch while the door
is open. After all the doors are locked and closed, the
Vehicle Security Light (located in the instrument cluster)
will flash rapidly for about 16 seconds to signal that the
20 THINGS TO KNOW BEFORE STARTING YOUR VEHICLE
Page 101 of 521

Turning Confirmation Prompts ON/OFF
Turning confirmation prompts off will stop the system
from confirming your choices (e.g., the uconnect�phone
will not repeat a phone number before you dial it).
•Press the PHONE button to begin.
•After the�Ready�prompt and the following beep, say
�Setup Confirmations.�The uconnect�phone will play
the current confirmation prompt status and you will
be given the choice to change it.
Phone and Network Status Indicators
If available on the radio and/or on a premium display
such as the instrument panel cluster, and supported by
your cellular phone, the uconnect�phone will provide
notification to inform you of your phone and network
status when you are attempting to make a phone call
using uconnect�phone. The status is given for roaming,
network signal strength, phone battery strength, etc.
Dialing Using the Cellular Phone Keypad
You can dial a phone number with your cellular phone
keypad and still use the uconnect�phone (while dialing
via the cellular phone keypad, the user must exercise
caution and take precautionary safety measures). By
dialing a number with your paired Bluetooth�cellular
phone, the audio will be played through your vehicle’s
audio system. The uconnect�phone will work the same
as if you dial the number using voice recognition.
NOTE:Certain brands of cellular phones do not send
the dial ring to the uconnect�phone to play it on the
vehicle audio system, so you will not hear it. Under this
situation, after successfully dialing a number the user
may feel that the call did not go through even though the
call is in progress. Once your call is answered, you will
hear the audio.
UNDERSTANDING THE FEATURES OF YOUR VEHICLE 99
3
Page 137 of 521
Battery Saver Feature
If the multifunction lever is left in the interior light
position, parking light position, or the headlight position
when the ignition switch is moved to the LOCK position,
the battery saver feature will automatically turn off the
exterior and interior lights after eight minutes. Normal
operation will resume when the ignition is turned ON or
when the headlight switch is turned to another position.
Lights-On Reminder
If the headlights or parking lights are on after the ignition
switch has been turned to LOCK/ACC, a chime will
sound when the driver’s door is opened.
Fog Lights — If Equipped
The fog light switch is located in the multifunction
lever. To activate the fog lights, turn on the park/turn lights, low beam headlights, or Auto headlights and
pull out the end of the multifunction lever. A light in the
instrument cluster shows when the fog lights are on.
Front Fog Light Control
UNDERSTANDING THE FEATURES OF YOUR VEHICLE 135
3
Page 138 of 521
NOTE:
•Turning on the high beam headlights turns off the fog
lights.
•A front fog light is a lighting device that provides
illumination in front of the vehicle under conditions of
fog, rain, snow, or dust. The front fog lights supple-
ment the lower beam of a standard headlight system.
•Proper aim and adjustment of the front fog lights
should be made to prevent excessive glare for other
drivers.
Turn Signals
Move the multifunction lever up or down, and the
arrows on each side of the instrument cluster will flash to
show proper operation of the left and right turn signal
lights. You can signal a lane change by moving the
multifunction lever partially up or down.Turn Signal Auto-Mode
Tap the multifunction lever once, and the turn signal (left
or right) will flash three times and automatically turn off.
Turn Signal Control
136 UNDERSTANDING THE FEATURES OF YOUR VEHICLE
Page 147 of 521

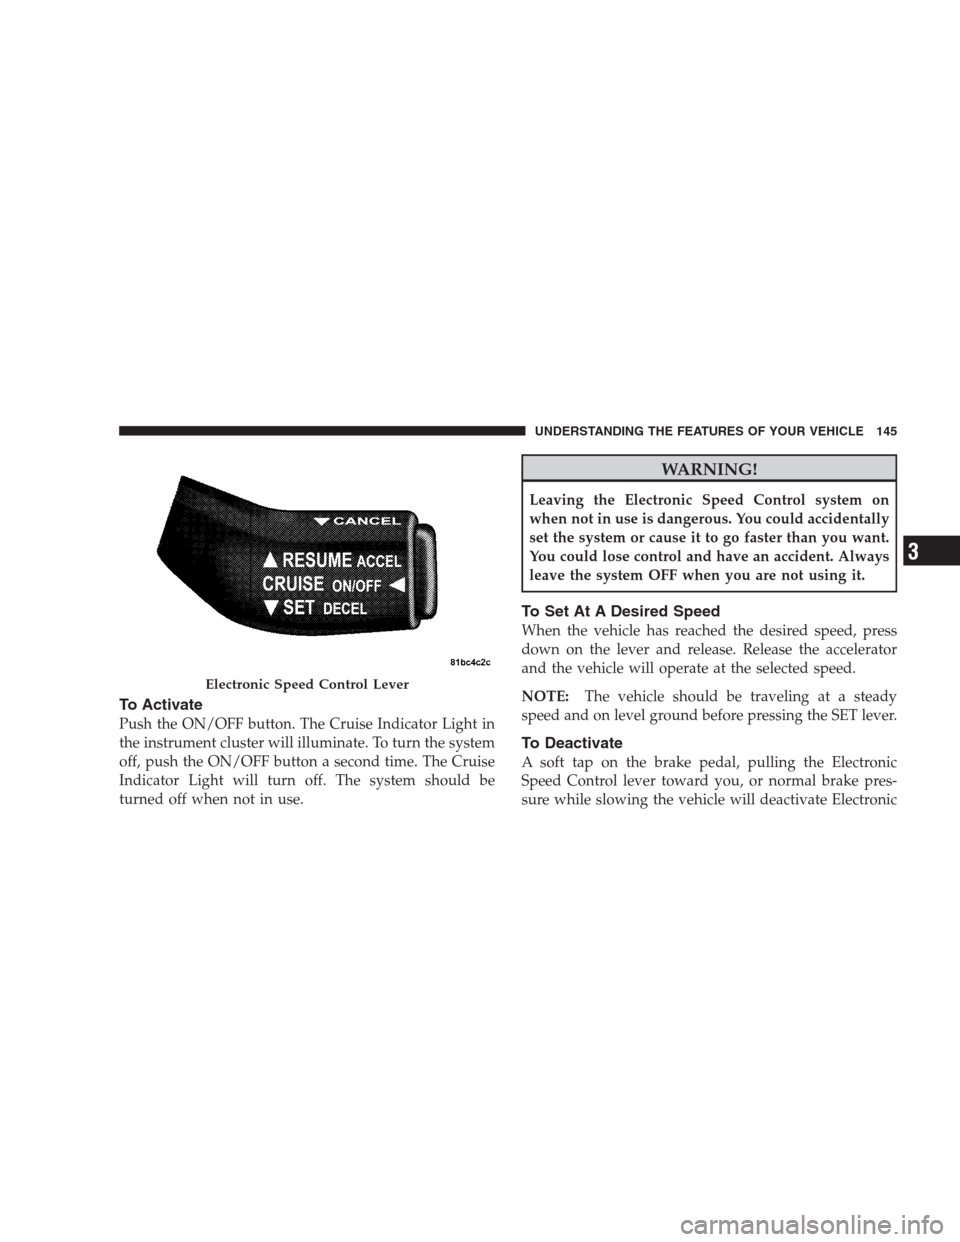
To Activate
Push the ON/OFF button. The Cruise Indicator Light in
the instrument cluster will illuminate. To turn the system
off, push the ON/OFF button a second time. The Cruise
Indicator Light will turn off. The system should be
turned off when not in use.
WARNING!
Leaving the Electronic Speed Control system on
when not in use is dangerous. You could accidentally
set the system or cause it to go faster than you want.
You could lose control and have an accident. Always
leave the system OFF when you are not using it.
To Set At A Desired Speed
When the vehicle has reached the desired speed, press
down on the lever and release. Release the accelerator
and the vehicle will operate at the selected speed.
NOTE:The vehicle should be traveling at a steady
speed and on level ground before pressing the SET lever.
To Deactivate
A soft tap on the brake pedal, pulling the Electronic
Speed Control lever toward you, or normal brake pres-
sure while slowing the vehicle will deactivate Electronic
Electronic Speed Control Lever
UNDERSTANDING THE FEATURES OF YOUR VEHICLE 145
3
Page 152 of 521

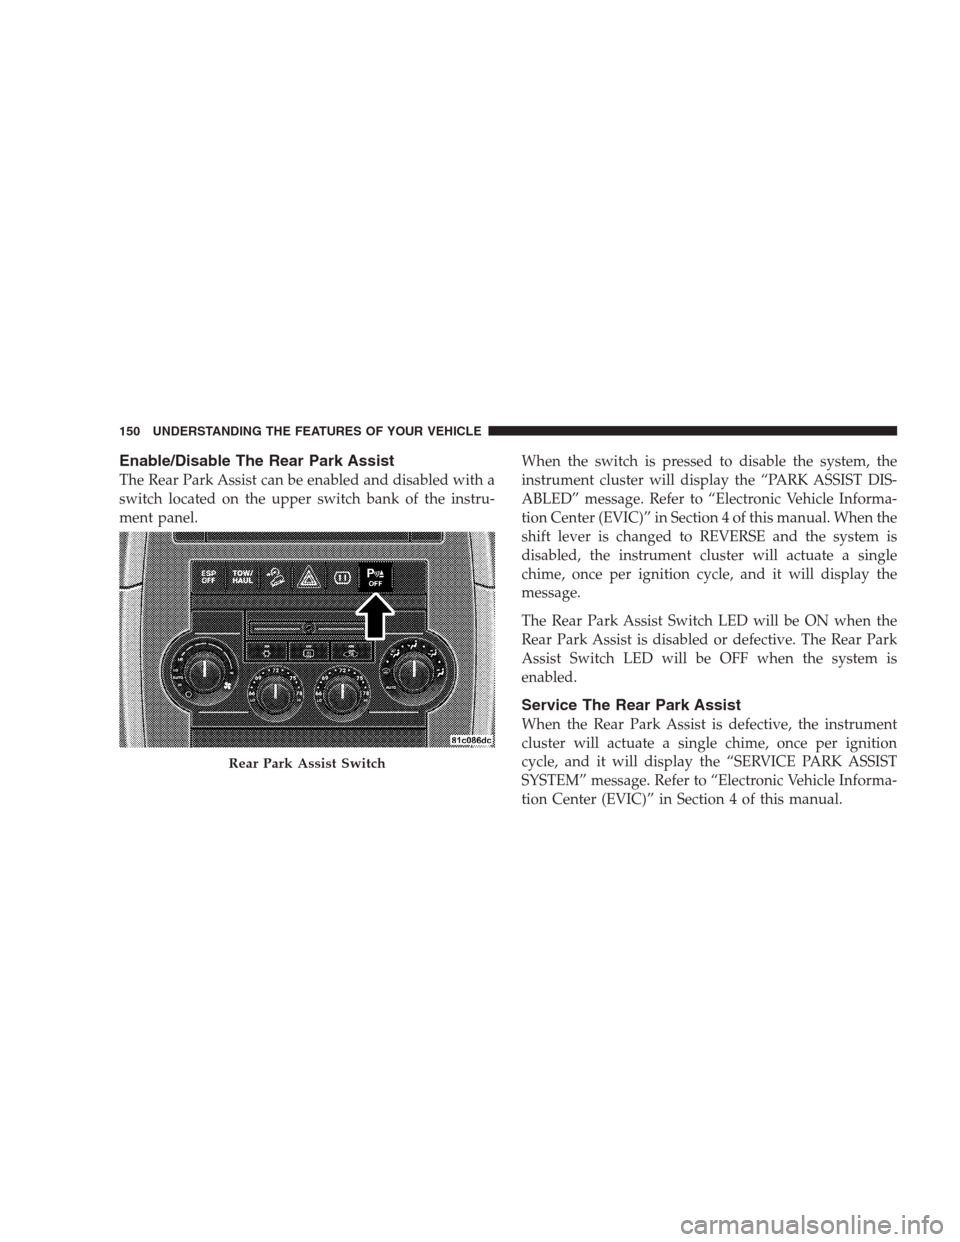
Enable/Disable The Rear Park Assist
The Rear Park Assist can be enabled and disabled with a
switch located on the upper switch bank of the instru-
ment panel.When the switch is pressed to disable the system, the
instrument cluster will display the “PARK ASSIST DIS-
ABLED” message. Refer to “Electronic Vehicle Informa-
tion Center (EVIC)” in Section 4 of this manual. When the
shift lever is changed to REVERSE and the system is
disabled, the instrument cluster will actuate a single
chime, once per ignition cycle, and it will display the
message.
The Rear Park Assist Switch LED will be ON when the
Rear Park Assist is disabled or defective. The Rear Park
Assist Switch LED will be OFF when the system is
enabled.
Service The Rear Park Assist
When the Rear Park Assist is defective, the instrument
cluster will actuate a single chime, once per ignition
cycle, and it will display the “SERVICE PARK ASSIST
SYSTEM” message. Refer to “Electronic Vehicle Informa-
tion Center (EVIC)” in Section 4 of this manual.
Rear Park Assist Switch
150 UNDERSTANDING THE FEATURES OF YOUR VEHICLE
Page 179 of 521
UNDERSTANDING YOUR INSTRUMENT PANEL
CONTENTS
�Instrument Panel Features............... 181
�Instrument Cluster – Gasoline Engine....... 182
�Instrument Cluster – Diesel Engine......... 183
�Instrument Cluster Description............ 184
�Electronic Vehicle Information Center (EVIC) . . 193
▫Electronic Vehicle Information Center (EVIC)
Displays........................... 195
▫Engine Oil Change Indicator System....... 198
▫Trip Functions...................... 198▫Compass Display.................... 200
▫Personal Settings (Customer-Programmable
Features).......................... 202
▫System Status....................... 206
�Sales Code REQ — AM/FM Stereo Radio And
6–Disc CD/DVD Changer (MP3/WMA AUX
Jack)............................... 208
▫Operating Instructions - Radio Mode...... 208
▫Operation Instructions - (Disc Mode For CD
And MP3/WMA Audio Play, DVD-Video) . . . 2164
Page 183 of 521
INSTRUMENT PANEL FEATURES
1 - Air Outlet 5 - Upper Switch Bank 9 - Lower Switch Bank
2 - Instrument Cluster 6 - Power Outlet/Cigar Lighter 10 - Climate Controls
3 - Radio 7 - Storage Bin 11 - Ignition Switch
4 - Glove Compartment 8 - Power Outlet 12 - Storage BinUNDERSTANDING YOUR INSTRUMENT PANEL 181
4