Page 194 of 521

NOTE:You must apply the brakes before shifting from
PARK.
22. Fuel Gauge
The pointer shows the level of fuel in the fuel tank when
the ignition switch is in the ON position.
23. Electronic Throttle Control (ETC) Warning Light
This light informs you of a problem with the
Electronic Throttle Control (ETC) system. If a
problem is detected the light will come on
while the engine is running. Cycle the ignition
key when the vehicle has completely stopped and the
shift lever is placed in the PARK position. The light
should turn off. If the light remains lit with the engine
running your vehicle will usually be drivable, however,
see your authorized dealer for service as soon as possible.
If the light is flashing when the engine is running,
immediate service is required and you may experience
reduced performance, an elevated/rough idle or enginestall and your vehicle may require towing. The light will
come on when the ignition is first turned on and remain
on briefly as a bulb check. If the light does not come on
during starting, have the system checked by an autho-
rized dealer.
24. Front Fog Light Indicator — If Equipped
This light shows the front fog lights are ON.
25. Charging System Light
This light shows the status of the electrical charg-
ing system. The light should come on when the
ignition switch is first turned ON and remain on briefly
as a bulb check. If the light stays on or comes on while
driving, turn off some of the vehicle’s non-essential
electrical devices or increase engine speed (if at idle). If
the charging system light remains on, it means that the
192 UNDERSTANDING YOUR INSTRUMENT PANEL
Page 297 of 521
drops below a calibrated speed, or during acceleration,
the clutch automatically and smoothly disengages. The
feature is operational in Overdrive and in DRIVE.
NOTE:
•The torque converter clutch will not engage until the
transmission fluid and engine coolant are warm [usu-
ally after 1 to 3 miles (1.6 to 4.8 km) of driving].
Because the engine speed is higher when the torque
converter clutch is not engaged, it may seem as if the
transmission is not shifting into Overdrive when cold.
This is normal. Manually shifting (using the ERS shift
control) between 4 (direct gear) and 5/D (Overdrive
gear) positions will demonstrate that the transmission
is able to shift into and out of Overdrive. For vehicles
with 4.7L or 5.7L engines (which have two Overdrive
gears), the transmission may not shift into the top
Overdrive gear (normal 5th gear) until the transmis-
sion fluid and engine coolant are warm.
•If the vehicle has not been driven in several days, the
first few seconds of operation after shifting the trans-
mission into gear may seem sluggish. This is due to the
fluid partially draining from the torque converter into
the transmission. This condition is normal and will not
cause damage to the transmission. The torque con-
verter will refill within five seconds of shifting from
PARK into any other gear position.
Rocking The Vehicle
If the vehicle becomes stuck in snow, sand, or mud, it can
often be moved by a rocking motion. Move the shift lever
between DRIVE and REVERSE, while applying slight
pressure to the accelerator.
NOTE:The Electronic Stability Program (ESP) and
Traction Control (if equipped) should be turned OFF
before attempting to rock the vehicle. Refer to “Electronic
Brake Control System” in Section 3 of this manual.
STARTING AND OPERATING 295
5
Page 306 of 521
Hill Climbing
NOTE:Before attempting to climb a hill, determine the
conditions at the crest and/or on the other side.
Before climbing a steep hill,shift the transmission to a
lower gear and shift the transfer case to 4WD LOW. Use
first gear and 4WD LOW for very steep hills.
If you stall or begin to lose forward motionwhile
climbing a steep hill, allow your vehicle to come to a stop
and immediately apply the brakes. Restart the engine,
and shift into REVERSE. Back slowly down the hill,
allowing the compression braking of the engine to help
regulate your speed. If the brakes are required to control
vehicle speed, apply them lightly and avoid locking or
skidding the tires.
WARNING!
If the engine stalls, you lose forward motion, or
cannot make it to the top of a steep hill or grade,
never attempt to turn around. To do so may result in
tipping and rolling the vehicle. Always back care-
fully straight down a hill in REVERSE gear. Never
back down a hill in NEUTRAL using only the brake.
Remember, never drive diagonally across a hill always
drive straight up or down.
If the wheels start to slip as you approach the crest of a
hill, ease off the accelerator and maintain forward motion
by turning the front wheels slowly. This may provide a
fresh “bite” into the surface and will usually provide
traction to complete the climb.
304 STARTING AND OPERATING
Page 310 of 521
WARNING!
Fluid level should be checked on a level surface and
with the engine off to prevent injury from moving
parts and to ensure accurate fluid level reading. Do
not overfill. Use only manufacturers recommended
power steering fluid.
If necessary, add fluid to restore to the proper indicated
level. With a clean cloth, wipe any spilled fluid from all
surfaces.
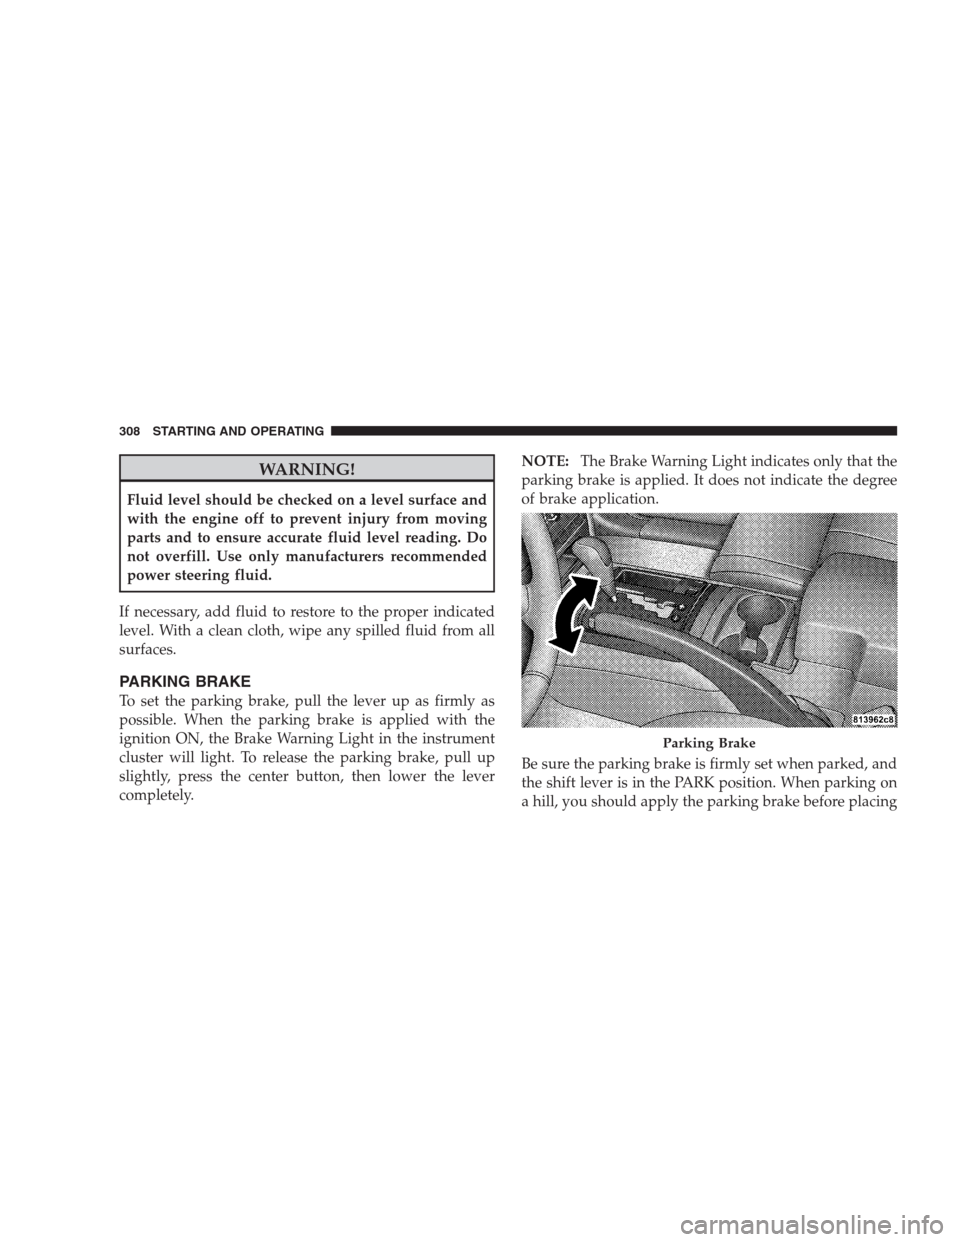
PARKING BRAKE
To set the parking brake, pull the lever up as firmly as
possible. When the parking brake is applied with the
ignition ON, the Brake Warning Light in the instrument
cluster will light. To release the parking brake, pull up
slightly, press the center button, then lower the lever
completely.NOTE:The Brake Warning Light indicates only that the
parking brake is applied. It does not indicate the degree
of brake application.
Be sure the parking brake is firmly set when parked, and
the shift lever is in the PARK position. When parking on
a hill, you should apply the parking brake before placing
Parking Brake
308 STARTING AND OPERATING
Page 312 of 521

wheel lock-up and help avoid skidding on slippery
surfaces.
All vehicle wheels and tires must be the same size and
type, and tires must be properly inflated, to produce
accurate signals for the computer.
WARNING!
Significant over or under-inflation of tires or mixing
sizes of tires or wheels on the vehicle can lead to loss
of braking effectiveness.
The ABS conducts a low-speed self-test at about 12 mph
(20 km/h). If you have your foot lightly on the brake
while this test is occurring, you may feel slight pedal
movement. The movement can be more apparent on ice
and snow. This is normal.The ABS pump motor runs during the self-test at 12 mph
(20 km/h) and during an ABS stop. The pump motor
makes a low humming noise during operation, which is
normal.
WARNING!
•Pumping of the Anti-Lock Brakes will diminish
their effectiveness and may lead to an accident.
Pumping makes the stopping distance longer. Just
press firmly on your brake pedal when you need
to slow down or stop.
•The ABS cannot prevent the natural laws of phys-
ics from acting on the vehicle, nor can it increase
braking or steering efficiency beyond that af-
forded by the condition of the vehicle brakes and
tires or the traction afforded.
(Continued)
310 STARTING AND OPERATING
Page 322 of 521
WARNING!
With the ESP switched off, the enhanced vehicle
stability offered by ESP and ERM are unavailable. In
an emergency evasive maneuver, the ESP and ERM
systems will not engage to assist in maintaining
stability. The “Full Off” mode is intended for off-
road use only.
TSC (Trailer Sway Control)
TSC uses sensors in the vehicle to recognize an exces-
sively swaying trailer and will take the appropriate
actions to attempt to stop the sway. The system may
reduce engine power and apply the brake of the appro-
priate wheel(s) to counteract the sway of the trailer. TSC
will become active automatically once an excessively
swaying trailer is recognized. No driver action is re-
quired. Note that TSC cannot stop all trailers from
swaying. Always use caution when towing a trailer andfollow the trailer tongue weight recommendations. Refer
to “Trailer Towing” in Section 5 of this manual. When
TSC is functioning, the ESP/TCS Indicator Light will
flash, the engine power may be reduced and you may
feel the brakes being applied to individual wheels to
attempt to stop the trailer from swaying. TSC is disabled
when the ESP system is in the “Partial Off” or “Full Off”
modes.
WARNING!
If TSC activates while driving, slow the vehicle
down, stop at the nearest safe location, and adjust the
trailer load to eliminate trailer sway.
HSA (Hill Start Assist) (4WD Models With NV245
Two–Speed Transfer Case Only)
The HSA system is designed to assist the driver when
starting a vehicle from a stop on a hill. HSA will maintain
the level of brake pressure the driver applied for a short
320 STARTING AND OPERATING
Page 323 of 521
period of time after the driver takes their foot off of the
brake pedal. If the driver does not apply the throttle
during this short period of time, the system will release
brake pressure and the vehicle will roll down the hill. The
system will release brake pressure in proportion to
amount of throttle applied as the vehicle starts to move in
the intended direction of travel.
HSA Activation Criteria
The following criteria must be met in order for HSA to
activate:
•Vehicle must be stopped.
•Vehicle must be on a 8% grade or greater hill.
•Gear selection matches vehicle uphill direction (i.e.,
vehicle facing uphill is in forward gear; vehicle back-
ing uphill is in REVERSE gear).HSA will work in REVERSE and all forward gears when
the activation criteria have been met. The system will not
activate if the vehicle is placed in NEUTRAL or PARK.
WARNING!
There may be situations on minor hills (i.e., less than
8%), with a loaded vehicle, or while pulling a trailer,
when the system will not activate and slight rolling
may occur. This could cause a collision with another
vehicle or object. Always remember the driver is
responsible for braking the vehicle.
Towing with HSA
HSA will provide assistance when starting on a grade
when pulling a trailer.
STARTING AND OPERATING 321
5
Page 325 of 521
HDC (Hill Descent Control) (4WD Models With
NV245 Two–Speed Transfer Case Only)
HDC maintains vehicle speed while descending hills
during off-road driving situations and is available in
4WD LOW range only. To enable HDC (transfer case
must be in 4WD LOW range), press the HDC switch. If
the HDC switch is pressed when the vehicle is not in
4WD LOW range, the light in the switch will flash for five
seconds and HDC will not be enabled.
When HDC is properly enabled, the message “HILL
DESCENT CONTROL” will appear in the EVIC and the
light in the switch will be illuminated. HDC will auto-
matically apply the brakes to control downhill speed
when necessary. HDC has the capability to sense terrain
Hill Descent Switch
STARTING AND OPERATING 323
5