2009 JAGUAR XF ignition
[x] Cancel search: ignitionPage 146 of 391

Brakes
146
Emergency Brake Assist (EBA)
The EBA system measures the rate at which the
brake pressure increases. If the system detects
an emergency braking situation, EBA
automatically init iates full braking effect. This
can reduce stopping dist ances in critical
situations.
EBA stops operating as soon as the brake pedal
is released.
EBA is part of the Dynamic Stability
Control (DSC) system and a fault
with the EBA system is indicated by
the amber DSC warning indicator illuminating
and DSC NOT AVAILABLE (with amber
backlight) displaying in the message centre.
Seek qualified assistan ce as soon as possible.
Brake vacuum assist
(V6 petrol models only)
When the engine is cold and/or engine vacuum
is low, Brake vacuum assist provides additional
brake pedal assistance. When the function is
operating, a pulsation ma y be felt through the
brake pedal - this is not a cause for concern.
A fault is indicate d by the message BRAKE
ASSIST FAULT (with amber backlight)
appearing in the message centre. Increased
brake pedal effort may be required to slow the
vehicle when the engine is cold and/or engine
vacuum is low. Seek qualified assistance.
ELECTRIC PARKING BRAKE (EPB)
The switch which operate s the parking brake is
mounted on the centre c onsole to the rear of
the gear selector.
To engage the parking brake (1): Pull the
parking brake switch up wards and release. The
switch will return to the neutral position. The
Parking brake warning and Brake fluid low
warning indicator on the instrument panel will
illuminate.
The Drive Away Release feature allows the
parking brake to release automatically as the
vehicle is driven away.
To disengage the parking brake (2): With the
ignition system on or with the engine running,
apply the foot brake and press the parking
brake switch down.
If the parking brake is a pplied while the vehicle
is stationary and D or R is selected, applying
the throttle will auto matically release the
parking brake.
The parking brake is also automatically
released when the gear selector is moved from
the P position.
WARNING
The EBA system is an additional
safety system; it is not intended to
relieve the driver of his or her
responsibility for exercising due care and
attention when driving.12
E95148
Page 147 of 391

147
Brakes
If the parking brake is inadvertently applied
when the vehicle is moving at above 3 km/h
(1.8 mph), PARK BRAKE APPLIED is displayed
in the message centre, the warning indicator in
the instrument panel will illuminate and a
warning chime will sound.
If the parking brake is a pplied whilst the vehicle
is moving, releasing the switch will disengage
the parking brake. The parking brake cannot be
applied when the vehicle is moving, if the
accelerator pedal is pressed.
Note: If the vehicle is in motion, the parking
brake should only be used as an emergency
brake.
The warning indicator in the instrument panel
will remain on for a short time, if the parking
brake is applied when the ignition system is
reverted to the convenience mode.
If a fault in the system is detected,
the amber brake warning indicator
will illuminate and PARK BRAKE
FAULT or CANNOT APPLY PARK BRAKE will
be displayed in the message centre. Seek
qualified assistance as soon as possible.
If the battery has been discharged or
disconnected, APPLY FOOT AND PARK BRAKE
will be displayed in the message centre when
the ignition is next switched on. Depress the
foot brake and pull the parking brake switch up
to apply the parking brake. This is required to
reset the parking brake system. The parking
brake will now function correctly.
CAUTION
Always apply the parking brake when
the vehicle is parked.
Page 148 of 391

Parking aid
148
PRINCIPLE OF OPERATION
Note: Once the system has been activated by
selecting reverse or using the switch, the front
and rear sensors are active when the gear
selector is in neutral. Therefore, if an obstacle
is detected an audible warning tone will sound.
The parking aid is automatically in standby
when the ignition is on and provides the driver
with information on most obstructions, and
their distance from the vehicle, when
manoeuvring. This is ac hieved by using four
ultrasonic sensors on each bumper.
When objects are detected the Park aid will
emit a warning tone which increases in
frequency and then becomes constant, as the
vehicle gets closer to the object.
USING THE PARKING AID
Touch-screen
To set the volume of the parking aid warning
tones:
• Select Vehicle from the touch-screen
Home menu, then select Veh. settings.
• Select Parking , then select Vol. presets.
Touch the Parking aid + or - button to increase
or decrease the warning tone volume.
Note: This adjusts both front and rear speaker
volume.
WARNINGS
It remains the driver’s responsibility
to be vigilant when reversing. Small
children or animals may not be
detected by the system.
It remains the driver’s responsibility
to detect obstacles and estimate the
vehicle’s distance from them. Some
overhanging objects , barriers, thin
obstructions or painted surfaces which could
possibly cause damage to the vehicle may not
be detected by the system. Always be vigilant
when reversing.
CAUTIONS
Objects moving away from the vehicle
will be reported. Howe ver, whilst driving
away, object warning may be temporarily
reported due to ground reflection.
Systems using the same frequency
band as the front parking sensors, may
cause irregular tones to be emitted.
mirror dip
Vol. presetsOff
On
Vehicle
Security
ParkingReverse
12 : 26 pm
Navigat
Phone
Vehicle
Display set.
Preferences
Button audioParking aid
Vol. presets
AVC Low
MediumHigh
12 : 26 pm
Valet mode
E94137
Page 149 of 391

149
Parking aid
When the parking aid is active, a pop-up screen
is initiated displaying a plan view of the vehicle
and the immediate surrounding area. This can
be cancelled by touching the screen within the
pop-up area.
Note: If a rear-view camera is fitted, when
reverse gear (R ) is selected, the camera display
is selected automatically. To view the parking
aid display, touch the screen. The rear view
camera will indicate wh en a rear parking aid
sensor has been activated, by showing a red
panel over the relevant area of the camera
display. See Rear view camera (page 152).
Rear parking aid
The rear parking aid operates only with the
ignition is on and reve rse gear selected. If
obstacles are detected within operating range
(shown in next illustra tion), the parking aid
automatically provides an audible proximity
warning. 1.
Approximately 600 mm (24 inches).
2. Approximately 1800mm (71 inches).
Note: The outer rear sensors ( 1) will show
visual detection on the touch-screen, before
the audible warn ing is given.
Hom
Audi
Clim
Phon
Navi
Vehi
Valet12:26 pm
Parking aid alert
E94138
E94139
21
E94140
Page 151 of 391

151
Parking aid
The front or rear warning tone will become
continuous when the obstacle is detected at or
within 300 mm (12 inches) from the vehicle.
Note: The outer front and rear sensors will
switch off if the distance to an object increases
or remains constant for 3 seconds. The
sensors will reactivate automatically if a new
object is detected with in the operating range,
or if the distance to the original object reduces.
Rear fitted accessories
Particular care must be taken when reversing
with rear fitted accessories e.g. bicycle carrier,
as the rear park assist will only indicate the
distance from the bumper to the obstacle.
Cleaning the sensors
Do not clean the sensors with abrasive or sharp
objects or materials.
For reliable operation, th e sensors in the front
and rear bumpers should be kept free from ice,
frost and grime.
When using a high pressure spray the sensors
should only be sprayed br iefly and not from a
distance of less than 200 mm (8 inches).
System fault
If the system has a fault when engaging reverse
gear or turning on the ignition, then a single,
three second tone will be heard (only once per
ignition cycle) and a pop-up warning will
appear on the touch-scre en. If both front and
rear parking aids are fitted, the warning
indicator in the parking aid switch will flash for
three seconds and then switch off, if a fault is
detected.
If a fault is detected, the system is
automatically disabled.
The parking aid may sound spurious tones if it
detects a frequency tone using the same band
as the sensors (e.g. air brakes).
Page 153 of 391

153
Rear view camera
Camera overlays
A.Solid line: This is the projected wheel
trajectory.
B. Dotted line: This is the safe working width
of the vehicle (includi ng standard exterior
mirrors).
C. Boot access guideline: Do not reverse the
vehicle beyond this point if access to the
boot is required.
D. Rear bumper.
E. Parking sensor activa tion: A red area will
appear on the camera image, to indicate
which rear parking sensor(s) has been
activated.
C
BA
D
JAG1651
C
B
A
D
E
JAG1652
CAUTIONS
If, after the ignition has been switched
off, the steering wheel is turned, the
projected wheel trajecto ry graphics (A) will
display as being straight (as in the second
illustration), until the vehicle is driven for
approximately 10 seconds.
Page 157 of 391

157
Cruise control
Changing the speed
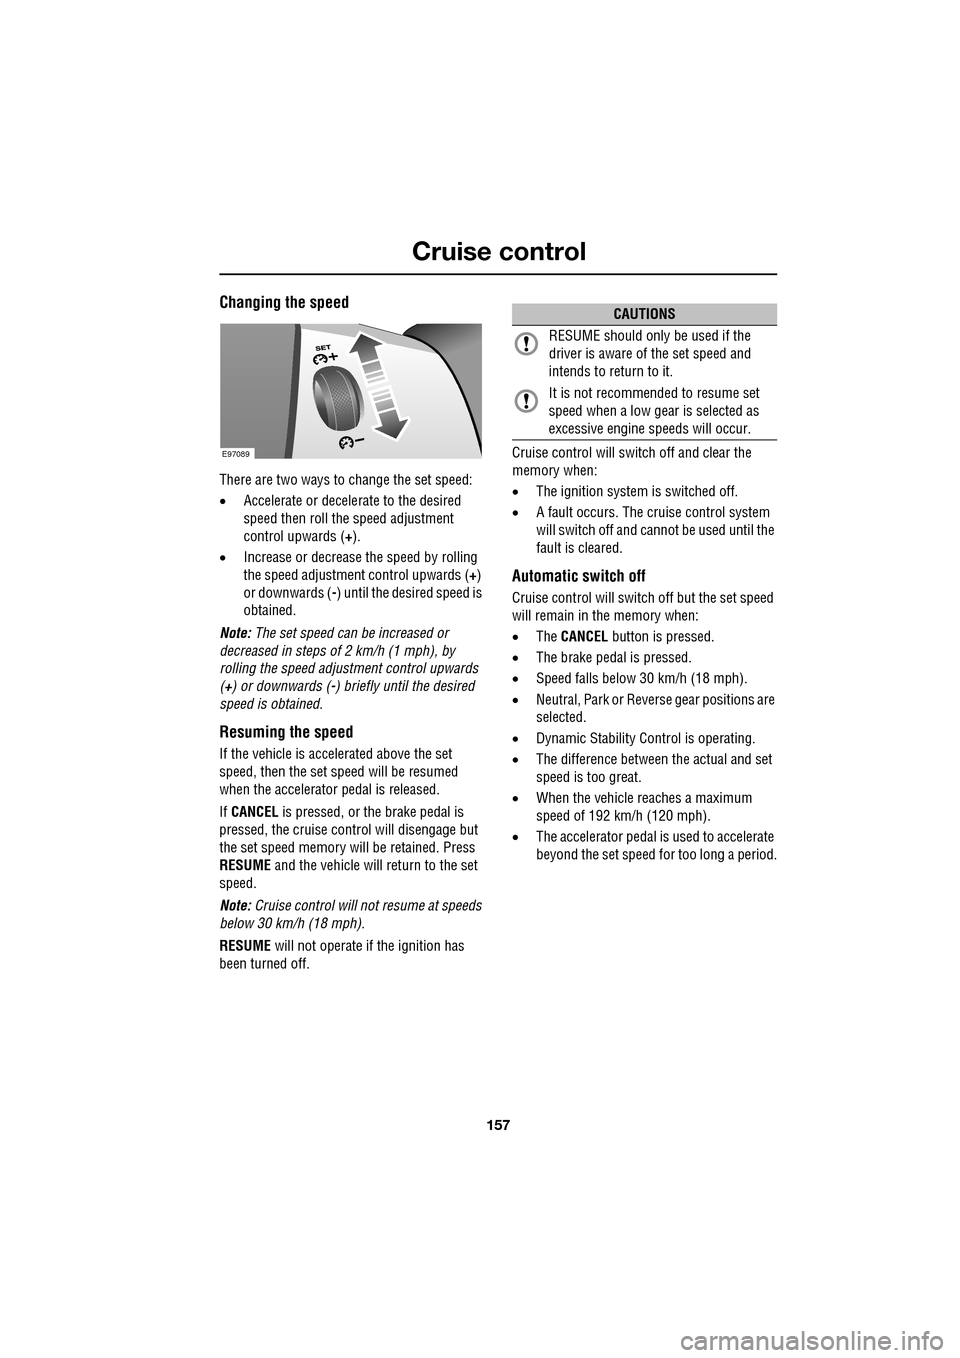
There are two ways to change the set speed:
•Accelerate or decele rate to the desired
speed then roll the speed adjustment
control upwards (+).
• Increase or decrease the speed by rolling
the speed adjustment control upwards ( +)
or downwards ( -) until the desired speed is
obtained.
Note: The set speed can be increased or
decreased in steps of 2 km/h (1 mph), by
rolling the speed adjustment control upwards
(+) or downwards ( -) briefly until the desired
speed is obtained.
Resuming the speed
If the vehicle is accelerated above the set
speed, then the set speed will be resumed
when the accelerator pedal is released.
If CANCEL is pressed, or the brake pedal is
pressed, the cruise cont rol will disengage but
the set speed memory will be retained. Press
RESUME and the vehicle will return to the set
speed.
Note: Cruise control will not resume at speeds
below 30 km/h (18 mph).
RESUME will not operate if the ignition has
been turned off. Cruise control will switch off and clear the
memory when:
•
The ignition system is switched off.
• A fault occurs. The cruise control system
will switch off and cannot be used until the
fault is cleared.
Automatic switch off
Cruise control will switch off but the set speed
will remain in the memory when:
•The CANCEL button is pressed.
• The brake pedal is pressed.
• Speed falls below 30 km/h (18 mph).
• Neutral, Park or Reve rse gear positions are
selected.
• Dynamic Stability Control is operating.
• The difference between the actual and set
speed is too great.
• When the vehicle reaches a maximum
speed of 192 km/h (120 mph).
• The accelerator pedal is used to accelerate
beyond the set speed for too long a period.
E97089
CAUTIONS
RESUME should only be used if the
driver is aware of the set speed and
intends to return to it.
It is not recomme nded to resume set
speed when a low gear is selected as
excessive engine speeds will occur.
Page 161 of 391

161
Adaptive cruise control (ACC)
The vehicle will then maintain the constant time
gap to the vehicle ahead until:
•The vehicle ahead accelerates to a speed
above the set speed.
• The vehicle ahead moves out of lane or out
of view.
• A new gap distance is set.
If necessary, the vehicle brakes will be
automatically applied to slow the vehicle to
maintain the gap to the vehicle in front.
The maximum braking which is applied by the
ACC system is limited and can be overridden by
the driver applying the brakes, if required.
Note: Driver braking will cancel ACC.
If the ACC system predicts that its maximum
braking level will not be sufficient, then an
audible warning will sound while the ACC
continues to brake. DRIVER INTERVENE will be
displayed on the message centre. The driver
should take immediate action.
When in follow mode, the vehicle will
automatically return to the set speed when the
road ahead is clear, for instance when:
• The vehicle in front accelerates or changes
lane.
• The driver changes lane to either side or
enters an exit lane.
The driver should intervene if appropriate.
Changing the follow mode set gap
The gap from the vehicle ahead can be
decreased or increased by rolling the
thumbwheel on the stee ring wheel. Four gap
settings are available and the selected gap
setting will be displaye d on the message centre
when either ACC button is pressed. Each gap level is indicated by an
additional
chevron in front of th e vehicle icon in the
message centre (one chevron (gap level 1)
being the shortest, four chevrons (gap level 4)
being the longest). A fter the ignition is
switched on, the default gap (gap level 3) will
be automatically selected ready for ACC
operation.
Note: When the ignition is switched off, the
gap setting will revert to the default setting
(gap level 3) when switched on again.
Note: It is the driver’s responsibility to select a
gap appropriate to the driving conditions.
Overriding the speed and follow mode
The set speed and gap ca n be overridden by
pressing the accelerator pedal when cruising at
constant speed or in follow mode. If the vehicle
is in follow mode, the instrument warning
indicator will go out when the ACC is
overridden by the driver using the accelerator
and CRUISE OVERRIDE will be displayed on
the message centre. When the accelerator is
released the ACC functi on will operate again
and vehicle speed will decrease to the set
speed, or a lower spee d if follow mode is
active.
WARNING
Whenever the driver is overriding the
ACC by depressing the accelerator
pedal, the ACC will not automatically
apply the brakes to ma intain separation from
any vehicle ahead.