2009 JAGUAR XF seats
[x] Cancel search: seatsPage 79 of 391

79
Lighting
HEADLAMP LEVELLING
Halogen headlamps
Use the headlamp levelling control to account
for vehicle loading changes.
Xenon headlamps
Headlamp levelling is adjusted automatically if
Xenon headlamps are fitted, to account for
vehicle load conditions, to avoid dazzling
oncoming drivers.
CORNERING OR STATIC BENDING
LAMPS
Cornering or static bending lamps are angled
outwards from the centre line of the vehicle.
These lamps broaden the beam of the
headlamps when cornering during normal
night driving.
1. Light spread of a vehicle not fitted with
static bending lamps.
2. Light spread of a vehicle fitted with static
bending lamps
The system switches on the lamp if it has
received an input from the vehicle's direction
indicator. Only the lamp on the same side as
the operating direction indicator illuminates.
The system only operate s with the ignition
switched on.
Vehicle load Switch position
Driver only 0
Driver and front seat
passenger
1
Driver and pa ssengers in
all seats 2
Maximum gross vehicle
weight 2
Maximum rear axle load 2 or 3
JAG1334
1
2
JAG0923
Page 94 of 391

Windows and mirrors
94
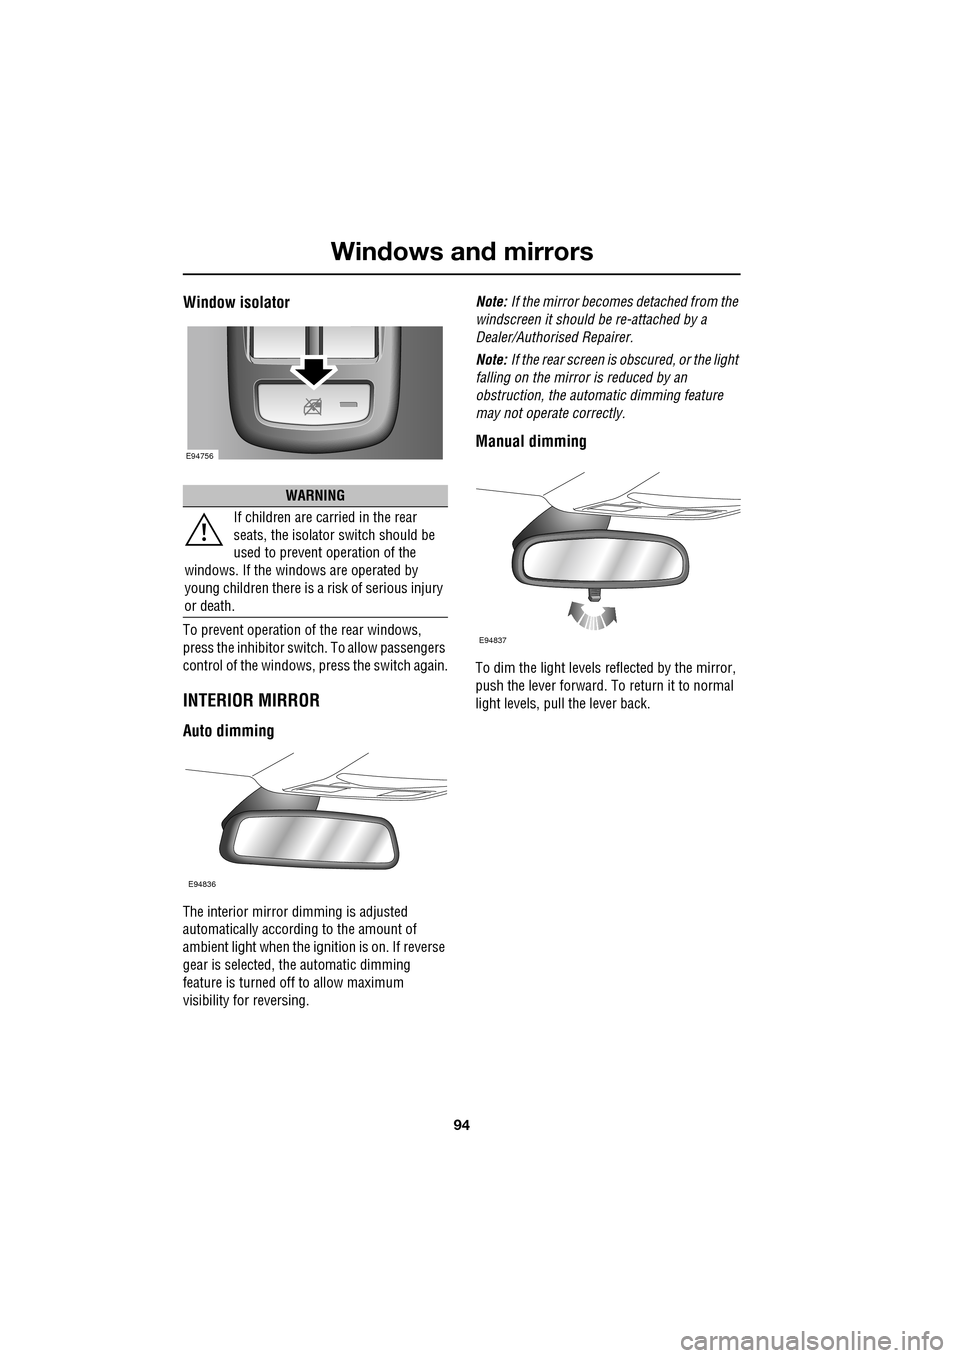
Window isolator
To prevent operation of the rear windows,
press the inhibitor switch. To allow passengers
control of the windows, press the switch again.
INTERIOR MIRROR
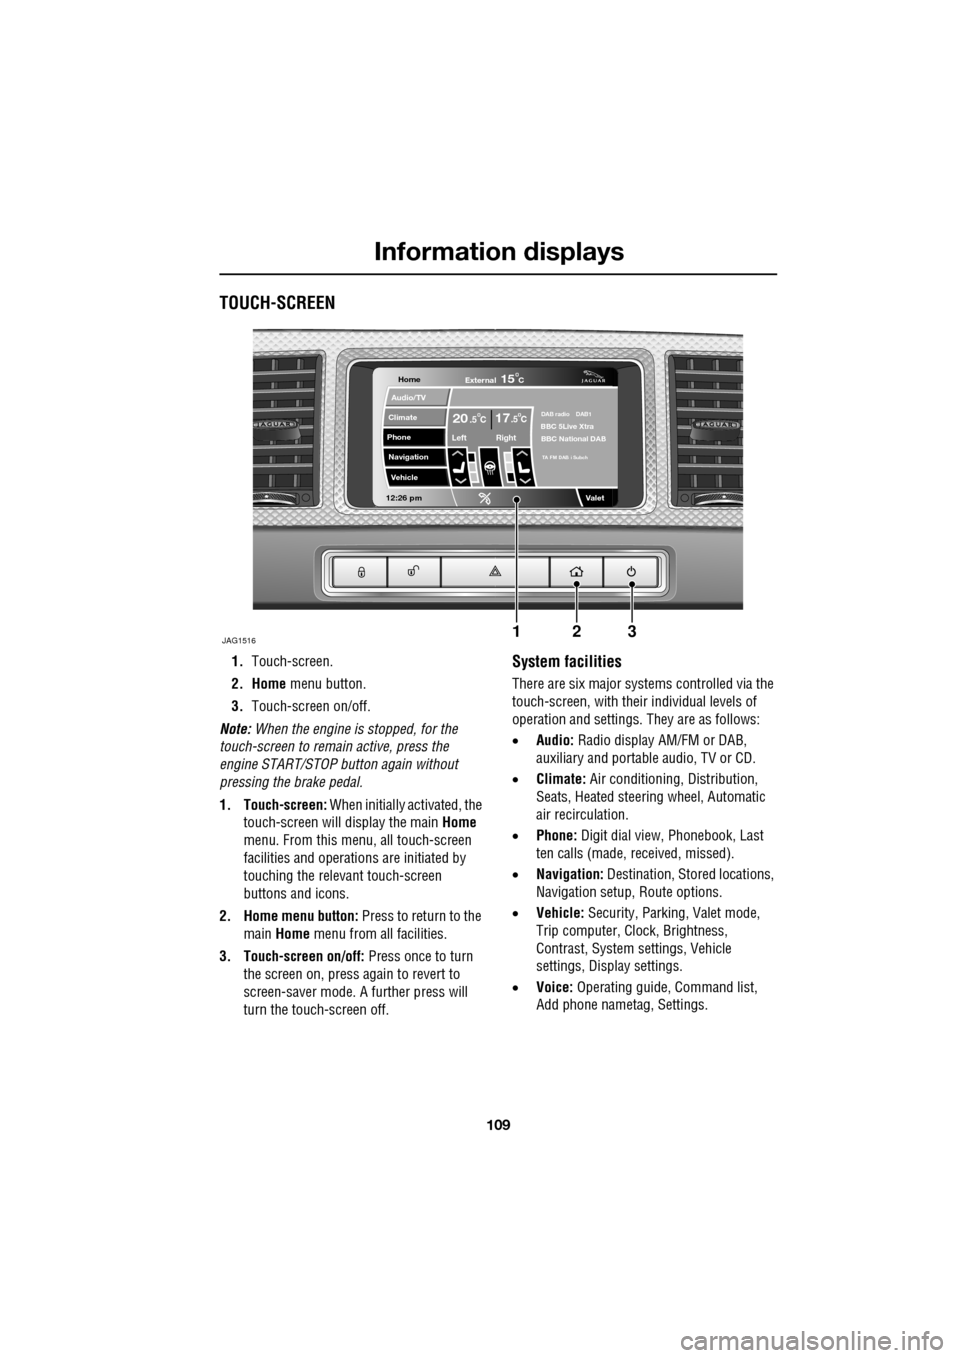
Auto dimming
The interior mirror dimming is adjusted
automatically according to the amount of
ambient light when the i gnition is on. If reverse
gear is selected, the automatic dimming
feature is turned off to allow maximum
visibility for reversing. Note:
If the mirror becomes detached from the
windscreen it should be re-attached by a
Dealer/Authorised Repairer.
Note: If the rear screen is obscured, or the light
falling on the mirror is reduced by an
obstruction, the automa tic dimming feature
may not operate correctly.
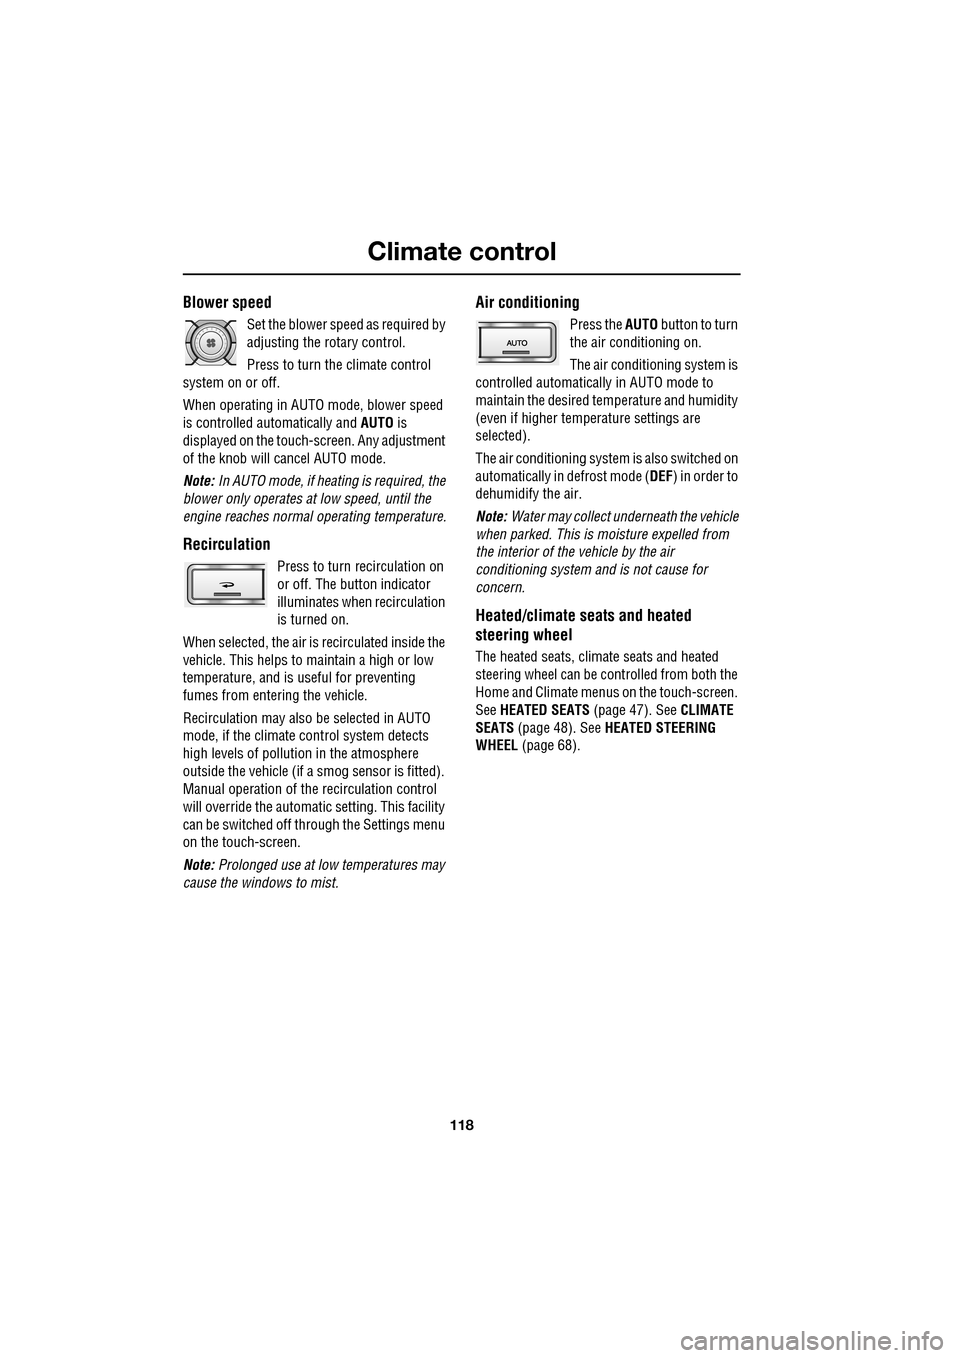
Manual dimming
To dim the light levels re flected by the mirror,
push the lever forward. To return it to normal
light levels, pull the lever back.
WARNING
If children are carried in the rear
seats, the is olator switch should be
used to prevent operation of the
windows. If the windows are operated by
young children there is a risk of serious injury
or death.
E94756
E94836
E94837
Page 109 of 391

109
Information displays
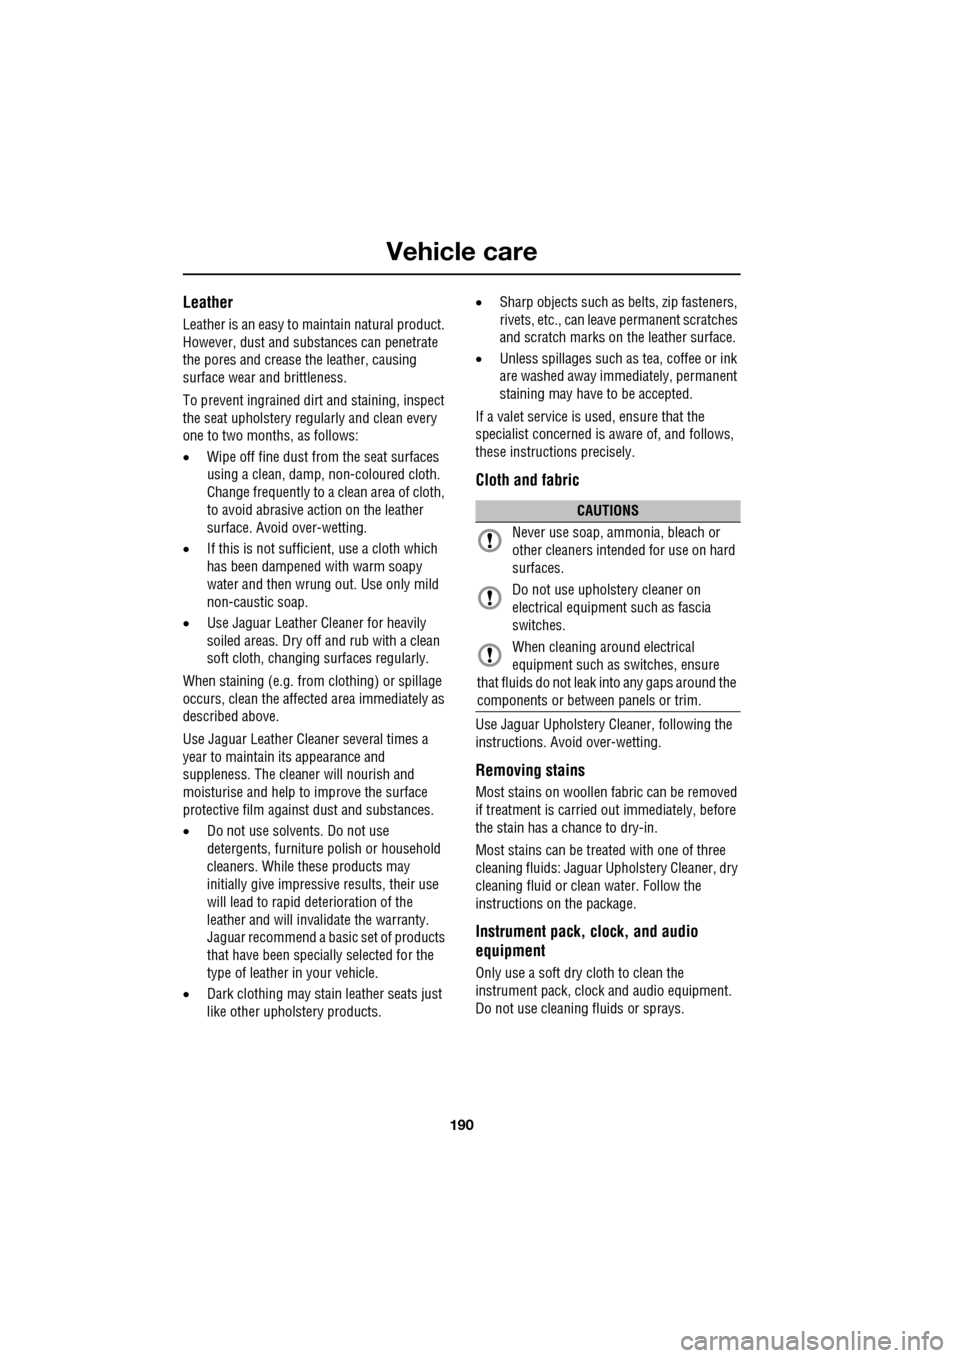
TOUCH-SCREEN
1.Touch-screen.
2. Home menu button.
3. Touch-screen on/off.
Note: When the engine is stopped, for the
touch-screen to remain active, press the
engine START/STOP button again without
pressing the brake pedal.
1. Touch-screen: When initially activated, the
touch-screen will display the main Home
menu. From this menu, all touch-screen
facilities and operati ons are initiated by
touching the relevant touch-screen
buttons and icons.
2. Home menu button: Press to return to the main Home menu from all facilities.
3. Touch-screen on/off: Press once to turn
the screen on, press again to revert to
screen-saver mode. A further press will
turn the touch-screen off.System facilities
There are six major systems controlled via the
touch-screen, with their individual levels of
operation and settings. They are as follows:
• Audio: Radio display AM/FM or DAB,
auxiliary and portable audio, TV or CD.
• Climate: Air conditioning, Distribution,
Seats, Heated steering wheel, Automatic
air recirculation.
• Phone: Digit dial view, Phonebook, Last
ten calls (made, received, missed).
• Navigation: Destination, St ored locations,
Navigation setup, Route options.
• Vehicle: Security, Parking, Valet mode,
Trip computer, Clock, Brightness,
Contrast, System settings, Vehicle
settings, Displa y settings.
• Voice: Operating guide, Command list,
Add phone nametag, Settings.
Home
Audio/TV
Climate
Phone
Navigation
Vehicle
Valet12:26 pm
JAG1516
External15C
Left Right
20 17CC.5 .5DAB radio DAB1BBC 5Live Xtra
BBC National DAB
TA FM DAB i Subch
123
Page 115 of 391

115
Climate control
AIR VENTS
1.Air volume adjust.
2. Air direction adjust.
3. Solar sensor.
The rotating air vents acti vate and rotate out of
the fascia when the engine START/STOP
button is pressed, provided the climate system
has not been manually switched off. Adjust the
volume of air usi ng the thumbwheels ( 1) and
the direction of the air using the direction
controls ( 2), to suit your requirements.
It is possible to set the air vents so that they
remain permanently on view, even when the
ignition is switched off. From the touch-screen Climate menu, select
Settings
. Select Vent rotation Always open .
Rear vents
The temperature of the air supplied by the rear
air vents is dependent on the combined
temperature settings for the driver and front
passenger. For example, if the driver
temperature is set to 21°C (70°F) and 20°C
(68°F) for the front passenger, the temperature
of the air supplied to the rear of the vehicle will
be approximately 20.5°C (69°F).
AkI t F1 k
E95077
11
1
23
2
1
2
2
CAUTIONS
Do not obstruct the solar sensor ( 3) or
the temperature a nd humidity sensor,
located adjacent to the glove box.
Do not obstruct the extract vents for the
climate system, located in the trim panel
behind the rear seats.
Climate
SensitivityAuto
Climate seat settings
Vent rotation
12 : 26 pm
Auto Always
open
Change units External 15˚c
Left Right
Auto
E95447
Page 118 of 391

Climate control
118
Blower speed
Set the blower speed as required by
adjusting the rotary control.
Press to turn the climate control
system on or off.
When operating in AUTO mode, blower speed
is controlled au tomatically and AUTO is
displayed on the touch-screen. Any adjustment
of the knob will cancel AUTO mode.
Note: In AUTO mode, if heating is required, the
blower only operates at low speed, until the
engine reaches normal operating temperature.
Recirculation
Press to turn recirculation on
or off. The button indicator
illuminates when recirculation
is turned on.
When selected, the air is recirculated inside the
vehicle. This helps to ma intain a high or low
temperature, and is useful for preventing
fumes from entering the vehicle.
Recirculation may also be selected in AUTO
mode, if the climate control system detects
high levels of pollution in the atmosphere
outside the vehicle (if a smog sensor is fitted).
Manual operation of the recirculation control
will override the automatic setting. This facility
can be switched off through the Settings menu
on the touch-screen.
Note: Prolonged use at low temperatures may
cause the windows to mist.
Air conditioning
Press the AUTO button to turn
the air conditioning on.
The air conditioning system is
controlled automatically in AUTO mode to
maintain the desired temperature and humidity
(even if higher temperature settings are
selected).
The air conditioning system is also switched on
automatically in defrost mode ( DEF) in order to
dehumidify the air.
Note: Water may collect unde rneath the vehicle
when parked. This is moisture expelled from
the interior of the vehicle by the air
conditioning system a nd is not cause for
concern.
Heated/climate seats and heated
steering wheel
The heated seats, climate seats and heated
steering wheel can be controlled from both the
Home and Climate menus on the touch-screen.
See HEATED SEATS (page 47). See CLIMATE
SEATS (page 48). See HEATED STEERING
WHEEL (page 68).
Page 190 of 391

Vehicle care
190
Leather
Leather is an easy to maintain natural product.
However, dust and subs tances can penetrate
the pores and crease the leather, causing
surface wear and brittleness.
To prevent ingrained dirt and staining, inspect
the seat upholstery regularly and clean every
one to two months, as follows:
• Wipe off fine dust from the seat surfaces
using a clean, damp, non-coloured cloth.
Change frequently to a clean area of cloth,
to avoid abrasive action on the leather
surface. Avoid over-wetting.
• If this is not suffic ient, use a cloth which
has been dampened with warm soapy
water and then wrung out. Use only mild
non-caustic soap.
• Use Jaguar Leather Cleaner for heavily
soiled areas. Dry off and rub with a clean
soft cloth, changing surfaces regularly.
When staining (e.g. from clothing) or spillage
occurs, clean the affected area immediately as
described above.
Use Jaguar Leather Cleaner several times a
year to maintain its appearance and
suppleness. The clea ner will nourish and
moisturise and help to improve the surface
protective film agains t dust and substances.
• Do not use solvents. Do not use
detergents, furniture polish or household
cleaners. While these products may
initially give impressi ve results, their use
will lead to rapid deterioration of the
leather and will inva lidate the warranty.
Jaguar recommend a basic set of products
that have been specially selected for the
type of leather in your vehicle.
• Dark clothing may stain leather seats just
like other upholstery products. •
Sharp objects such as belts, zip fasteners,
rivets, etc., can leave permanent scratches
and scratch marks on the leather surface.
• Unless spillages such as tea, coffee or ink
are washed away immediately, permanent
staining may have to be accepted.
If a valet service is used, ensure that the
specialist concerned is aware of, and follows,
these instructions precisely.
Cloth and fabric
Use Jaguar Upholstery Cleaner, following the
instructions. Avoid over-wetting.
Removing stains
Most stains on woollen fabric can be removed
if treatment is carried out immediately, before
the stain has a chance to dry-in.
Most stains can be treated with one of three
cleaning fluids: Jaguar U pholstery Cleaner, dry
cleaning fluid or clean water. Follow the
instructions on the package.
Instrument pack, clock, and audio
equipment
Only use a soft dry cloth to clean the
instrument pack, clock and audio equipment.
Do not use cleaning fluids or sprays.
CAUTIONS
Never use soap, ammonia, bleach or
other cleaners intended for use on hard
surfaces.
Do not use upholst ery cleaner on
electrical equipment such as fascia
switches.
When cleaning around electrical
equipment such as switches, ensure
that fluids do not leak into any gaps around the
components or between panels or trim.
Page 238 of 391

Wheels and tyres
238
TYRE GLOSSARY
lbf/in² or psi
Pounds per square inch, an imperial unit of
measure for pressure.
kPa
Kilo Pascal, a metric unit of measure for
pressure.
Cold tyre pressure
The air pressure in a tyre which has been
standing in excess of th ree hours, or driven for
less than 1.6 km (1 mile).
Maximum inflation pressure
The maximum pressure to which the tyre
should be inflated. This pressure is given on
the tyre side wall in lbf/in² (psi) and kPa.
Note: This pressure is the maximum allowed
by the tyre manufacturer. It is not the pressure
recommended for use.
Kerb weight
The weight of a standa rd vehicle, including a
full tank of fuel, any optional equipment fitted,
and with the correct coolant and oil levels.
Gross vehicle weight
The maximum permissible weight of a vehicle
with driver, passen gers, load, luggage,
equipment, and towbar load.
Accessory weight
The combined weight (in excess of those items
replaced) of items available as factory installed
equipment.
Production options weight
The combined weight of options installed
which weigh in excess of 1.4 kg (3 lb) more
than the standard items that they replaced, and
are not already considered in kerb or accessory
weights. Items such as heavy duty brakes, high
capacity battery, special trim etc.
Vehicle capacity weight
The number of seats multiplied by 68 kg
(150 lb) plus the rated amount of load/luggage.
Maximum loaded vehicle weight
The sum of kerb wei ght, accessory weight,
vehicle capacity weig ht, plus any production
option weights.
Rim
The metal support for a ty re, or tyre and tube,
upon which the tyre beads are seated.
Bead
The inner edge of a tyre th at is shaped to fit to
the rim and form an air tight seal. The bead is
constructed of steel wires which are wrapped,
or reinforced, by the ply cords.
Page 251 of 391

251
Status after a collision
DRIVING AFTER A COLLISION
Before starting or driving
If the vehicle has been involved in an accident
it should be checked thoroughly before
attempting to start the engine or drive the
vehicle.
Check for:-
• Fuel leaks.
• Fluid leaks.
• Battery damage.
• Damage to wiring.
• Damage to lights.
• Damage to steering, suspension, wheels
or tyres.
• Sharp or protruding bodywork.
• Operation of doors and locks.
• Condition and operation of seat belts and
SRS components.
• Activation of the pe destrian protection
system.
• Condition of chil d seats and their
mounting/attach ment points.
Note: This list is not exhaustive.
Resetting the fuel cut-off
The fuel system cut-off forms part of the Safety
and Restraint System (SRS) fitted to your
vehicle. Following an impact, and depending on
the severity, the fuel pump may be switched
off.
1.Switch the ignition off, and wait for 10
seconds.
2. Without pressing the brake pedal, press
the engine START/STOP button, to switch
the electrical circuits on. Wait for 30
seconds.
3. Check the vehicle thoroughly for fuel leaks.
If a leak is detected switch the ignition off
immediately.
•The vehicle must not be started if a leak
is present. Seek qualified advice, and
have the vehicle recovered.
4. If no leaks are detected, start the engine.
WARNING
If the vehicle is involved in a collision
it should be checked by a Dealer/
Authorised repairer, or suitably
qualified personnel, before starting or driving.
WARNING
The fuel cut-off should never be reset
if you can smell fuel, or a leak can be
seen. Doing so can lead to a fire
which may cause personal injury or death.