2009 INFINITI QX56 ECU
[x] Cancel search: ECUPage 3258 of 4171
SE-26
< ECU DIAGNOSIS >
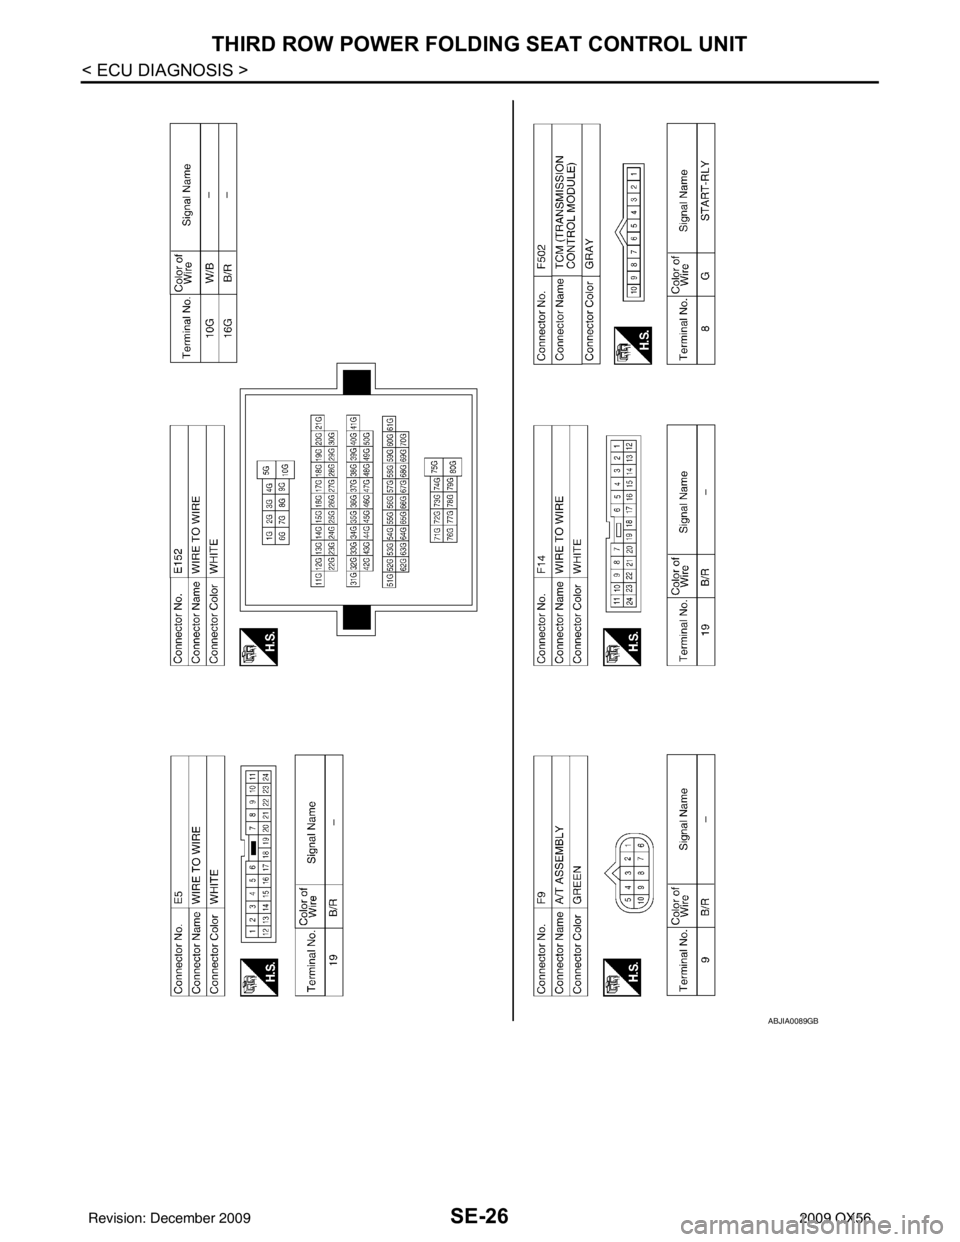
THIRD ROW POWER FOLDING SEAT CONTROL UNIT
ABJIA0089GB
Revision: December 20092009 QX56
Page 3259 of 4171
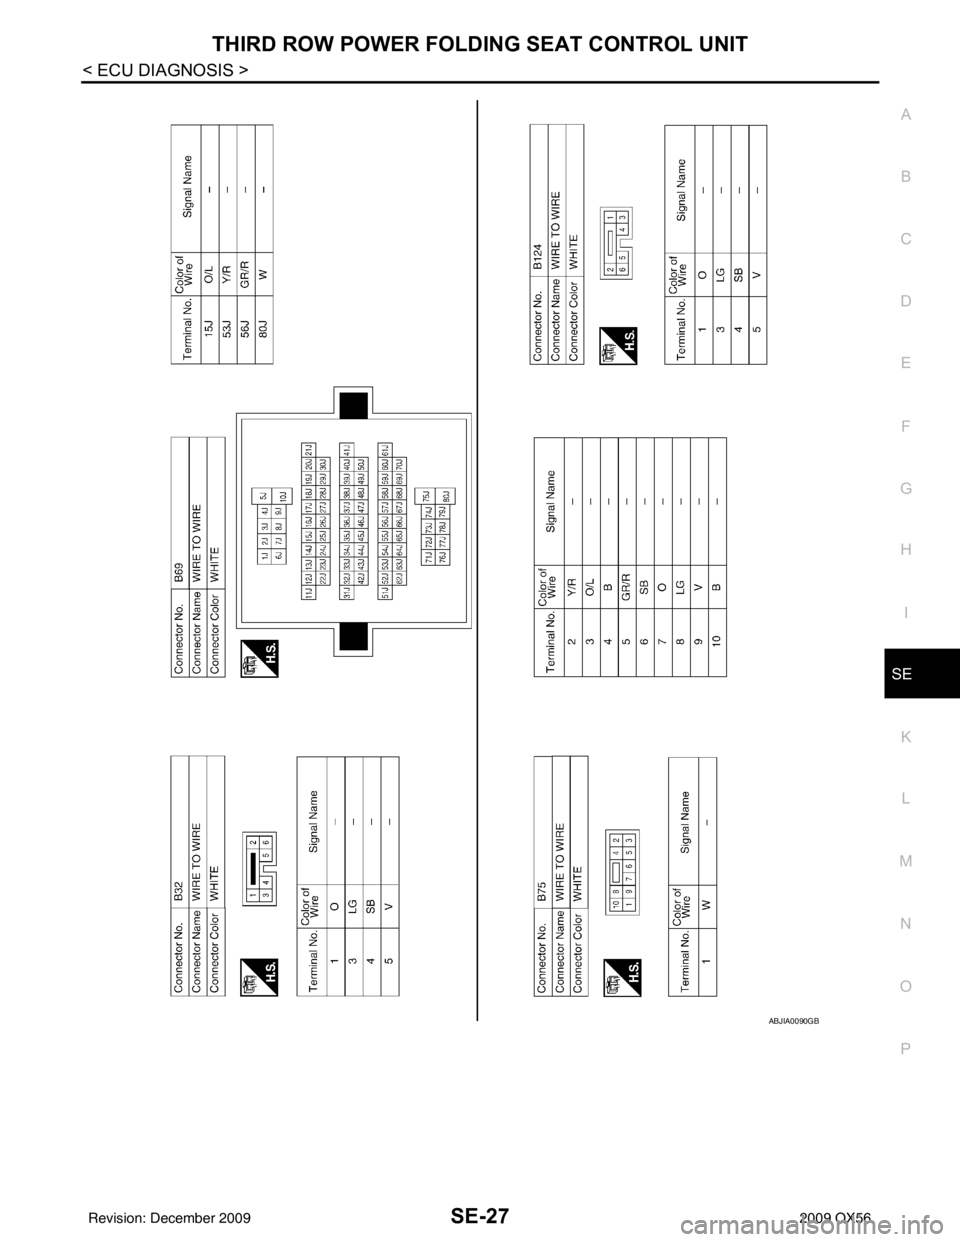
THIRD ROW POWER FOLDING SEAT CONTROL UNITSE-27
< ECU DIAGNOSIS >
C
DE
F
G H
I
K L
M A
B
SE
N
O P
ABJIA0090GB
Revision: December 20092009 QX56
Page 3260 of 4171
SE-28
< ECU DIAGNOSIS >
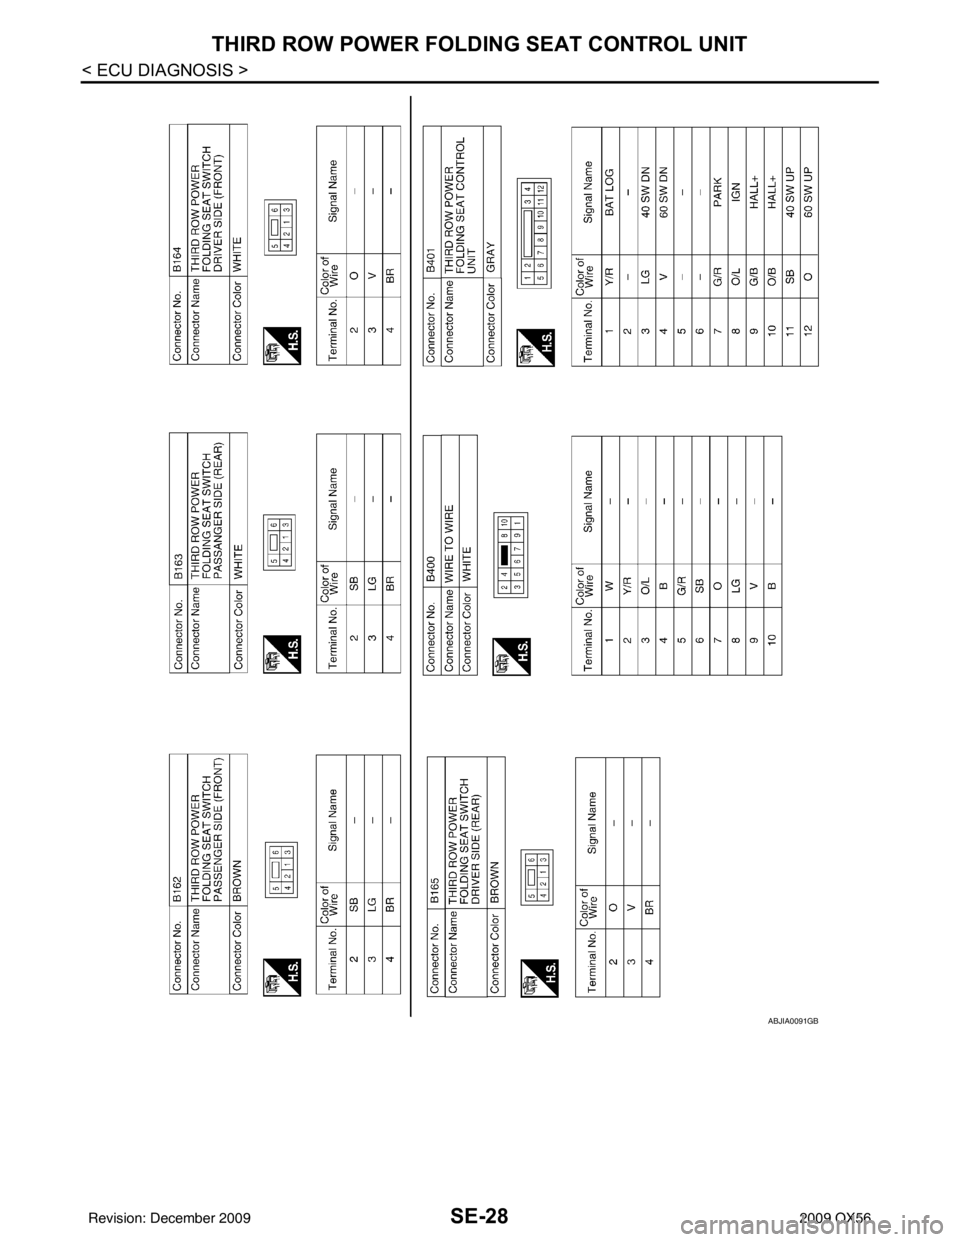
THIRD ROW POWER FOLDING SEAT CONTROL UNIT
ABJIA0091GB
Revision: December 20092009 QX56
Page 3261 of 4171
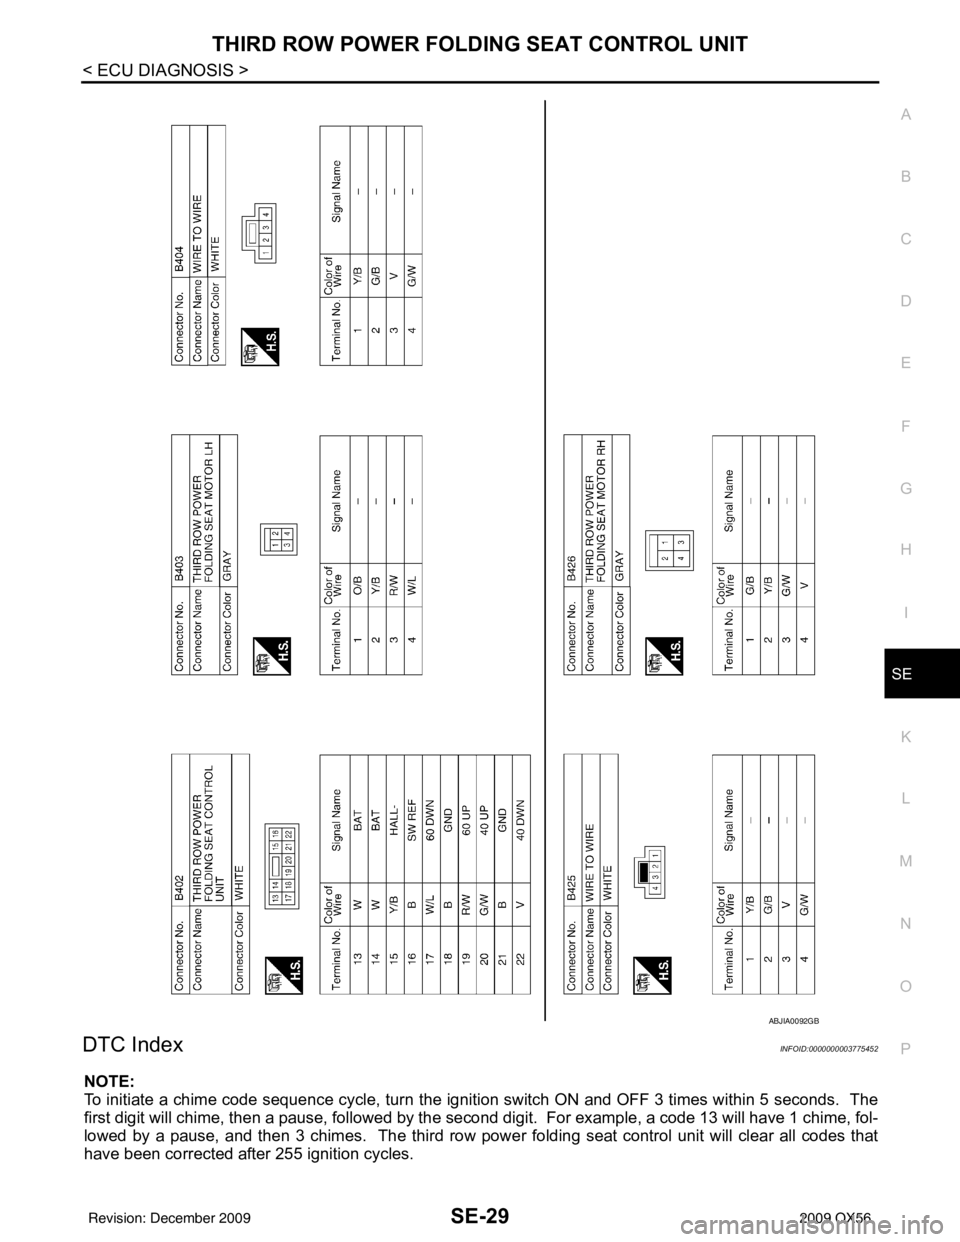
THIRD ROW POWER FOLDING SEAT CONTROL UNITSE-29
< ECU DIAGNOSIS >
C
DE
F
G H
I
K L
M A
B
SE
N
O P
DTC IndexINFOID:0000000003775452
NOTE:
To initiate a chime code sequence cycle, turn the ignition switch ON and OFF 3 times within 5 seconds. The
first digit will chime, then a pause, followed by the sec ond digit. For example, a code 13 will have 1 chime, fol-
lowed by a pause, and then 3 chimes. The third row pow er folding seat control unit will clear all codes that
have been corrected after 255 ignition cycles.
ABJIA0092GB
Revision: December 20092009 QX56
Page 3262 of 4171
SE-30
< ECU DIAGNOSIS >
THIRD ROW POWER FOLDING SEAT CONTROL UNIT
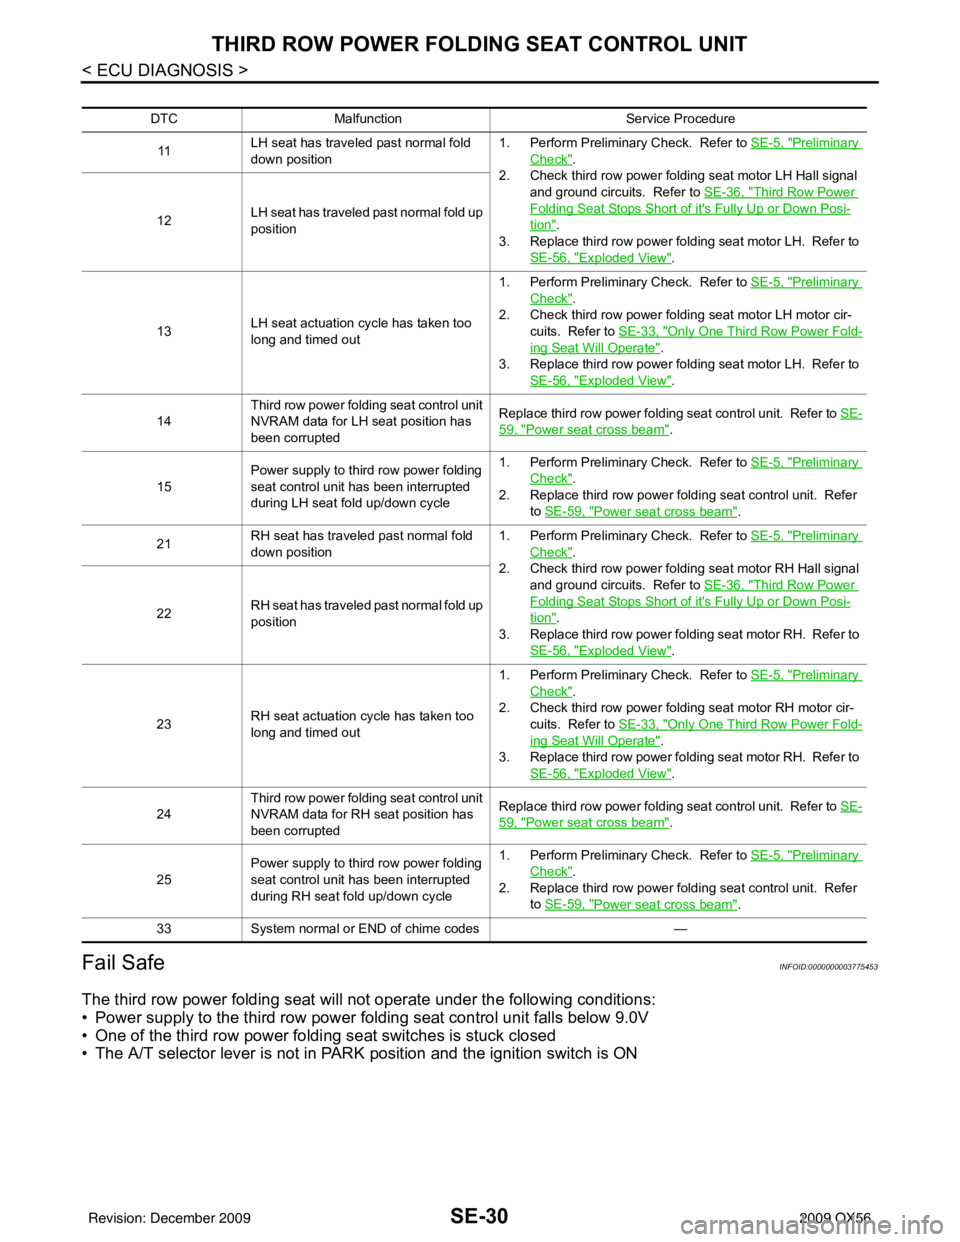
Fail Safe
INFOID:0000000003775453
The third row power folding seat will not operate under the following conditions:
• Power supply to the third row power folding seat control unit falls below 9.0V
• One of the third row power foldi ng seat switches is stuck closed
• The A/T selector lever is not in PARK position and the ignition switch is ON
DTCMalfunction Service Procedure
11 LH seat has traveled past normal fold
down position 1. Perform Preliminary Check. Refer to
SE-5, "
Preliminary
Check".
2. Check third row power folding seat motor LH Hall signal and ground circuits. Refer to SE-36, "
Third Row Power
Folding Seat Stops Short of it's Fully Up or Down Posi-
tion".
3. Replace third row power folding seat motor LH. Refer to SE-56, "
Exploded View".
12
LH seat has traveled past normal fold up
position
13 LH seat actuation cycle has taken too
long and timed out 1. Perform Preliminary Check. Refer to
SE-5, "
Preliminary
Check".
2. Check third row power folding seat motor LH motor cir- cuits. Refer to SE-33, "
Only One Third Row Power Fold-
ing Seat Will Operate".
3. Replace third row power folding seat motor LH. Refer to SE-56, "
Exploded View".
14 Third row power folding seat control unit
NVRAM data for LH seat position has
been corrupted Replace third row power folding seat control unit. Refer to
SE-
59, "Power seat cross beam".
15 Power supply to thir
d row power folding
seat control unit has been interrupted
during LH seat fold up/down cycle 1. Perform Preliminary Check. Refer to
SE-5, "
Preliminary
Check".
2. Replace third row power folding seat control unit. Refer to SE-59, "
Power seat cross beam".
21 RH seat has traveled past normal fold
down position 1. Perform Preliminary Check. Refer to
SE-5, "
Preliminary
Check".
2. Check third row power folding seat motor RH Hall signal and ground circuits. Refer to SE-36, "
Third Row Power
Folding Seat Stops Short of it's Fully Up or Down Posi-
tion".
3. Replace third row power folding seat motor RH. Refer to SE-56, "
Exploded View".
22
RH seat has traveled past normal fold up
position
23 RH seat actuation cycle has taken too
long and timed out 1. Perform Preliminary Check. Refer to
SE-5, "
Preliminary
Check".
2. Check third row power folding seat motor RH motor cir- cuits. Refer to SE-33, "
Only One Third Row Power Fold-
ing Seat Will Operate".
3. Replace third row power folding seat motor RH. Refer to SE-56, "
Exploded View".
24 Third row power folding seat control unit
NVRAM data for RH seat position has
been corrupted Replace third row power folding seat control unit. Refer to
SE-
59, "Power seat cross beam".
25 Power supply to thir
d row power folding
seat control unit has been interrupted
during RH seat fold up/down cycle 1. Perform Preliminary Check. Refer to
SE-5, "
Preliminary
Check".
2. Replace third row power folding seat control unit. Refer
to SE-59, "
Power seat cross beam".
33 System normal or END of chime codes —
Revision: December 20092009 QX56
Page 3271 of 4171
SQUEAK AND RATTLE TROUBLE DIAGNOSESSE-39
< SYMPTOM DIAGNOSIS >
C
DE
F
G H
I
K L
M A
B
SE
N
O P
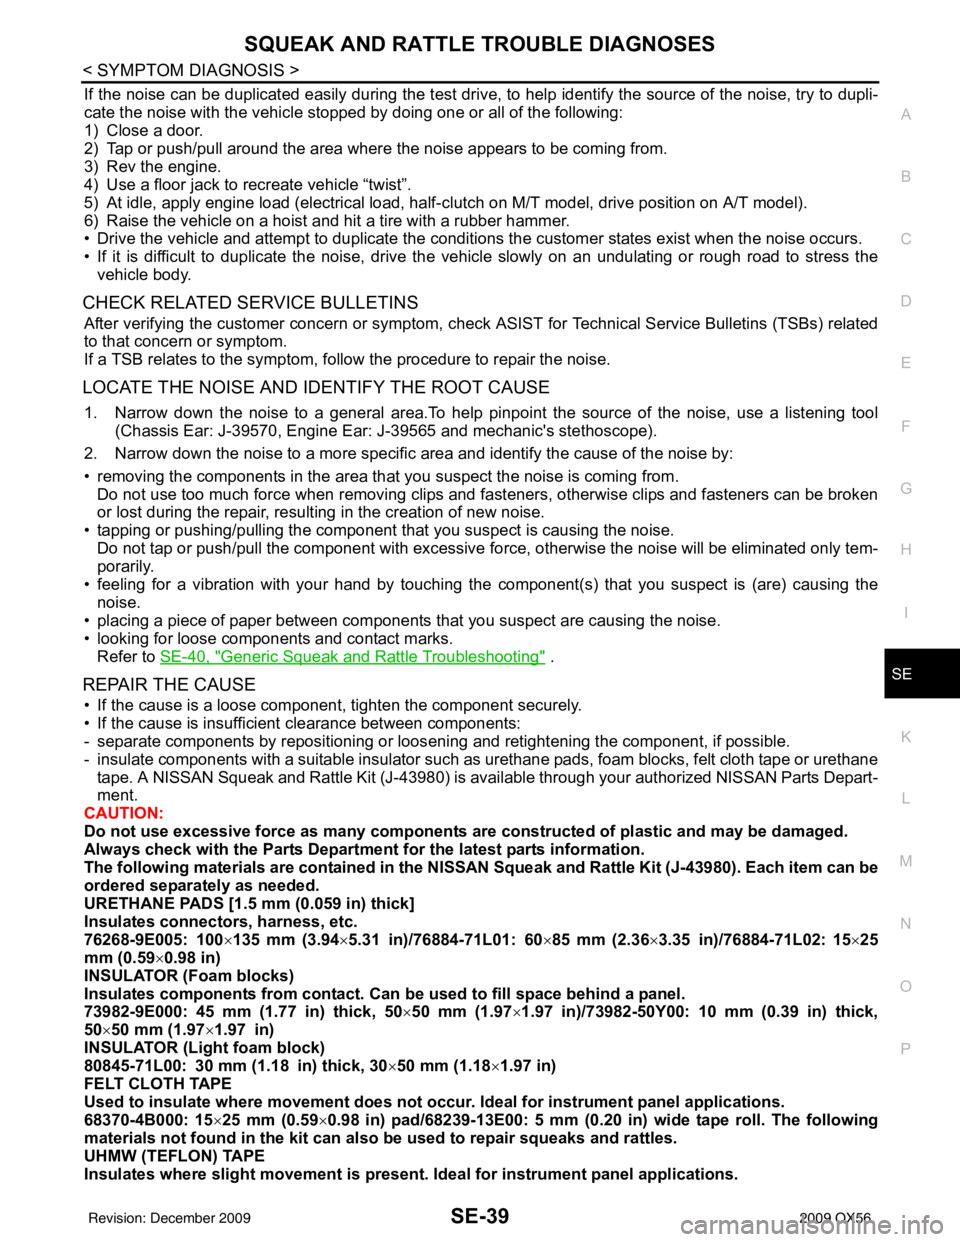
If the noise can be duplicated easily during the test drive, to help identify the source of the noise, try to dupli-
cate the noise with the vehicle stopped by doing one or all of the following:
1) Close a door.
2) Tap or push/pull around the area where the noise appears to be coming from.
3) Rev the engine.
4) Use a floor jack to recreate vehicle “twist”.
5) At idle, apply engine load (electrical load, half- clutch on M/T model, drive position on A/T model).
6) Raise the vehicle on a hoist and hit a tire with a rubber hammer.
• Drive the vehicle and attempt to duplicate the conditions the customer states exist when the noise occurs.
• If it is difficult to duplicate the noise, drive the vehicle slowly on an undulating or rough road to stress the vehicle body.
CHECK RELATED SERVICE BULLETINS
After verifying the customer concern or symptom, check ASIST for Technical Service Bulletins (TSBs) related
to that concern or symptom.
If a TSB relates to the symptom, follow the procedure to repair the noise.
LOCATE THE NOISE AND IDENTIFY THE ROOT CAUSE
1. Narrow down the noise to a general area.To help pinpoint the source of the noise, use a listening tool (Chassis Ear: J-39570, Engine Ear: J-39565 and mechanic's stethoscope).
2. Narrow down the noise to a more specific area and identify the cause of the noise by:
• removing the components in the area that you suspect the noise is coming from. Do not use too much force when removing clips and fasteners, otherwise clips and fasteners can be broken
or lost during the repair, resulting in the creation of new noise.
• tapping or pushing/pulling the component that you suspect is causing the noise.
Do not tap or push/pull the component with excessive force, otherwise the noise will be eliminated only tem-
porarily.
• feeling for a vibration with your hand by touching the component(s) that you suspect is (are) causing the
noise.
• placing a piece of paper between components that you suspect are causing the noise.
• looking for loose components and contact marks. Refer to SE-40, "
Generic Squeak and Rattle Troubleshooting" .
REPAIR THE CAUSE
• If the cause is a loose component, tighten the component securely.
• If the cause is insufficient clearance between components:
- separate components by repositioning or loos ening and retightening the component, if possible.
- insulate components with a suitable insulator such as urethane pads, foam blocks, felt cloth tape or urethane tape. A NISSAN Squeak and Rattle Kit (J-43980) is available through your authorized NISSAN Parts Depart-
ment.
CAUTION:
Do not use excessive force as many components are constructed of plastic and may be damaged.
Always check with the Parts Department for the latest parts information.
The following materials are contained in the NISSAN Squeak and Rattle Kit (J-43980). Each item can be
ordered separately as needed.
URETHANE PADS [1.5 mm (0.059 in) thick]
Insulates connectors, harness, etc.
76268-9E005: 100 ×135 mm (3.94 ×5.31 in)/76884-71L01: 60 ×85 mm (2.36× 3.35 in)/76884-71L02: 15× 25
mm (0.59 ×0.98 in)
INSULATOR (Foam blocks)
Insulates components from contact. Can be used to fill space behind a panel.
73982-9E000: 45 mm (1.77 in) thick, 50× 50 mm (1.97×1.97 in)/73982-50Y00: 10 mm (0.39 in) thick,
50× 50 mm (1.97 ×1.97 in)
INSULATOR (Light foam block)
80845-71L00: 30 mm (1.18 in) thick, 30 ×50 mm (1.18 ×1.97 in)
FELT CLOTH TAPE
Used to insulate where movement does not occu r. Ideal for instrument panel applications.
68370-4B000: 15 ×25 mm (0.59 ×0.98 in) pad/68239-13E00: 5 mm (0.20 in) wide tape roll. The following
materials not found in the kit can also be used to repair squeaks and rattles.
UHMW (TEFLON) TAPE
Insulates where slight movement is present. Ideal for instrument panel applications.
Revision: December 20092009 QX56
Page 3273 of 4171
SQUEAK AND RATTLE TROUBLE DIAGNOSESSE-41
< SYMPTOM DIAGNOSIS >
C
DE
F
G H
I
K L
M A
B
SE
N
O P
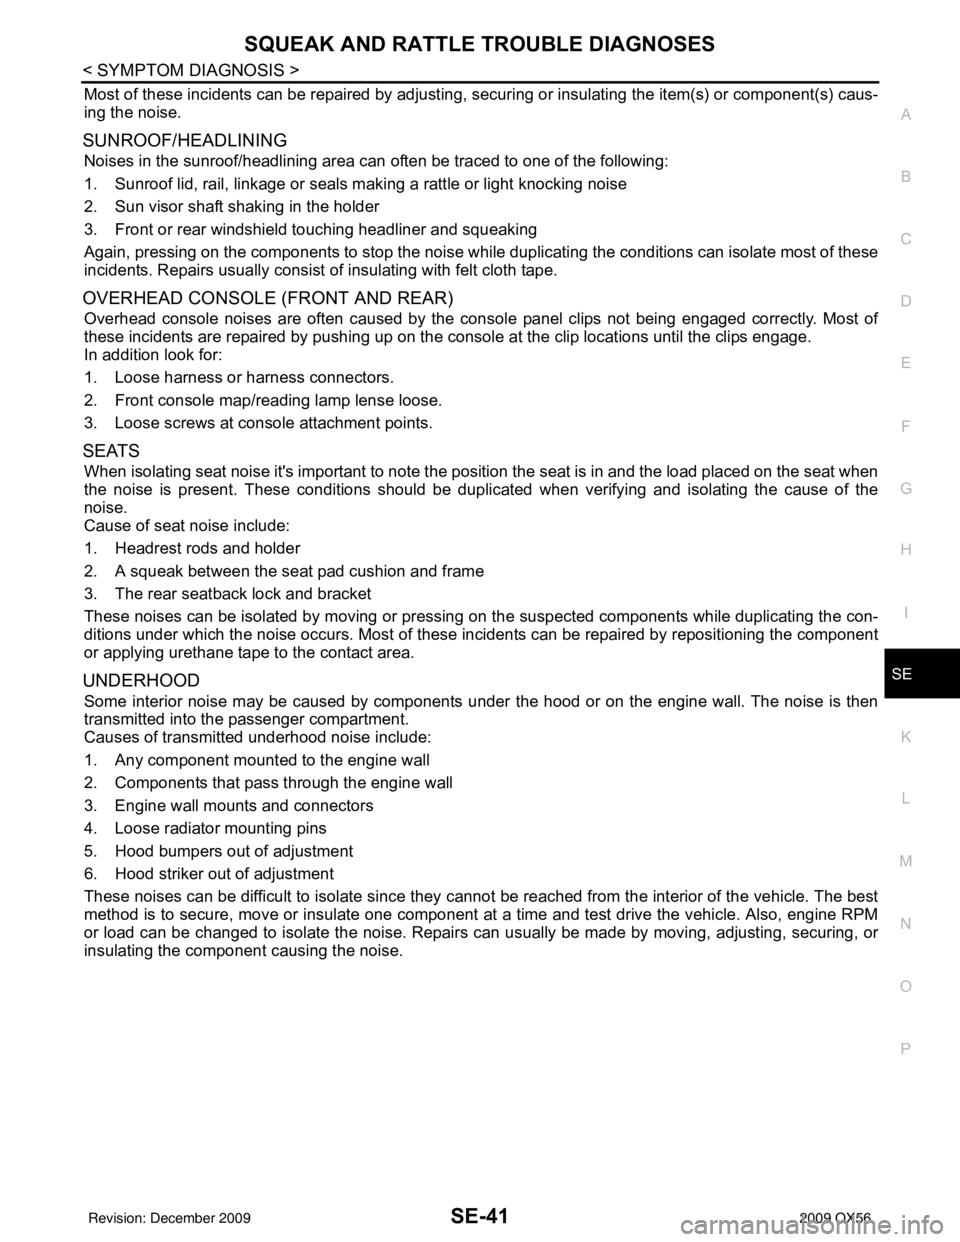
Most of these incidents can be repaired by adjusting, se curing or insulating the item(s) or component(s) caus-
ing the noise.
SUNROOF/HEADLINING
Noises in the sunroof/headlining area can often be traced to one of the following:
1. Sunroof lid, rail, linkage or seals making a rattle or light knocking noise
2. Sun visor shaft shaking in the holder
3. Front or rear windshield touching headliner and squeaking
Again, pressing on the components to stop the noise while duplicating the conditions can isolate most of these
incidents. Repairs usually consist of insulating with felt cloth tape.
OVERHEAD CONSOLE (FRONT AND REAR)
Overhead console noises are often caused by the cons ole panel clips not being engaged correctly. Most of
these incidents are repaired by pushing up on the c onsole at the clip locations until the clips engage.
In addition look for:
1. Loose harness or harness connectors.
2. Front console map/reading lamp lense loose.
3. Loose screws at console attachment points.
SEATS
When isolating seat noise it's important to note the position the seat is in and the load placed on the seat when
the noise is present. These conditions should be duplicated when verifying and isolating the cause of the
noise.
Cause of seat noise include:
1. Headrest rods and holder
2. A squeak between the seat pad cushion and frame
3. The rear seatback lock and bracket
These noises can be isolated by moving or pressing on the suspected components while duplicating the con-
ditions under which the noise occurs. Most of thes e incidents can be repaired by repositioning the component
or applying urethane tape to the contact area.
UNDERHOOD
Some interior noise may be caused by components under the hood or on the engine wall. The noise is then
transmitted into the passenger compartment.
Causes of transmitted underhood noise include:
1. Any component mounted to the engine wall
2. Components that pass through the engine wall
3. Engine wall mounts and connectors
4. Loose radiator mounting pins
5. Hood bumpers out of adjustment
6. Hood striker out of adjustment
These noises can be difficult to isolate since they cannot be reached from the interior of the vehicle. The best
method is to secure, move or insulate one component at a time and test drive the vehicle. Also, engine RPM
or load can be changed to isolate the noise. Repairs can usually be made by moving, adjusting, securing, or
insulating the component causing the noise.
Revision: December 20092009 QX56
Page 3277 of 4171
PRECAUTIONSSE-45
< PRECAUTION >
C
DE
F
G H
I
K L
M A
B
SE
N
O P
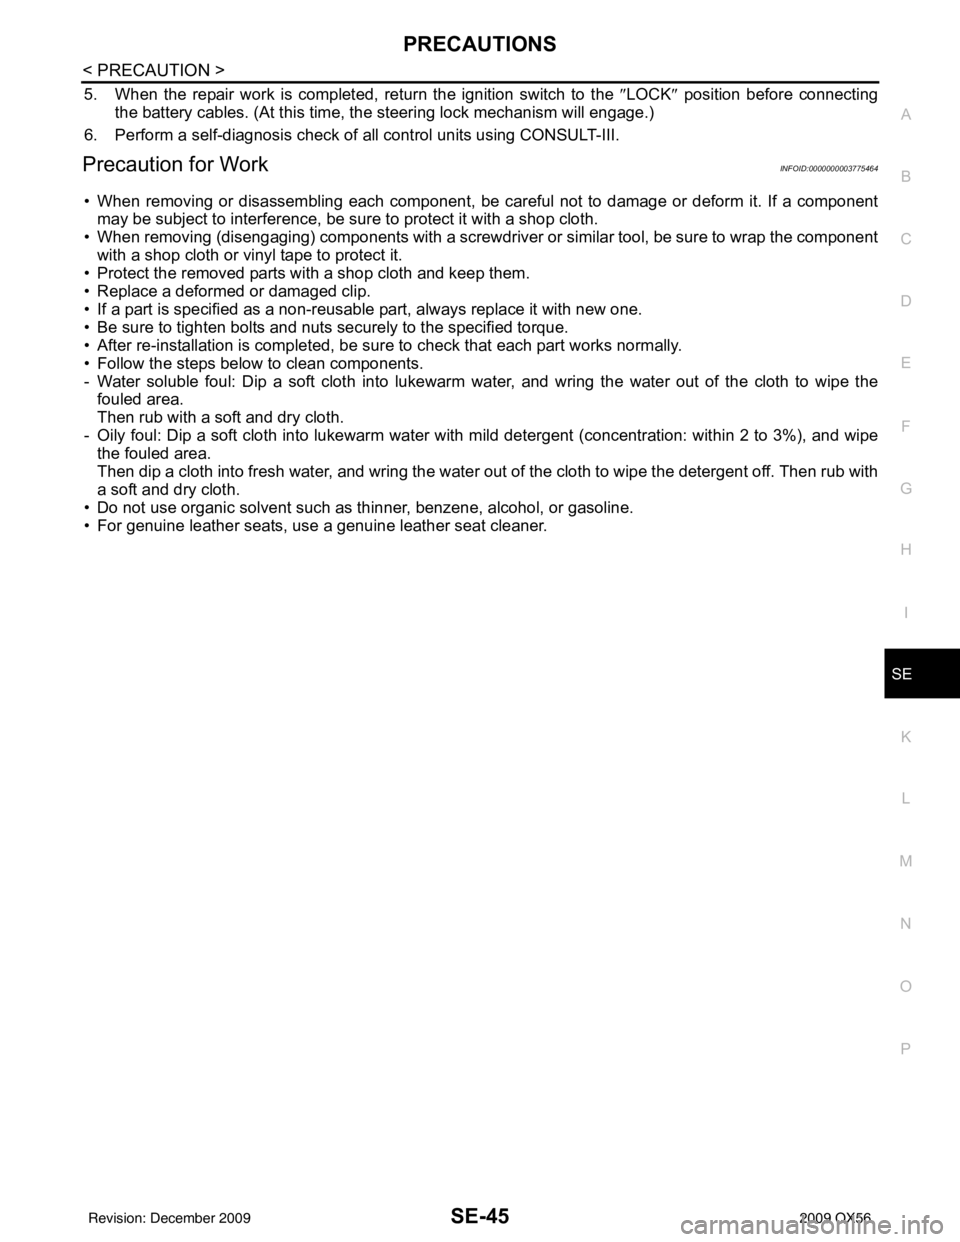
5. When the repair work is completed, return the ignition switch to the ″LOCK ″ position before connecting
the battery cables. (At this time, the steering lock mechanism will engage.)
6. Perform a self-diagnosis check of al l control units using CONSULT-III.
Precaution for WorkINFOID:0000000003775464
• When removing or disassembling each component, be ca reful not to damage or deform it. If a component
may be subject to interference, be sure to protect it with a shop cloth.
• When removing (disengaging) components with a screwdriver or similar tool, be sure to wrap the component
with a shop cloth or vinyl tape to protect it.
• Protect the removed parts with a shop cloth and keep them.
• Replace a deformed or damaged clip.
• If a part is specified as a non-reusable part, always replace it with new one.
• Be sure to tighten bolts and nuts securely to the specified torque.
• After re-installation is completed, be sure to check that each part works normally.
• Follow the steps below to clean components.
- Water soluble foul: Dip a soft cloth into lukewarm water, and wring the water out of the cloth to wipe the fouled area.
Then rub with a soft and dry cloth.
- Oily foul: Dip a soft cloth into lukewarm water with mild detergent (concentration: within 2 to 3%), and wipe the fouled area.
Then dip a cloth into fresh water, and wring the water out of the cloth to wipe the detergent off. Then rub with
a soft and dry cloth.
• Do not use organic solvent such as thinner, benzene, alcohol, or gasoline.
• For genuine leather seats, use a genuine leather seat cleaner.
Revision: December 20092009 QX56