Page 3263 of 4171

THIRD ROW POWER FOLDING SEATSE-31
< SYMPTOM DIAGNOSIS >
C
DE
F
G H
I
K L
M A
B
SE
N
O P
SYMPTOM DIAGNOSIS
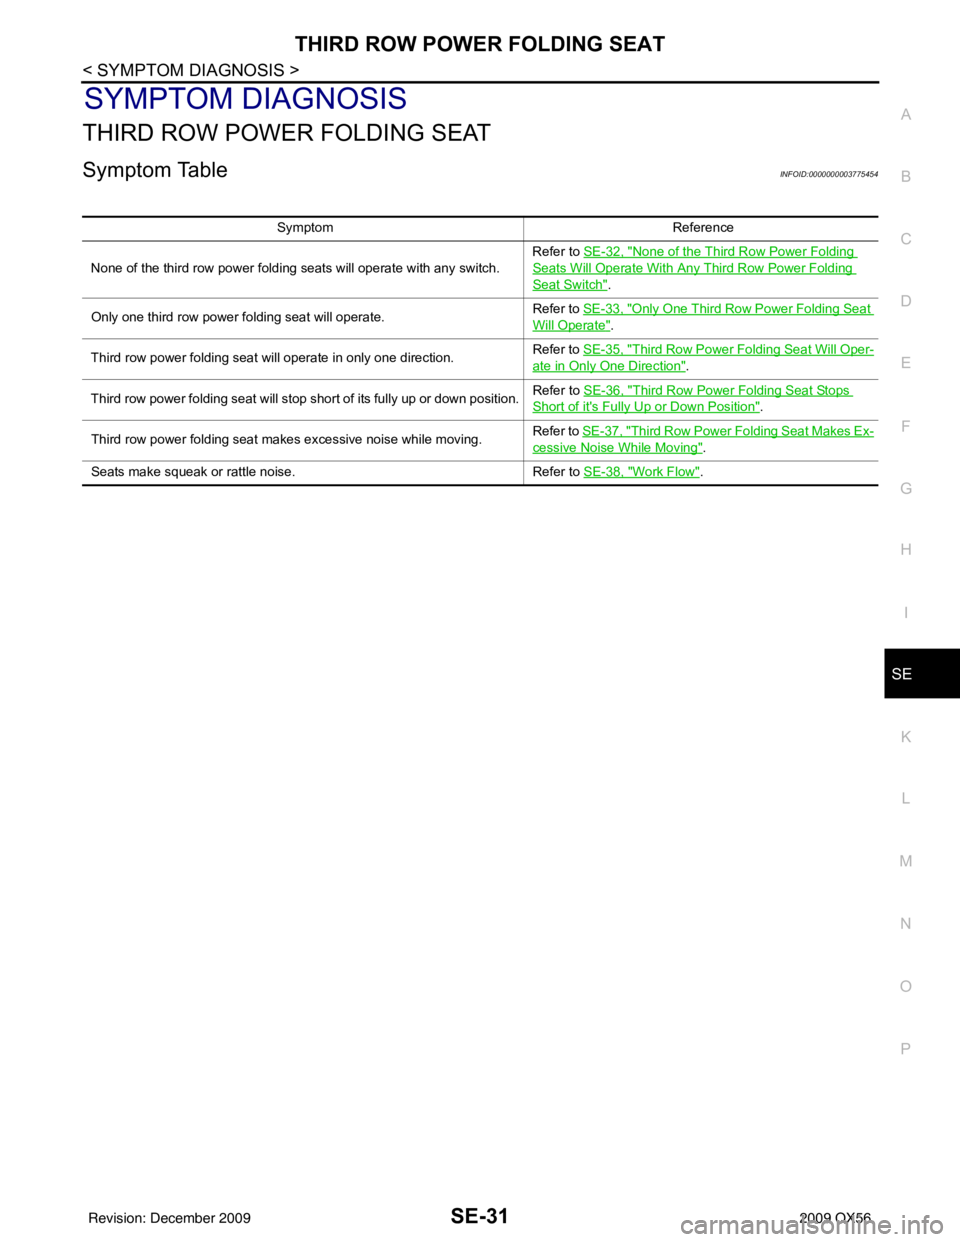
THIRD ROW POWER FOLDING SEAT
Symptom TableINFOID:0000000003775454
Symptom Reference
None of the third row power folding seats will operate with any switch. Refer to
SE-32, "
None of the Third Row Power Folding
Seats Will Operate With Any Third Row Power Folding
Seat Switch".
Only one third row power folding seat will operate. Refer to
SE-33, "
Only One Third Row Power Folding Seat
Will Operate".
Third row power folding seat will operate in only one direction. Refer to
SE-35, "
Third Row Power Folding Seat Will Oper-
ate in Only One Direction".
Third row power folding seat will stop short of its fully up or down position. Refer to
SE-36, "
Third Row Power Folding Seat Stops
Short of it's Fully Up or Down Position".
Third row power folding seat makes excessive noise while moving. Refer to
SE-37, "
Third Row Power Fold ing Seat Makes Ex-
cessive Noise While Moving".
Seats make squeak or rattle noise. Refer to SE-38, "
Work Flow".
Revision: December 20092009 QX56
Page 3264 of 4171

SE-32
< SYMPTOM DIAGNOSIS >
NONE OF THE THIRD ROW POWER FOLDING SEATS WILL OPERATE WITH
ANY SWITCH.
NONE OF THE THIRD ROW POWE R FOLDING SEATS WILL OPERATE
WITH ANY SWITCH.
None of the Third Row Power Folding Seat s Will Operate With Any Third Row Power
Folding Seat Switch
INFOID:0000000003775455
1.PRELIMINARY CHECK
Perform preliminary check. Refer to SE-5, "
Preliminary Check".
Are inspection results normal?
YES >> GO TO 2.
NO >> Perform repairs as necessary.
2.THIRD ROW POWER FOLDING SEAT SWITCH GROUND
1. Turn ignition switch OFF.
2. Disconnect any third row power folding seat switch connector.
3. Check continuity between third row power folding seat switch harness connector terminal 4 and ground.
Is there continuity?
YES >> GO TO 3.
NO >> Repair ground circuit.
3.PNP SWITCH SIGNAL
1. Confirm A/T selector lever is in PARK position.
2. Turn ignition switch ON.
3. Check voltage between third row power folding seat control unit harness connector B401 terminal 7 and ground.
Is there battery voltage?
YES >> Replace third row power folding seat control unit. Refer to SE-59, "Power seat cross beam".
NO >> Repair circuit as necessary.
ALJIA0116ZZ
Terminals Ignition switch
(+)
(-)ON
Third row power
folding seat
control unit Te r m i n a l N o .
B401 7Ground Battery voltage
ALJIA0278ZZ
Revision: December 20092009 QX56
Page 3266 of 4171

SE-34
< SYMPTOM DIAGNOSIS >
ONLY ONE THIRD ROW POWER FOLDING SEAT WILL OPERATE.
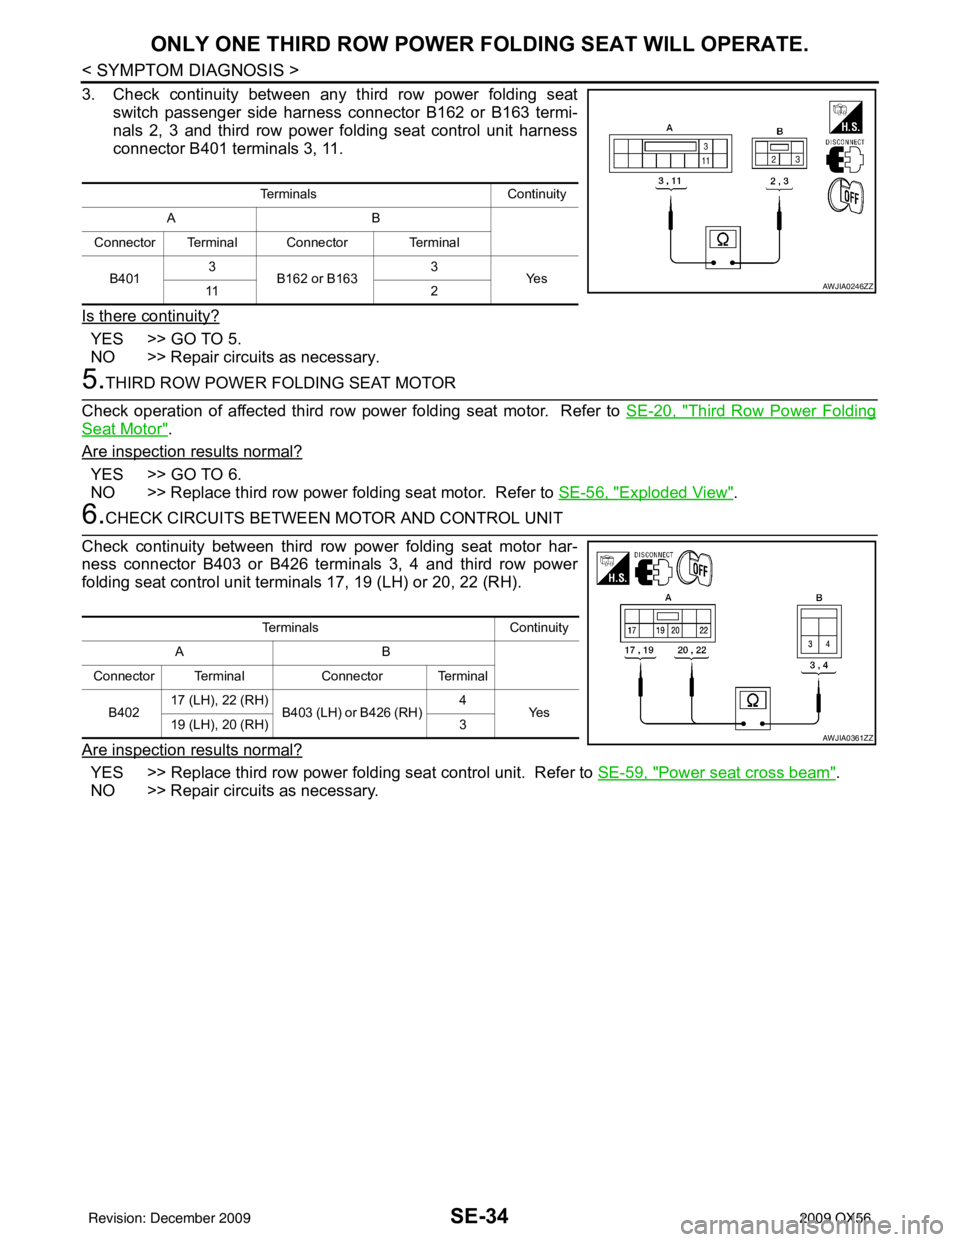
3. Check continuity between any third row power folding seatswitch passenger side harness connector B162 or B163 termi-
nals 2, 3 and third row power folding seat control unit harness
connector B401 terminals 3, 11.
Is there continuity?
YES >> GO TO 5.
NO >> Repair circuits as necessary.
5.THIRD ROW POWER FOLDING SEAT MOTOR
Check operation of affected third row power folding seat motor. Refer to SE-20, "
Third Row Power Folding
Seat Motor".
Are inspection results normal?
YES >> GO TO 6.
NO >> Replace third row power folding seat motor. Refer to SE-56, "
Exploded View".
6.CHECK CIRCUITS BETWEEN MOTOR AND CONTROL UNIT
Check continuity between third row power folding seat motor har-
ness connector B403 or B426 terminals 3, 4 and third row power
folding seat control unit terminals 17, 19 (LH) or 20, 22 (RH).
Are inspection results normal?
YES >> Replace third row power folding seat control unit. Refer to SE-59, "Power seat cross beam".
NO >> Repair circuits as necessary.
Terminals Continuity
AB
Connector Terminal Connector Terminal
B401 3
B162 or B163 3
Ye s
11 2
AWJIA0246ZZ
Terminals Continuity
AB
Connector Terminal Connector Terminal
B402 17 (LH), 22 (RH)
B403 (LH) or B426 (RH) 4
Ye s
19 (LH), 20 (RH) 3
AWJIA0361ZZ
Revision: December 20092009 QX56
Page 3273 of 4171

SQUEAK AND RATTLE TROUBLE DIAGNOSESSE-41
< SYMPTOM DIAGNOSIS >
C
DE
F
G H
I
K L
M A
B
SE
N
O P
Most of these incidents can be repaired by adjusting, se curing or insulating the item(s) or component(s) caus-
ing the noise.
SUNROOF/HEADLINING
Noises in the sunroof/headlining area can often be traced to one of the following:
1. Sunroof lid, rail, linkage or seals making a rattle or light knocking noise
2. Sun visor shaft shaking in the holder
3. Front or rear windshield touching headliner and squeaking
Again, pressing on the components to stop the noise while duplicating the conditions can isolate most of these
incidents. Repairs usually consist of insulating with felt cloth tape.
OVERHEAD CONSOLE (FRONT AND REAR)
Overhead console noises are often caused by the cons ole panel clips not being engaged correctly. Most of
these incidents are repaired by pushing up on the c onsole at the clip locations until the clips engage.
In addition look for:
1. Loose harness or harness connectors.
2. Front console map/reading lamp lense loose.
3. Loose screws at console attachment points.
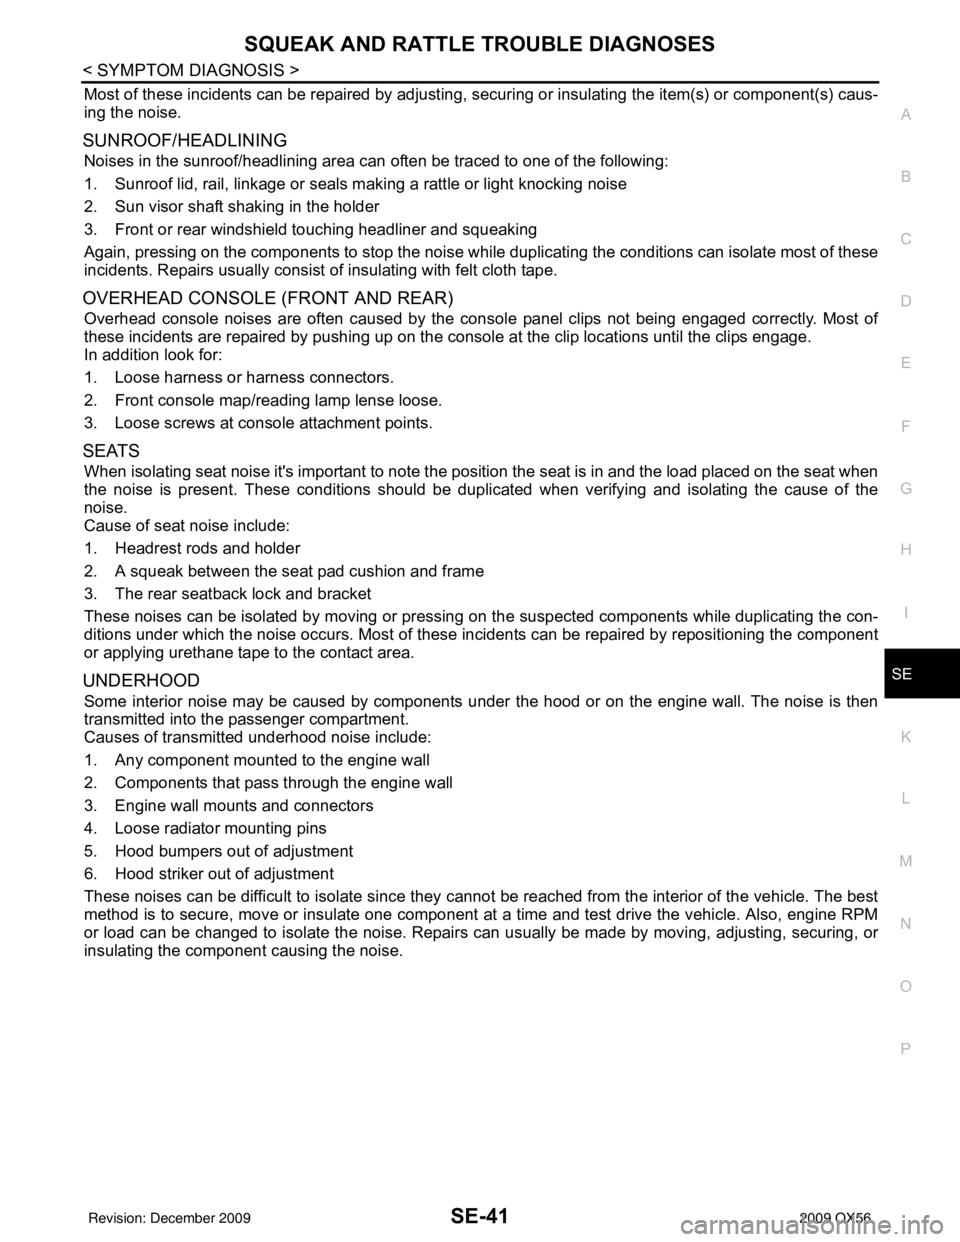
SEATS
When isolating seat noise it's important to note the position the seat is in and the load placed on the seat when
the noise is present. These conditions should be duplicated when verifying and isolating the cause of the
noise.
Cause of seat noise include:
1. Headrest rods and holder
2. A squeak between the seat pad cushion and frame
3. The rear seatback lock and bracket
These noises can be isolated by moving or pressing on the suspected components while duplicating the con-
ditions under which the noise occurs. Most of thes e incidents can be repaired by repositioning the component
or applying urethane tape to the contact area.
UNDERHOOD
Some interior noise may be caused by components under the hood or on the engine wall. The noise is then
transmitted into the passenger compartment.
Causes of transmitted underhood noise include:
1. Any component mounted to the engine wall
2. Components that pass through the engine wall
3. Engine wall mounts and connectors
4. Loose radiator mounting pins
5. Hood bumpers out of adjustment
6. Hood striker out of adjustment
These noises can be difficult to isolate since they cannot be reached from the interior of the vehicle. The best
method is to secure, move or insulate one component at a time and test drive the vehicle. Also, engine RPM
or load can be changed to isolate the noise. Repairs can usually be made by moving, adjusting, securing, or
insulating the component causing the noise.
Revision: December 20092009 QX56
Page 3277 of 4171

PRECAUTIONSSE-45
< PRECAUTION >
C
DE
F
G H
I
K L
M A
B
SE
N
O P
5. When the repair work is completed, return the ignition switch to the ″LOCK ″ position before connecting
the battery cables. (At this time, the steering lock mechanism will engage.)
6. Perform a self-diagnosis check of al l control units using CONSULT-III.
Precaution for WorkINFOID:0000000003775464
• When removing or disassembling each component, be ca reful not to damage or deform it. If a component
may be subject to interference, be sure to protect it with a shop cloth.
• When removing (disengaging) components with a screwdriver or similar tool, be sure to wrap the component
with a shop cloth or vinyl tape to protect it.
• Protect the removed parts with a shop cloth and keep them.
• Replace a deformed or damaged clip.
• If a part is specified as a non-reusable part, always replace it with new one.
• Be sure to tighten bolts and nuts securely to the specified torque.
• After re-installation is completed, be sure to check that each part works normally.
• Follow the steps below to clean components.
- Water soluble foul: Dip a soft cloth into lukewarm water, and wring the water out of the cloth to wipe the fouled area.
Then rub with a soft and dry cloth.
- Oily foul: Dip a soft cloth into lukewarm water with mild detergent (concentration: within 2 to 3%), and wipe the fouled area.
Then dip a cloth into fresh water, and wring the water out of the cloth to wipe the detergent off. Then rub with
a soft and dry cloth.
• Do not use organic solvent such as thinner, benzene, alcohol, or gasoline.
• For genuine leather seats, use a genuine leather seat cleaner.
Revision: December 20092009 QX56
Page 3279 of 4171
FRONT SEATSE-47
< ON-VEHICLE REPAIR >
C
DE
F
G H
I
K L
M A
B
SE
N
O P
ON-VEHICLE REPAIR
FRONT SEAT
Exploded ViewINFOID:0000000003775469
Driver Seat
LIIA1578E
Revision: December 20092009 QX56
Page 3281 of 4171
FRONT SEATSE-49
< ON-VEHICLE REPAIR >
C
DE
F
G H
I
K L
M A
B
SE
N
O P
Passenger Seat
WIIA0476E
1. Headrest 2. Headrest holder with multi-position
lock 3. Seatback board
4. Armrest assembly 5. Lumbar switch bezel6. Fold flat link bar
7. Outboard reclining arm outer cover 8. Outboard reclining arm inner cover 9. Inboard reclining arm inner cover
10. Latch cover 11. Inner leg cover12. Outboard reclining arm inner cover
13. Seat cushion inner cover 14. Passenger seat wiring harness 15. Inner front leg cover
16. Power seat frame assembly 17. NVH assembly 18. Seat cushion front finisher
Revision: December 20092009 QX56
Page 3283 of 4171
SECOND SEATSE-51
< ON-VEHICLE REPAIR >
C
DE
F
G H
I
K L
M A
B
SE
N
O P
SECOND SEAT
Exploded ViewINFOID:0000000003775471
Second Row RH
WIIA1013E
1. Headrest 2. Seatback pad 3. Seatback frame
4. Rear seat bezel 5. RH Headrest guide (free) 6. LH Headrest guide (locking)
7. Seat back panel 8. Seat actuator assembly 9. Reclining device inner cover
Revision: December 20092009 QX56