Page 2705 of 4171
MA-32
< ON-VEHICLE MAINTENANCE >
CHASSIS AND BODY MAINTENANCE
Checking Axle and Suspension Parts
INFOID:0000000003777011
FRONT AND REAR AXLE AND SUSPENSION PARTS
Check front and rear axle and suspension parts for excessive play, cracks, wear or other damage.
• Shake each wheel to check for excessive play.
• Rotate each wheel to check for abnormal noise.
• Check the axle and suspension nuts and bolts for looseness.
• Check the strut and shock absorber for oil leakage or other damage.
• Check the suspension ball joints for grease leakage and ball joint dust cover for cracks or other damage.
DRIVE SHAFT
Check the boots and drive shaft for cracks, wear, damage, and
grease leakage.
SMA525A
SFA901
Revision: December 20092009 QX56
Page 3076 of 4171
RAX-1
TRANSMISSION & DRIVELINE
CEF
G H
I
J
K L
M
SECTION RAX
A
B
RAX
N
O P
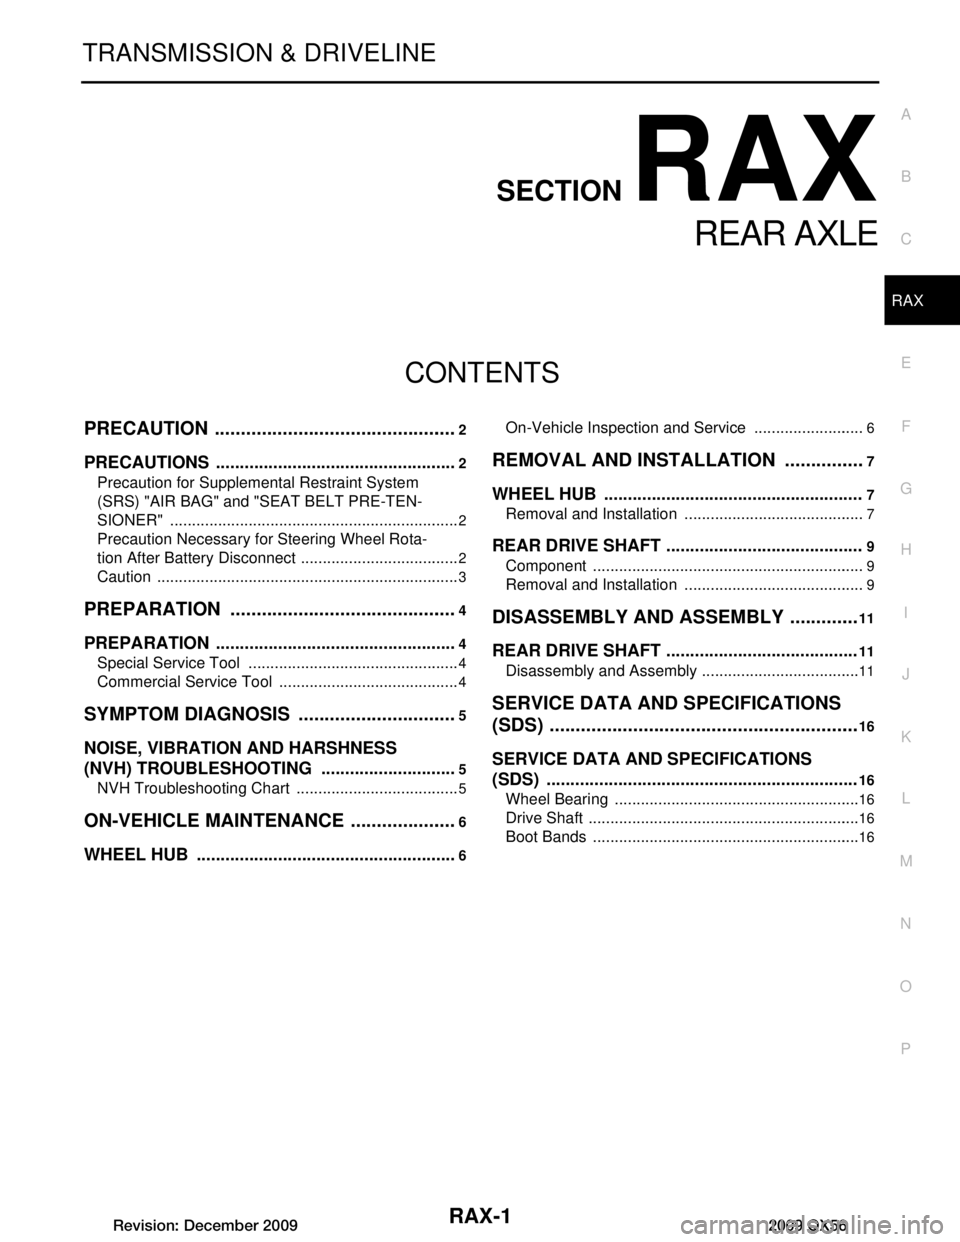
CONTENTS
REAR AXLE
PRECAUTION ................ ...............................2
PRECAUTIONS .............................................. .....2
Precaution for Supplemental Restraint System
(SRS) "AIR BAG" and "SEAT BELT PRE-TEN-
SIONER" ............................................................. ......
2
Precaution Necessary for Steering Wheel Rota-
tion After Battery Disconnect .....................................
2
Caution ......................................................................3
PREPARATION ............................................4
PREPARATION .............................................. .....4
Special Service Tool ........................................... ......4
Commercial Service Tool ..........................................4
SYMPTOM DIAGNOSIS ...............................5
NOISE, VIBRATION AND HARSHNESS
(NVH) TROUBLESHOOTING ........................ .....
5
NVH Troubleshooting Chart ................................ ......5
ON-VEHICLE MAINTENANCE .....................6
WHEEL HUB .... .............................................. .....6
On-Vehicle Inspection and Service ..................... .....6
REMOVAL AND INSTALLATION ................7
WHEEL HUB ......................................................7
Removal and Installation ..................................... .....7
REAR DRIVE SHAFT .........................................9
Component ...............................................................9
Removal and Installation ..........................................9
DISASSEMBLY AND ASSEMBLY ..............11
REAR DRIVE SHAFT ........................................11
Disassembly and Assembly ................................. ....11
SERVICE DATA AND SPECIFICATIONS
(SDS) ............... .............................................
16
SERVICE DATA AND SPECIFICATIONS
(SDS) .................................................................
16
Wheel Bearing ..................................................... ....16
Drive Shaft ...............................................................16
Boot Bands ..............................................................16
Revision: December 20092009 QX56
Page 3080 of 4171
NOISE, VIBRATION AND HARSHNESS (NVH) TROUBLESHOOTINGRAX-5
< SYMPTOM DIAGNOSIS >
CEF
G H
I
J
K L
M A
B
RAX
N
O P
SYMPTOM DIAGNOSIS
NOISE, VIBRATION AND HARSHN ESS (NVH) TROUBLESHOOTING
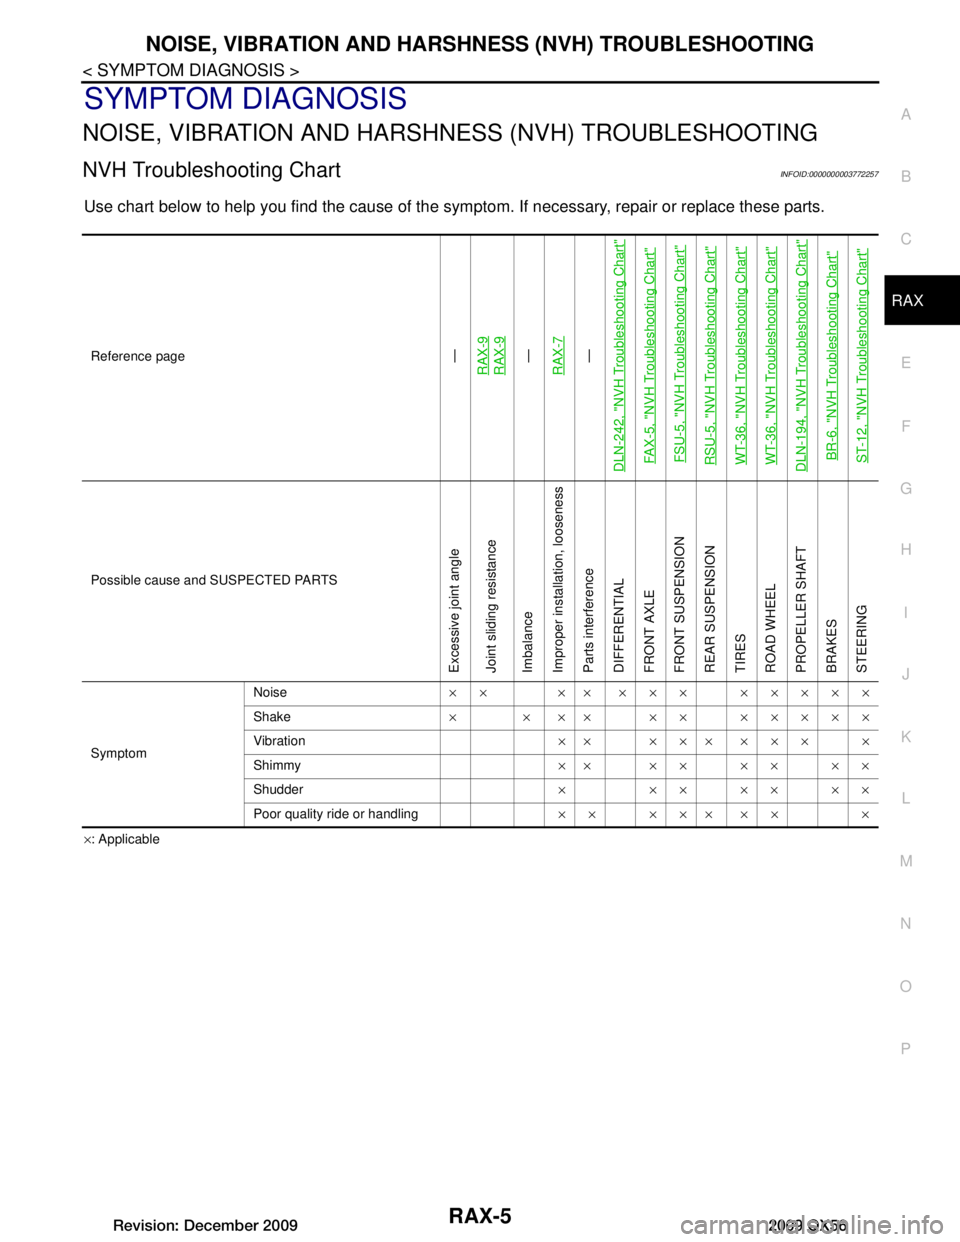
NVH Troubleshooting ChartINFOID:0000000003772257
Use chart below to help you find the cause of the symp tom. If necessary, repair or replace these parts.
×: Applicable
Reference page
—
RAX-9RAX-9—
RAX-7—
DLN-242, "NVH Troubleshooting Chart"
FAX-5, "NVH Troubleshooting Chart" FSU-5, "NVH Troubleshooting Chart"RSU-5, "NVH Troubleshooting Chart"WT-36, "NVH Troubleshooting Chart"WT-36, "NVH Troubleshooting Chart"DLN-194, "NVH Troubleshooting Chart"BR-6, "NVH Troubleshooting Chart"ST-12, "NVH Troubleshooting Chart"
Possible cause and SUSPECTED PARTS
Excessive joint angle
Joint sliding resistance
Imbalance
Improper installation, looseness
Parts interference
DIFFERENTIAL
FRONT AXLE
FRONT SUSPENSION
REAR SUSPENSION
TIRES
ROAD WHEEL
PROPELLER SHAFT
BRAKES
STEERING
Symptom Noise
×× ×× ××× ×××××
Shake × × ×× ×× ×××××
Vibration ×× ××× ××× ×
Shimmy ×× ×× ×× ××
Shudder × ××××××
Poor quality ride or handling ×× ××× ×× ×
Revision: December 20092009 QX56
Page 3083 of 4171
RAX-8
< REMOVAL AND INSTALLATION >
WHEEL HUB
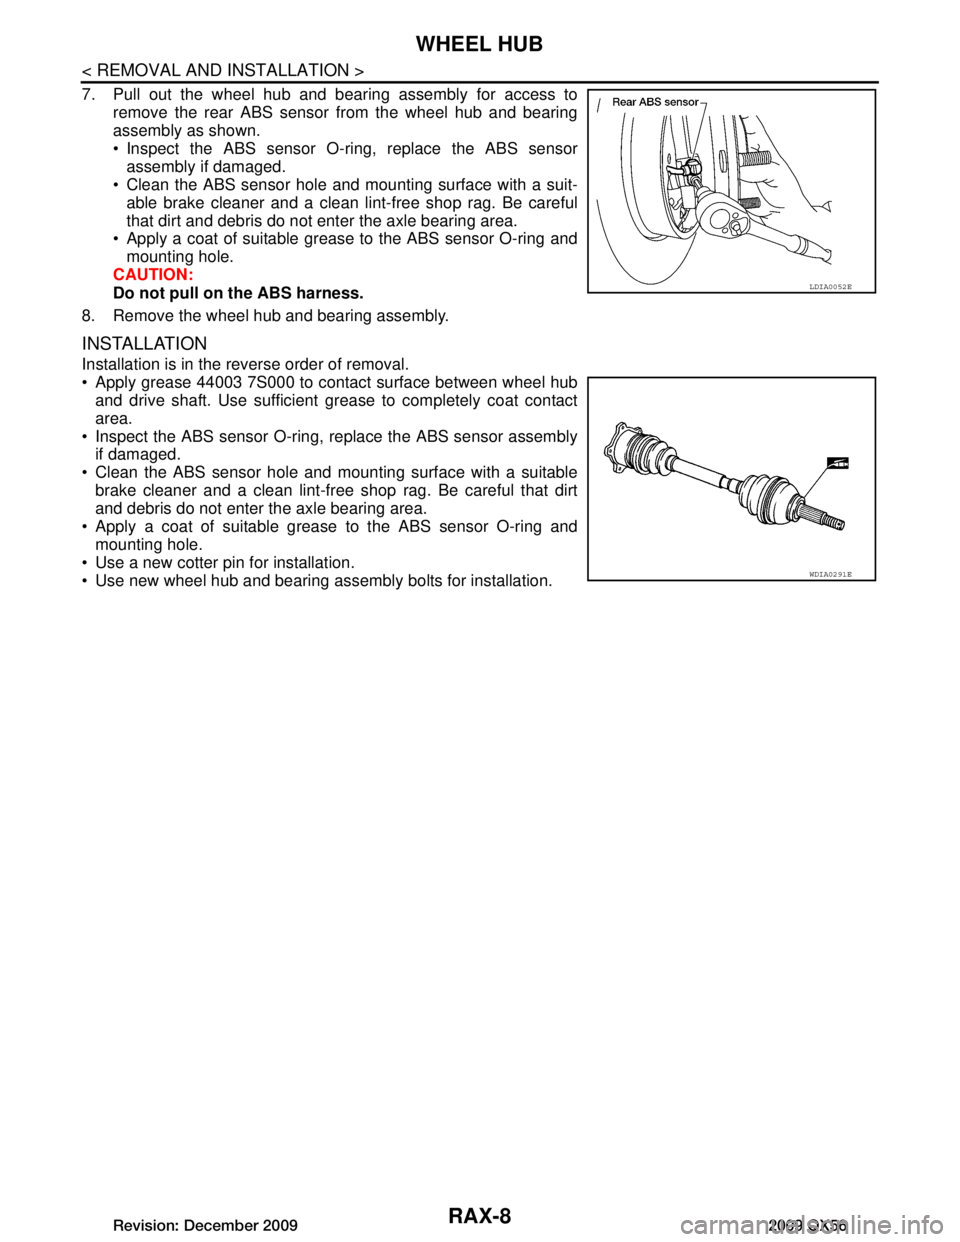
7. Pull out the wheel hub and bearing assembly for access toremove the rear ABS sensor from the wheel hub and bearing
assembly as shown.
Inspect the ABS sensor O-ring, replace the ABS sensor
assembly if damaged.
Clean the ABS sensor hole and mounting surface with a suit-
able brake cleaner and a clean lint-free shop rag. Be careful
that dirt and debris do not enter the axle bearing area.
Apply a coat of suitable grease to the ABS sensor O-ring and
mounting hole.
CAUTION:
Do not pull on the ABS harness.
8. Remove the wheel hub and bearing assembly.
INSTALLATION
Installation is in the reverse order of removal.
Apply grease 44003 7S000 to contact surface between wheel hub and drive shaft. Use sufficient gr ease to completely coat contact
area.
Inspect the ABS sensor O-ring, replace the ABS sensor assembly
if damaged.
Clean the ABS sensor hole and mounting surface with a suitable brake cleaner and a clean lint-free shop rag. Be careful that dirt
and debris do not enter the axle bearing area.
Apply a coat of suitable grease to the ABS sensor O-ring and
mounting hole.
Use a new cotter pin for installation.
Use new wheel hub and bearing assembly bolts for installation.
LDIA0052E
WDIA0291E
Revision: December 20092009 QX56
Page 3167 of 4171
FRONT LOWER LINKRSU-19
< REMOVAL AND INSTALLATION >
C
DF
G H
I
J
K L
M A
B
RSU
N
O P
FRONT LOWER LINK
Removal and InstallationINFOID:0000000005889875
REMOVAL
1. Remove the wheel and tire assembly using power tool.
2. If equipped with rear load leveling air suspension system, use CONSULT-III “EXHAUST SOLENOID”
active test to release the air pressure from the rear load leveling air suspension system.
3. Set suitable jack to support rear lower link.
4. Remove the shock absorber lower end bolt.
5. Remove stabilizer bar connecting rod from front lower link.
6. Remove stabilizer bar clamps and place bar aside.
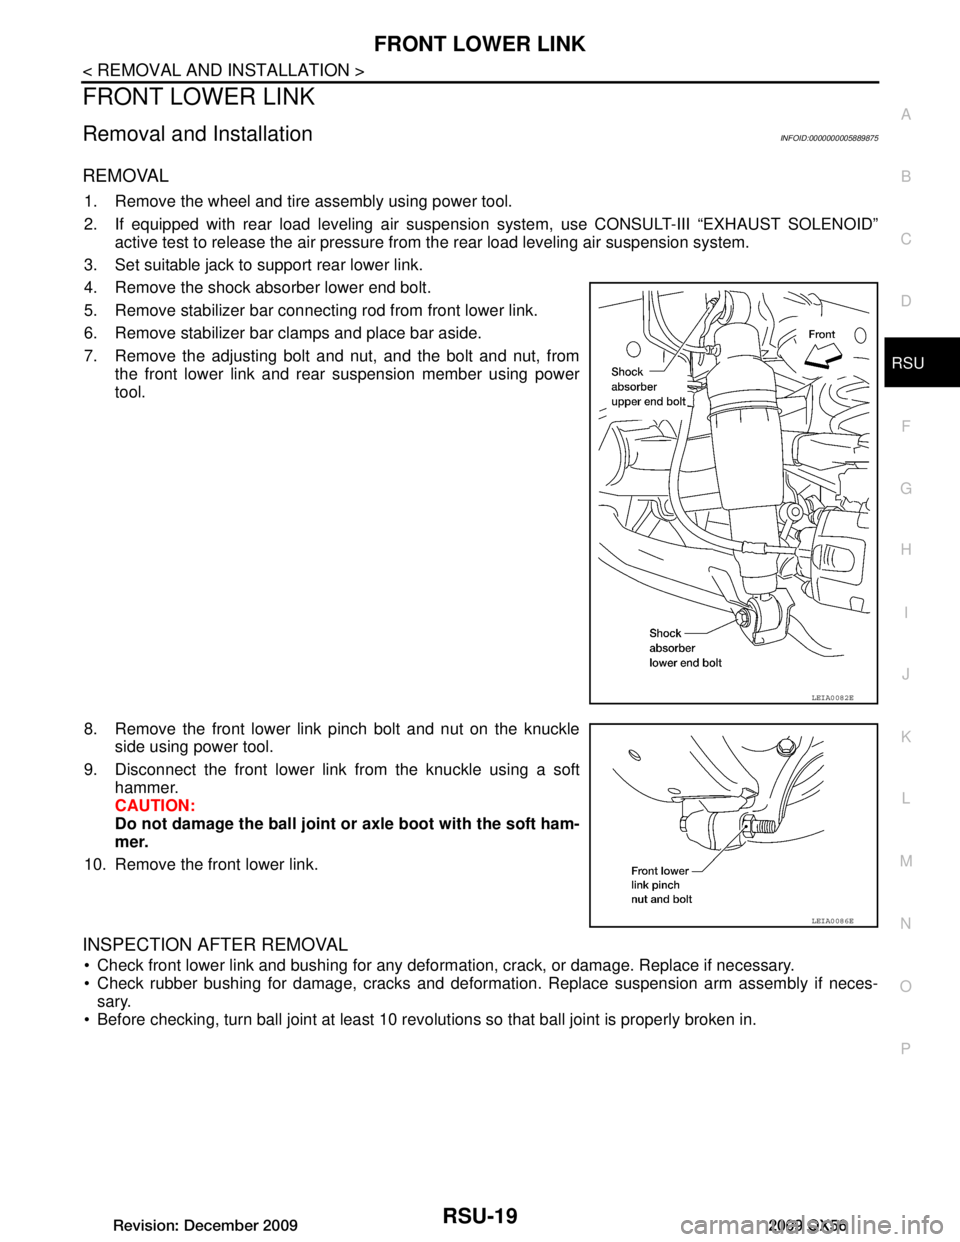
7. Remove the adjusting bolt and nut, and the bolt and nut, from the front lower link and rear suspension member using power
tool.
8. Remove the front lower link pinch bolt and nut on the knuckle side using power tool.
9. Disconnect the front lower link from the knuckle using a soft hammer.
CAUTION:
Do not damage the ball joint or axle boot with the soft ham-
mer.
10. Remove the front lower link.
INSPECTION AFTER REMOVAL
Check front lower link and bushing for any deformation, crack, or damage. Replace if necessary.
Check rubber bushing for damage, cracks and deformation. Replace suspension arm assembly if neces-
sary.
Before checking, turn ball joint at least 10 revo lutions so that ball joint is properly broken in.
LEIA0082E
LEIA0086E
Revision: December 20092009 QX56
Page 4078 of 4171
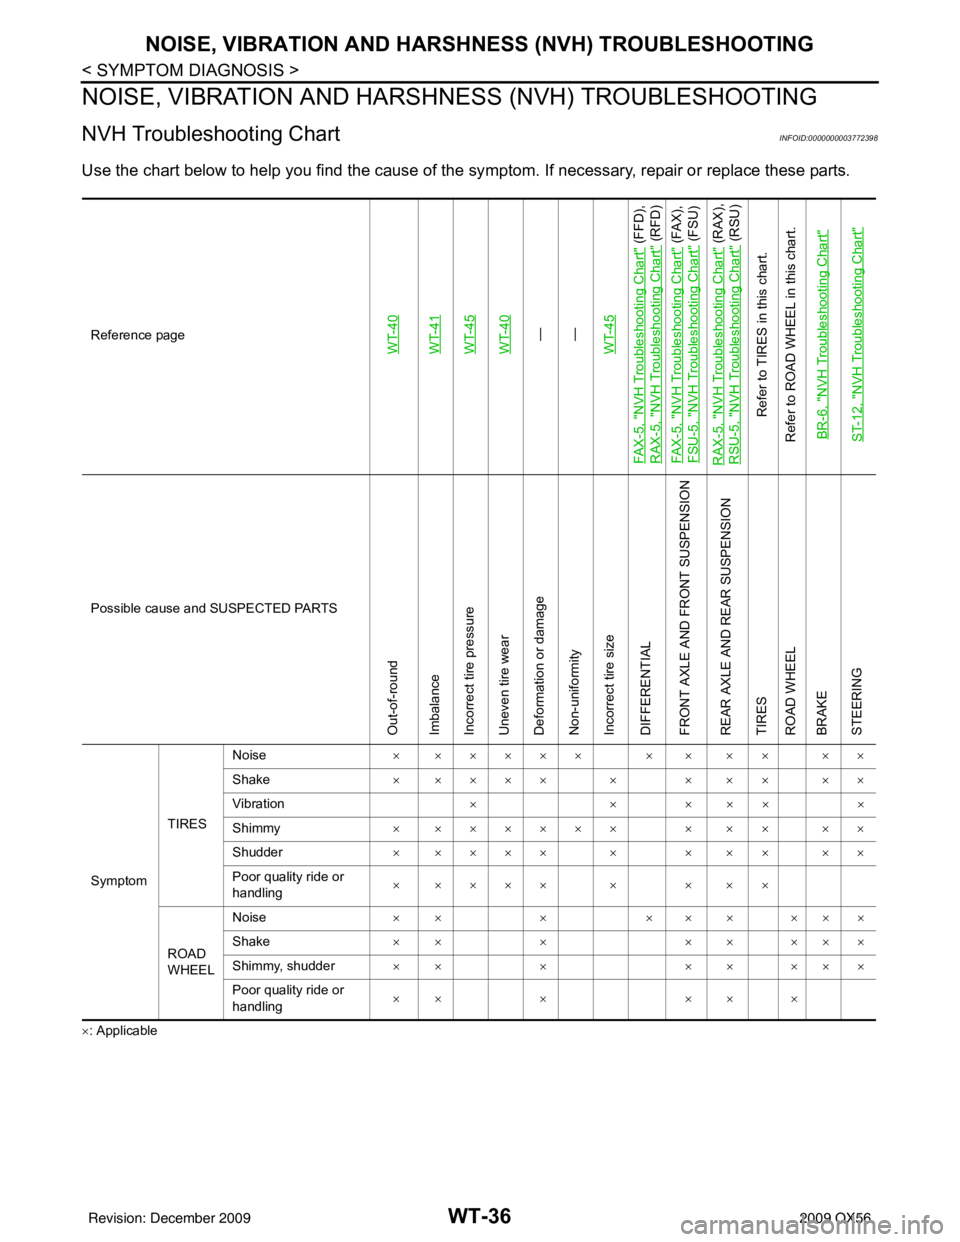
WT-36
< SYMPTOM DIAGNOSIS >
NOISE, VIBRATION AND HARSHNESS (NVH) TROUBLESHOOTING
NOISE, VIBRATION AND HARSHNESS (NVH) TROUBLESHOOTING
NVH Troubleshooting ChartINFOID:0000000003772398
Use the chart below to help you find the cause of the sy mptom. If necessary, repair or replace these parts.
×: ApplicableReference page
WT-40WT-41WT-45WT-40—
—
WT-45
FA X - 5 , "
NVH Troubleshooting Chart
" (FFD),
RAX-5, "
NVH Troubleshooting Chart
" (RFD)
FA X - 5 , "
NVH Troubleshooting Chart
" (FAX),
FSU-5, "
NVH Troubleshooting Chart
" (FSU)
RAX-5, "
NVH Troubleshooting Chart
" (RAX),
RSU-5, "
NVH Troubleshooting Chart
" (RSU)
Refer to TIRES in this chart.
Refer to ROAD WHEEL in this chart.
BR-6, "
NVH Troubleshooting Chart
"
ST-12, "
NVH Troubleshooting Chart
"
Possible cause and SUSPECTED PARTS
Out-of-round
Imbalance
Incorrect tire pressure
Uneven tire wear
Deformation or damage
Non-uniformity
Incorrect tire size
DIFFERENTIAL
FRONT AXLE AND FRONT SUSPENSION
REAR AXLE AND REAR SUSPENSION
TIRES
ROAD WHEEL
BRAKE
STEERING
Symptom TIRESNoise
× ××××× × × × × ××
Shake × ×××× × × × × ××
Vibration ××× ×××
Shimmy × ×××××× × × × ××
Shudder × ×××× × × × × ××
Poor quality ride or
handling × ×××× × × × ×
ROAD
WHEEL Noise
×× × ××× ×××
Shake ×× × ×× ×××
Shimmy, shudder ×× × ×× ×××
Poor quality ride or
handling ×× ×
×× ×
Revision: December 20092009 QX56