2009 HYUNDAI TUCSON tires
[x] Cancel search: tiresPage 180 of 273
3
WHAT TO DO IN AN EMERGENCY
11
CHANGING A FLAT TIRED060A02HP-AATThe procedure described on the follow-
ing pages can be used to rotate tires as
well as to change a flat tire. When
preparing to change a flat tire, check to
be sure the gear selector lever is in "P"
(automatic) or reverse gear (manual
transaxle) and that the parking brake is
set, then:
D060A01JM
!
WARNING:
Your vehicle is equipped with tires
designed to provide for safe ride and
handling capability.
Do not use a size and type of tire and
wheel that is different from the one
that is originally installed on your
vehicle. It can affect the safety and
performance of your vehicle, which
could lead to handling failure or
rollover and serious injury.
When replacing the tires, be sure to
equip all four tires with the tire and
wheel of the same size, type, tread,
brand and load-carrying capacity. If
you nevertheless decide to equip
your vehicle with any tire/wheel com-
bination not recommended by
Hyundai for off-road driving, you
should not use these tires for high-
way driving.
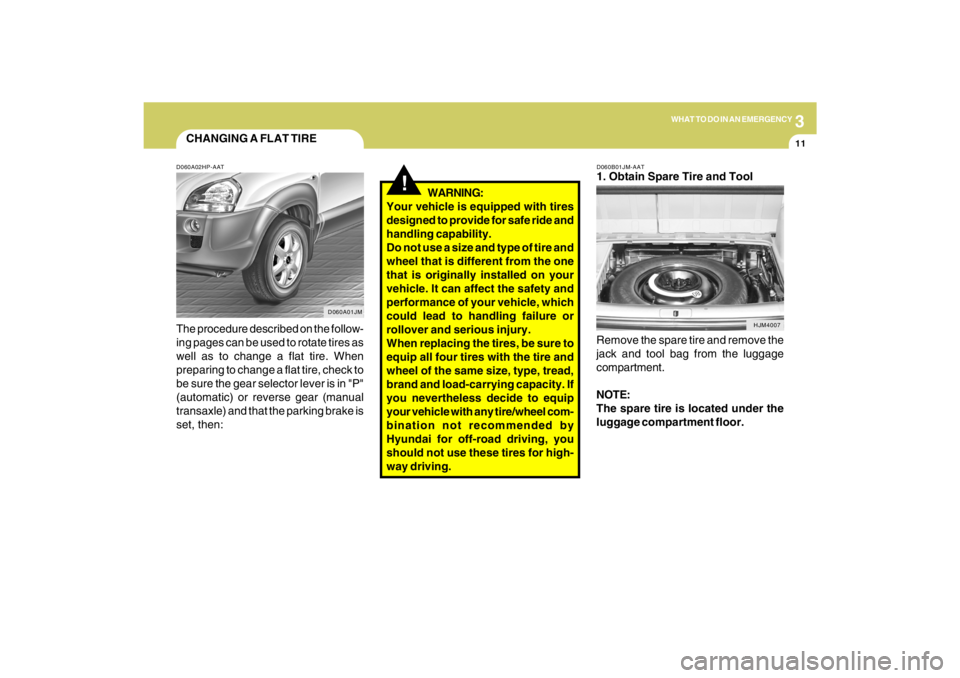
Remove the spare tire and remove the
jack and tool bag from the luggage
compartment.
NOTE:
The spare tire is located under the
luggage compartment floor.D060B01JM-AAT1. Obtain Spare Tire and Tool
HJM4007
Page 192 of 273
4
CORROSION PREVENTION AND APPEARANCE CARE4
After rinsing, dry the car using a damp
chamois or soft, absorbent cloth. The rea-
son for drying the car is to remove water
from the car so it will dry without water
spots. Don't rub, this can damage the fin-
ish.
If you find any nicks or scratches in the
paint, use touch-up paint to cover them to
prevent corrosion. To protect the paintwork
of the car against corrosion, you must
clean your Hyundai (at least once a month).
Give special attention
to the removal of salt, mud and other sub-
stances on the underside of the
splashboards of the car. Make sure that the
outlets and the underside of the doors are
open. Paint damage can be caused by
small accumulation of tar, industrial pre-
cipitation, tree resin, insects and bird drop-
pings, when not removed immediately. If
water alone is not strong enough to re-
move the accumulated dirt, use a mild car
washing solution. Be sure to rinse the
surface after washing to remove the solu-
tion. Never allow the solution to dry on the
painted surfaces. Use a clean sponge or cloth, rinse it fre-
quently and don't damage the finish by
rubbing too hard. For stubborn spots,
dampen them frequently and remove them
a little at a time.
To clean whitewall tires, use a stiff brush or
soapy steel-wool scouring pad.
To clean plastic wheel covers, use a clean
sponge or soft cloth and water.
To clean cast aluminum alloy wheels, use
a mild soap or neutral detergent. Do not
use abrasive cleaners. Protect the bare-
metal surfaces by cleaning, polishing and
waxing. Because aluminum is subject to
corrosion, be sure to give aluminum alloy
wheels special attention in winter. If you
drive on salted roads, clean the wheels
thoroughly afterwards.
After washing, be sure to rinse thoroughly.
If soapy water dries on the finish, streaking
will result.
When the weather is warm and the humid-
ity low, you may find it necessary to rinse
each section immediately after washing to
avoid streaking.
CAUTION:
!
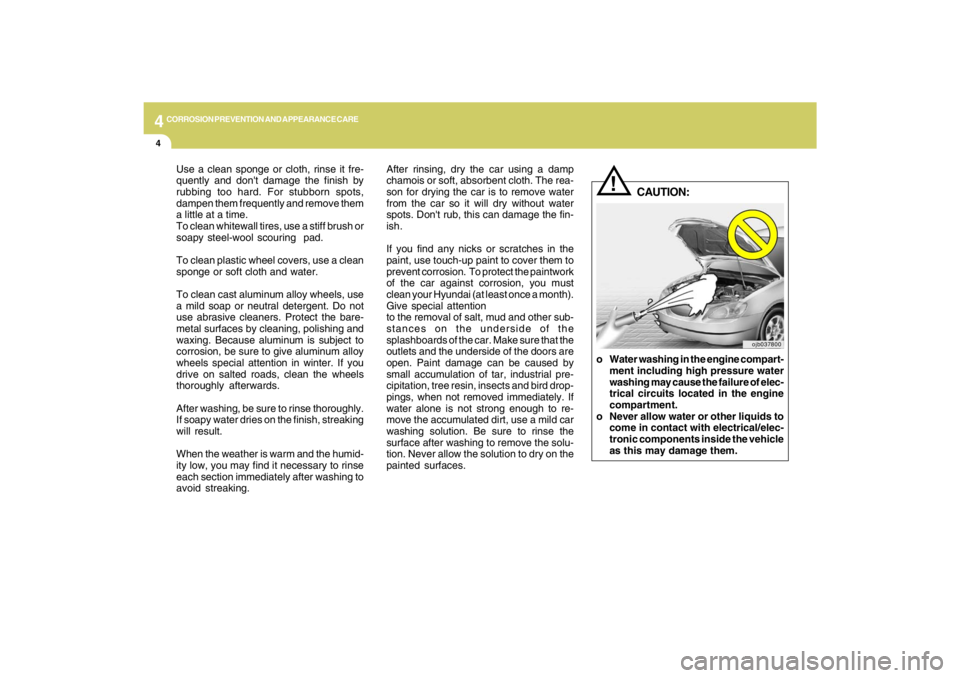
o Water washing in the engine compart-
ment including high pressure water
washing may cause the failure of elec-
trical circuits located in the engine
compartment.
o Never allow water or other liquids to
come in contact with electrical/elec-
tronic components inside the vehicle
as this may damage them.
ojb037800
Page 229 of 273
6
DO-IT-YOURSELF MAINTENANCE
25
POWER STEERING FLUID
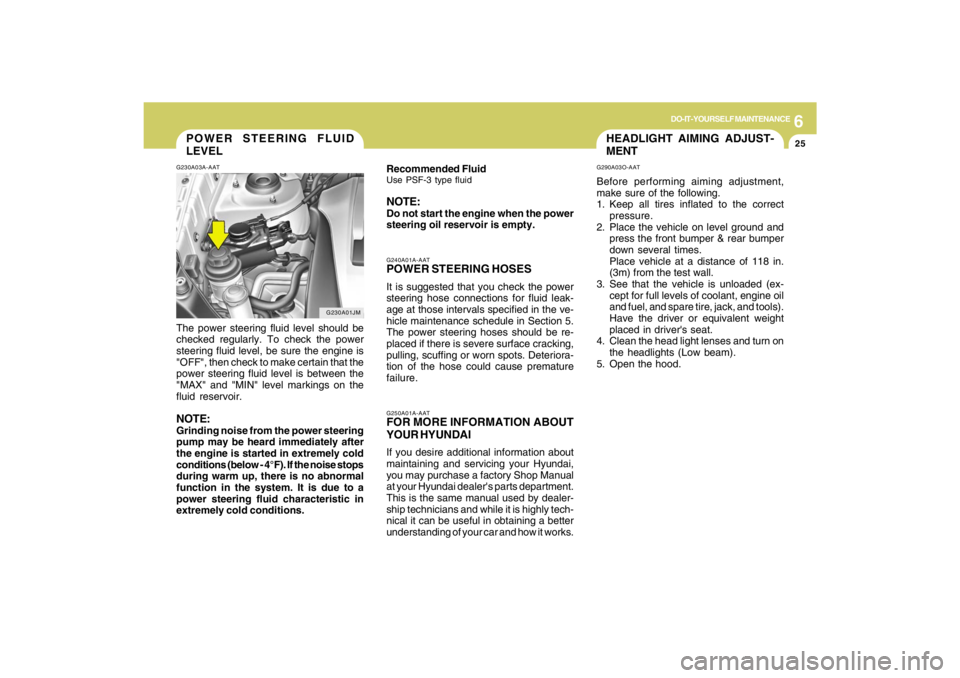
LEVELG230A03A-AATThe power steering fluid level should be
checked regularly. To check the power
steering fluid level, be sure the engine is
"OFF", then check to make certain that the
power steering fluid level is between the
"MAX" and "MIN" level markings on the
fluid reservoir.NOTE:Grinding noise from the power steering
pump may be heard immediately after
the engine is started in extremely cold
conditions (below - 4°F). If the noise stops
during warm up, there is no abnormal
function in the system. It is due to a
power steering fluid characteristic in
extremely cold conditions.
G230A01JM
HEADLIGHT AIMING ADJUST-
MENTG290A03O-AATBefore performing aiming adjustment,
make sure of the following.
1. Keep all tires inflated to the correct
pressure.
2. Place the vehicle on level ground and
press the front bumper & rear bumper
down several times.
Place vehicle at a distance of 118 in.
(3m) from the test wall.
3. See that the vehicle is unloaded (ex-
cept for full levels of coolant, engine oil
and fuel, and spare tire, jack, and tools).
Have the driver or equivalent weight
placed in driver's seat.
4. Clean the head light lenses and turn on
the headlights (Low beam).
5. Open the hood.
G250A01A-AATFOR MORE INFORMATION ABOUT
YOUR HYUNDAIIf you desire additional information about
maintaining and servicing your Hyundai,
you may purchase a factory Shop Manual
at your Hyundai dealer's parts department.
This is the same manual used by dealer-
ship technicians and while it is highly tech-
nical it can be useful in obtaining a better
understanding of your car and how it works.G240A01A-AATPOWER STEERING HOSESIt is suggested that you check the power
steering hose connections for fluid leak-
age at those intervals specified in the ve-
hicle maintenance schedule in Section 5.
The power steering hoses should be re-
placed if there is severe surface cracking,
pulling, scuffing or worn spots. Deteriora-
tion of the hose could cause premature
failure. Recommended FluidUse PSF-3 type fluidNOTE:Do not start the engine when the power
steering oil reservoir is empty.
Page 246 of 273
Vehicle Identification Number (VIN) .............................. 8-2
Engine Number ............................................................. 8-2
Tire Information ............................................................. 8-3
Recommended Inflation Pressures ............................... 8-3
Tire Sidewall Labeling ................................................... 8-6
Tire Terminology and Definitions ................................... 8-7
Snow Tires..................................................................8-10
Tire Chains ..................................................................8-10
Tire Rotation................................................................8-11
Tire Balancing.............................................................8-11
Tire Traction................................................................8-11
When to Replace Tires ...............................................8-12
Tire Maintenance........................................................8-13
Spare Tire and Tools ...................................................8-14
Warranties for Your Hyundai Vehicle..........................8-14
Consumer Information.................................................8-15
Reporting Safety Defects (U.S.A Only)...................... 8-17
Binding Arbitration of Warranty Claims (U.S.A Only) .. 8-18
CONSUMER INFORMATION, REPORTING
SAFETY DEFECTS & BINDING
ARBITRATION OF WARRANTY CLAIMS
8
8
Page 248 of 273
8
CONSUMER INFORMATION, REPORTING SAFETY DEFECTS & BINDING ARBITRATION OF WARRANTY CLAIMS
3
TIRES
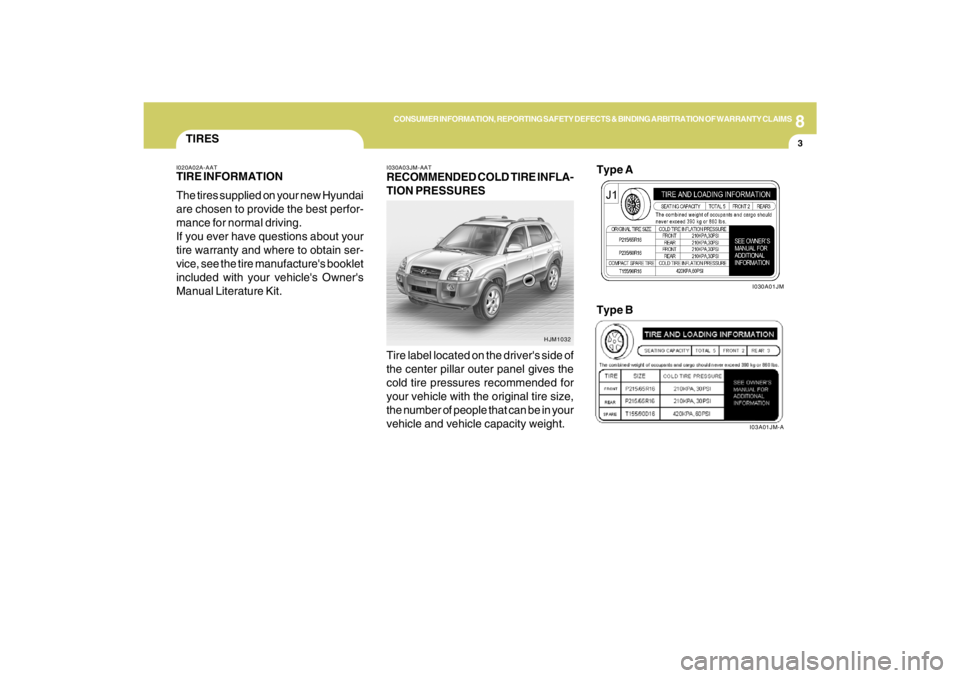
I030A03JM-AATRECOMMENDED COLD TIRE INFLA-
TION PRESSURES
I020A02A-AATTIRE INFORMATION
The tires supplied on your new Hyundai
are chosen to provide the best perfor-
mance for normal driving.
If you ever have questions about your
tire warranty and where to obtain ser-
vice, see the tire manufacture's booklet
included with your vehicle's Owner's
Manual Literature Kit.
Tire label located on the driver's side of
the center pillar outer panel gives the
cold tire pressures recommended for
your vehicle with the original tire size,
the number of people that can be in your
vehicle and vehicle capacity weight.
HJM1032
I03A01JM-A
Type B
I030A01JM
Type A
Page 249 of 273

8
CONSUMER INFORMATION, REPORTING SAFETY DEFECTS & BINDING ARBITRATION OF WARRANTY CLAIMS4
!
These pressures were chosen to pro-
vide the most satisfactory combination
of ride comfort, tire wear and stability
under normal conditions. Tire pressures
should be checked at least monthly.
Proper tire inflation pressures should
be maintained for these reasons:
!
WARNING:
Overinflation or underinflation can
reduce the tire life, adversely affect
vehicle handling, and lead to sud-
den tire failure. This could rusult in
loss of vehicle control and potential
injury.
Type C
I030A02-A
NOTE:
o Underinflation also results in ex-
cessive wear, poor handling and
reduced fuel economy. Wheel de-
formation also is possible. Keep
your tire pressures at the proper
levels. If a tire frequently needs
refilling, have it checked by your
Hyundai Dealer.
o Overinflation produces a harsh
ride, excessive wear at the center
of the tire tread, and a greater
possibility of damage from road
hazards. WARNING:
o Inspect your tires frequently for
proper inflation as well as wear
and damage. Always use a tire
pressure gauge.
o Tires with too much or too little
pressure wear unevenly causing
poor handling, loss of vehicle
control, and sudden tire failure
leading to accidents, injuries, and
even death. The recommended
cold tire pressure for your vehicle
can be found in this manual and
on the tire label located on the
driver's side of the center pillar.
o Worn tires can cause accidents.
Replace tires that are worn, show
uneven wear, or are damaged. See
page 8-12.
o Remember to check the pressure
of your spare tire. Hyundai recom-
mends that you check the spare
every time you check the pressure
of the other tires on your vehicle.
Page 250 of 273

8
CONSUMER INFORMATION, REPORTING SAFETY DEFECTS & BINDING ARBITRATION OF WARRANTY CLAIMS
5
CAUTION:
Always observe the following:
o Check pressures when the tires
are cold. (After the vehicle has
been parked for at least three hours
or hasn't been driven more than
one mile (1.6 km) since starting
up.)
o Check the pressure of your spare
tire each time you check the pres-
sure of other tires.
o Never overload your vehicle. Be
especially careful about overload-
ing if you equip your vehicle with
a luggage rack.
o Worn, old tires can cause acci-
dents. If your tread is badly worn,
or if your tires have been dam-
aged, replace them.
!
Remove the valve cap from the tire
valve stem. Press the tire gage firmly
onto the valve to get a pressure mea-
surement. If the cold tire inflation pres-
sure matches the recommended pres-
sure on the tire and loading information
label, no further adjustment is neces-
sary. If the pressure is low, add air until
you reach the recommended amount.
If you overfill the tire, release air by
pushing on the metal stem in the center
of the tire valve. Recheck the tire pres-
sure with the tire gage. Be sure to put
the valve caps back on the valve stems.
They help prevent leaks by keeping out
dirt and moisture.
I035A01JM-AATCHECKING TIRE INFLATION PRES-
SURE
Check your tires once a month or more.
Also, check the tire pressure of the
spare tire.
How to Check
Use a good quality gage to check tire
pressure. You can not tell if your tires
are properly inflated simply by looking
at them. Radial tires may look properly
inflated even when they're underinflated.
Check the tire's inflation pressure when
the tires are cold. - "Cold" means your
vehicle has been sitting for at least
three hours or driven no more than 1
mile (1.6 km).
Page 251 of 273
8
CONSUMER INFORMATION, REPORTING SAFETY DEFECTS & BINDING ARBITRATION OF WARRANTY CLAIMS6
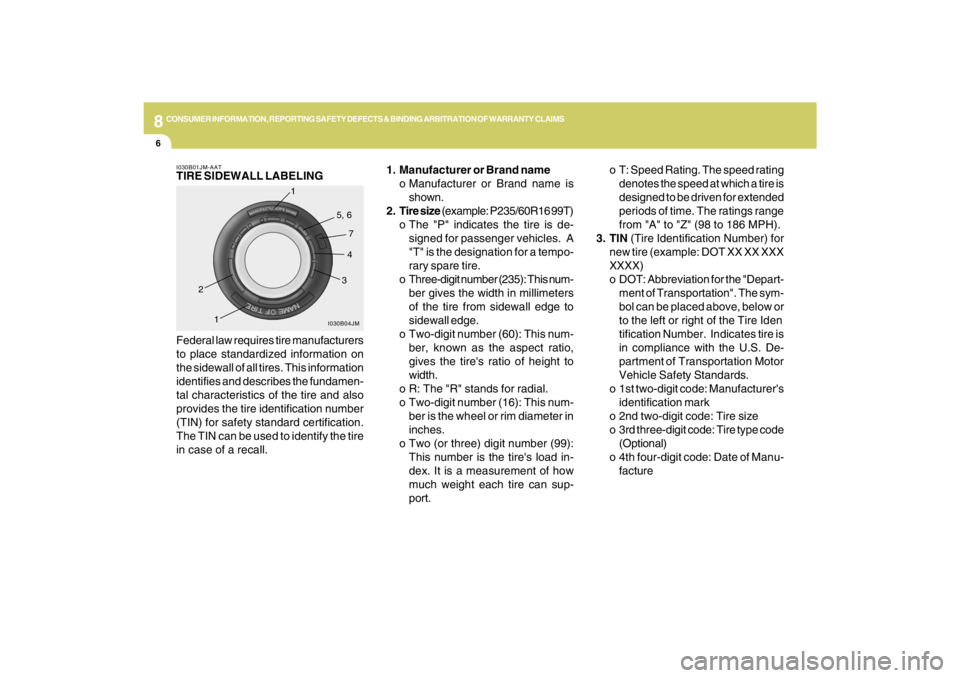
1. Manufacturer or Brand name
o Manufacturer or Brand name is
shown.
2. Tire size (example: P235/60R16 99T)
o The "P" indicates the tire is de-
signed for passenger vehicles. A
"T" is the designation for a tempo-
rary spare tire.
o Three-digit number (235): This num-
ber gives the width in millimeters
of the tire from sidewall edge to
sidewall edge.
o Two-digit number (60): This num-
ber, known as the aspect ratio,
gives the tire's ratio of height to
width.
o R: The "R" stands for radial.
o Two-digit number (16): This num-
ber is the wheel or rim diameter in
inches.
o Two (or three) digit number (99):
This number is the tire's load in-
dex. It is a measurement of how
much weight each tire can sup-
port.o T: Speed Rating. The speed rating
denotes the speed at which a tire is
designed to be driven for extended
periods of time. The ratings range
from "A" to "Z" (98 to 186 MPH).
3. TIN (Tire Identification Number) for
new tire (example: DOT XX XX XXX
XXXX)
o DOT: Abbreviation for the "Depart-
ment of Transportation". The sym-
bol can be placed above, below or
to the left or right of the Tire Iden
tification Number. Indicates tire is
in compliance with the U.S. De-
partment of Transportation Motor
Vehicle Safety Standards.
o 1st two-digit code: Manufacturer's
identification mark
o 2nd two-digit code: Tire size
o 3rd three-digit code: Tire type code
(Optional)
o 4th four-digit code: Date of Manu-
facture
Federal law requires tire manufacturers
to place standardized information on
the sidewall of all tires. This information
identifies and describes the fundamen-
tal characteristics of the tire and also
provides the tire identification number
(TIN) for safety standard certification.
The TIN can be used to identify the tire
in case of a recall.I030B01JM-AATTIRE SIDEWALL LABELING
I030B04JM
1
234 5, 6
7
1