Page 205 of 273
6
Engine Compartment .................................................... 6-2
General Checks ............................................................ 6-4
Checking the Engine Oil ............................................... 6-5
Changing the Oil and Filter ............................................ 6-6
Checking and Changing the Engine Coolant ................ 6-8
Changing the Air Cleaner Filter ...................................6-10
Checking the Transaxle Oil (Manual) .........................6-11
Checking the Transaxle Fluid (Automatic)..................6-12
Checking the Brakes ..................................................6-14
Checking the Clutch Fluid...........................................6-15
Air Conditioning Care..................................................6-16
Changing the Climate Control Air Filter .......................6-17
Checking the Free-play...............................................6-19
Checking Drive Belts ..................................................6-20
Checking and Replacing Fuses..................................6-21
Checking the Battery..................................................6-23
Power Steering Fluid Level .........................................6-25
Replacement of Light Bulbs ........................................6-27
Bulb Wattage ...............................................................6-34
Fuse Panel Description...............................................6-35
6
DO-IT-YOURSELF MAINTENANCE
Page 206 of 273
6
DO-IT-YOURSELF MAINTENANCE
2
ENGINE COMPARTMENTG010A01JM-GAT(2.7 Gasoline)1. Power steering fluid reservoir
2. Brake & Clutch fluid reservoir
3. Air cleaner
4. Fuse and Relay box5. Windshield washer fluid reservoir
6. Engine oil level dipstick
7. Coolant reservoir cap
8. Engine oil filler cap9. Automatic transaxle fluid level dipstick
(Vehicle with Automatic Transaxle)
10. Radiator cap
11. Battery
G010A01JM
CAUTION:
When inspecting or servicing the
engine, you should handle tools
and other heavy objects care-
fully so that the plastic cover of
the engine is not damaged.
!
Page 207 of 273
6
DO-IT-YOURSELF MAINTENANCE
3
G010B01JM-AAT(2.0 Gasoline)
G010B01JM
1. Power steering fluid reservoir
2. Engine oil filler cap
3. Brake & Clutch fluid reservoir
4. Air cleaner5. Fuse and Relay box
6. Windshield washer fluid reservoir
7. Engine oil level dipstick
8. Coolant reservoir cap9. Automatic transaxle fluid level dipstick
(Vehicle with Automatic Transaxle)
10. Radiator cap
11. Battery
CAUTION:
When inspecting or servicing the
engine, you should handle tools
and other heavy objects care-
fully so that the plastic cover of
the engine is not damaged.
!
Page 208 of 273
6
DO-IT-YOURSELF MAINTENANCE
4
GENERAL CHECKS
G020C01A-AATVehicle InteriorThe following should be checked each
time when the vehicle is driven:
o Lights operation
o Windshield wiper operation
o Horn operation
o Defroster, heating system operation
(and air conditioning, if installed)
o Steering operation and condition
o Mirror condition and operation
o Turn signal operation
o Accelerator pedal operation
o Brake operation, including parking
brake
o Manual transaxle operation, including
clutch operation
o Automatic transaxle operation, includ-
ing "Park" mechanism operation
o Seat control condition and operation
o Seat belt condition and operation
o Sunvisor operation
If you notice anything that does not operate
correctly or appears to be functioning cor-
rectly, inspect it carefully and seek assis-
tance from your Hyundai dealer if service
is needed.
G020B01A-AATVehicle ExteriorThe following should be checked monthly:
o Overall appearance and condition
o Wheel condition and wheel nut torque
o Exhaust system condition
o Light condition and operation
o Windshield glass condition
o Wiper blade condition
o Paint condition and body corrosion
o Fluid leaks
o Door and hood lock condition
o Tire pressure and condition
(including spare tire)
G020A01A-AATEngine CompartmentThe following should be checked regu-
larly:
o Engine oil level and condition
o Transaxle fluid level and condition
o Brake fluid level
o Clutch fluid level
o Engine coolant level
o Windshield washer fluid level
o Accessory drive belt condition
o Engine coolant hose condition
o Fluid leaks (on or below components)
o Power steering fluid level
o Battery condition
o Air filter condition
Page 213 of 273
6
DO-IT-YOURSELF MAINTENANCE
9
!
!
WARNING:
The cooling fan is controlled by engine
coolant temperature and may some-
times operate even when the engine is
not running. Use extreme caution when
working near the blades of the coolant
fan so that you are not injured by a
rotating fan blade. As the engine coolant
temperature decreases, the fan will au-
tomatically shut off. This is a normal
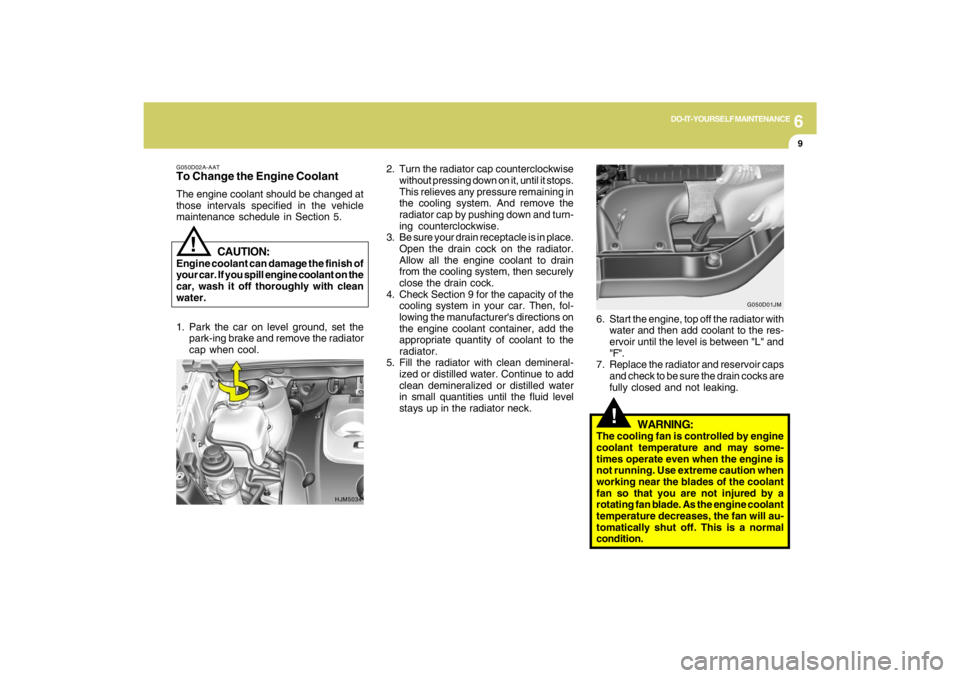
condition. 2. Turn the radiator cap counterclockwise
without pressing down on it, until it stops.
This relieves any pressure remaining in
the cooling system. And remove the
radiator cap by pushing down and turn-
ing counterclockwise.
3. Be sure your drain receptacle is in place.
Open the drain cock on the radiator.
Allow all the engine coolant to drain
from the cooling system, then securely
close the drain cock.
4. Check Section 9 for the capacity of the
cooling system in your car. Then, fol-
lowing the manufacturer's directions on
the engine coolant container, add the
appropriate quantity of coolant to the
radiator.
5. Fill the radiator with clean demineral-
ized or distilled water. Continue to add
clean demineralized or distilled water
in small quantities until the fluid level
stays up in the radiator neck.6. Start the engine, top off the radiator with
water and then add coolant to the res-
ervoir until the level is between "L" and
"F".
7. Replace the radiator and reservoir caps
and check to be sure the drain cocks are
fully closed and not leaking.
G050D02A-AATTo Change the Engine CoolantThe engine coolant should be changed at
those intervals specified in the vehicle
maintenance schedule in Section 5.
HJM5034G050D01JM
CAUTION:
Engine coolant can damage the finish of
your car. If you spill engine coolant on the
car, wash it off thoroughly with clean
water.
1. Park the car on level ground, set the
park-ing brake and remove the radiator
cap when cool.
Page 217 of 273
6
DO-IT-YOURSELF MAINTENANCE
13
!
G110D03O-AATChecking the Automatic Transaxle
Fluid LevelThe automatic transaxle fluid level should
be checked regularly.
Keep the vehicle on the level ground with
the parking brake applied and check the
fluid level according to the following pro-
cedure.
1. Place the shift lever in N (Neutral) posi-
tion and confirm the engine is running
at normal idle speed.
2. After the transaxle is warmed up suffi-
ciently (fluid temperature 158~176°F),
for example by 10 minutes usual driv-
ing, move the shift lever through all
positions then place the shift lever in N
(Neutral) or P (Park) position.
G110C01JM-AATTransaxle Fluid CapacityThe fluid capacity of the automatic
transaxle is 8.2 U.S. quarts (7.8 liters).
WARNING:
The transaxle fluid level should be
checked when the engine is at normal
operating temperature. This means that
the engine, radiator, exhaust system
etc., are very hot so you should exercise
great care not to burn yourself during
this procedure.
HJM5011
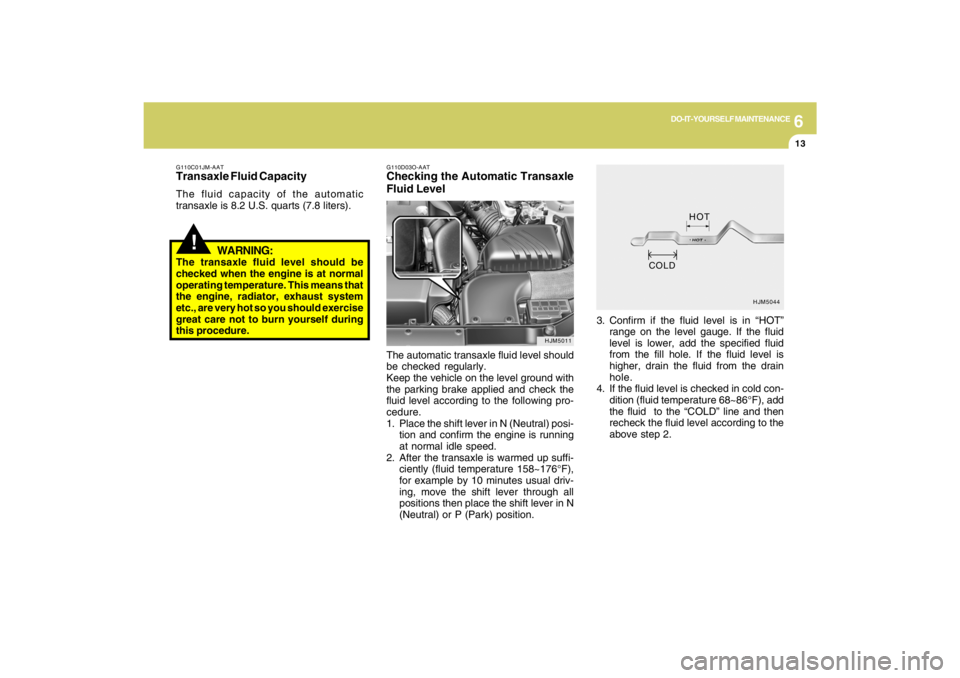
3. Confirm if the fluid level is in “HOT”
range on the level gauge. If the fluid
level is lower, add the specified fluid
from the fill hole. If the fluid level is
higher, drain the fluid from the drain
hole.
4. If the fluid level is checked in cold con-
dition (fluid temperature 68~86°F), add
the fluid to the “COLD” line and then
recheck the fluid level according to the
above step 2.
HJM5044
HOT
COLD
Page 218 of 273
6
DO-IT-YOURSELF MAINTENANCE
14
CHECKING THE BRAKES
!
G120B01A-AATChecking the Brake Fluid Level
WARNING:Use caution when handling brake fluid. It
can damage your vision if it gets into
your eyes. It will also damage your
vehicle's paint if spilled on it and not
removed immediately.
!
WARNING:
The cooling fan is controlled by engine
coolant temperature and may some-
times operate even when the engine is
not running. Use extreme caution when
working near the blades of the cooling
fan, so that you are not injured by a
rotating fan blade. As the engine coolant
temperature decreases, the fan will au-
tomatically shut off. This is a normal
condition.
G120A01A-AAT
CAUTION:
Because brakes are essential to the
safe operation of the car, it is suggested
that they be checked and inspected by
your Hyundai dealer. The brakes should
be checked and inspected for wear at
those intervals specified in the vehicle
maintenance schedule in Section 5.
!
G120C02A-AATRecommended Brake FluidUse only hydraulic brake fluid conforming
to DOT 3 or DOT 4 specifications in your
braking system. Follow the instructions
printed on the container.
Page 219 of 273

6
DO-IT-YOURSELF MAINTENANCE
15
G120D01A-AATTo Check the Fluid LevelThe fluid level in the brake fluid reservoir
should be checked periodically. The level
should be between the "MIN" and "MAX"
marks on the side of the reservoir. If the
level is at or below the "MIN" mark, care-
fully add fluid to bring it up to "MAX". Do not
overfill.
HJM5007
!
G120E02A-AATAdding Brake Fluid
WARNING:Handle brake fluid carefully. It can dam-
age your vision if it gets into your eyes.
Use only DOT 3 or DOT 4 specification
fluid from a sealed container. Do not
allow the fluid can or reservoir to remain
open any longer than required. This will
prevent entry of dirt and moisture which
can damage the brake system and cause
improper operation.
To add brake fluid, first wipe away any dirt
then unscrew the fluid reservoir cap. Slowly
pour the recommended fluid into the res-
ervoir. Do not overfill. Carefully replace the
cap on the reservoir and tighten.
HJM5007
CHECKING THE CLUTCH FLUIDG130A01A-AATTo Check the Clutch FluidThe clutch fluid level in the master cylinder
should be checked when performing other
under hood services. The system should
be checked for leakage at the same time.
Check to make certain that the clutch fluid
level is always between the "MAX" and
"MIN" level markings on the fluid reservoir.
Fill as required. Fluid loss indicates a leak
in the clutch system which should be in-
spected and repaired immediately. Con-
sult your Hyundai dealer.