2009 HYUNDAI TUCSON ESP
[x] Cancel search: ESPPage 2 of 273
Please consult your Owner's Handbook & Warranty Information booklet for your vehicle's spe-
cific warranty coverage.The maintenance requirements for your new Hyundai are found in Section 7. As the owner, it is your
responsibility to see that all maintenance operations specified by the manufacturer are carried out at
the appropriate intervals. When the vehicle is used in severe driving conditions, more frequent main-
tenance is required for some operations. Maintenance requirements for severe operating conditions
are also included in Section 7.
WARRANTIES FOR YOUR HYUNDAI VEHICLE
RESPONSIBILITY FOR MAINTENANCE
EN hma cover.qxd 11/27/2006 5:07 PM Page 2
Page 5 of 273
F4
A110A01A-AAT
VEHICLE DATA COLLECTION AND EVENT DATA RECORDERS
Your Hyundai vehicle is equipped with many high technology, electronically controlled systems
that help to ensure your vehicle operates properly and provides the performance that you
expect. These systems utilize computers to monitor the operation of various systems and
components and help to control their operation. These computerized system operations are
wide-ranging and involve components to reduce emissions, to continuously evaluate the
readiness of the airbag and seat belt pretensioner systems, to determine when the airbag and
seat belt pre-tensioner systems should be deployed and then to activate the deployment, and
if equipped, to operate anti-lock braking, traction control and electrical stability control to assist
the driver to control the vehicle in difficult driving situations. These systems electronically store
information that is useful to service technicians when they need to diagnose and repair these
systems. Additional information is stored only when a crash occurs that results in the
deployment of the airbags or seat belt pre-tensioners. This type of data storage is done by
devices called event data recorders(EDR).
After a crash event, the airbag and seat belt pre-tensioner computer system, known as the
Supplemental Restraint System Control Module (SRSCM) or Airbag Control Unit (ACU), may
record some information about the condition of the vehicle and how it was being operated. This
information consists of data related to seat belt usage and if there was diagnostic information
in the airbag or seat belt systems at the time that a crash occurred, and if the ACU sensed that
a crash of sufficient severity occurred to require seat belt pre-tensioner or airbag deployment.
To retrieve this information, special equipment is needed and access to the vehicle or the device
that stores the data is required. Hyundai will not access information about a crash event or share
it with others except:
o in response to an official request of police or similar government office, or
o with the consent of the vehicle owner or, if the vehicle is leased, with the consent of the lessee,
or
o as part of Hyundai’s defense of litigation, or
o as required by law.
Page 15 of 273
1FEATURES OF YOUR HYUNDAI4
B030C01E-1
DOOR LOCKS!
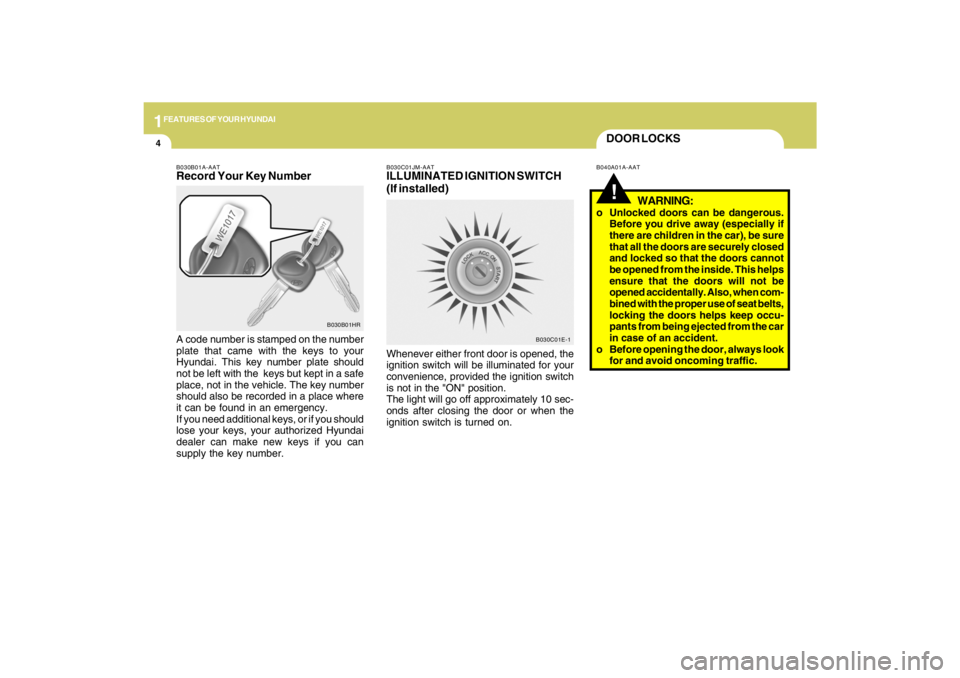
B040A01A-AAT B030C01JM-AAT
ILLUMINATED IGNITION SWITCH
(If installed)Whenever either front door is opened, the
ignition switch will be illuminated for your
convenience, provided the ignition switch
is not in the "ON" position.
The light will go off approximately 10 sec-
onds after closing the door or when the
ignition switch is turned on.
WARNING:
o Unlocked doors can be dangerous.
Before you drive away (especially if
there are children in the car), be sure
that all the doors are securely closed
and locked so that the doors cannot
be opened from the inside. This helps
ensure that the doors will not be
opened accidentally. Also, when com-
bined with the proper use of seat belts,
locking the doors helps keep occu-
pants from being ejected from the car
in case of an accident.
o Before opening the door, always look
for and avoid oncoming traffic.
B030B01A-AATRecord Your Key NumberA code number is stamped on the number
plate that came with the keys to your
Hyundai. This key number plate should
not be left with the keys but kept in a safe
place, not in the vehicle. The key number
should also be recorded in a place where
it can be found in an emergency.
If you need additional keys, or if you should
lose your keys, your authorized Hyundai
dealer can make new keys if you can
supply the key number.
B030B01HR
Page 19 of 273
1FEATURES OF YOUR HYUNDAI8
Locking doors1. Close all doors.
2. Push the "LOCK" button on the transmit-
ter.
3. At the same time all doors lock, the turn
signal lights will blink once to indicate
that the system is armed.Unlocking doors1. Push the "UNLOCK" button on the trans-
mitter.
2. At the same time the driver's door un-
locks, the turn signal lights will blink
twice to indicate that the system is dis-
armed.NOTE:If you wish to unlock all doors, press the
"UNLOCK" button on the transmitter
again within 4 seconds.
CAUTION:
Changes or modifications not expressly
approved by the party responsible for
compliance could void the user's au-
thority to operate the equipment.
!
B070F03O-AATKEYLESS ENTRY SYSTEM
(If installed)
NOTE:This device complies with Part 15 of the
FCC rules. Operation is subject to the
following two conditions:
(1) This device may not cause harmful
interference, and (2) this device must
accept any interference received, in-
cluding interference that may cause
undesired operation. o If the door is locked/unlocked multiple
times in rapid succession with either
the vehicle key or door lock switch,
the system may stop operating tem-
porarily in order to protect the circuit
and prevent damage to system com-
ponents.
Page 85 of 273
1FEATURES OF YOUR HYUNDAI74
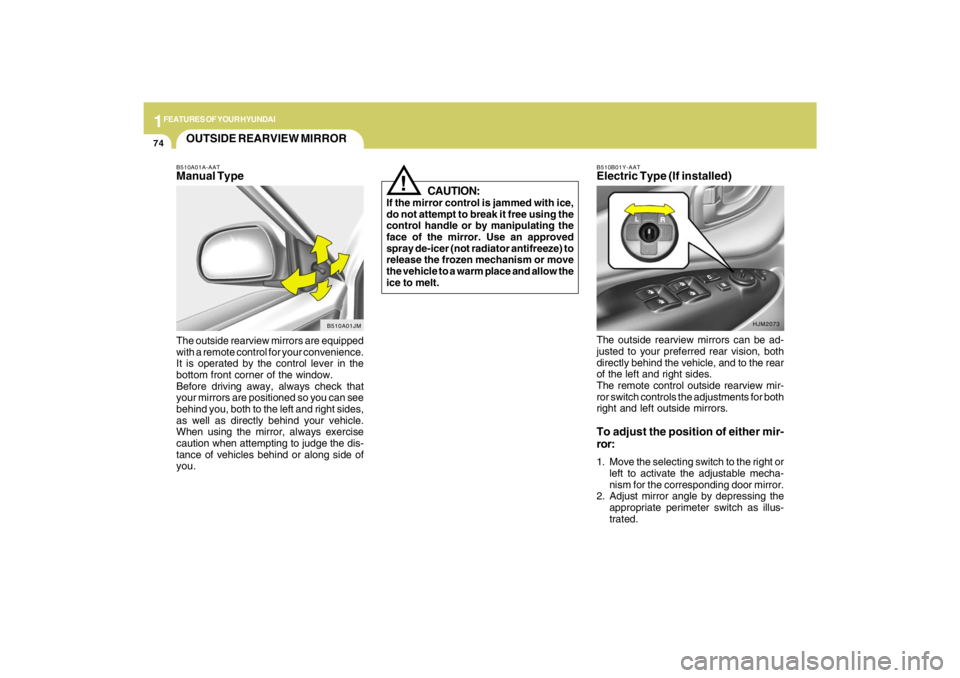
The outside rearview mirrors can be ad-
justed to your preferred rear vision, both
directly behind the vehicle, and to the rear
of the left and right sides.
The remote control outside rearview mir-
ror switch controls the adjustments for both
right and left outside mirrors.To adjust the position of either mir-
ror:1. Move the selecting switch to the right or
left to activate the adjustable mecha-
nism for the corresponding door mirror.
2. Adjust mirror angle by depressing the
appropriate perimeter switch as illus-
trated.B510B01Y-AATElectric Type (If installed)
HJM2073
B510A01A-AATManual TypeThe outside rearview mirrors are equipped
with a remote control for your convenience.
It is operated by the control lever in the
bottom front corner of the window.
Before driving away, always check that
your mirrors are positioned so you can see
behind you, both to the left and right sides,
as well as directly behind your vehicle.
When using the mirror, always exercise
caution when attempting to judge the dis-
tance of vehicles behind or along side of
you.OUTSIDE REARVIEW MIRROR
CAUTION:
If the mirror control is jammed with ice,
do not attempt to break it free using the
control handle or by manipulating the
face of the mirror. Use an approved
spray de-icer (not radiator antifreeze) to
release the frozen mechanism or move
the vehicle to a warm place and allow the
ice to melt.
!
B510A01JM
Page 125 of 273
1FEATURES OF YOUR HYUNDAI
114
1. FM Selection ButtonTurns to FM mode and toggles FM1 and
FM2 when the button is pressed each time.2. AM Selection ButtonTurns to AM mode, and toggles in the order
of AM1➟AM2➟···➟AM1···when the button
is pressed each time.3. XM Selection ButtonTurns to XM mode, and toggles in the order
of XM1➟XM2➟XM3➟···➟XM1··· when the
button is pressed each time.4. CD/AUX Selection ButtonIf there is a cd in the CDP DECK it turns to
CD mode, and if a device is connected to
AUX then it toggles.
CD➟AUX➟CD··· when the button is
pressed each time.(It will not turn to AUX if
the auxiliary device is not connected)
5. Automatic Channel Selection
Buttono When the [SEEK
]button is pressed,
it reduces the band frequency by 200khz
to automatically select channel. Stops
at the previous frequency if no channel
is found.
o When the [SEEK ]button is pressed,
it increases the band frequency by
50khz to automatically select channel.
Stops at the previous frequency if no
channel is found.
6. Power ON/OFF & Volume Control
ButtonTurns on/off the set when the IGNITION
SWITCH is on ACC or ON. If the button is
turned to the right, it increases the volume
and left, decreases the volume.7. MUTE ButtonPress to temporarily cut off the Sound.8. SCAN ButtonIf this button is pressed, the frequencies
will become increased and receive the
corresponding broadcasts.
This function will play the frequencies for
5 seconds (XM MODE : 10 seconds) each
and find other broadcasts as the frequency
increases.Press the button again when desiring to
continue listening to the currently playing
broadcast.
9. Information Display ButtonInformation Display function operation (In-
formation is displayed each time (the) Key
is pressed) : Pressing the Category
➟Channel Name ➟Artist Name➟Song
Title➟Category-KEY for 3 seconds will
display the corresponding text then be-
come restored.
Text Scroll operation :
After pressing (the) Key, if the text to be
displayed is longer than the LCD text line,
then rotating the Tune Knob will operate
the Page up function displaying 8 charac-
ters for 3 seconds each - displays the
maximum lines of text supported by XM.10. SET UP ButtonPress this button to turn to the XMoption,
SCROLL and adjustment mode.
If no action is taken for 5 seconds after
pressing the button, it will return to the play
mode.(After entering SET UP mode, move
between items using the left, right and
PUSH functions of the TUNE button.)
The set up item changes from AUDIO ad-
justment, TEXT SCROLL, XM setup.
Page 126 of 273

1
FEATURES OF YOUR HYUNDAI
115115115115115
11. TUNE/ENTER ButtonTurn this button clockwise by one notch to
increase frequency by 0.05Mhz from cur-
rent frequency.
Turn this button counterclockwise by one
notch to decrease frequency by 0.05Mhz
from current frequency.
Press this button while holding SET UP
button to activate / inactivate the item to.
Select SET UP item using left and right
function of the Tune button.
Pressing the changes the BASS, MIDR-
ANGE, TREBLE, FADER and BALANCE
TUNE mode.
The mode selected is shown on the dis-
play. After selecting each mode, rotate the
Audio control knob clockwise or counter-
clockwise.
o BASS Control
To increase the BASS, rotate the knob
clockwise, while to decrease the BASS,
rotate the knob counterclockwise.
o MID-RANGE Control
To increase the MID-RANGE, rotate the
knob clockwise, while to decrease the
MID-RANGE, rotate the knob counterclock-
wise.o TREBLE Control
To increase the TREBLE, rotate the knob
clockwise, while to decrease the TREBLE,
rotate the knob counterclockwise.
o FADER Control
Turn the control knob clockwise to emph-
asize rear speaker sound (front speaker
sound will be attenuated). When the con-
trol knob is turned counterclockwise, front
speaker sound will be emphasized (rear
speaker sound will be attenuated).
o BALANCE Control
Rotate the knob clockwise to emphasize
right speaker sound (left speaker sound
will be attenuated). When the control knob
is turned counter clockwise, left speaker
sound will be emphasized (right speaker
sound will be attenuated).
12. CAT(FLDR) ButtonMoves [CAT
] Button when Category Up
search operation.
o Category is moved Up from the cat-
egory currently being received and
Category Name becomes displayed.
o If the Enter Key is not pressed within 5
seconds, then the previous mode will
be restored.o If the Key is pressed while in the last
Category, then the first category will
become displayed and operation will
be repeated.
o Corresponding category can be se-
lected by pressing ENTER.
Moves [CAT
] Button when Category
Down search operation.
o Category is moved Down from the cat-
egory currently being received and
Category Name becomes displayed.
o If the Enter Key is not pressed within 5
seconds, then the previous mode will
be restored.
o If the [CAT ] Key is pressed while in
the first Category, then the last category
will become displayed and operation
will be repeated.
o Corresponding category can be se-
lected by pressing ENTER.
13. Preset ButtonPush [1]~[6] buttons less than 0.8 seconds
to play the channel saved in each button.
Push pre-set button for 0.8 seconds or
longer to save current channel to the re-
spective button with a beep.
Page 131 of 273
1FEATURES OF YOUR HYUNDAI
120
1. FM Selection ButtonTurns to FM mode and toggles FM1 and
FM2 when the button is pressed each time.2. AM Selection ButtonTurns to AM mode, and toggles in the order
of AM1➟AM2➟···➟AM1···when the button
is pressed each time.3. XM Selection ButtonTurns to XM mode, and toggles in the order
of XM1➟XM2➟XM3➟···➟XM1··· when the
button is pressed each time.4. CD/AUX Selection ButtonIf there is a cd in the CDP DECK it turns to
CD mode, and if a device is connected to
AUX then it toggles.
CD➟AUX➟CD··· when the button is
pressed each time.(It will not turn to AUX if
the auxiliary device is not connected)
5. Automatic Channel Selection
Buttono When the [SEEK
]button is pressed,
it reduces the band frequency by 200khz
to automatically select channel. Stops
at the previous frequency if no channel
is found.
o When the [SEEK ]button is pressed,
it increases the band frequency by
50khz to automatically select channel.
Stops at the previous frequency if no
channel is found.
6. Power ON/OFF & Volume Control
ButtonTurns on/off the set when the IGNITION
SWITCH is on ACC or ON. If the button is
turned to the right, it increases the volume
and left, decreases the volume.7. MUTE ButtonPress to temporarily cut off the Sound.8. SCAN ButtonIf this button is pressed, the frequencies
will become increased and receive the
corresponding broadcasts.
This function will play the frequencies for
5 seconds (XM MODE : 10 seconds) each
and find other broadcasts as the frequency
increases.Press the button again when desiring to
continue listening to the currently playing
broadcast.
9. Information Display ButtonInformation Display function operation (In-
formation is displayed each time (the) Key
is pressed) : Pressing the Category
➟Channel Name ➟Artist Name➟Song
Title➟Category-KEY for 3 seconds will
display the corresponding text then be-
come restored.
Text Scroll operation :
After pressing (the) Key, if the text to be
displayed is longer than the LCD text line,
then rotating the Tune Knob will operate
the Page up function displaying 8 charac-
ters for 3 seconds each - displays the
maximum lines of text supported by XM.10. SET UP ButtonPress this button to turn to the XMoption,
SCROLL and adjustment mode.
If no action is taken for 5 seconds after
pressing the button, it will return to the play
mode.(After entering SET UP mode, move
between items using the left, right and
PUSH functions of the TUNE button.)
The set up item changes from AUDIO ad-
justment, TEXT SCROLL, XM setup.