2009 Hyundai Sonata ica
[x] Cancel search: icaPage 94 of 286

1
FEATURES OF YOUR HYUNDAI
81
Standard Programming
To train most devices, follow these
instructions:
1. For first-time programming, press and
hold the two outside buttons, HomeLink
®
Channel 1 and Channel 3 Buttons, until
the indicator light begins to flash (after
20 seconds). Release both buttons. Do
not hold the buttons for longer than 30
seconds.
2. Position the end of your hand-held trans-
mitter 1-3 inches (2-8 cm) away from the
HomeLink
® buttons while keeping the
indicator light in view.
3. Simultaneously press and hold both
the HomeLink
® and hand-held
transmitter button. DO NOT release the
buttons until step 4 has been completed.
4. While continuing to hold the buttons the
red Indicator Status LED will flash slowly
and then rapidly after HomeLink
®
successfully trains to the frequency
signal from the hand-held transmitter.
Release both buttons.
5. Press and hold the just-trained
HomeLink
® button and observe the red
Status Indicator LED. If the indicator
light stays on constantly, programming
is complete and your device should
activate when the HomeLink
® button is
pressed and released.
6. To program the remaining two
HomeLink
® buttons, follow steps 2
through 5.Rolling Code Programming
Rolling code devices which are "code-
protected" and manufactured after 1996
may be determined by the following:
o Reference the device owner's manual
for verification.
o The handheld transmitter appears to
program the HomeLink Universal
Transceiver but does not activate the
device.
o Press and hold the trained HomeLink
button. The device has the rolling code
feature if the indicator light flashes rapidly
and then turns solid after 2 seconds.
To train rolling code devices, follow these
instructions:
1. At the garage door opener receiver
(motor-head unit) in the garage, locate
the "learn" or "smart" button. This can
usually be found where the hanging
antenna wire is attached to the motor-
head unit. Exact location and color of
the button may vary by garage door
opener brand. If there is difficulty
locating the training button, reference
the device owner's manual or please
visit our Web site at www.homelink.com.
2. Firmly press and release the "learn" or
"smart" button (which activates the
"training light").
NOTE:There are 30 seconds in which to initiate
step3.
3. Return to the vehicle and firmly press,
hold for two seconds and then release
the desired HomeLink
® button. Repeat
the "press/hold/release" sequence a
second time to complete the
programming. (Some devices may
require you to repeat this sequence a
third time to complete the programming.)
4. Press and hold the just-trained
HomeLink
® button and observe the red
Status Indicator LED. If the indicator
light stays on constantly, programming
is complete and your device should
activate.
5. To program the remaining two
HomeLink® buttons, follow either steps
1 through 4 above for other Rolling
Code devices or steps 2 through 5 in
Standard Programming for standard
devices.
Gate Operator & Canadian Programming
During programming, your handheld trans-
mitter may automatically stop transmitting.
Continue to press the Integrated
HomeLink
® Wireless Control System button
(note steps 2 through 4 in the Standard
Programming portion of this document)
while you press and re-press ("cycle") your
Page 95 of 286
1FEATURES OF YOUR HYUNDAI82
!
handheld transmitter every two seconds
until the frequency signal has been learned.
The indicator light will flash slowly and
then rapidly after several seconds upon
successful training.
Operating HomeLink
®
To operate, simply press and release the
programmed HomeLink
® button. Activation
will now occur for the trained device (i.e.
garage door opener, gate operator, security
system, entry door lock, home/office
lighting, etc.). For convenience, the hand-
held transmitter of the device may also be
used at any time.
Reprogramming a Single HomeLink
® But-
ton
To program a new device to a previously
trained HomeLink
® button, follow these
steps:
1. Press and hold the desired HomeLink
®
button. Do NOT release until step 4 has
been completed.
2. When the indicator light begins to flash
slowly (after 20 seconds), position the
handheld transmitter 1 to 3 inches away
from the HomeLink
® surface.
3. Press and hold the handheld transmitter
button. The HomeLink
® indicator light
will flash, first slowly and then rapidly.4. When the indicator light begins to flash
rapidly, release both buttons.
5. Press and hold the just-trained
HomeLink
® button and observe the red
Status Indicator LED. If the indicator
light stays on constantly, programming
is complete and your new device should
activate.
Erasing HomeLink
® Buttons
Individual buttons cannot be erased.
However, to erase all three programmed
buttons:
1. Press and hold the two outer HomeLink
®
buttons until the indicator light begins to
flash-after 20 seconds.
2. Release both buttons. Do not hold for
longer than 30 seconds.
The Integrated HomeLink
® Wireless
Control System is now in the training (learn)
mode and can be programmed at any time
following the appropriate steps in the
Programming sections above.
FCC ID: NZLZTVHL3
IC: 4112A-ZTVHL3This device complies with Part 15 FCC
Rules. Operation is subject to the following
two conditions: (1) this device may not
cause harmful interference, and (2) this
device must accept any interference
received, including interference that may
cause undesired operation.
WARNING:
The transceiver has been tested and
complies with FCC and Industry Canada
rules. Changes or modifications not
expressly approved by the party
responsible for compliance could void
the user's authority to operate the
device.
NVS
® is a registered trademark and Z-
Nav™ is a trademark of the Gentex
Corporation, Zeeland, Michigan.
HomeLink
® is a registered trademark
owned by Johnson Controls, Incorporated,
Milwaukee, Wisconsin.
Page 96 of 286
1
FEATURES OF YOUR HYUNDAI
83
!
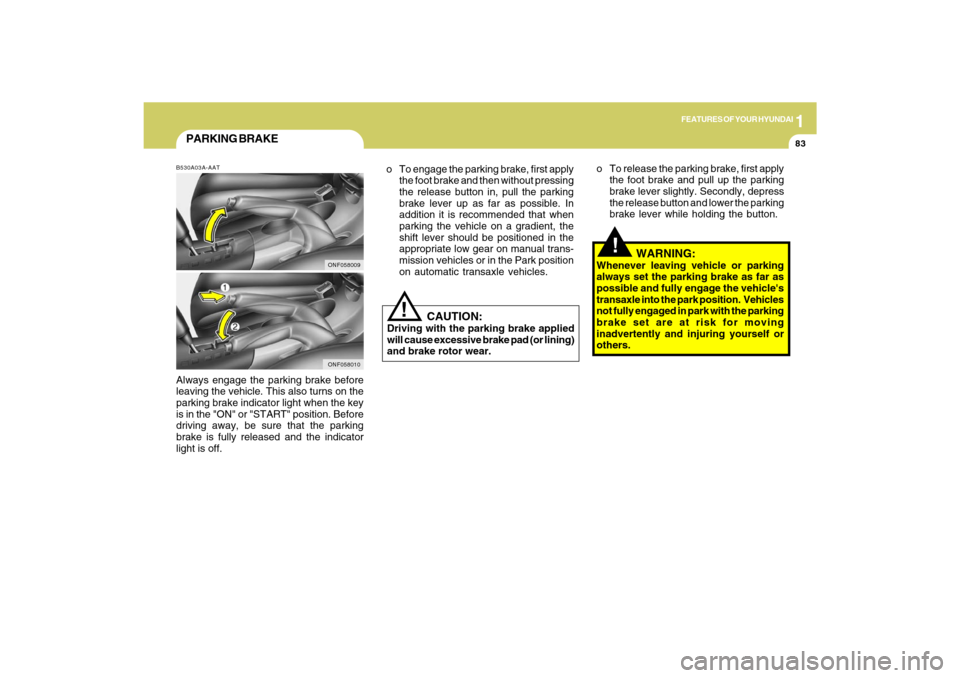
PARKING BRAKEB530A03A-AATAlways engage the parking brake before
leaving the vehicle. This also turns on the
parking brake indicator light when the key
is in the "ON" or "START" position. Before
driving away, be sure that the parking
brake is fully released and the indicator
light is off.
WARNING:
Whenever leaving vehicle or parking
always set the parking brake as far as
possible and fully engage the vehicle's
transaxle into the park position. Vehicles
not fully engaged in park with the parking
brake set are at risk for moving
inadvertently and injuring yourself or
others. o To release the parking brake, first apply
the foot brake and pull up the parking
brake lever slightly. Secondly, depress
the release button and lower the parking
brake lever while holding the button.
CAUTION:
Driving with the parking brake applied
will cause excessive brake pad (or lining)
and brake rotor wear.
!
ONF058010ONF058009
o To engage the parking brake, first apply
the foot brake and then without pressing
the release button in, pull the parking
brake lever up as far as possible. In
addition it is recommended that when
parking the vehicle on a gradient, the
shift lever should be positioned in the
appropriate low gear on manual trans-
mission vehicles or in the Park position
on automatic transaxle vehicles.
Page 99 of 286
1FEATURES OF YOUR HYUNDAI86
!
WARNING:
- When using a portable fuel container,
be sure to place the container on the
ground while refueling. Static elec-
tricity discharge from the container
can ignite fuel vapors causing a fire.
While starting refueling, contact
should be maintained until the filling
is complete.
- Do not use cellular phones around a
gas station. The electric current or
electronic interference from cellular
phones can ignite fuel vapors caus-
ing a fire.
- When refueling, always turn the en-
gine off. Sparks by engine compart-
ment electrical equipment can ignite
fuel vapors causing a fire. After re-
fueling, check to make sure the fuel
filler cap is securely closed, and
then start the engine.
- Do not smoke or try to light cigarettes
around a gas station. Automotive
fuels are flammable.
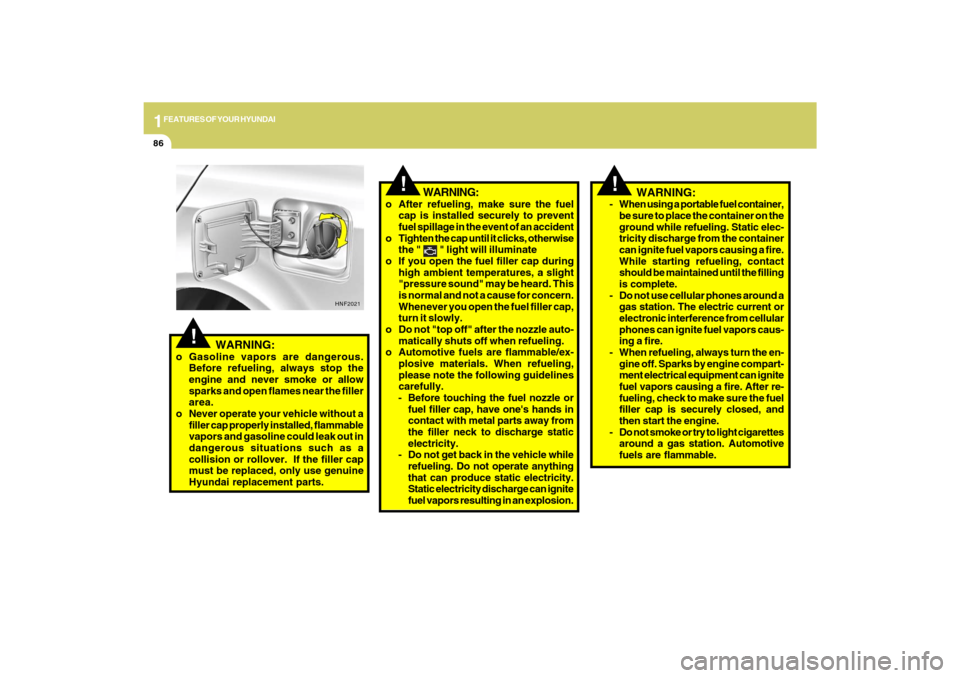
o After refueling, make sure the fuel
cap is installed securely to prevent
fuel spillage in the event of an accident
o Tighten the cap until it clicks, otherwise
the "
" light will illuminate
o If you open the fuel filler cap during
high ambient temperatures, a slight
"pressure sound" may be heard. This
is normal and not a cause for concern.
Whenever you open the fuel filler cap,
turn it slowly.
o Do not "top off" after the nozzle auto-
matically shuts off when refueling.
o Automotive fuels are flammable/ex-
plosive materials. When refueling,
please note the following guidelines
carefully.
- Before touching the fuel nozzle or
fuel filler cap, have one's hands in
contact with metal parts away from
the filler neck to discharge static
electricity.
- Do not get back in the vehicle while
refueling. Do not operate anything
that can produce static electricity.
Static electricity discharge can ignite
fuel vapors resulting in an explosion.
!
!
WARNING:
o Gasoline vapors are dangerous.
Before refueling, always stop the
engine and never smoke or allow
sparks and open flames near the filler
area.
o Never operate your vehicle without a
filler cap properly installed, flammable
vapors and gasoline could leak out in
dangerous situations such as a
collision or rollover. If the filler cap
must be replaced, only use genuine
Hyundai replacement parts.
HNF2021
WARNING:
Page 102 of 286
1
FEATURES OF YOUR HYUNDAI
89
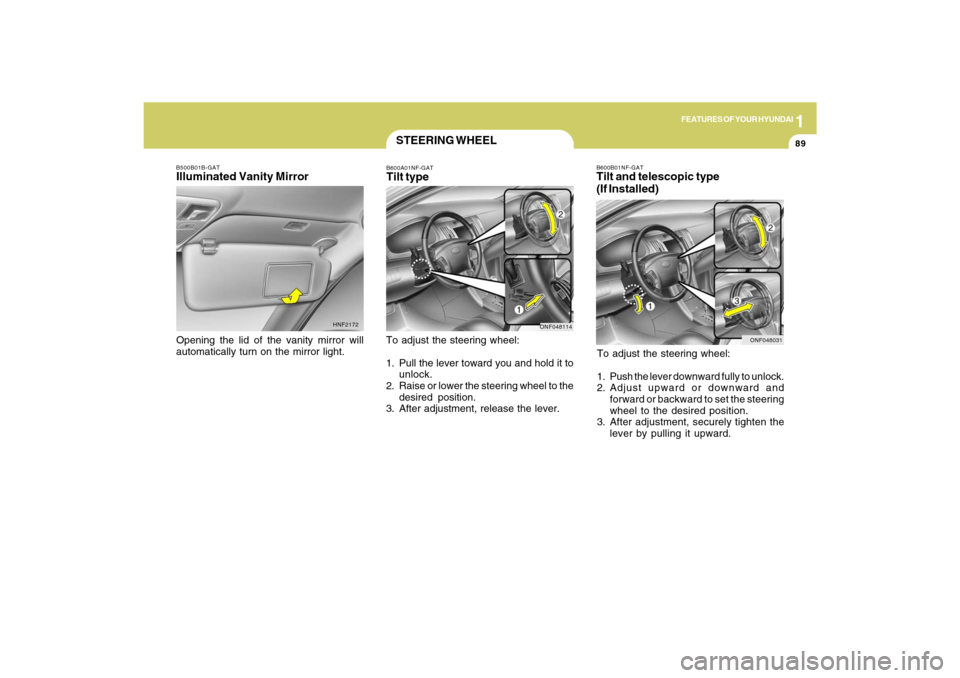
B600B01NF-GATTilt and telescopic type
(If Installed)To adjust the steering wheel:
1. Push the lever downward fully to unlock.
2. Adjust upward or downward and
forward or backward to set the steering
wheel to the desired position.
3. After adjustment, securely tighten the
lever by pulling it upward.
ONF048031
STEERING WHEELB600A01NF-GATTilt typeTo adjust the steering wheel:
1. Pull the lever toward you and hold it to
unlock.
2. Raise or lower the steering wheel to the
desired position.
3. After adjustment, release the lever.
ONF048114
B500B01B-GATIlluminated Vanity MirrorOpening the lid of the vanity mirror will
automatically turn on the mirror light.
HNF2172
Page 104 of 286
1
FEATURES OF YOUR HYUNDAI
91
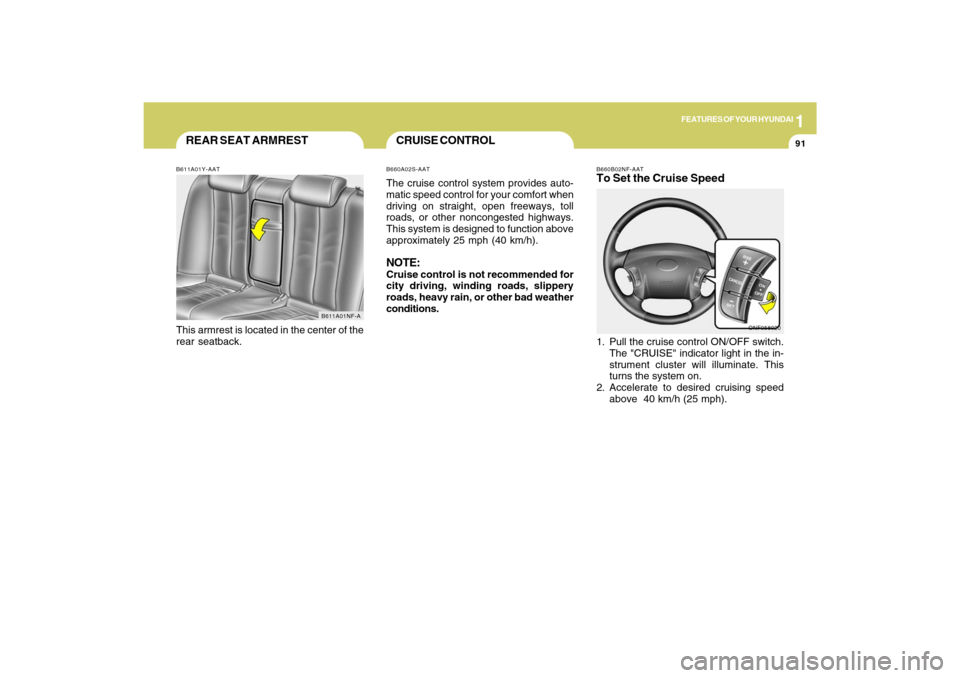
B660B02NF-AATTo Set the Cruise Speed1. Pull the cruise control ON/OFF switch.
The "CRUISE" indicator light in the in-
strument cluster will illuminate. This
turns the system on.
2. Accelerate to desired cruising speed
above 40 km/h (25 mph).
ONF058020
REAR SEAT ARMRESTB611A01Y-AATThis armrest is located in the center of the
rear seatback.
B611A01NF-A
CRUISE CONTROLB660A02S-AATThe cruise control system provides auto-
matic speed control for your comfort when
driving on straight, open freeways, toll
roads, or other noncongested highways.
This system is designed to function above
approximately 25 mph (40 km/h).NOTE:Cruise control is not recommended for
city driving, winding roads, slippery
roads, heavy rain, or other bad weather
conditions.
Page 105 of 286
1FEATURES OF YOUR HYUNDAI92
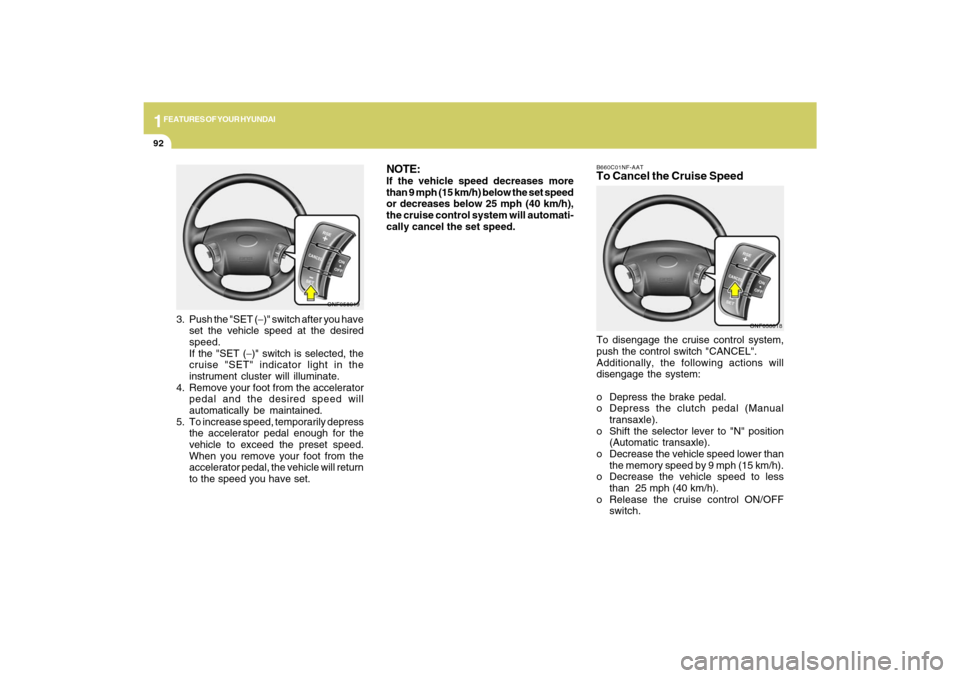
B660C01NF-AATTo Cancel the Cruise SpeedTo disengage the cruise control system,
push the control switch "CANCEL".
Additionally, the following actions will
disengage the system:
o Depress the brake pedal.
o Depress the clutch pedal (Manual
transaxle).
o Shift the selector lever to "N" position
(Automatic transaxle).
o Decrease the vehicle speed lower than
the memory speed by 9 mph (15 km/h).
o Decrease the vehicle speed to less
than 25 mph (40 km/h).
o Release the cruise control ON/OFF
switch.
ONF058018
ONF058019
3. Push the "SET (−)" switch after you have
set the vehicle speed at the desired
speed.
If the "SET (−)" switch is selected, the
cruise "SET" indicator light in the
instrument cluster will illuminate.
4. Remove your foot from the accelerator
pedal and the desired speed will
automatically be maintained.
5. To increase speed, temporarily depress
the accelerator pedal enough for the
vehicle to exceed the preset speed.
When you remove your foot from the
accelerator pedal, the vehicle will return
to the speed you have set.
NOTE:If the vehicle speed decreases more
than 9 mph (15 km/h) below the set speed
or decreases below 25 mph (40 km/h),
the cruise control system will automati-
cally cancel the set speed.
Page 106 of 286
1
FEATURES OF YOUR HYUNDAI
93
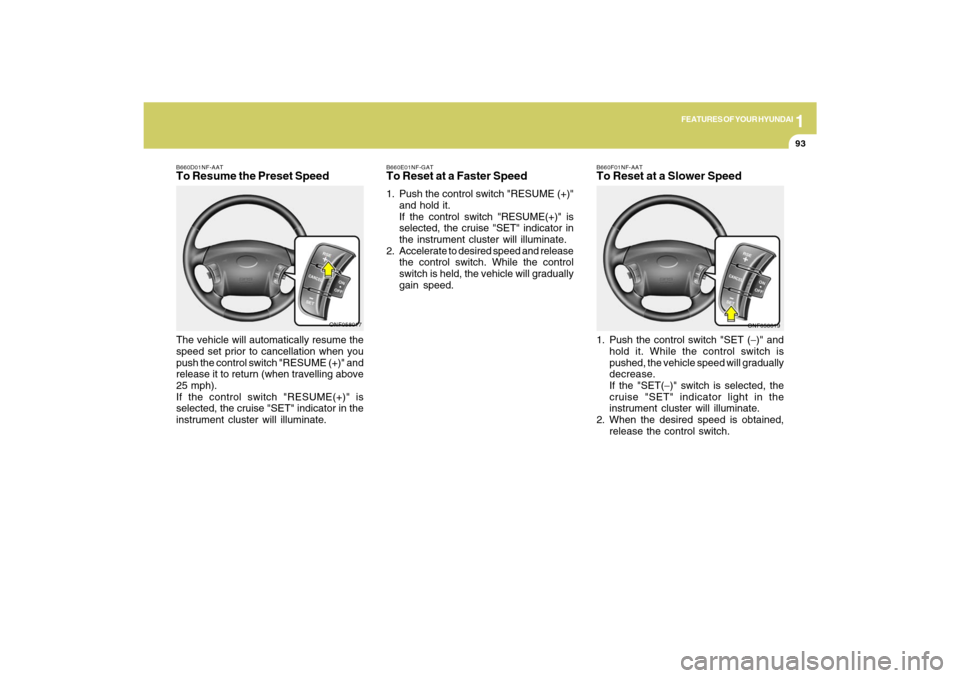
B660D01NF-AATTo Resume the Preset SpeedThe vehicle will automatically resume the
speed set prior to cancellation when you
push the control switch "RESUME (+)" and
release it to return (when travelling above
25 mph).
If the control switch "RESUME(+)" is
selected, the cruise "SET" indicator in the
instrument cluster will illuminate.
ONF058017
B660F01NF-AATTo Reset at a Slower Speed1. Push the control switch "SET (−)" and
hold it. While the control switch is
pushed, the vehicle speed will gradually
decrease.
If the "SET(−)" switch is selected, the
cruise "SET" indicator light in the
instrument cluster will illuminate.
2. When the desired speed is obtained,
release the control switch.
ONF058019 B660E01NF-GAT
To Reset at a Faster Speed1. Push the control switch "RESUME (+)"
and hold it.
If the control switch "RESUME(+)" is
selected, the cruise "SET" indicator in
the instrument cluster will illuminate.
2. Accelerate to desired speed and release
the control switch. While the control
switch is held, the vehicle will gradually
gain speed.