2009 Hyundai Santa Fe wheel
[x] Cancel search: wheelPage 76 of 353

1
FEATURES OF YOUR HYUNDAI
65
!
WARNING:
Significantly low tire pressure makes
the vehicle unstable and can contribute
to loss of vehicle control and increased
braking distances.
Continued driving on low pressure tires
may cause the tires to overheat and fail. Avoid hard braking and overcorrecting at
the steering wheel. Inflate the tires to the
proper pressure as indicated on the
vehicle’s tire information placard.
If you have a flat tire, the Low tire Pressure
and Position Telltales will illuminate.
Replace the flat tire with the spare tire(see
page 3-12)
Each wheel is equipped with a tire pres-
sure sensor mounted inside the tire be-
hind the valve stems. You must use TPMS
specific wheels. IT is recommended that
you always have tires serviced by your
Hyundai dealer or qualified technician.
After you replace the flat tire, the Low Tire
Pressure and Position Telltales remain
illuminated. This is normal; the system is
not monitoring the spare tire pressure.
Check the spare tire pressure to make sure
it is correct.B260T01O-GAT
AWD (All Wheel Drive)
System Warning Light
(If installed)
When the key is turned to the "ON" position,
the AWD(All Wheel Drive) system warning
light will illuminate and then go off in a few
seconds.
CAUTION:
If the AWD system warning light ( )
blinks while driving, this indicates that
there is a malfunction in the AWD sys-
tem. If this occurs, have your vehicle
checked by an authorized Hyundai dealer
as soon as possible.
!
CAUTION:
Never use a puncture-repair agent in a
flat tire. If used, the tire pressure sensor
will be damaged and will require replace-
ment. Have the flat tire repaired by a
Hyundai dealer or qualified technician
as soon as possible.
!
B260V01CM-GAT
AWD (All Wheel Drive) Lock
Indicator Light (If installed)
The AWD (All Wheel Drive) lock indicator
light in the instrument cluster is illuminated
when the AWD lock switch is pushed.
The purpose of this switch is to increase
the drive power when driving on wet pave-
ment, snow-covered roads and/or off-road.
The AWD lock indicator light is turned off by
pushing the switch again.NOTE:Do not use AWD LOCK on normal dry
pavement conditions.
Page 78 of 353
1
FEATURES OF YOUR HYUNDAI
67
The brake fluid level warning light indi-
cates that the brake fluid level in the brake
master cylinder is low and hydraulic brake
fluid conforming to DOT 3 or DOT 4 speci-
fications should be added. After adding
fluid, if no other trouble is found, the car
should be immediately and carefully driven
to a Hyundai dealer for inspection. If further
trouble is experienced, the vehicle should
not be driven at all but taken to a dealer by
a professional towing service.
Your Hyundai is equipped with dual-di-
agonal braking systems. This means you
still have braking on two wheels even if
one of the dual systems should malfunc-
tion. With only one of the dual systems
working, more than normal pedal travel
and greater pedal pressure are required to
stop the car. Also, the car will not stop in as
short a distance with only half of the brake
system working. If the brakes malfunction
while you are driving, shift to a lower gear
for additional engine braking and stop the
car as soon as it is safe to do so.
B260J02TG-AAT
Charging System Warning
Light
The charging system warning light should
illuminate when the ignition is turned on,
then go out when the engine is running. If
the light stays on while the engine is run-
ning, there is a malfunction in the electrical
charging system. If the light illuminates
while you are driving, have the system
checked by your Hyundai dealer as soon
as possible.Parking brake warning chime
(if installed)The parking brake warning chime sounds
to remind you that the parking brake is
applied when your are driving above
6mph(10km/h). Always release the park-
ing brake before you drive.
B260G02A-AAT
Low Oil Pressure Warning
Light
CAUTION:
If the low oil pressure warning light stays
on while the engine is running, serious
engine damage may result. The oil pres-
sure warning light comes on whenever
there is insufficient oil pressure. In nor-
mal operation, it should illuminate when
the ignition switch is turned on, then go
out when the engine is started. If the oil
pressure warning light stays on while
the engine is running, there is a serious
malfunction.
If this happens, stop the car as soon as
it is safe to do so, turn off the engine and
check the oil level. If the oil level is low,
fill the engine oil to the proper level and
start the engine again. If the light stays
on with the engine running, turn the en-
gine off immediately. In any instance
where the oil light stays on when the
engine is running, the engine should be
checked by a Hyundai dealer before the
car is driven again.
!
Page 92 of 353
1
FEATURES OF YOUR HYUNDAI
81
Mist Wiper Operation
OCM027074A
When the washer lever is operated, the
wipers automatically make two passes
across the windshield. The washer contin-
ues to operate until the lever is released.NOTE:o Do not operate the washer more than
15 seconds at a time or when the
washer fluid reservoir is empty.
o In icy or freezing weather, be sure the
wiper blades are not frozen to the
glass prior to operating the wipers.
o In areas where water freezes in win-
ter, use windshield washer fluid ap-
propriate for cold weather.
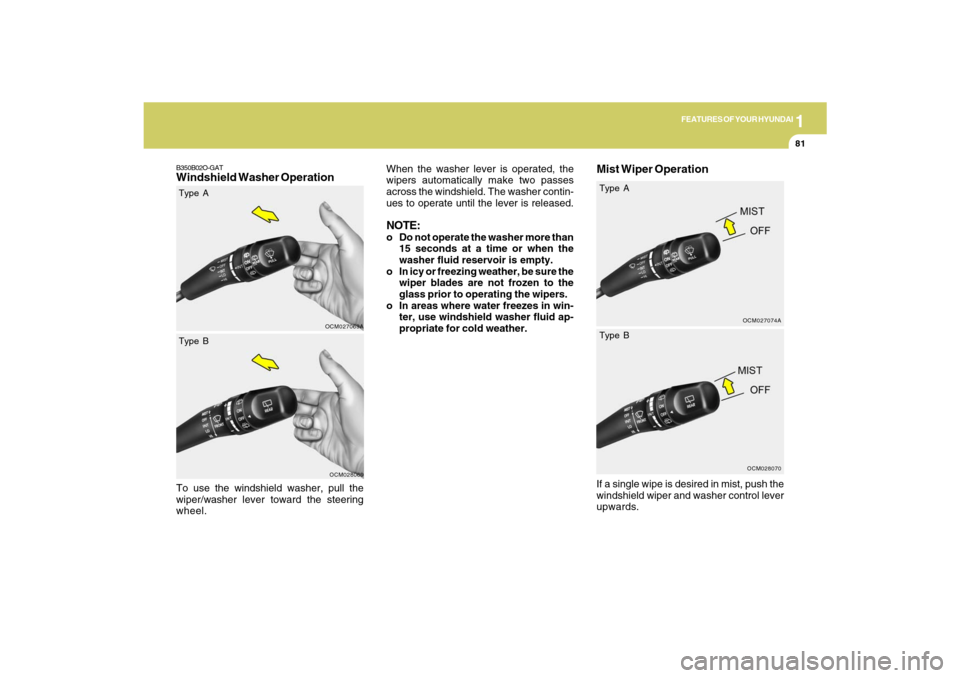
If a single wipe is desired in mist, push the
windshield wiper and washer control lever
upwards.
OCM028070
Type A
Type B
B350B02O-GATWindshield Washer OperationTo use the windshield washer, pull the
wiper/washer lever toward the steering
wheel.
OCM027069AOCM028069
Type A
Type B
Page 111 of 353
1FEATURES OF YOUR HYUNDAI
100
If the vehicle’s compass headings become
inaccurate, the compass should be cali-
brated as follows:
1. Ensure the vehicle is not located near
large steel structures or under electric
power lines.
2. Turn on the compass by pressing the
button.
3. Press and hold the
button for more
than 6 but less than 9 seconds. The
current zone number will appear in the
display. Release then press the
but-
ton until your zone number appears in
the display.
4. Check the mirror angle by pressing and
holding the
button for more than
12seconds. Release then press the
button to “L”(for steering wheel on the
Left side of the vehicle). (if installed)
5. Press and hold the
button between 9
and 12 seconds. Release the
button
when a “C” appears in the display.
6. Drive the vehicle in 2 complete circles
at less than 5mph(8km/h) or until the
compass heading appears.
CAUTION:
Be sure the area is free of traffic, pedes-
trians, and obstructions.
To operate Compass featurePress and release the button, then the
vehicle's directional heading will be dis-
played. Pressing and releasing the button
again will turn off the display.
Heading display
- E : East
- W : West
- S : South
- N : North
ex) NE : North East
!
Calibration procedureIf the compass is not properly calibrated,
set to the correct variance zone, or the
vehicle is driven in certain environments
(tunnel, underground or in-building park-
ing garage, near transformer substation),
the following may occur :
- “C” is displayed.
- The compass heading become inaccu-
rate.
- The compass heading does not
changed.
- Some compass headings are not dis-
played.
- The compass headings are inaccurate
in long distance driving.
Page 129 of 353
1FEATURES OF YOUR HYUNDAI
118
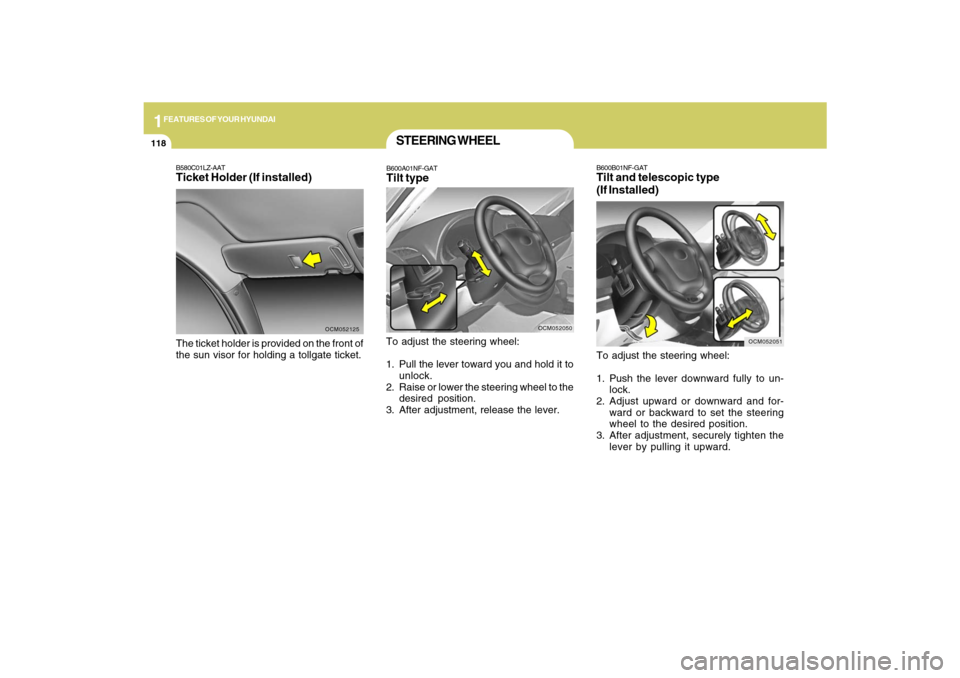
B600B01NF-GATTilt and telescopic type
(If Installed)To adjust the steering wheel:
1. Push the lever downward fully to un-
lock.
2. Adjust upward or downward and for-
ward or backward to set the steering
wheel to the desired position.
3. After adjustment, securely tighten the
lever by pulling it upward.
OCM052051
B580C01LZ-AATTicket Holder (If installed)The ticket holder is provided on the front of
the sun visor for holding a tollgate ticket.
OCM052125
STEERING WHEELB600A01NF-GATTilt typeTo adjust the steering wheel:
1. Pull the lever toward you and hold it to
unlock.
2. Raise or lower the steering wheel to the
desired position.
3. After adjustment, release the lever.
OCM052050
Page 130 of 353
1
FEATURES OF YOUR HYUNDAI
119
FRONT DOOR EDGE
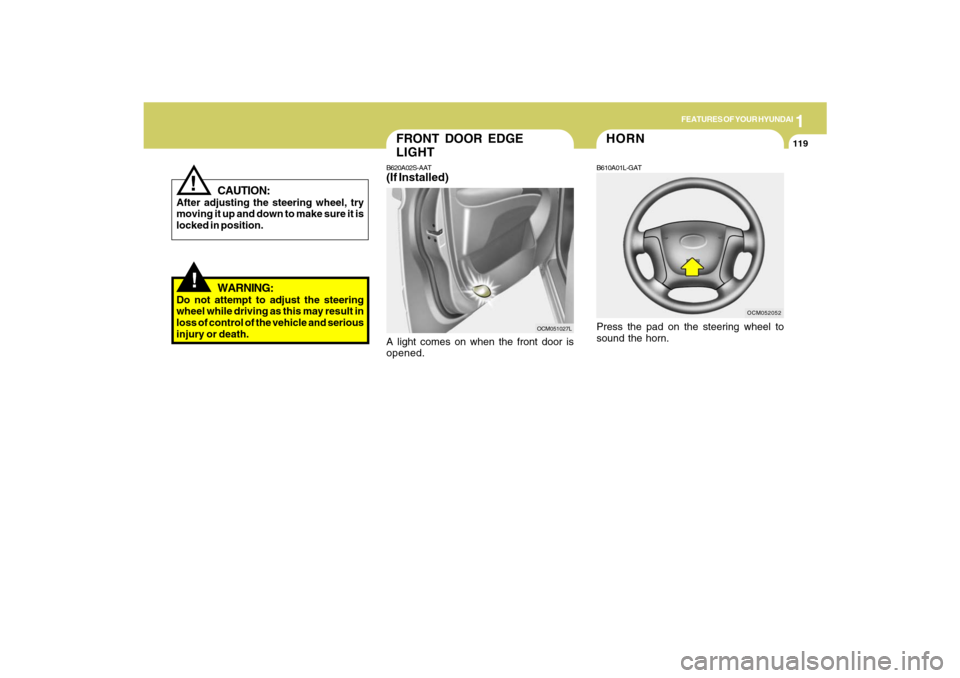
LIGHTB620A02S-AAT(If Installed)A light comes on when the front door is
opened.
OCM051027L
!
CAUTION:
After adjusting the steering wheel, try
moving it up and down to make sure it is
locked in position.
!
WARNING:
Do not attempt to adjust the steering
wheel while driving as this may result in
loss of control of the vehicle and serious
injury or death.
OCM052052
HORNB610A01L-GATPress the pad on the steering wheel to
sound the horn.
Page 134 of 353
1
FEATURES OF YOUR HYUNDAI
123
!
o During normal cruise control opera-
tion, when the "SET" switch is acti-
vated or reactivated after applying
the brakes, the cruise control will
energize after approximately 3 sec-
onds. This delay is normal.
WARNING:
AUDIO REMOTE CONTROL
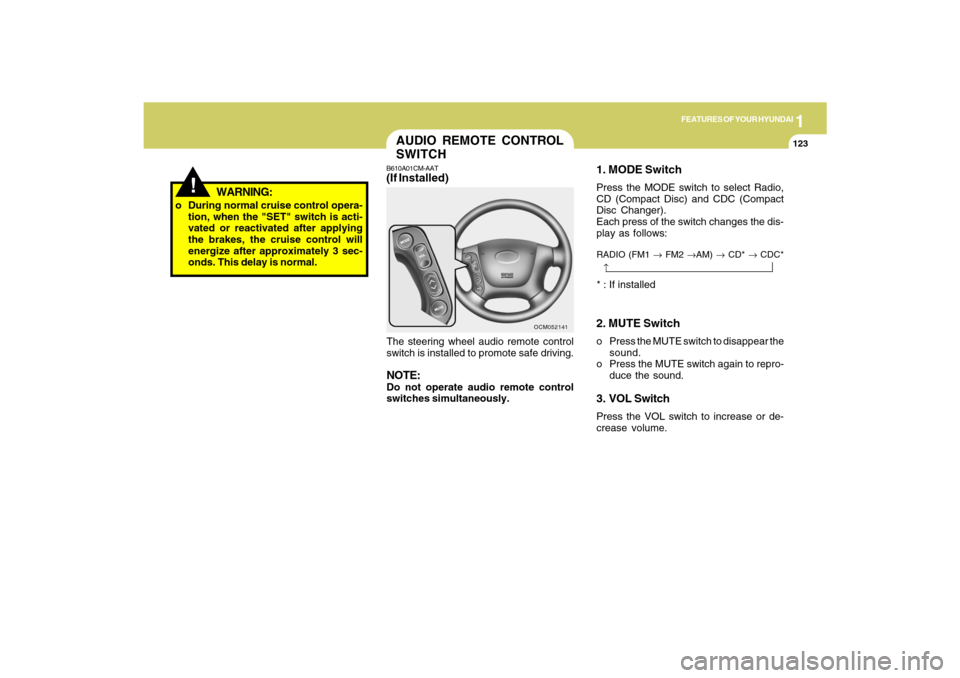
SWITCHB610A01CM-AAT(If Installed)The steering wheel audio remote control
switch is installed to promote safe driving.NOTE:Do not operate audio remote control
switches simultaneously.
OCM052141
2. MUTE Switcho Press the MUTE switch to disappear the
sound.
o Press the MUTE switch again to repro-
duce the sound.3. VOL SwitchPress the VOL switch to increase or de-
crease volume.1. MODE SwitchPress the MODE switch to select Radio,
CD (Compact Disc) and CDC (Compact
Disc Changer).
Each press of the switch changes the dis-
play as follows:
→
RADIO (FM1 → FM2 →AM) → CD* → CDC** : If installed
Page 186 of 353
1175175175175175175
FEATURES OF YOUR HYUNDAI
USING EXTERNAL CONTROLSThe Dimmer controlThe Dimmer control setting determines
the brightness of the entire vehicle’s dis-
plays.
Turn the scroll wheel up or down to in-
crease or decrease the brightness of the
vehicle’s instrument panels, backlit dis-
plays and the audio system’s LCD screen
and backlit controls.
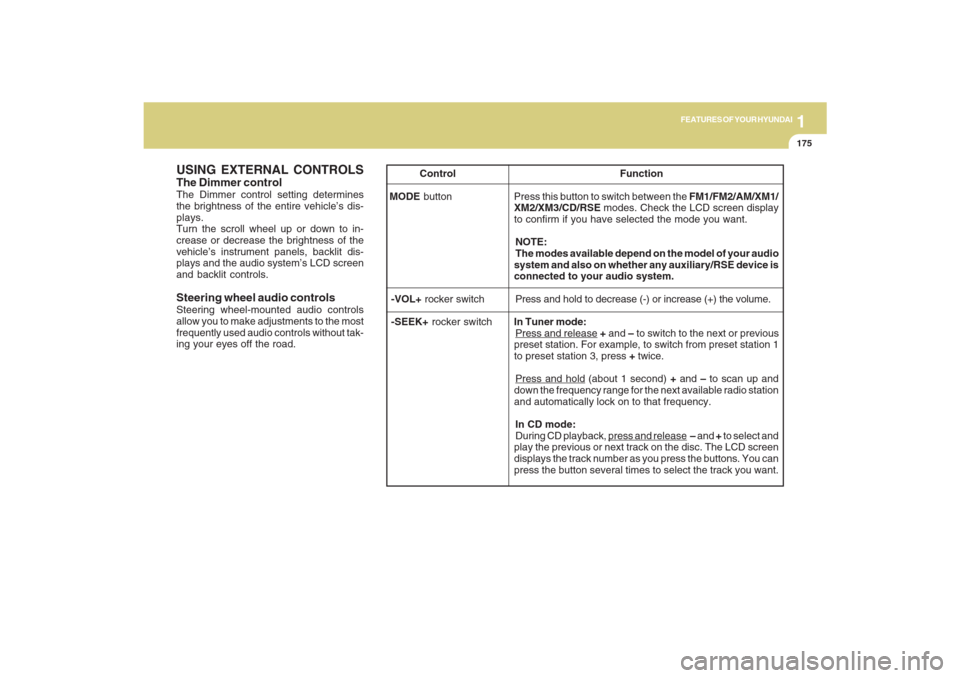
Steering wheel audio controlsSteering wheel-mounted audio controls
allow you to make adjustments to the most
frequently used audio controls without tak-
ing your eyes off the road. Control Function
MODE button Press this button to switch between the FM1/FM2/AM/XM1/
XM2/XM3/CD/RSE modes. Check the LCD screen display
to confirm if you have selected the mode you want.
NOTE:
The modes available depend on the model of your audio
system and also on whether any auxiliary/RSE device is
connected to your audio system.
-VOL+ rocker switchPress and hold to decrease (-) or increase (+) the volume.
-SEEK+ rocker switchIn Tuner mode:
Press and release + and – to switch to the next or previous
preset station. For example, to switch from preset station 1
to preset station 3, press + twice.Press and hold (about 1 second) + and – to scan up and
down the frequency range for the next available radio station
and automatically lock on to that frequency.
In CD mode:
During CD playback,
press and release – and + to select and
play the previous or next track on the disc. The LCD screen
displays the track number as you press the buttons. You can
press the button several times to select the track you want.