2009 Hyundai Santa Fe display
[x] Cancel search: displayPage 113 of 353
1FEATURES OF YOUR HYUNDAI
102
HOMELINK MIRRORB520C01CM-AATAutomatic-Dimming Mirror
with Z-Nav™ Electronic Compass
Display and HomeLink
®
(If Installed)Your vehicle comes with a Gentex Auto-
matic-Dimming Mirror with a Z-Nav™ Elec-
tronic Compass Display and an Integrated
HomeLink
® Wireless Control System. Dur-
ing nighttime driving, this feature will auto-
matically detect and reduce rearview mir-
ror glare while the compass indicates the
direction the vehicle is pointed. The
HomeLink® Universal Transceiver allows
you to activate your garage door(s), elec-
tric gate, home lighting, etc.
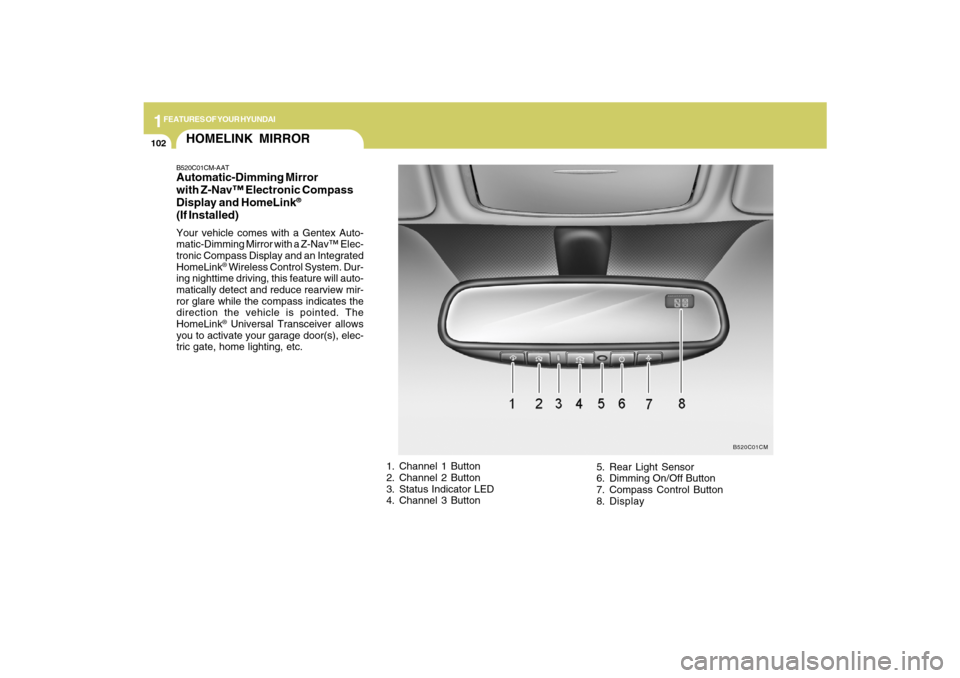
1. Channel 1 Button
2. Channel 2 Button
3. Status Indicator LED
4. Channel 3 Button5. Rear Light Sensor
6. Dimming On/Off Button
7. Compass Control Button
8. Display
B520C01CM
Page 114 of 353
1
FEATURES OF YOUR HYUNDAI
103
Automatic-Dimming Night Vision
Safety™ (NVS
®) Mirror
The NVS
® Mirror in your vehicle is the most
advanced way to reduce glare in the rear-
view mirror during any driving situation.
For more information regarding NVS
® mir-
rors and other applications, please refer to
the Gentex website:
www.gentex.com.
CAUTION:
Too close the NVS
® Mirror automatically
reduces glare during driving conditions
based upon light levels monitored in front
of the vehicle and from the rear of the
vehicle. These light sensors are visible
through openings in the front and rear of
the mirror case. Any object that would
obstruct either light sensor will degrade
the automatic dimming control feature.
!
Automatic-Dimming Function
Your mirror will automatically dim upon
detecting glare from the vehicles traveling
behind you. The auto-dimming function
can be controlled by the Dimming ON/OFF
Button:
1. Pressing the
button turns the auto-
dimming function OFF which is indi-
cated by the green Status Indicator LED
turning off.
2. Pressing the button again turns the
auto-dimming function ON which is in-
dicated by the green Status Indicator
LED turning on.
NOTE:The mirror defaults to the "ON" position
each time the vehicle is started.Compass Function
The Compass can be turned ON and OFF
and will remember the last state when the
ignition is cycled. To turn the display fea-
ture ON/OFF:
1. Press and release the
button to turn
the display feature OFF.
2. Press and release the button again
to turn the display back ON.
Additional options can be set with press
and hold sequences of the button and
are detailed below.
There is a difference between magnetic
north and true north. The compass in the
mirror can compensate for this difference
when it knows the Magnetic Zone in which
it is operating. This is set either by the
dealer or by the user. The operating Zone
Numbers for North America are shown in
the figure on the following section.
Z-Nav™ Compass DisplayThe NVS™ Mirror in your vehicle is also
equipped with a Z-Nav™ Compass that
shows the vehicle Compass heading in
the Display Window using the 8 basic
cardinal headings (N, NE, E, SE, etc.).
Page 115 of 353
1FEATURES OF YOUR HYUNDAI
104
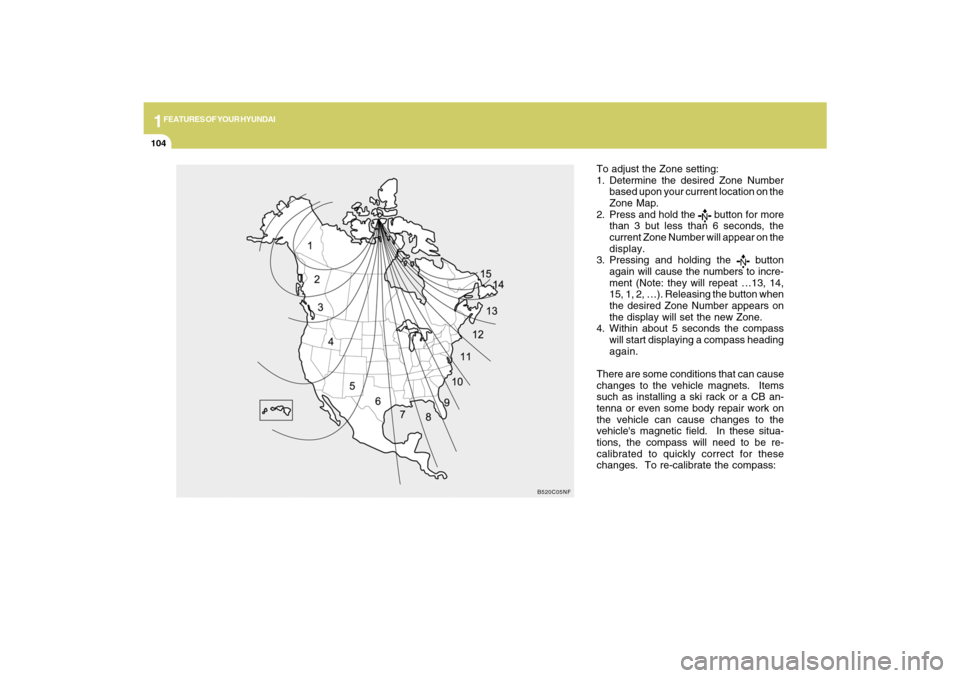
To adjust the Zone setting:
1. Determine the desired Zone Number
based upon your current location on the
Zone Map.
2. Press and hold the
button for more
than 3 but less than 6 seconds, the
current Zone Number will appear on the
display.
3. Pressing and holding the
button
again will cause the numbers to incre-
ment (Note: they will repeat …13, 14,
15, 1, 2, …). Releasing the button when
the desired Zone Number appears on
the display will set the new Zone.
4. Within about 5 seconds the compass
will start displaying a compass heading
again.
There are some conditions that can cause
changes to the vehicle magnets. Items
such as installing a ski rack or a CB an-
tenna or even some body repair work on
the vehicle can cause changes to the
vehicle's magnetic field. In these situa-
tions, the compass will need to be re-
calibrated to quickly correct for these
changes. To re-calibrate the compass:
B520C05NF
Page 116 of 353
1
FEATURES OF YOUR HYUNDAI
105
1. Press and hold the
button for more
than 6 seconds. When the compass
memory is cleared a "C" will appear in
the display.
2. To calibrate the compass, drive the
vehicle in 2 complete circles at less than
5 MPH (8 Km/h) or until the compass
heading appears.
!
Integrated HomeLink
® Wireless
Control System
The HomeLink
® Wireless Control System
provides a convenient way to replace up to
three hand-held radio-frequency (RF)
transmitters with a single built-in device.
This innovative feature will learn the radio
frequency codes of most current transmit-
ters to operate devices such as gate op-
erators, garage door openers, entry door
locks, security systems, even home light-
ing. Both standard and rolling code-
equipped transmitters can be programmed
by following the outlined procedures.
CAUTION:
Before programming HomeLink
® to a
garage door opener or gate operator,
make sure that people and objects are
out of the way of the device to prevent
potential harm or damage. Do not use
HomeLink
® with any garage door opener
that lacks the safety stop and reverse
features as required by U.S. federal
safety standards (this includes any ga-
rage door opener model manufactured
before April 1, 1982). A garage door that
cannot detect an object - signaling the
door to stop and reverse - does not meet
current U.S. federal safety standards.
Using a garage door opener without these
features increases the risk of serious
injury or death.Programming HomeLink
®
NOTE:o When programming a garage door
opener, it is advised to park the ve-
hicle outside of the garage.
o It is recommended that a new battery
be placed in the hand-held transmit-
ter of the device being programmed
to HomeLink
® for quicker training and
accurate transmission of the radio-
frequency signal.
o Some vehicles may require the igni-
tion switch to be turned to the second
(or "accessories") position for pro-
gramming and/or operation of
HomeLink.
o In the event that there are still pro-
gramming difficulties or questions
after following the programming steps
listed below, contact HomeLink
® at:
www.homelink.com or 1-800-355-
3515.
Retain the original transmitter of the RF
device you are programming for use in
other vehicles as well as for future
HomeLink
® programming. It is also sug-
gested that upon the sale of the vehicle, the
programmed HomeLink
® buttons be
erased for security purposes.
CAUTION:
Be sure the area is free of traffic, pedes-
trians, and obstructions.
!
Additional HomeLink
® information can be
found at: www.homelink.com or by calling
1-800-355-3515.
Page 145 of 353
1FEATURES OF YOUR HYUNDAI
134
AUTOMATIC HEATING AND COOLING CONTROL SYSTEMB970A01Y-AAT(If installed)Your Hyundai is equipped with an auto-
matic heating and cooling control system
controlled by simply setting the desired
temperature.
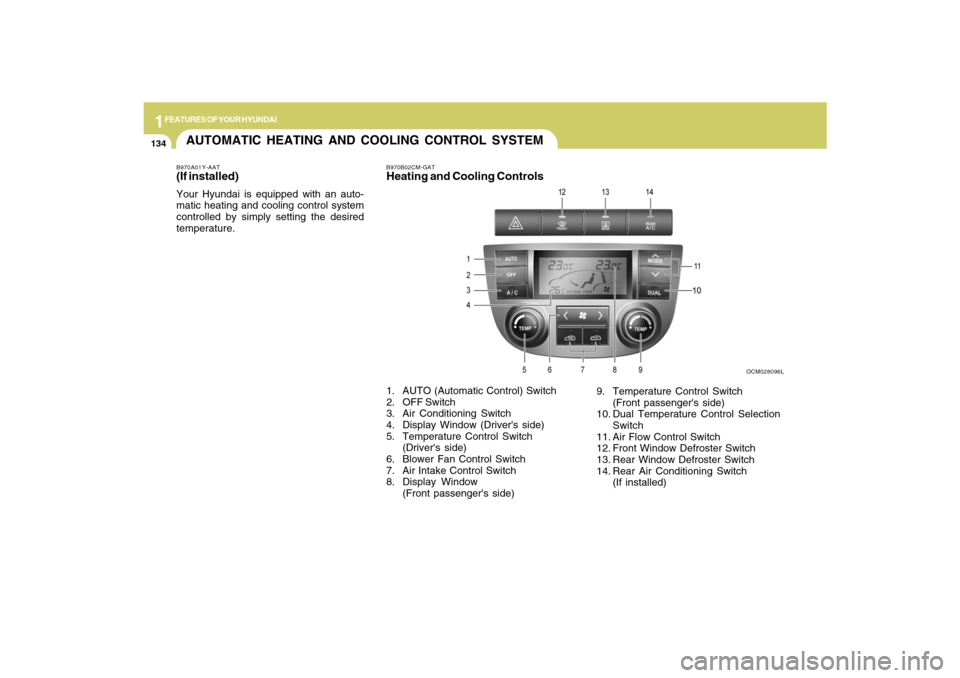
B970B02CM-GATHeating and Cooling Controls
OCM028096L
1. AUTO (Automatic Control) Switch
2. OFF Switch
3. Air Conditioning Switch
4. Display Window (Driver's side)
5. Temperature Control Switch
(Driver's side)
6. Blower Fan Control Switch
7. Air Intake Control Switch
8. Display Window
(Front passenger's side)9. Temperature Control Switch
(Front passenger's side)
10. Dual Temperature Control Selection
Switch
11. Air Flow Control Switch
12. Front Window Defroster Switch
13. Rear Window Defroster Switch
14. Rear Air Conditioning Switch
(If installed)
Page 146 of 353
1
FEATURES OF YOUR HYUNDAI
135
FEATURES OF YOUR HYUNDAI
135135135135
B970C01CM-AATAutomatic OperationThe FATC (Full Automatic Temperature
Control) system automatically controls
heating and cooling by doing as follows:
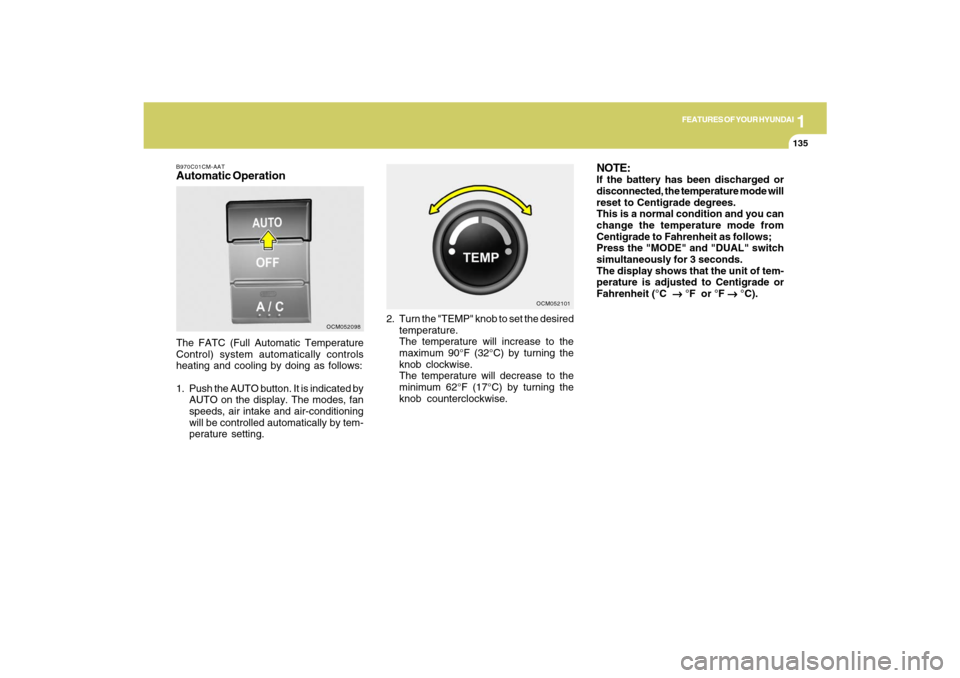
1. Push the AUTO button. It is indicated by
AUTO on the display. The modes, fan
speeds, air intake and air-conditioning
will be controlled automatically by tem-
perature setting.2. Turn the "TEMP" knob to set the desired
temperature.
The temperature will increase to the
maximum 90°F (32°C) by turning the
knob clockwise.
The temperature will decrease to the
minimum 62°F (17°C) by turning the
knob counterclockwise.
OCM052098OCM052101
NOTE:If the battery has been discharged or
disconnected, the temperature mode will
reset to Centigrade degrees.
This is a normal condition and you can
change the temperature mode from
Centigrade to Fahrenheit as follows;
Press the "MODE" and "DUAL" switch
simultaneously for 3 seconds.
The display shows that the unit of tem-
perature is adjusted to Centigrade or
Fahrenheit (°C
→ →→ →
→ °F or °F
→ →→ →
→ °C).
Page 159 of 353
1FEATURES OF YOUR HYUNDAI
148
B445B02CM-AATCONTROLLING HOW YOUR
AUDIO SYSTEM SOUNDSOperating your Audio system
Your audio system comprises a factory-
installed amplifier, an AM/FM digital tuner
(radio) and a CD player (single disc or 6-
disc changer). Use the CD player to play
discs encoded in the CD Audio, MP3, and
WMA formats. This audio system also
comes with an external Satellite Digital
Audio Receiver (SDAR) in providing the
XM service.
If your audio system is the D465S or D466S
model and it is connected to a factory-
installed Rear Seat Entertainment (RSE)
system*, you can control some playback
functions of the RSE system using the
audio system’s front panel controls (for
example, CD player controls).Your audio system has 5 different types of
controls. These controls are used either
independently or in combination with your
audio system’s radio, CD player, SDAR or
optional RSE system*.
NOTE:Your audio system’s factory-installed
amplifier is pre-configured for optimum
performance. You will not be able to
make any adjustments. If there is a prob-
lem with the audio system’s amplifier,
please consult a professional audio en-
gineer or the dealer where you purchased
your vehicle.1. General Controls:
These controls are used to operate the
entire audio system. (e.g. Power ON-OFF
control knob)
Use these controls independently or in
combination to control how the audio sys-
tem sounds. (e.g. Volume control, Bass
and Treble controls)
The sound settings you make are appli-
cable to all audio reproduction sources
(radio, CD, SDAR or auxiliary RSE* de-
vices).
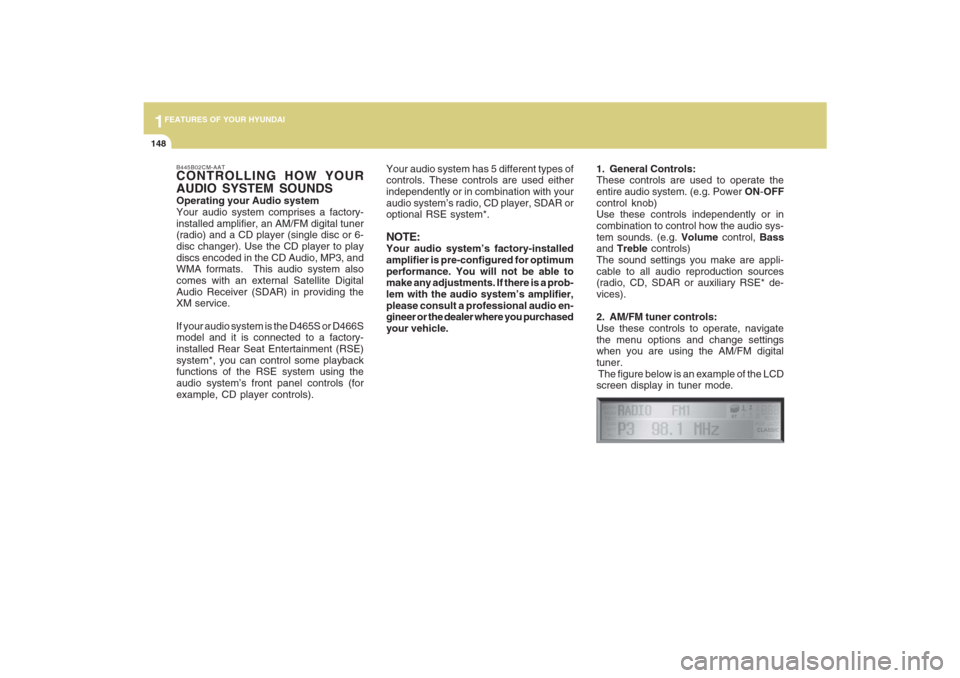
2. AM/FM tuner controls:
Use these controls to operate, navigate
the menu options and change settings
when you are using the AM/FM digital
tuner.
The figure below is an example of the LCD
screen display in tuner mode.
Page 160 of 353
1149149149149149149
FEATURES OF YOUR HYUNDAI
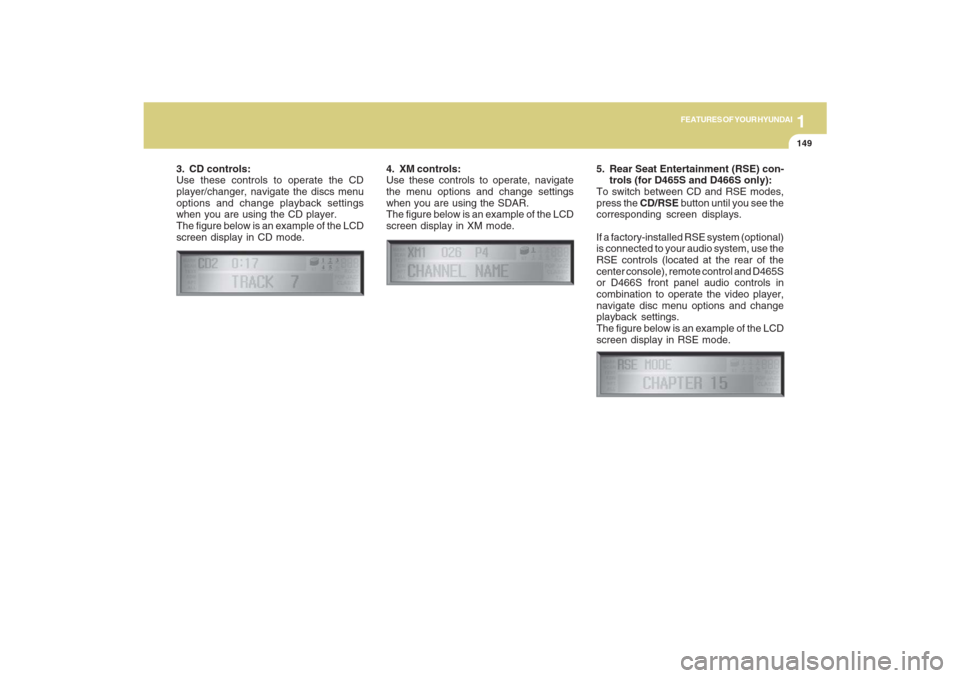
3. CD controls:
Use these controls to operate the CD
player/changer, navigate the discs menu
options and change playback settings
when you are using the CD player.
The figure below is an example of the LCD
screen display in CD mode.4. XM controls:
Use these controls to operate, navigate
the menu options and change settings
when you are using the SDAR.
The figure below is an example of the LCD
screen display in XM mode.
5. Rear Seat Entertainment (RSE) con-
trols (for D465S and D466S only):
To switch between CD and RSE modes,
press the CD/RSE button until you see the
corresponding screen displays.
If a factory-installed RSE system (optional)
is connected to your audio system, use the
RSE controls (located at the rear of the
center console), remote control and D465S
or D466S front panel audio controls in
combination to operate the video player,
navigate disc menu options and change
playback settings.
The figure below is an example of the LCD
screen display in RSE mode.