2009 Hyundai Santa Fe ESP
[x] Cancel search: ESPPage 119 of 353
1FEATURES OF YOUR HYUNDAI
108
!
WARNING:
The transceiver has been tested and
complies with FCC and Industry Canada
rules. Changes or modifications not ex-
pressly approved by the party respon-
sible for compliance could void the user's
authority to operate the device.
NVS
® is a registered trademark and Z-
Nav™ is a trademark of the Gentex Corpo-
ration, Zeeland, Michigan. HomeLink
® is
a registered trademark owned by Johnson
Controls, Incorporated, Milwaukee, Wis-
consin.
FCC ID: NZLZTVHL3
IC: 4112A-ZTVHL3This device complies with Part 15 of the
FCC Rules. Operation is subject to the
following two conditions: (1) this device
may not cause harmful interference, and
(2) this device must accept any interfer-
ence received, including interference that
may cause undesired operation.
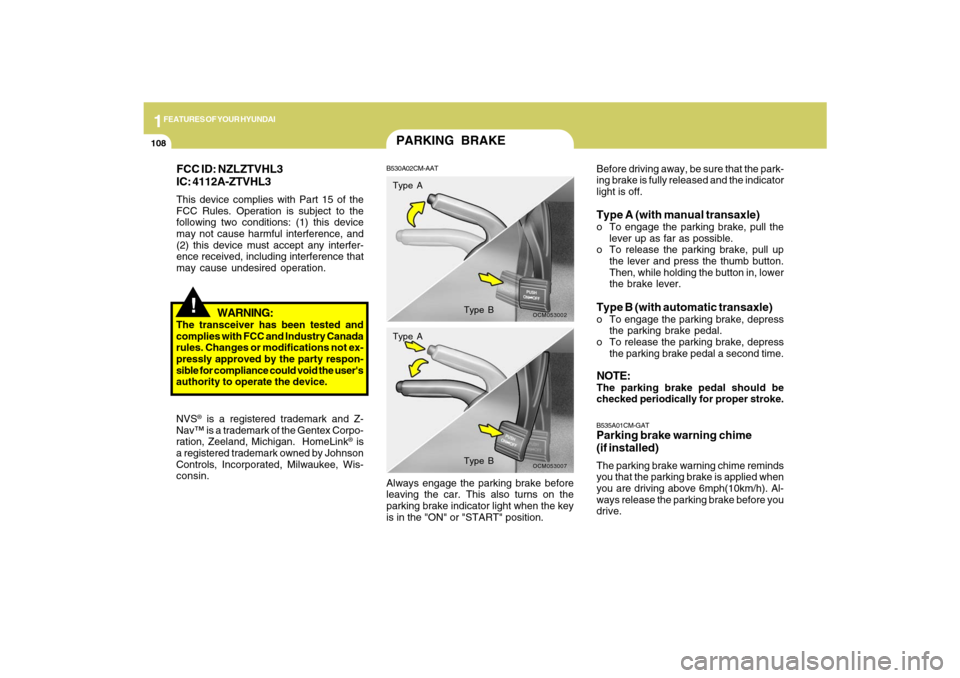
PARKING BRAKEB530A02CM-AAT
OCM053002
Type A
Type B
OCM053007
Type A
Type B
Before driving away, be sure that the park-
ing brake is fully released and the indicator
light is off.Type A (with manual transaxle)o To engage the parking brake, pull the
lever up as far as possible.
o To release the parking brake, pull up
the lever and press the thumb button.
Then, while holding the button in, lower
the brake lever.Type B (with automatic transaxle)o To engage the parking brake, depress
the parking brake pedal.
o To release the parking brake, depress
the parking brake pedal a second time.NOTE:The parking brake pedal should be
checked periodically for proper stroke.B535A01CM-GATParking brake warning chime
(if installed)The parking brake warning chime reminds
you that the parking brake is applied when
you are driving above 6mph(10km/h). Al-
ways release the parking brake before you
drive. Always engage the parking brake before
leaving the car. This also turns on the
parking brake indicator light when the key
is in the "ON" or "START" position.
Page 123 of 353
1FEATURES OF YOUR HYUNDAI
112
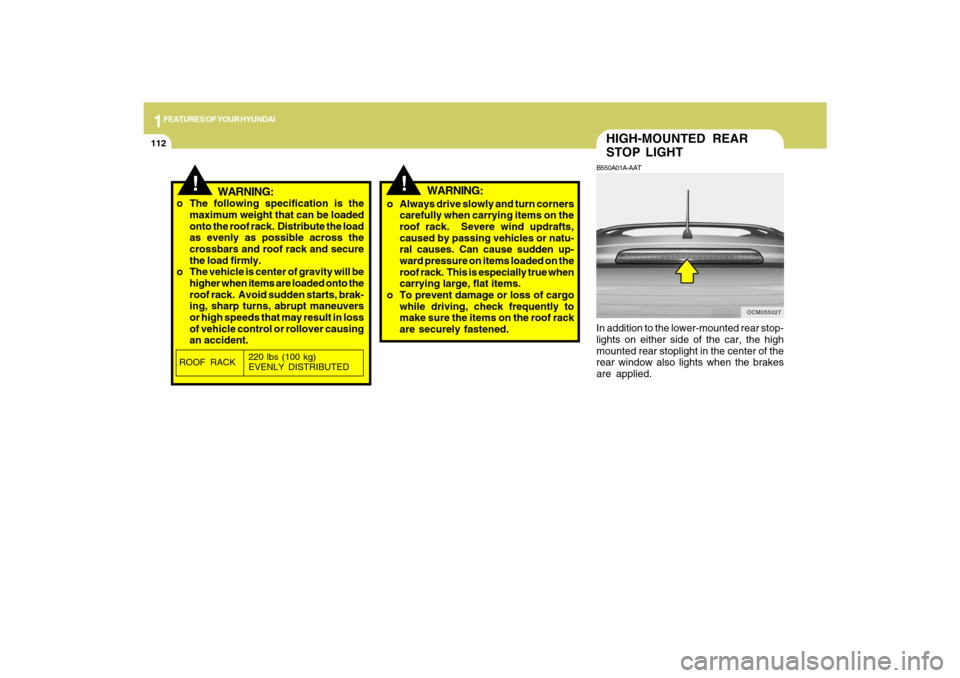
HIGH-MOUNTED REAR
STOP LIGHTB550A01A-AATIn addition to the lower-mounted rear stop-
lights on either side of the car, the high
mounted rear stoplight in the center of the
rear window also lights when the brakes
are applied.
OCM055027
!
!
WARNING:
o The following specification is the
maximum weight that can be loaded
onto the roof rack. Distribute the load
as evenly as possible across the
crossbars and roof rack and secure
the load firmly.
o The vehicle is center of gravity will be
higher when items are loaded onto the
roof rack. Avoid sudden starts, brak-
ing, sharp turns, abrupt maneuvers
or high speeds that may result in loss
of vehicle control or rollover causing
an accident.o Always drive slowly and turn corners
carefully when carrying items on the
roof rack. Severe wind updrafts,
caused by passing vehicles or natu-
ral causes. Can cause sudden up-
ward pressure on items loaded on the
roof rack. This is especially true when
carrying large, flat items.
o To prevent damage or loss of cargo
while driving, check frequently to
make sure the items on the roof rack
are securely fastened.ROOF RACK220 lbs (100 kg)
EVENLY DISTRIBUTED
WARNING:
Page 158 of 353
1147147147147147147
FEATURES OF YOUR HYUNDAI
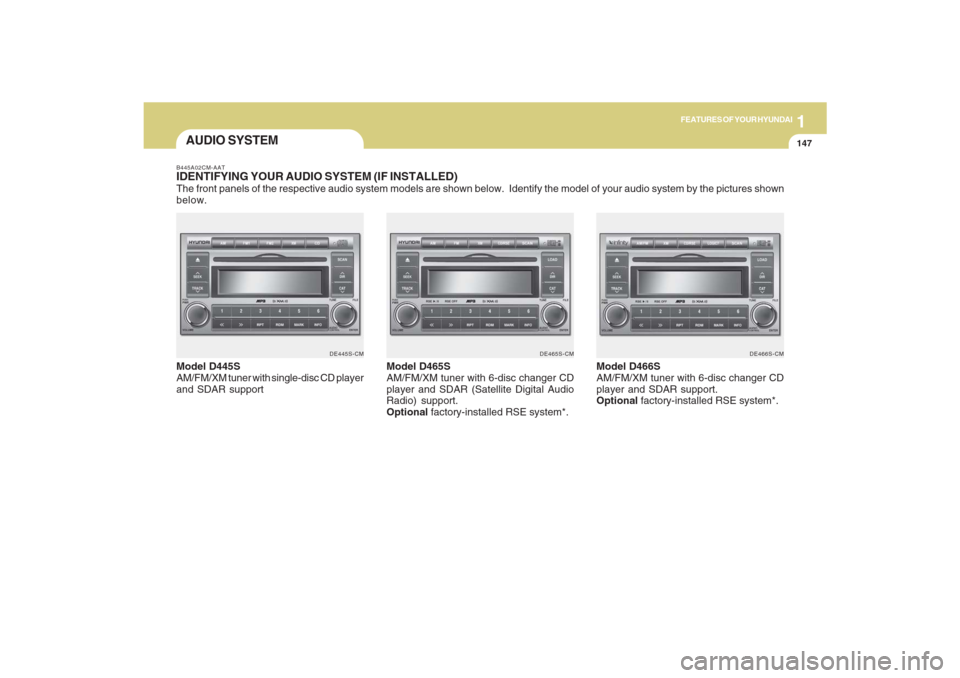
AUDIO SYSTEMB445A02CM-AATIDENTIFYING YOUR AUDIO SYSTEM (IF INSTALLED)The front panels of the respective audio system models are shown below. Identify the model of your audio system by the pictures shown
below.
DE445S-CM DE465S-CM DE466S-CM
Model D445S
AM/FM/XM tuner with single-disc CD player
and SDAR supportModel D465S
AM/FM/XM tuner with 6-disc changer CD
player and SDAR (Satellite Digital Audio
Radio) support.
Optional factory-installed RSE system*.Model D466S
AM/FM/XM tuner with 6-disc changer CD
player and SDAR support.
Optional factory-installed RSE system*.
Page 160 of 353
1149149149149149149
FEATURES OF YOUR HYUNDAI
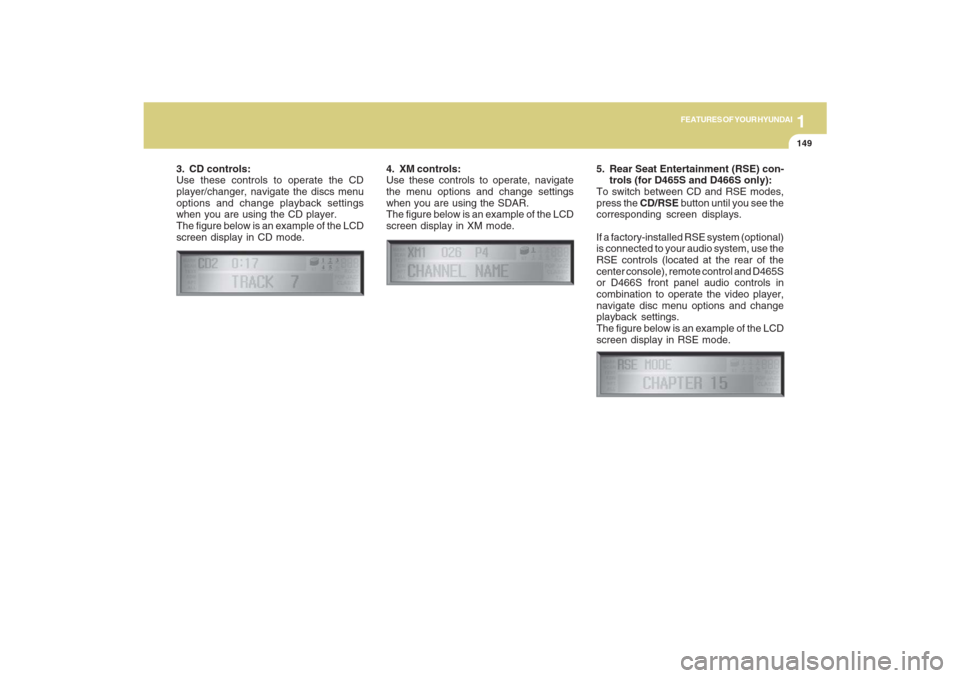
3. CD controls:
Use these controls to operate the CD
player/changer, navigate the discs menu
options and change playback settings
when you are using the CD player.
The figure below is an example of the LCD
screen display in CD mode.4. XM controls:
Use these controls to operate, navigate
the menu options and change settings
when you are using the SDAR.
The figure below is an example of the LCD
screen display in XM mode.
5. Rear Seat Entertainment (RSE) con-
trols (for D465S and D466S only):
To switch between CD and RSE modes,
press the CD/RSE button until you see the
corresponding screen displays.
If a factory-installed RSE system (optional)
is connected to your audio system, use the
RSE controls (located at the rear of the
center console), remote control and D465S
or D466S front panel audio controls in
combination to operate the video player,
navigate disc menu options and change
playback settings.
The figure below is an example of the LCD
screen display in RSE mode.
Page 164 of 353
1153153153153153153
FEATURES OF YOUR HYUNDAI
3. CD EJECT ( ) ButtonModel D445S :
Press the button once to eject the CD
from the CD player.
Models D465S and D466S :
Press the button once to eject the last
CD played.
Press and hold button for more than 2
seconds to eject all the CDs in the changer
in sequence beginning with the last CD
played.NOTE:You can eject discs even if the audio
system is switched off.
4. Audio Control knobUse the audio control knob to change how
music playback sounds and also to control
how sound is distributed to the speaker
system.
Sound properties
Press the knob repeatedly to display the
corresponding audio control settings
(Bass, Middle, Treble, Fader, Balance,
EQ).
The LCD screen displays the audio control
settings in sequence. Once the audio con-
trol setting you want is displayed, rotate the
knob clockwise/anti-clockwise to change
the level of that audio setting.Bass– increases/decreases Bass re-
sponse of audio reproduction
Middle– increases/decreases Mid-
range response of audio re-
production
Treble– increases/decreases Treble
response of audio reproduc-
tion
Fader– sets front/rear balance level
for your speaker system
Balance– sets left/right balance level for
your speaker system
EQ– selects one of the 6 equalizer-
settings: ROCK, POP, JAZZ,
CLASSIC, TALK and equal-
izer off by turning the audio
control knob once in the EQ
mode. If no icon is displayed in
the LCD screen, the equalizer
is switched off.
Page 169 of 353
1FEATURES OF YOUR HYUNDAI
158
4. Station Preset buttons (1~6)There are 6 Station Preset buttons which
you can use to store the frequencies of
your 6 favorite radio stations. Saving a
station as a preset gives you one-touch
access to the station you want. Remember
that the 6 presets stations you store are for
the specific radio band mode you are in.
That means that you can store up to 6
stations in AM mode, 6 in FM1 mode, and
6 in FM2 mode. This means that you can
store up to 18 of your favorite stations in the
preset memory.NOTE:o For Model D445S, use FM1 and FM2
buttons to switch between FM1 and
FM2 modes.
o For Model D465S, use FM button to
switch between FM1 and FM2 modes.
o For Model D466S, use AM/FM button
to switch between AM, FM1 and FM2
modes.
o Remember that if you store a station
as preset 1 in FM2 mode, you must
first select FM2 mode before you can
use that preset button.
o This function is not effective if you are
experiencing poor reception in your
vicinity.
Using PresetsTo save a radio station as a preset:
1. Take note of the band selection dis-
played on the LCD screen (AM, FM1 or
FM2)
2. Tune in to the radio station you want
using either the SEEK UP and DOWN
buttons or the TUNE Knob.
3. Choose the preset button (1~6) you
want to use to store the radio station.
4. Press and hold the Preset button for
more than 2 seconds.
The system beeps to indicate that it has
saved the new station and displays the
frequency and preset number on the
LCD screen.NOTE:Saving a new station erases the previ-
ous setting saved in that preset.To tune in to a preset station:
1. Select the band (AM, FM1 or FM2) you
want using the band selector buttons.
2. Press the preset button corresponding
to the radio station you want.
The system automatically jumps to the
preset station. The frequency and pre-
set number is displayed on the LCD
screen.
Buttons not in use in tuner mode
The following buttons and functions are
not used in tuner mode.
-<< button
->> button
-RPT button
-RDM button
-MARK button
-INFO button
Page 171 of 353
1FEATURES OF YOUR HYUNDAI
160
B445G02CM-AAT1. SCAN buttonDisc Scan function
During CD playback, press the SCAN
button to play the first 10 seconds (pre-
view) of all tracks on the current CD.
Once you hear a track you want, press the
SCAN button again to resume normal play-
back2. Track UP '
∧ ∧∧ ∧
∧' and DOWN '
∨ ∨∨ ∨
∨' but-
tons
During CD playback, press the
∧ and
∨
buttons to select and play the next or pre-
vious track on the current disc. The LCD
screen displays the track number as you
press the buttons. You can press the but-
ton several times to select the track you
want.
3. CD selector buttons (1~6)Model D445S:
The CD selector buttons are not used with
Model D445.
Models D465S and D466S:
Press the CD selector button correspond-
ing to the CD you want. The CD player
automatically interrupts playback and loads
the selected CD.NOTE:If no CD is loaded in the selected posi-
tion, the LCD screen displays the No
Disc indicator.4. Rewind << and Fast Forward >>
buttonsDuring CD playback, press and hold the
<< or >> buttons to rewind or fast-forward
playback of the current track. The LCD
screen displays the elapsed time of the
track you are rewinding or fast-forwarding.
Release the << or >> button when you
have reached the point you want. Play-
back resumes automatically at the selected
point.
5. DIR '
∧ ∧∧ ∧
∧' and '
∨ ∨∨ ∨
∨' buttons (MP3 and
WMA discs)
During MP3/WMA CD playback, press the
DIR '
∧ ∧∧ ∧
∧' or '
∨ ∨∨ ∨
∨' buttons to switch to the next
or previous directory on the CD. The LCD
screen displays the name of the directory
you have switched to. You can press the
button several times to search for the direc-
tory you want. The directories are dis-
played in sequence (i.e. ascending or
descending alphabetical order).
To access the directory displayed, press
the File Search knob to ENTER your se-
lection.
NOTE:The Directory UP and DOWN buttons
can only be used when you are playing a
CD which has organized its tracks in the
form of directories. Normally, only MP3
or WMA CDs will contain a directory tree
which you can navigate using these but-
tons.
Page 172 of 353
1161161161161161161
FEATURES OF YOUR HYUNDAI
6. File Search KnobRotate the knob clockwise or counter-clock-
wise to manually advance up or down the
track list of the CD currently played. This
function allows you to quickly scroll to a
specific track number. It is especially use-
ful if you are playing an MP3 or WMA CD
which contains many directories and
tracks. The LCD screen displays the track
number you have scrolled to.
Once the track number you want is dis-
played, press the File Search knob to
ENTER your selection and begin play-
back of the selected track.
NOTE:You must push the File Search knob to
select the track for playback. Other-
wise, the CD player will not jump to the
track number displayed in the number
counter.
Use the File Search knob and the DIR '
∧ ∧∧ ∧
∧'
and '
∨ ∨∨ ∨
∨' buttons in together to quickly
search for a track you want on an MP3
CD with many directories and tracks.
7. RPT, RDM, MARK & INFO buttonsThese buttons correspond to the Repeat,
Random Playback, Marklist and Disc In-
formation functions.
Turn to the next section of your handbook
for detailed instructions.