2009 Hyundai Santa Fe clock
[x] Cancel search: clockPage 9 of 269
F9
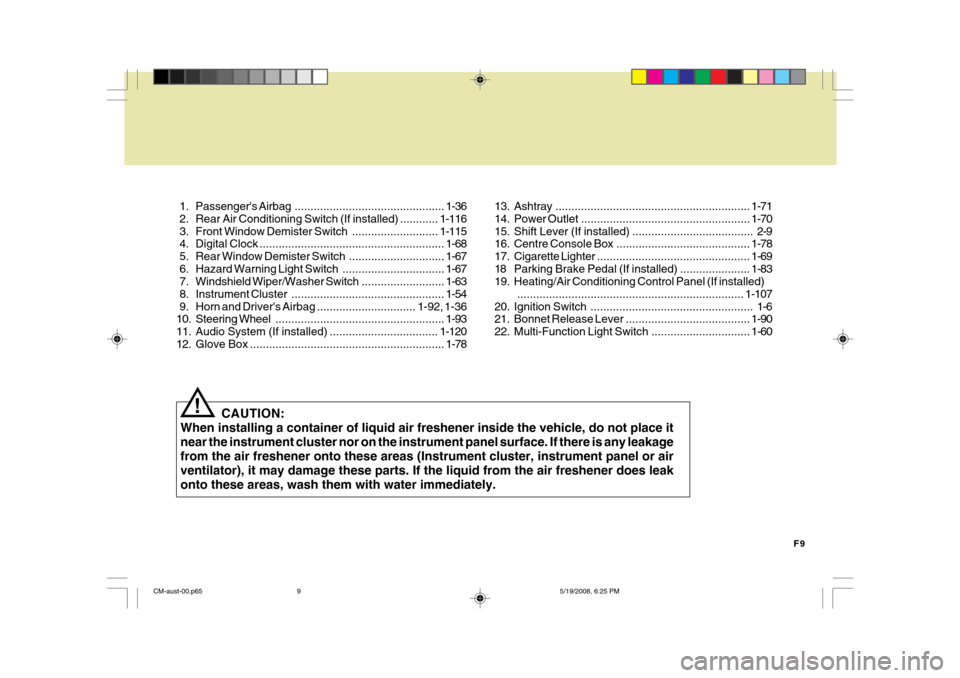
1. Passenger's
Airbag............................................... 1-36
2. Rear Air Conditioning Sw itch (If installed) ............1-116
3. Front Window Demister Switch........................... 1-115
4. Digital Clock .......................................................... 1-68
5. Rear Window Demi ster Switch .............................. 1-67
6. Hazard Warning Light Switch................................ 1-67
7. Windshield W iper/Washer Switch ..........................1-63
8. Instrument Cluster ................................................ 1-54
9. Horn and Driver' s Airbag ............................... 1-92, 1-36
10. Steering Wheel ..................................................... 1-93
11. Audio System (If installed) .................................. 1-120
12. Glove Box ............................................................. 1-78
CAUTION:
When installing a container of liquid air freshener inside the vehicle, do not place it near the instrument cluster nor on the instrument panel surface. If there is any leakagefrom the air freshener onto these areas (Instrument cluster, instrument panel or airventilator), it may damage these parts. If the liquid from the air freshener does leakonto these areas, wash them with water immediately.
! 13. Ashtray
............................................................. 1-71
14. Power Outlet ..................................................... 1-70
15. Shift Lever (If installed) ...................................... 2-9
16. Centre Console Box .......................................... 1-78
17. Cigarette Lighter ................................................ 1-69
18 Parking Brake Pedal (If installed) ...................... 1-83
19. Heating/Air Conditioning Control Panel (If installed)
....................................................................... 1-107
20. Ignition Switch ................................................... 1-6
21. Bonnet Release Lever ....................................... 1-90
22. Multi-Function Light Switch ............................... 1-60
CM-aust-00.p65 5/19/2008, 6:25 PM
9
Page 51 of 269
1FEATURES OF YOUR HYUNDAI
40
!
OCM052212L
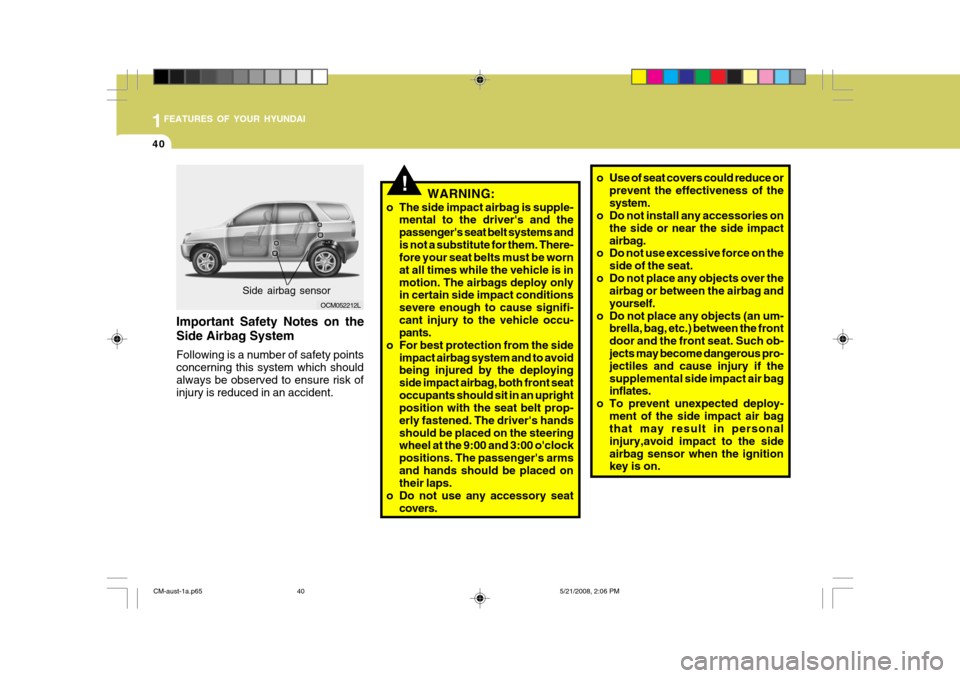
Side airbag sensor
Important Safety Notes on the Side Airbag System Following is a number of safety points concerning this system which shouldalways be observed to ensure risk of injury is reduced in an accident. WARNING:
o The side impact airbag is supple- mental to the driver's and the passenger's seat belt systems andis not a substitute for them. There- fore your seat belts must be worn at all times while the vehicle is inmotion. The airbags deploy only in certain side impact conditions severe enough to cause signifi-cant injury to the vehicle occu- pants.
o For best protection from the side impact airbag system and to avoidbeing injured by the deploying side impact airbag, both front seatoccupants should sit in an upright position with the seat belt prop- erly fastened. The driver's handsshould be placed on the steering wheel at the 9:00 and 3:00 o'clock positions. The passenger's armsand hands should be placed on their laps.
o Do not use any accessory seat covers. o Use of seat covers could reduce or
prevent the effectiveness of the system.
o Do not install any accessories on
the side or near the side impactairbag.
o Do not use excessive force on the
side of the seat.
o Do not place any objects over the airbag or between the airbag andyourself.
o Do not place any objects (an um- brella, bag, etc.) between the frontdoor and the front seat. Such ob- jects may become dangerous pro- jectiles and cause injury if thesupplemental side impact air bag inflates.
o To prevent unexpected deploy-
ment of the side impact air bagthat may result in personal injury,avoid impact to the sideairbag sensor when the ignition key is on.
CM-aust-1a.p65 5/21/2008, 2:06 PM
40
Page 79 of 269
1FEATURES OF YOUR HYUNDAI
68
!
CAUTION:
Do not clean the inner side of the rear window glass with an abrasive typeof glass cleaner or use a scraper to remove the foreign deposits from the inner surface of the glass as thismay cause damage to the demister elements. NOTE: The engine must be running for the rear window demister to operate.
DIGITAL CLOCK
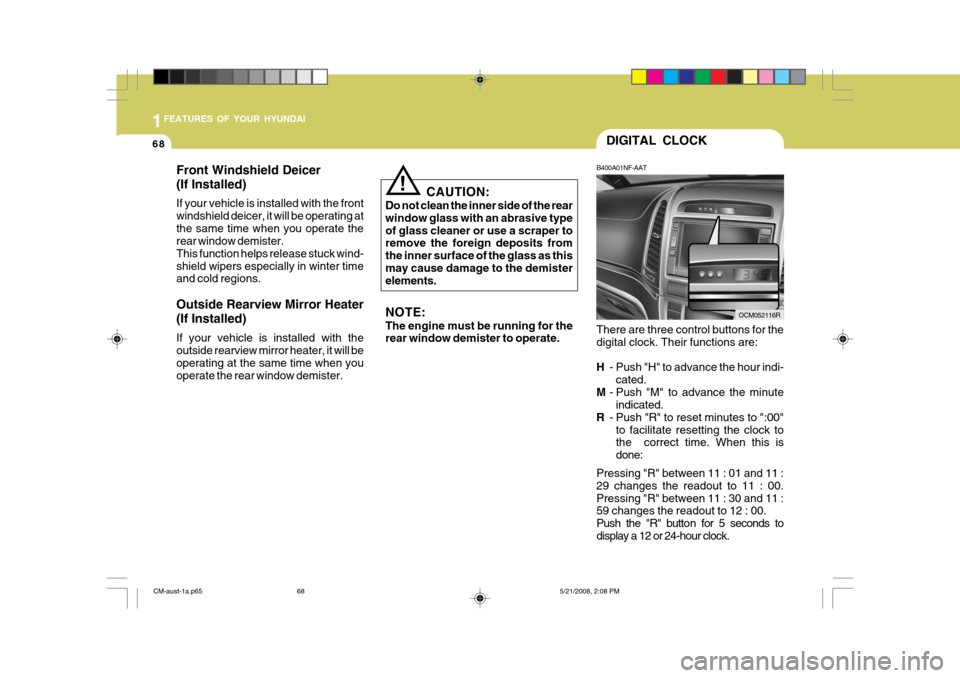
B400A01NF-AAT
There are three control buttons for the digital clock. Their functions are: H - Push "H" to advance the hour indi-
cated.
M - Push "M" to advance the minute
indicated.
R - Push "R" to reset minutes to ":00"
to facilitate resetting the clock to the correct time. When this is done:
Pressing "R" between 11 : 01 and 11 :29 changes the readout to 11 : 00.Pressing "R" between 11 : 30 and 11 : 59 changes the readout to 12 : 00.
Push the "R" button for 5 seconds todisplay a 12 or 24-hour clock.
OCM052116R
Front Windshield Deicer (If Installed) If your vehicle is installed with the front windshield deicer, it will be operating atthe same time when you operate the rear window demister. This function helps release stuck wind-shield wipers especially in winter time and cold regions. Outside Rearview Mirror Heater (If Installed) If your vehicle is installed with the outside rearview mirror heater, it will be operating at the same time when youoperate the rear window demister.
CM-aust-1a.p65
5/21/2008, 2:08 PM
68
Page 92 of 269
1
FEATURES OF YOUR HYUNDAI
81
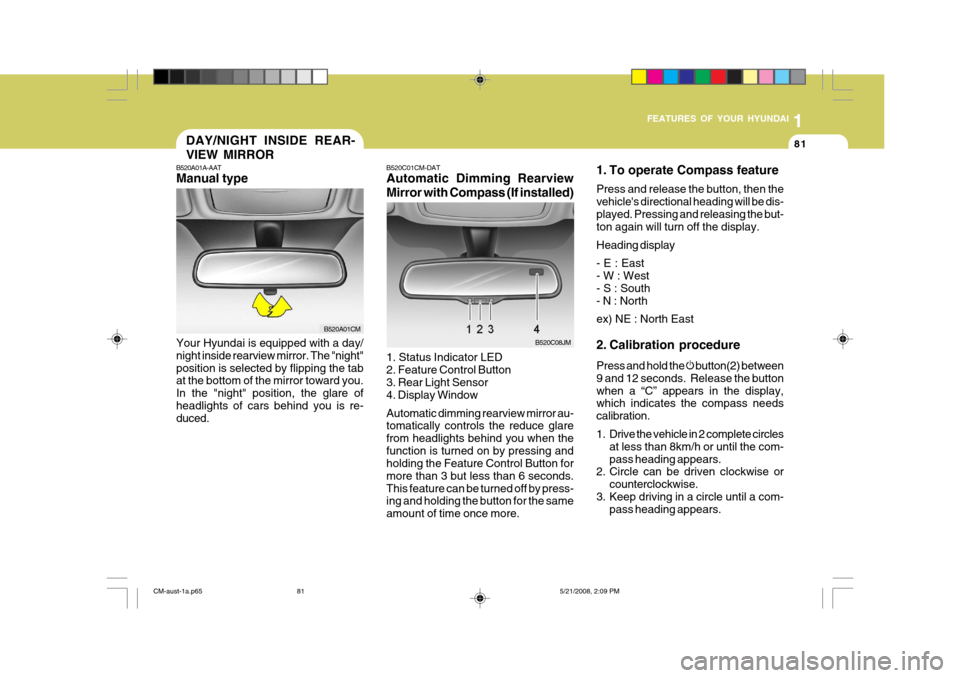
B520C01CM-DAT Automatic Dimming Rearview Mirror with Compass (If installed) 1. Status Indicator LED 2. Feature Control Button3. Rear Light Sensor 4. Display Window Automatic dimming rearview mirror au- tomatically controls the reduce glare from headlights behind you when thefunction is turned on by pressing and holding the Feature Control Button for more than 3 but less than 6 seconds.This feature can be turned off by press- ing and holding the button for the same amount of time once more.
B520C08JM 1. To operate Compass feature Press and release the button, then the vehicle's directional heading will be dis-played. Pressing and releasing the but- ton again will turn off the display. Heading display - E : East - W : West - S : South - N : North ex) NE : North East
2. Calibration procedure Press and hold the
button(2) between
9 and 12 seconds. Release the button when a “C” appears in the display, which indicates the compass needs calibration.
1. Drive the vehicle in 2 complete circles at less than 8km/h or until the com- pass heading appears.
2. Circle can be driven clockwise or
counterclockwise.
3. Keep driving in a circle until a com- pass heading appears.
DAY/NIGHT INSIDE REAR- VIEW MIRROR
B520A01A-AAT Manual type Your Hyundai is equipped with a day/ night inside rearview mirror. The "night"position is selected by flipping the tab at the bottom of the mirror toward you. In the "night" position, the glare ofheadlights of cars behind you is re- duced.
B520A01CM
CM-aust-1a.p65 5/21/2008, 2:09 PM
81
Page 120 of 269
1
FEATURES OF YOUR HYUNDAI
109
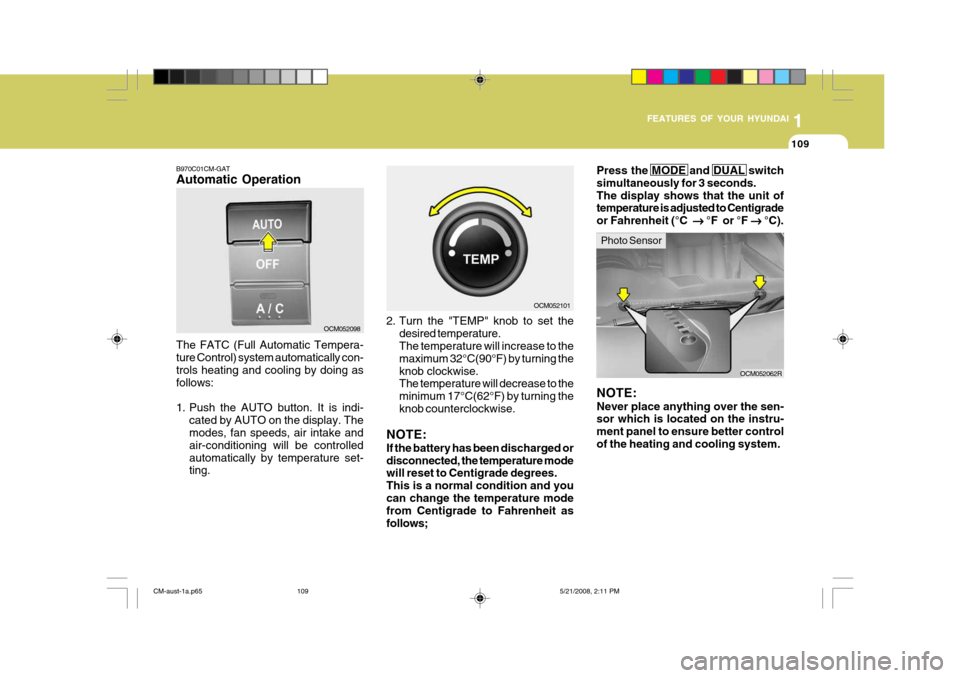
B970C01CM-GAT Automatic Operation The FATC (Full Automatic Tempera- ture Control) system automatically con- trols heating and cooling by doing asfollows:
1. Push the AUTO button. It is indi-
cated by AUTO on the display. The modes, fan speeds, air intake and air-conditioning will be controlledautomatically by temperature set- ting. 2. Turn the "TEMP" knob to set the
desired temperature.The temperature will increase to the maximum 32°C(90°F) by turning theknob clockwise. The temperature will decrease to the minimum 17°C(62°F) by turning theknob counterclockwise.
NOTE: If the battery has been discharged or disconnected, the temperature mode will reset to Centigrade degrees. This is a normal condition and youcan change the temperature mode from Centigrade to Fahrenheit as follows;
OCM052098
OCM052101
OCM052062R
NOTE: Never place anything over the sen- sor which is located on the instru- ment panel to ensure better controlof the heating and cooling system.Press the MODE and DUAL switch simultaneously for 3 seconds.The display shows that the unit of temperature is adjusted to Centigrade or Fahrenheit (°C
°F or °F
°C).
Photo Sensor
CM-aust-1a.p65 5/21/2008, 2:11 PM
109
Page 129 of 269
1FEATURES OF YOUR HYUNDAI
118ANTENNA
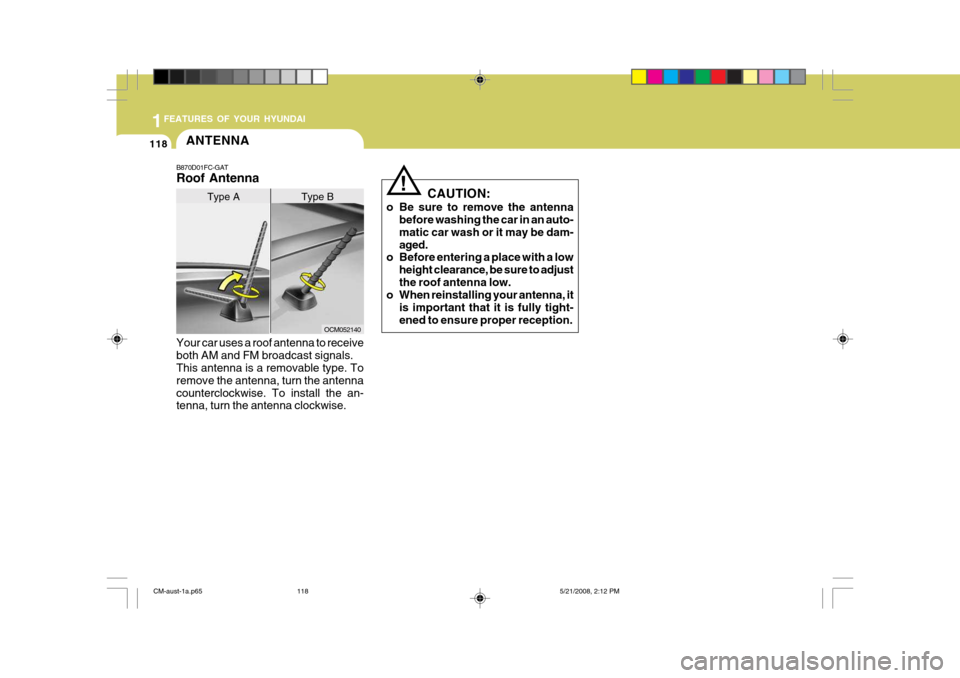
B870D01FC-GAT Roof Antenna Your car uses a roof antenna to receive both AM and FM broadcast signals. This antenna is a removable type. To remove the antenna, turn the antennacounterclockwise. To install the an- tenna, turn the antenna clockwise.
OCM052140
Type A Type B!
CAUTION:
o Be sure to remove the antenna before washing the car in an auto- matic car wash or it may be dam-aged.
o Before entering a place with a low
height clearance, be sure to adjustthe roof antenna low.
o When reinstalling your antenna, it
is important that it is fully tight-ened to ensure proper reception.
CM-aust-1a.p65 5/21/2008, 2:12 PM
118
Page 134 of 269
1
FEATURES OF YOUR HYUNDAI
123
1
FEATURES OF YOUR HYUNDAI
123
1
FEATURES OF YOUR HYUNDAI
123
1
FEATURES OF YOUR HYUNDAI
123
1
FEATURES OF YOUR HYUNDAI
123
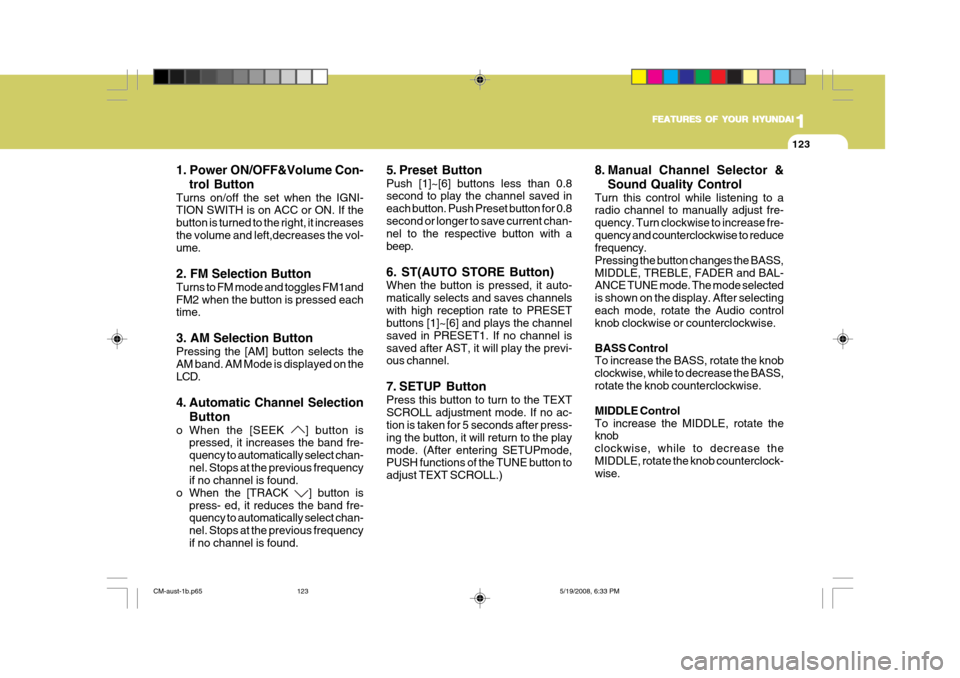
1. Power ON/OFF&Volume Con- trol Button
Turns on/off the set when the IGNI- TION SWITH is on ACC or ON. If the button is turned to the right, it increasesthe volume and left,decreases the vol- ume. 2. FM Selection Button Turns to FM mode and toggles FM1and FM2 when the button is pressed each time. 3. AM Selection Button Pressing the [AM] button selects the AM band. AM Mode is displayed on the LCD.
4. Automatic Channel Selection
Button
o When the [SEEK
] button is
pressed, it increases the band fre- quency to automatically select chan-nel. Stops at the previous frequency if no channel is found.
o When the [TRACK
] button is
press- ed, it reduces the band fre- quency to automatically select chan- nel. Stops at the previous frequencyif no channel is found. 5. Preset Button Push [1]~[6] buttons less than 0.8 second to play the channel saved in each button. Push Preset button for 0.8second or longer to save current chan- nel to the respective button with a beep. 6. ST(AUTO STORE Button) When the button is pressed, it auto- matically selects and saves channelswith high reception rate to PRESET buttons [1]~[6] and plays the channel saved in PRESET1. If no channel issaved after AST, it will play the previ- ous channel.
7. SETUP Button Press this button to turn to the TEXT SCROLL adjustment mode. If no ac- tion is taken for 5 seconds after press- ing the button, it will return to the playmode. (After entering SETUPmode, PUSH functions of the TUNE button to adjust TEXT SCROLL.)
8. Manual Channel Selector &
Sound Quality Control
Turn this control while listening to a radio channel to manually adjust fre- quency. Turn clockwise to increase fre-quency and counterclockwise to reduce frequency. Pressing the button changes the BASS,MIDDLE, TREBLE, FADER and BAL- ANCE TUNE mode. The mode selected is shown on the display. After selectingeach mode, rotate the Audio control knob clockwise or counterclockwise. BASS Control To increase the BASS, rotate the knob clockwise, while to decrease the BASS,rotate the knob counterclockwise. MIDDLE Control To increase the MIDDLE, rotate the knob clockwise, while to decrease theMIDDLE, rotate the knob counterclock- wise.
CM-aust-1b.p65 5/19/2008, 6:33 PM
123
Page 135 of 269
1FEATURES OF YOUR HYUNDAI
124
TREBLE Control To increase the TREBLE, rotate theknob clockwise, while to decrease the TREBLE, rotate the knob counterclock-wise. FADER Control Turn the control knob clockwise to emphasize rear speaker sound(front speaker sound will be attenuated). Whenthe control knob is turned counterclock- wise, front speaker sound will be emphasized(rear speaker sound will beattenuated). BALANCE Control Rotate the knob clockwise to empha- size right speaker sound(left speaker soundwill be attenuated). When the control knob is turned counter clockwise, left speaker sound will be emphasized(right speaker sound will be attenuated). 9. TA Selection Button In FM, CD, AUX mode, turns on/off the reception of TA channels of RDS. 10. PTY(FLDR) Button
o Moves [FOLDER
] Button when
searching PTY in RDS Broadcasting Program Type selection.
o Moves [PTY
] button when search-
ing PTY in RDS Broadcasting Pro- gram Type selection.
CM-aust-1b.p65 5/19/2008, 6:33 PM
124