2009 Hyundai Getz light
[x] Cancel search: lightPage 132 of 191

4- 6 CORROSION PREVENTION AND APPEARANCE CARE
E040C01A-AAT Cleaning the Carpets Use a foam-type carpet cleaner. Clean- ers of this type are available in aerosol cans in liquid form or powder. Read the instructions and follow them exactly.Using a vacuum cleaner with the ap- propriate attachment, remove as much dirt from the carpets as possible. Applythe foam following the manufacturer's directions, then rub in overlapping circles. Do not add water. These clean-ers work best when the carpet is kept as dry as possible.
E040B01A-DAT To Clean the Leather Upholstery (If installed) In the normal course of use, leather upholstered surfaces will, like any material, pick-up dust and dirt. Thisdust and dirt must be cleaned off or it may work into the surface of the leather, causing damage. Fine leather needs care, and should be cleaned when necessary. Washingleather thoroughly with soap and water will keep your leather lustrous, beautiful and ensure you have many years ofusage. Take a piece of cheese cloth and using any mild soap and lukewarm water,work up a good lather. Thoroughly wash the leather. Wipe clean with a slightly damp cloth and dry with a softcloth. Do this as often as possible as the leather becomes soiled. Consult your Hyundai dealer for recom-mended leather treatment products.
During tanning operations, sufficient oils are incorporated through process- ing that none need be applied duringthe life of the leather. Oil applied to the finished surface will in no way help the leather and may do more harm thangood. Varnishes and furniture polishes should never be used under any condi- tions.
E040A01A-AAT CLEANING THE INTERIOR To Clean the Vinyl Upholstery To clean the vinyl upholstery, first re- move loose dirt and dust with a vacuumcleaner. Then apply a solution of mild soap or detergent and water using a clean sponge or soft cloth. Allow this tostay on the surface to loosen the dirt, then wipe with a clean damp sponge or cloth. If all the dirt stains are not re-moved, repeat this procedure until the upholstery is clean. Do not use petrol, solvent, paint thinner or other strong cleaners.
Page 145 of 191

DO-IT-YOURSELF MAINTENANCE 6- 3
G020A01A-AAT GENERAL CHECKS Engine Compartment The following should be checked regu-larly:
o Engine oil level and condition
o Transaxle fluid level and condition
o Brake fluid level
o Clutch fluid level
o Engine coolant level
o Windshield washer fluid level
o Accessory drive belt condition
o Engine coolant hose condition
o Fluid leaks (on or below compo-
nents)
o Power steering fluid level
o Battery condition G020C01A-DAT Vehicle Interior The following should be checked each time when the vehicle is driven:
o Lights operation
o Windshield wiper operation
o Horn operation
o Defroster, heating system operation
(and air conditioning, if installed)
o Steering operation and condition
o Mirror condition and operation
o Turn signal light operation
o Accelerator pedal operation
o Brake operation, including hand brake
o Manual transaxle operation, includ- ing clutch operation
o Automatic transaxle operation, in- cluding "Park" mechanism operation
o Seat control condition and operation
o Seat belt condition and operation
o Sunvisor operation If you notice anything that does not operate correctly or appears to be functioning incorrectly, inspect it care- fully and seek assistance from yourHyundai dealer if service is needed.
G020B01A-DAT Vehicle Exterior The following should be checked monthly:
o Overall appearance and condition
o Air filter condition
o Wheel condition and wheel nut torque
o Exhaust system condition
o Light condition and operation
o Windshield glass condition
o Wiper blade condition
o Paint condition and body corrosion
o Fluid leaks
o Door and bonnet lock condition
o Tyre pressure and condition (includ-
ing spare tyre)
Page 158 of 191
6- 16 DO-IT-YOURSELF MAINTENANCE
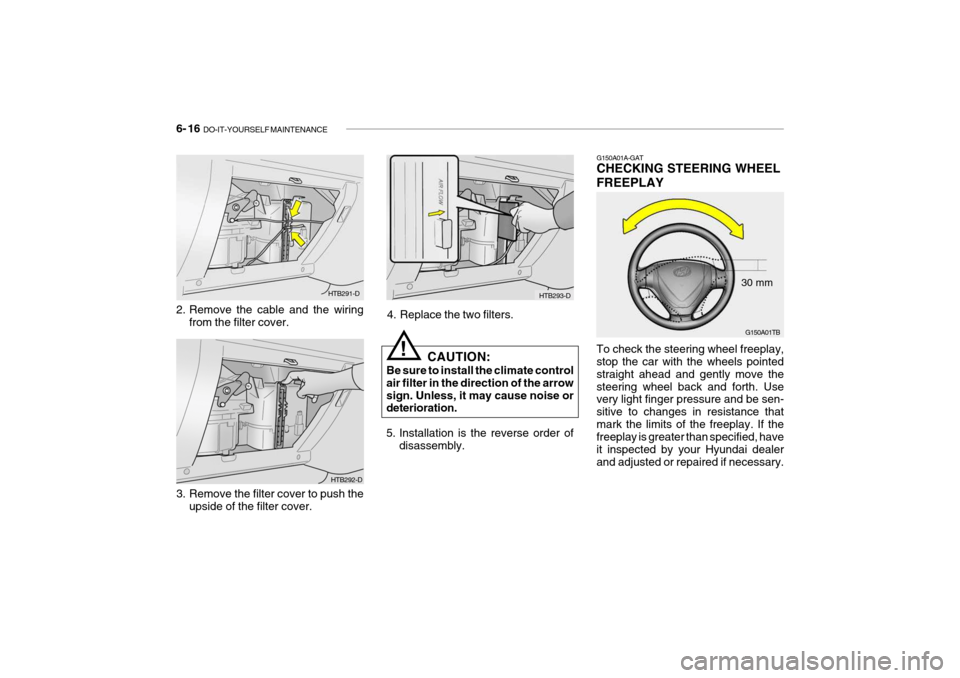
G150A01A-GAT CHECKING STEERING WHEEL FREEPLAY To check the steering wheel freeplay, stop the car with the wheels pointed straight ahead and gently move thesteering wheel back and forth. Use very light finger pressure and be sen- sitive to changes in resistance thatmark the limits of the freeplay. If the freeplay is greater than specified, have it inspected by your Hyundai dealerand adjusted or repaired if necessary. G150A01TB
30 mm
HTB293-D
4. Replace the two filters.
CAUTION:
Be sure to install the climate controlair filter in the direction of the arrowsign. Unless, it may cause noise or deterioration.
5. Installation is the reverse order of disassembly.
!
HTB291-D
2. Remove the cable and the wiring from the filter cover.
HTB292-D
3. Remove the filter cover to push the upside of the filter cover.
Page 159 of 191
DO-IT-YOURSELF MAINTENANCE 6- 17
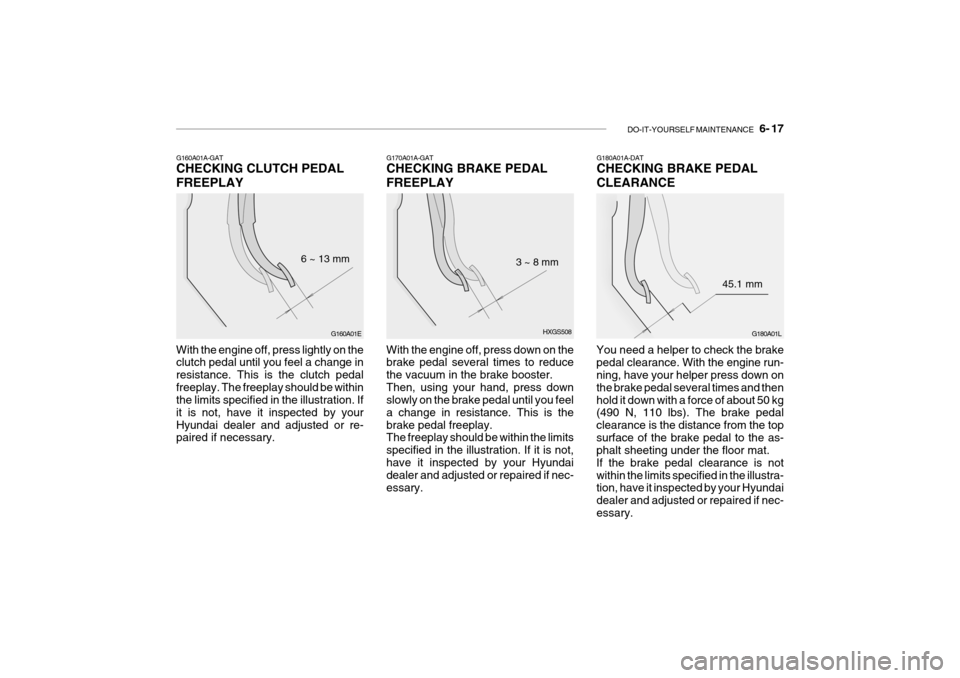
G160A01A-GAT CHECKING CLUTCH PEDAL FREEPLAY
G160A01E
6 ~ 13 mm
With the engine off, press lightly on the clutch pedal until you feel a change in resistance. This is the clutch pedalfreeplay. The freeplay should be within the limits specified in the illustration. If it is not, have it inspected by yourHyundai dealer and adjusted or re- paired if necessary.G180A01A-DAT CHECKING BRAKE PEDAL CLEARANCE
G180A01L
45.1 mm
You need a helper to check the brake pedal clearance. With the engine run- ning, have your helper press down on the brake pedal several times and thenhold it down with a force of about 50 kg (490 N, 110 lbs). The brake pedal clearance is the distance from the topsurface of the brake pedal to the as- phalt sheeting under the floor mat. If the brake pedal clearance is notwithin the limits specified in the illustra- tion, have it inspected by your Hyundai dealer and adjusted or repaired if nec-essary.G170A01A-GAT CHECKING BRAKE PEDAL FREEPLAY With the engine off, press down on the brake pedal several times to reduce the vacuum in the brake booster.Then, using your hand, press down slowly on the brake pedal until you feel a change in resistance. This is thebrake pedal freeplay. The freeplay should be within the limits specified in the illustration. If it is not,have it inspected by your Hyundai dealer and adjusted or repaired if nec- essary. HXGS508
3 ~ 8 mm
Page 161 of 191
DO-IT-YOURSELF MAINTENANCE 6- 19
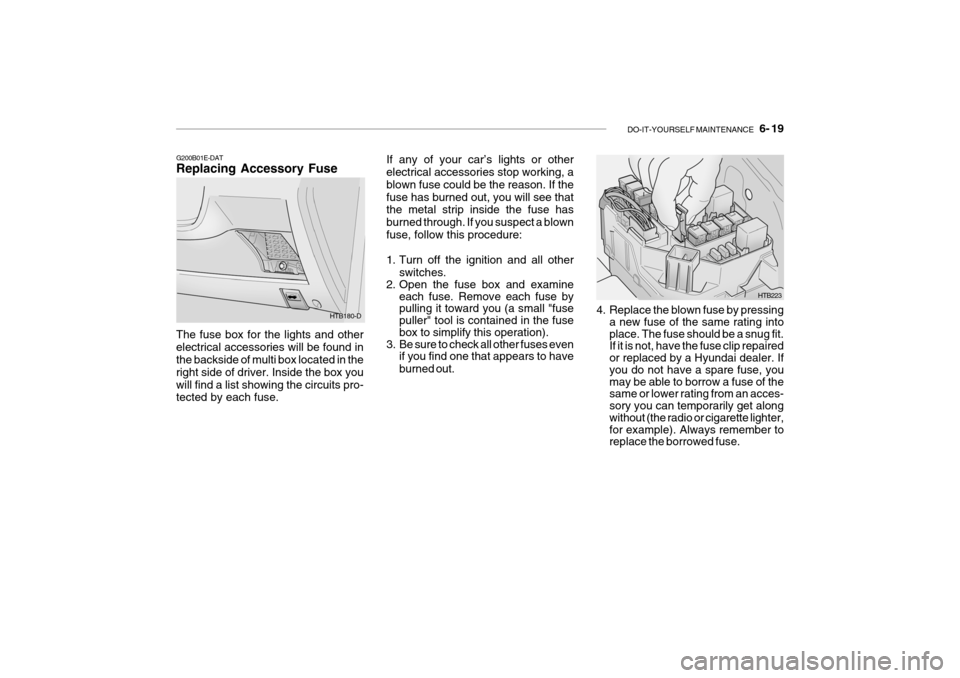
G200B01E-DAT Replacing Accessory Fuse The fuse box for the lights and other electrical accessories will be found in the backside of multi box located in the right side of driver. Inside the box youwill find a list showing the circuits pro- tected by each fuse. HTB180-D
HTB223
If any of your car’s lights or other electrical accessories stop working, a blown fuse could be the reason. If thefuse has burned out, you will see that the metal strip inside the fuse has burned through. If you suspect a blownfuse, follow this procedure:
1. Turn off the ignition and all other
switches.
2. Open the fuse box and examine each fuse. Remove each fuse by pulling it toward you (a small "fuse puller" tool is contained in the fuse box to simplify this operation).
3. Be sure to check all other fuses even if you find one that appears to have burned out. 4. Replace the blown fuse by pressing
a new fuse of the same rating into place. The fuse should be a snug fit. If it is not, have the fuse clip repaired or replaced by a Hyundai dealer. If you do not have a spare fuse, you may be able to borrow a fuse of the same or lower rating from an acces- sory you can temporarily get along without (the radio or cigarette lighter, for example). Always remember to replace the borrowed fuse.
Page 163 of 191
DO-IT-YOURSELF MAINTENANCE 6- 21
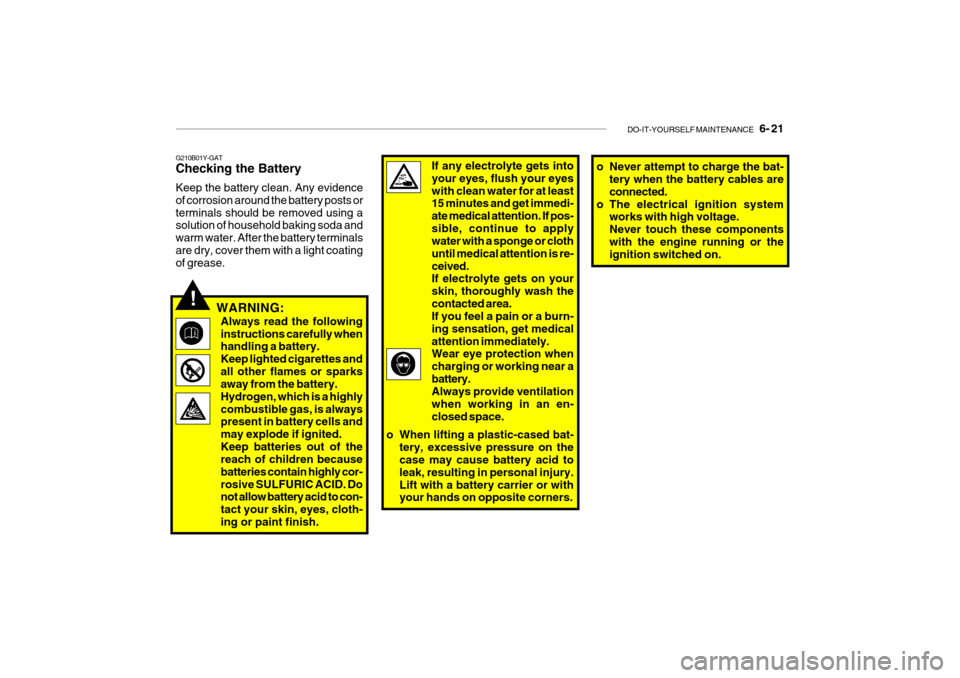
If any electrolyte gets into your eyes, flush your eyeswith clean water for at least 15 minutes and get immedi- ate medical attention. If pos-sible, continue to apply water with a sponge or cloth until medical attention is re-ceived. If electrolyte gets on your skin, thoroughly wash thecontacted area. If you feel a pain or a burn- ing sensation, get medicalattention immediately. Wear eye protection when charging or working near abattery. Always provide ventilation when working in an en-closed space.
o When lifting a plastic-cased bat- tery, excessive pressure on the case may cause battery acid to leak, resulting in personal injury.Lift with a battery carrier or with your hands on opposite corners.
!
G210B01Y-GAT Checking the Battery Keep the battery clean. Any evidence of corrosion around the battery posts orterminals should be removed using a solution of household baking soda and warm water. After the battery terminalsare dry, cover them with a light coating of grease.
WARNING:
Always read the following instructions carefully when handling a battery. Keep lighted cigarettes andall other flames or sparks away from the battery. Hydrogen, which is a highlycombustible gas, is always present in battery cells and may explode if ignited.Keep batteries out of the reach of children because batteries contain highly cor-rosive SULFURIC ACID. Do not allow battery acid to con- tact your skin, eyes, cloth-ing or paint finish. o Never attempt to charge the bat-
tery when the battery cables areconnected.
o The electrical ignition system works with high voltage.Never touch these componentswith the engine running or the ignition switched on.
Page 165 of 191
DO-IT-YOURSELF MAINTENANCE 6- 23
G290A01FC-DAT HEADLIGHT AIMING ADJUSTMENT Before performing aiming adjustment, make sure of the following.
1. Keep all tyres inflated to the correct
pressure.
2. Place the vehicle on level ground
and press the front bumper & rear bumper down several times. Place the vehicle at a distance of 3,000 mm (118 in.) from the test wall.
3. See that the vehicle is unloaded (except for full levels of coolant,engine oil and fuel, and spare tyre,jack, and tools).
4. Clean the head light lenses and turn
on the headlights (low beam).
G240A01A-DAT POWER STEERING HOSES It is suggested that you check the power steering hose connections forfluid leakage at those intervals speci- fied in the vehicle maintenance schedule in Section 5. The power steer-ing hoses should be replaced if there is severe surface cracking, pulling, scuff- ing or worn spots. Deterioration of thehoses could cause premature failure.
HTB269
Horizontal aiming
Vertical
aiming
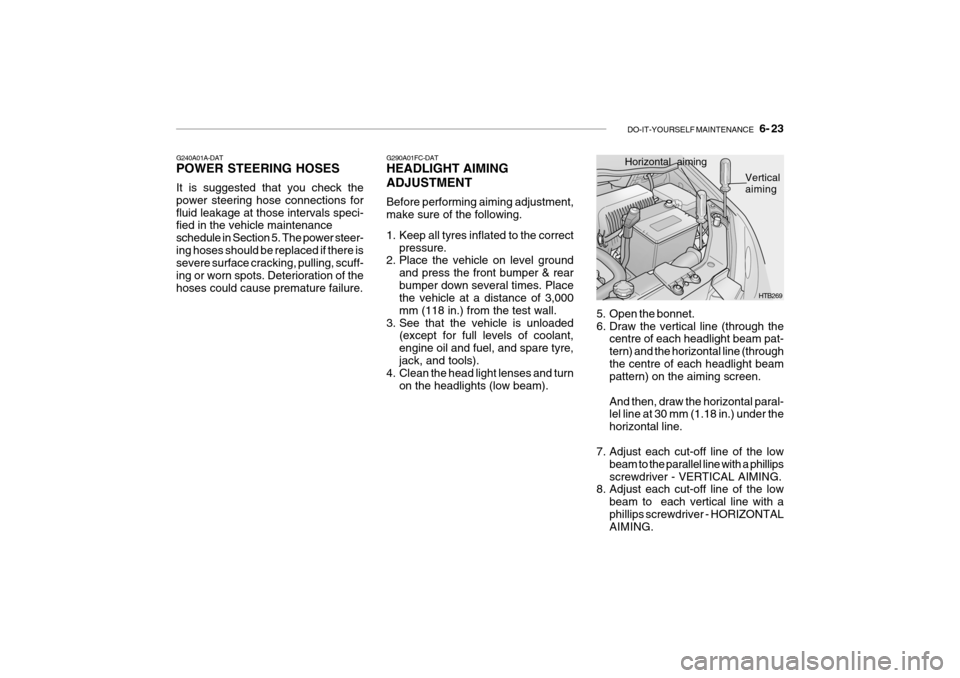
5. Open the bonnet.
6. Draw the vertical line (through the centre of each headlight beam pat-tern) and the horizontal line (throughthe centre of each headlight beam pattern) on the aiming screen. And then, draw the horizontal paral- lel line at 30 mm (1.18 in.) under the horizontal line.
7. Adjust each cut-off line of the low beam to the parallel line with a phillipsscrewdriver - VERTICAL AIMING.
8. Adjust each cut-off line of the low
beam to each vertical line with aphillips screwdriver - HORIZONTAL AIMING.
Page 166 of 191
6- 24 DO-IT-YOURSELF MAINTENANCE
G270A01TB-DAT REPLACEMENT OF BULBS Headlight Bulb Before attempting to replace a head- light bulb, be sure the switch is turned to the "OFF" position.The next paragraph shows how to reach headlight bulbs so they may be changed. Be sure to replace theburned-out bulb with one of the same number and wattage rating. All bulbs are available from yourHyundai dealers Parts Department.
CAUTION:
Keep the lamps out of contact with petroleum product, such as oil, petrol, etc.
!
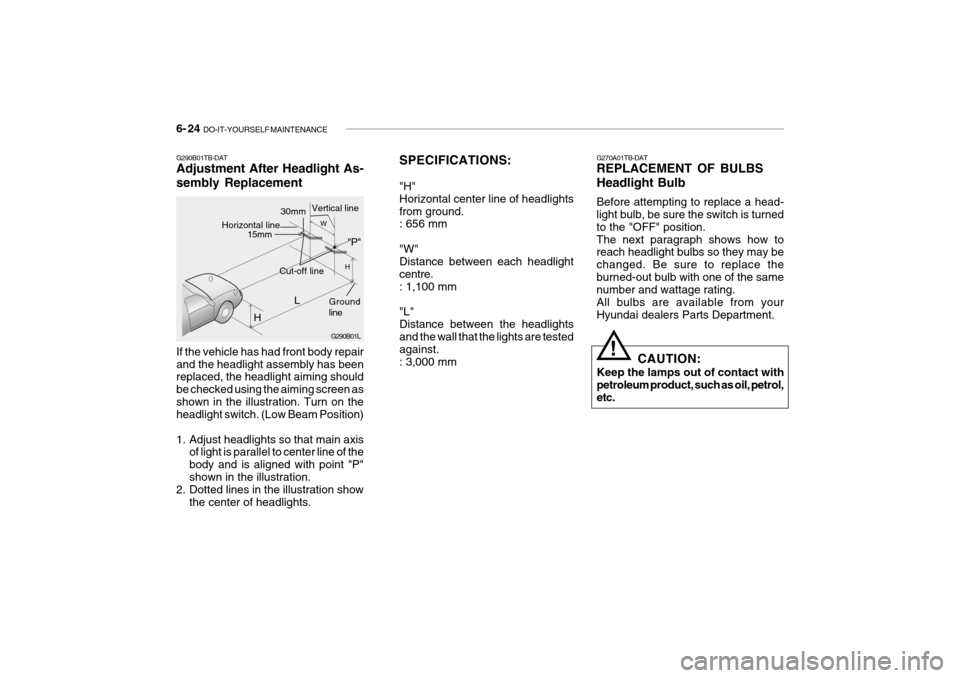
If the vehicle has had front body repair and the headlight assembly has been replaced, the headlight aiming should be checked using the aiming screen asshown in the illustration. Turn on the headlight switch. (Low Beam Position)
1. Adjust headlights so that main axis
of light is parallel to center line of the body and is aligned with point "P"shown in the illustration.
2. Dotted lines in the illustration show
the center of headlights.
G290B01TB-DAT Adjustment After Headlight As- sembly Replacement
SPECIFICATIONS: "H" Horizontal center line of headlightsfrom ground. : 656 mm "W" Distance between each headlight centre.: 1,100 mm "L" Distance between the headlights and the wall that the lights are tested against.: 3,000 mm
G290B01L
LW
H
H Cut-off line
Ground line
"P"
Horizontal line15mm
30mmVertical line