2009 Hyundai Getz ECU
[x] Cancel search: ECUPage 80 of 191
FEATURES OF YOUR HYUNDAI 1- 69
!
B610B01A-DAT HORN
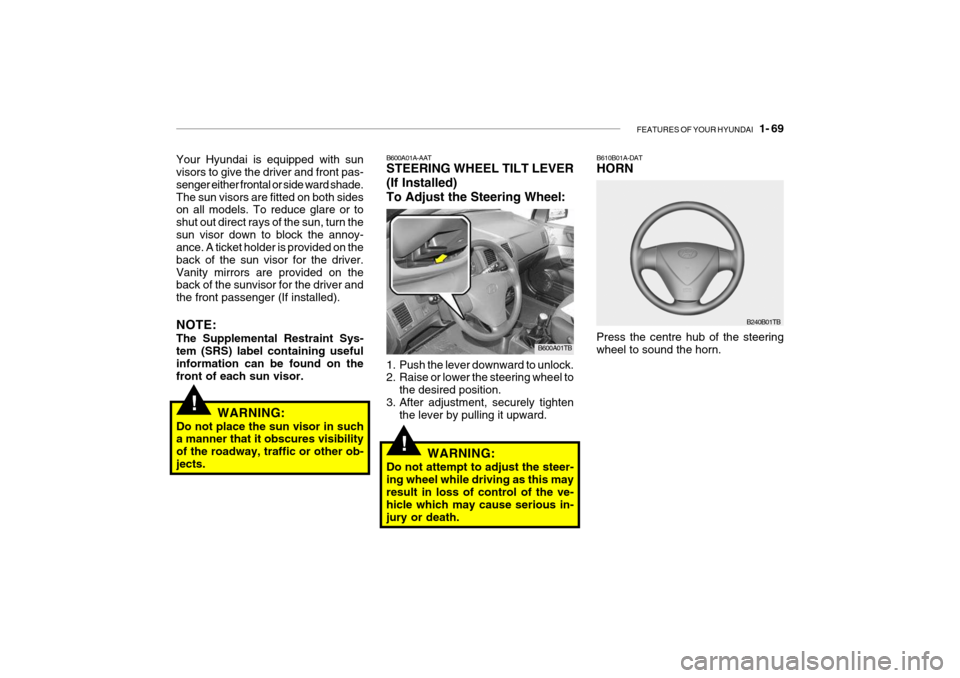
Press the centre hub of the steering wheel to sound the horn. B240B01TBB600A01A-AAT STEERING WHEEL TILT LEVER (If Installed)To Adjust the Steering Wheel:
1. Push the lever downward to unlock.
2. Raise or lower the steering wheel to
the desired position.
3. After adjustment, securely tighten the lever by pulling it upward.
WARNING:
Do not attempt to adjust the steer- ing wheel while driving as this mayresult in loss of control of the ve- hicle which may cause serious in- jury or death.
!
Your Hyundai is equipped with sun visors to give the driver and front pas- senger either frontal or side ward shade.The sun visors are fitted on both sides on all models. To reduce glare or to shut out direct rays of the sun, turn thesun visor down to block the annoy- ance. A ticket holder is provided on the back of the sun visor for the driver.Vanity mirrors are provided on the back of the sunvisor for the driver and the front passenger (If installed). NOTE: The Supplemental Restraint Sys- tem (SRS) label containing useful information can be found on the front of each sun visor.
WARNING:
Do not place the sun visor in such a manner that it obscures visibility of the roadway, traffic or other ob-jects.
B600A01TB
Page 115 of 191
2- 20 DRIVING YOUR HYUNDAI
!
C190F01A-DAT Trailer or Vehicle Towing Tips
1. Before towing, check hitch and
safety chain connections as well as proper operation of the trailer run- ning lights, brake lights, and turn signals.
2. Always drive your vehicle at a mod- erate speed (Less than 100 km/h).
3. Trailer towing requires more fuel than normal conditions.
4. To maintain engine braking effi-
ciency and electrical charging per-formance, do not use fifth gear (manual transmission) or overdrive (automatic transmission).
5. Always secure items in the trailer to prevent load shift while driving.
6. Check the condition and air pres- sure of all tyres on the trailer and your car. Low tyre pressure can seriously affect the handling. Alsocheck the spare tyre.
7. The vehicle/trailer combination is
more affected by crosswind andbuffeting. When being passed by a large vehicle, keep a constant speed and steer straight ahead. If there istoo much wind buffeting slow down to get out of the other vehicle's air turbulence.
!
Gross Axle Weight
Couplingpoint C190E02L
Gross Vehicle
Weight
HTB312
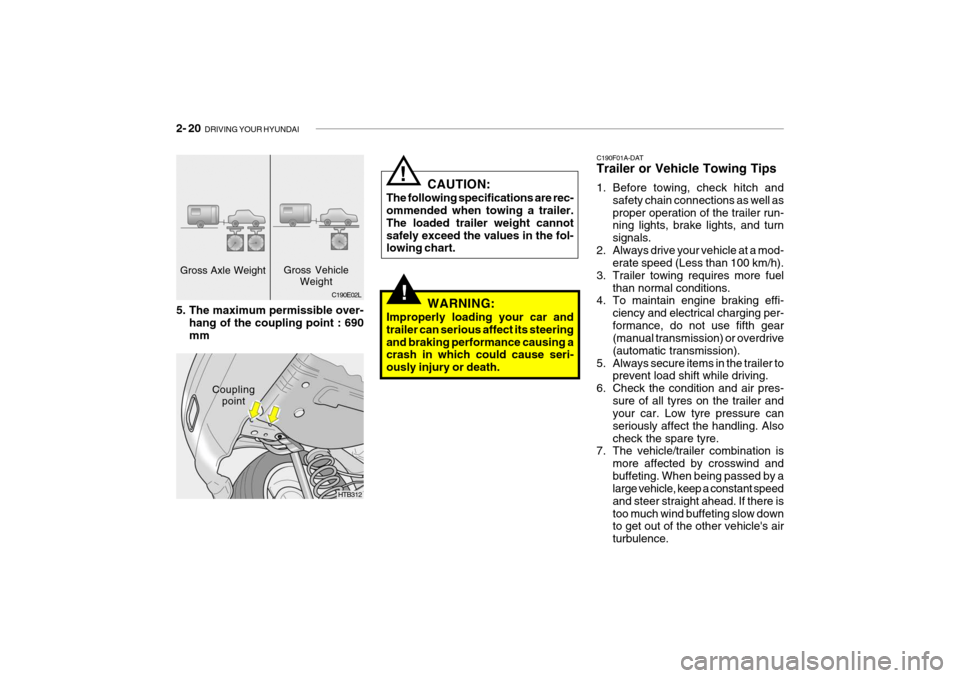
5. The maximum permissible over-
hang of the coupling point : 690 mm CAUTION:
The following specifications are rec- ommended when towing a trailer. The loaded trailer weight cannotsafely exceed the values in the fol- lowing chart.
WARNING:
Improperly loading your car and trailer can serious affect its steeringand braking performance causing a crash in which could cause seri- ously injury or death.
Page 116 of 191

DRIVING YOUR HYUNDAI 2- 21
14. When going down a hill, shift into a
lower gear and use the engine brak- ing effect. When ascending a longgrade, downshift the transmission to a lower gear and reduce speed to reduce chances of engine over-loading and/or overheating.
15.If you have to stop while going
uphill, do not hold the vehicle inplace by pressing on the accelera- tor. This can cause the automatic transmission to overheat. Use thehand brake or footbrake.
NOTE: When towing, check transaxle fluid more frequently. 1. Turn off the air conditioner.
2. Reduce highway speed.
3. Select a lower gear when going up-
hill.
4. While in stop and go traffic, place
the gear selection in park or neutraland idle the engine at a higher speed.
CAUTION:
If overheating should occur whentowing, (temperature gauge reads near red zone), taking the following action may reduce or eliminate theproblem.
!
8. When parking your car and trailer,
especially on a hill, be sure to follow all the normal precautions. Turnyour front wheel into the curb, set the hand brake firmly, and put the transmission in 1st or Reverse(manual) or Park (automatic). In addition, place wheel chocks at each of the trailer's tyres.
9. If the trailer has electric brakes, drive your vehicle with the trailerattached, and then apply the trailerbrakes by hand. This test confirms the operation of the trailer brakes and also checks your electrical con-nection at the same time.
10.During your trip, check occasion-
ally to be sure that the load issecure, and that the lights and any trailer brakes are still working.
11.Avoid jerky starts, sudden accel- eration or sudden stops.
12.Avoid sharp turns and rapid lane
changes.
13.Avoid holding the brake pedal down too long or too frequently. This could cause the brakes to overheat, re-sulting in reduced braking efficiency. D120A02A-DAT IF YOU LOSE YOUR KEYS If you happen to lose your leys, your vehicle will require towing to your Hyundai dealer to have the new set ofkeys programmed to your vehicle.
Page 118 of 191
3- 2 WHAT TO DO IN AN EMERGENCY
HTB165
D010B02A-AAT If Engine Doesn't Turn Over or Turns Over Slowly 2. Check the battery connections to be
sure they are clean and tight.
3. Turn on the interior light. If the light dims or goes out when you operate the starter, the battery is discharged.
4. Check the starter connections to be sure they are securely tightened.
5. Do not push or pull the vehicle to
start it. See instructions for "Jump Starting".
D010C01A-DAT If Engine Turns Over Normally but Does Not Start 4 If engine still refuses to start, call a
Hyundai dealer or seek other quali- fied assistance.
D010D01A-AAT If the Engine Stalls While Driv- ing
1. Reduce your speed gradually, keep- ing a straight line. Move cautiously off the road to a safe place.
2. Turn on your emergency flashers.
3. Try to start the engine again. If your vehicle will not start, contact aHyundai dealer or seek other quali-fied assistance.
D010A01A-AAT IF THE ENGINE WILL NOT START
!
HTB221
CAUTION:
If the engine will not start, do not push or pull the car to start it. This could result in a collision or causeother damage. In addition, push or pull starting may cause the cata- lytic converter to be overloaded andcreate a fire hazard.
F020100AUN If the engine stalls at a crossroad or crossing If the engine stalls at a crossroad or crossing, set the shift lever in the N(Neutral) position and then push the vehicle to a safe place. If your vehicle has a manual transaxle not equippedwith the ignition lock switch, the vehicle can move forward by shifting to the 2(second) or 3(third) gear and then turn-ing the starter without depressing the clutch pedal.
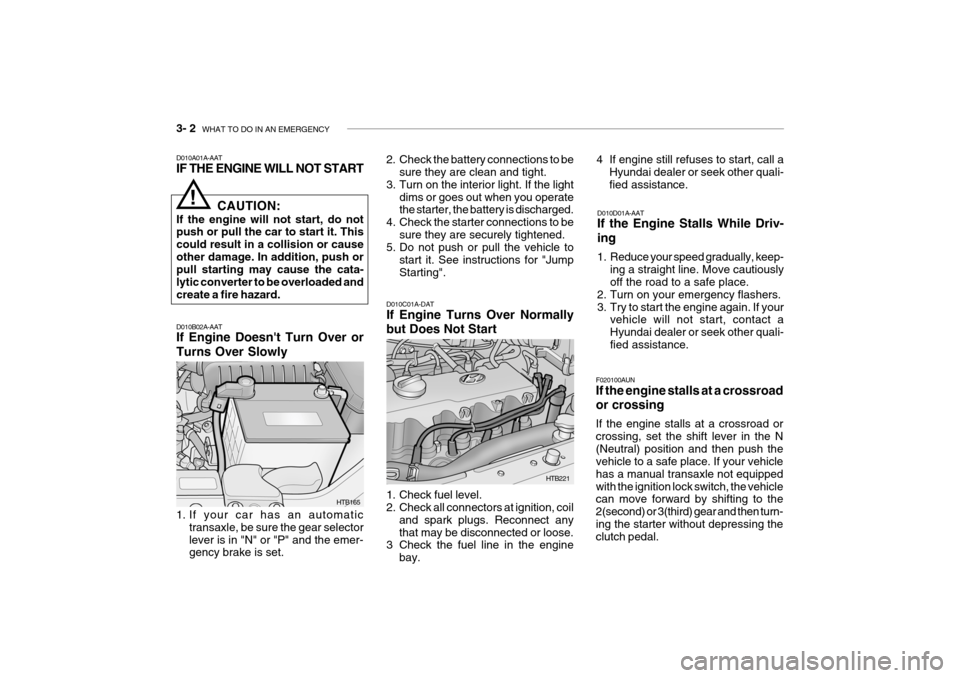
1. If your car has an automatic
transaxle, be sure the gear selector lever is in "N" or "P" and the emer- gency brake is set. 1. Check fuel level.
2. Check all connectors at ignition, coil
and spark plugs. Reconnect any that may be disconnected or loose.
3 Check the fuel line in the engine
bay.
Page 121 of 191
WHAT TO DO IN AN EMERGENCY 3- 5
!
CAUTION:
Serious loss of coolant indicates there is a leak in the cooling system and this should be checked as soon as possible by a Hyundai dealer.
Tyre Size
Inflation Pressure
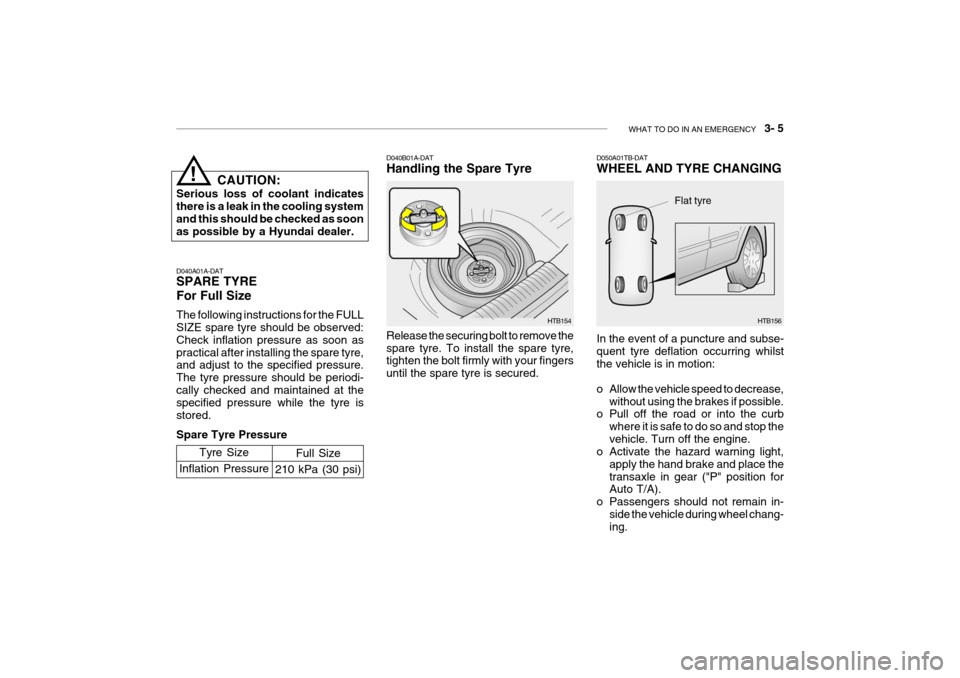
D040A01A-DAT SPARE TYRE For Full Size The following instructions for the FULL SIZE spare tyre should be observed: Check inflation pressure as soon as practical after installing the spare tyre, and adjust to the specified pressure. The tyre pressure should be periodi-cally checked and maintained at the specified pressure while the tyre is stored. Spare Tyre Pressure D040B01A-DAT Handling the Spare Tyre Release the securing bolt to remove the spare tyre. To install the spare tyre, tighten the bolt firmly with your fingers until the spare tyre is secured.
HTB154
Full Size
210 kPa (30 psi) D050A01TB-DAT WHEEL AND TYRE CHANGING In the event of a puncture and subse- quent tyre deflation occurring whilstthe vehicle is in motion:
o Allow the vehicle speed to decrease,
without using the brakes if possible.
o Pull off the road or into the curb
where it is safe to do so and stop the vehicle. Turn off the engine.
o Activate the hazard warning light,
apply the hand brake and place thetransaxle in gear ("P" position for Auto T/A).
o Passengers should not remain in-
side the vehicle during wheel chang-ing.
HTB156
Flat tyre
Page 140 of 191

VEHICLE MAINTENANCE REQUIREMENTS 5- 7
F060A01A-AAT
EXPLANATION OF SCHEDULED MAINTENANCE ITEMS
F060M01A-AAT
o Engine Oil and Filter
The engine oil and filter should be changed at the intervals specified in the maintenance schedule. If the car is being driven in severe conditions,more frequent oil and filter changes are required. F060B01A-AAT
o Drive Belts
Inspect all drive belts for evidence of cuts, cracks, excessive wear or oil and replace if necessary. Drive beltsshould be checked periodically for proper tension and adjusted as nec- essary. placement more frequently.
After installing a new filter, run the
engine for several minutes, and check for leaks at the connections. Fuel filters should be installed by trainedtechnicians. F060D01A-AAT
o Fuel Lines, Fuel Hoses and
Connections
Check the fuel lines, fuel hoses and connections for leakage and damage.Have a trained technician replace any damaged or leaking parts immedi- ately. F060E01A-AAT
o Timing Belt Inspect all parts related to the timing belt for damage and deformation. Replace any damaged parts immedi- ately. F060G01A-AAT
o Vapor Hose and Fuel Filler Cap The vapor hose and fuel filler cap should be inspected at those inter- vals specified in the maintenance schedule. Make sure that a new va-por hose or fuel filler cap is correctly replaced. F060F01A-AAT
o Vacuum, Crankcase Ventila-
tion Hoses
Inspect the surface of hoses for evi- dence of heat and/or mechanical dam-age. Hard and brittle rubber, crack- ing, tears, cuts, abrasions, and ex- cessive swelling indicate deteriora-tion. Particular attention should be paid to examine those hose surfaces nearest to high heat sources, such asthe exhaust manifold.Inspect the hose routing to assurethat the hoses do not come in contact with any heat source, sharp edges or moving component which might causeheat damage or mechanical wear. Inspect all hose connections, such as clamps and couplings, to make surethey are secure, and that no leaks are present. Hoses should be replaced immediately if there is any evidenceof deterioration or damage.
F060C01A-AAT
o Fuel Filter
A clogged filter can limit the speed atwhich the vehicle may be driven, dam- age the emission system and cause hard starting. If an excessive amountof foreign matter accumulates in the fuel tank, the filter may require re-
Page 164 of 191
6- 22 DO-IT-YOURSELF MAINTENANCE
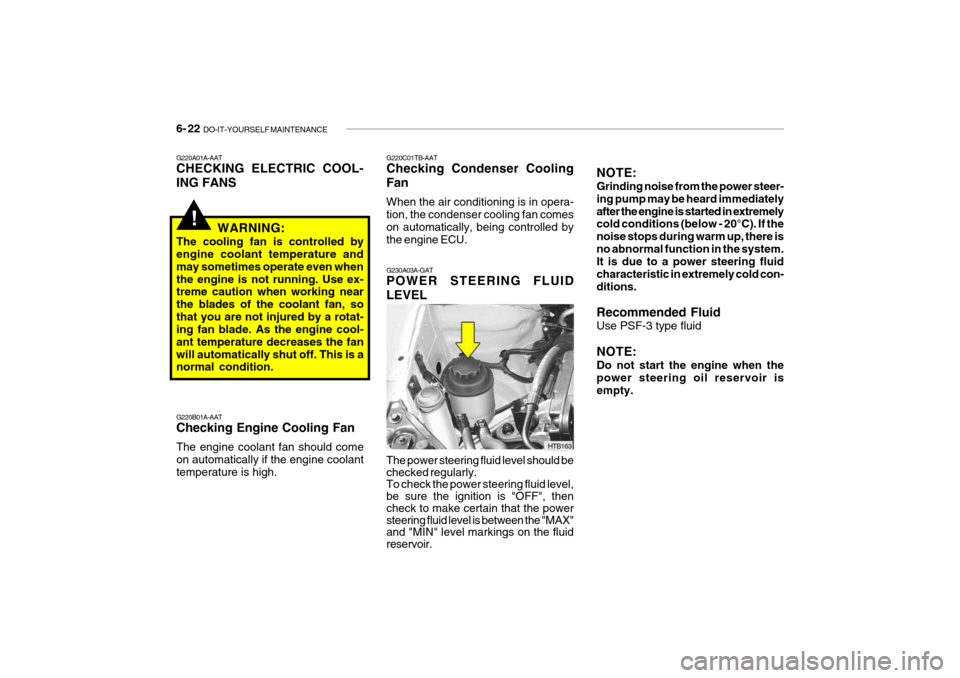
G230A03A-GAT POWER STEERING FLUID LEVEL The power steering fluid level should be checked regularly. To check the power steering fluid level, be sure the ignition is "OFF", then check to make certain that the power steering fluid level is between the "MAX" and "MIN" level markings on the fluid reservoir. HTB163NOTE: Grinding noise from the power steer- ing pump may be heard immediatelyafter the engine is started in extremely cold conditions (below - 20°C). If the noise stops during warm up, there isno abnormal function in the system. It is due to a power steering fluid characteristic in extremely cold con-ditions. Recommended Fluid Use PSF-3 type fluid NOTE: Do not start the engine when the power steering oil reservoir is empty.
!
G220A01A-AAT CHECKING ELECTRIC COOL- ING FANS
WARNING:
The cooling fan is controlled by engine coolant temperature and may sometimes operate even whenthe engine is not running. Use ex- treme caution when working near the blades of the coolant fan, sothat you are not injured by a rotat- ing fan blade. As the engine cool- ant temperature decreases the fanwill automatically shut off. This is a normal condition. G220B01A-AAT Checking Engine Cooling Fan The engine coolant fan should come on automatically if the engine coolanttemperature is high. G220C01TB-AAT Checking Condenser Cooling Fan When the air conditioning is in opera- tion, the condenser cooling fan comes on automatically, being controlled by
the engine ECU.
Page 172 of 191
6- 30 DO-IT-YOURSELF MAINTENANCE
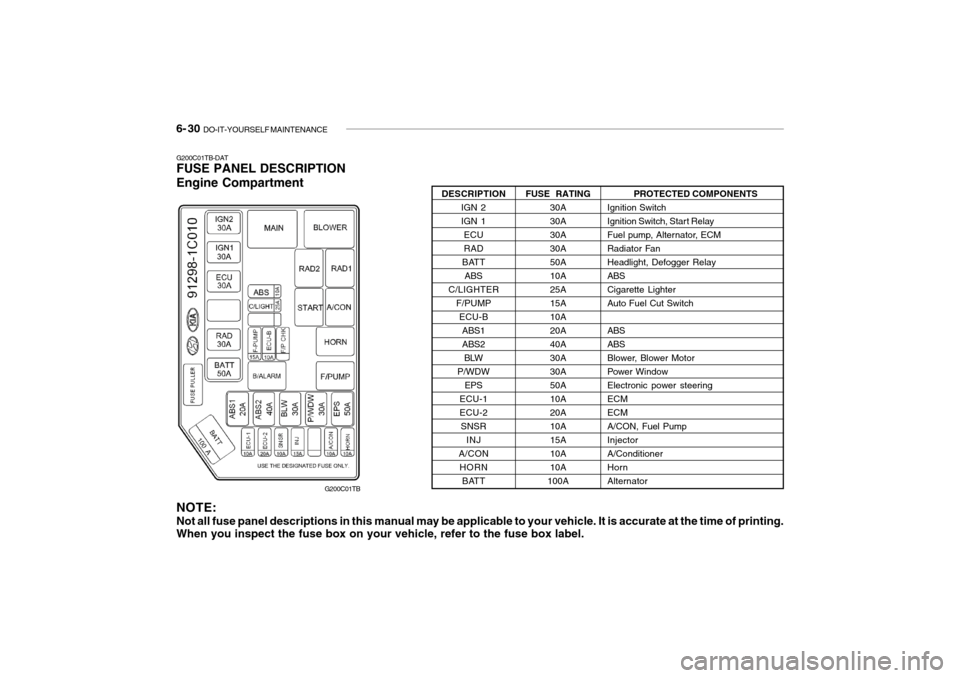
G200C01TB-DAT FUSE PANEL DESCRIPTION Engine Compartment
G200C01TB PROTECTED COMPONENTS
Ignition Switch
Ignition Switch, Start Relay
Fuel pump, Alternator, ECM
Radiator FanHeadlight, Defogger RelayABSCigarette LighterAuto Fuel Cut Switch ABS ABS
Blower, Blower Motor
Power WindowElectronic power steeringECMECMA/CON, Fuel PumpInjectorA/ConditionerHornAlternator
FUSE RATING
30A30A30A30A50A10A25A15A10A20A40A30A30A50A10A20A10A15A10A10A
100A
DESCRIPTION
IGN 2IGN 1ECURAD
BATT ABS
C/LIGHTER F/PUMPECU-BABS1ABS2BLW
P/WDW EPS
ECU-1ECU-2 SNSR INJ
A/CON HORN BATT
NOTE: Not all fuse panel descriptions in this manual may be applicable to your vehicle. It is accurate at the time of printing. When you inspect the fuse box on your vehicle, refer to the fuse box label.