Page 1 of 308
1
How to use this manual / 1-2
Fuel requirements / 1-3
Vehicle run-in process / 1-5
Indicator symbols on the instrument cluster / 1-6
Introduction
Page 6 of 308
Introduction
6
1
INDICATOR SYMBOLS ON THE INSTRUMENT CLUSTER
Door ajar warning light
Seat belt warning light
High beam indicator
Turn signal indicator lights
Front fog light indicator (If equipped)
ABS warning light (If equipped)
Hand brake & Brake fluid warning
Engine oil pressure warning
Charging system warning
ESP indicator (If equipped)
ESP OFF indicator (If equipped)
Malfunction indicator lamp (If equipped)
Air bag warning light (If equipped)
Cruise indicator (If equipped)
Cruise SET indicator (If equipped)
Immobiliser indicator
Low fuel level warning
Electronic power steering (EPS) system warning light
Boot lid open warning light
* For more detailed explanations, refer to section 4, “Instrument cluster”.
Engine coolant temperature warning light
Page 9 of 308

23
Your vehicle at a glance
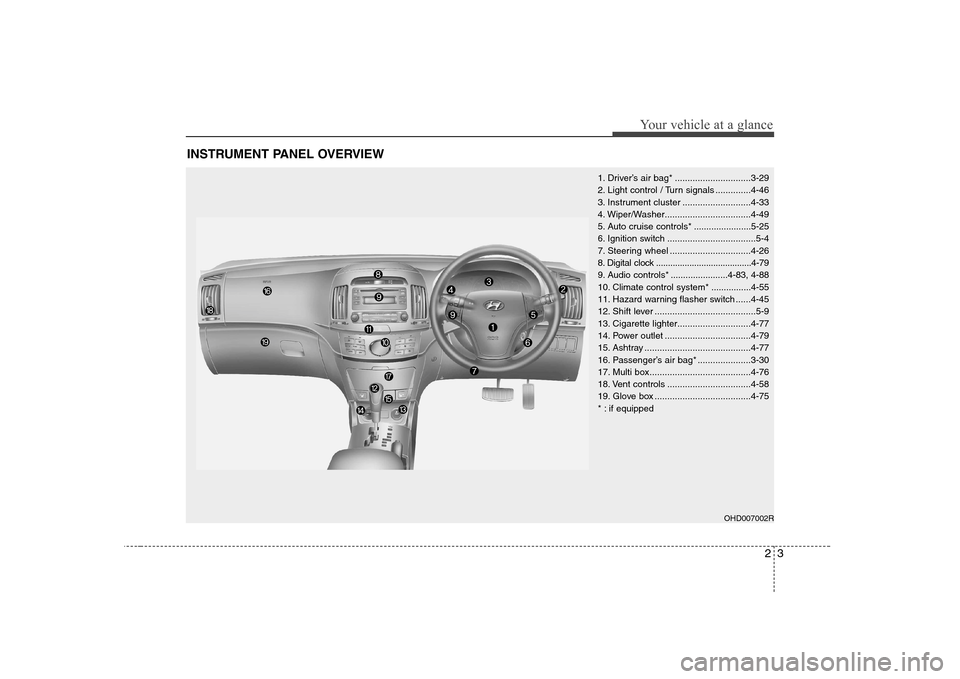
INSTRUMENT PANEL OVERVIEW
1. Driver’s air bag* ..............................3-29
2. Light control / Turn signals ..............4-46
3. Instrument cluster ...........................4-33
4. Wiper/Washer..................................4-49
5. Auto cruise controls * .......................5-25
6. Ignition switch ...................................5-4
7. Steering wheel ................................4-26
8. Digital clock ........................................4-79
9. Audio controls * .......................4-83, 4-88
10. Climate control system*................4-55
11. Hazard warning flasher switch ......4-45
12. Shift lever ........................................5-9
13. Cigarette lighter.............................4-77
14. Power outlet ..................................4-79
15. Ashtray ..........................................4-77
16. Passenger’s air bag* .....................3-30
17. Multi box........................................4-76
18. Vent controls .................................4-58
19. Glove box ......................................4-75
* : if equipped
OHD007002R
Page 37 of 308

Safety system of your vehicle
28
3
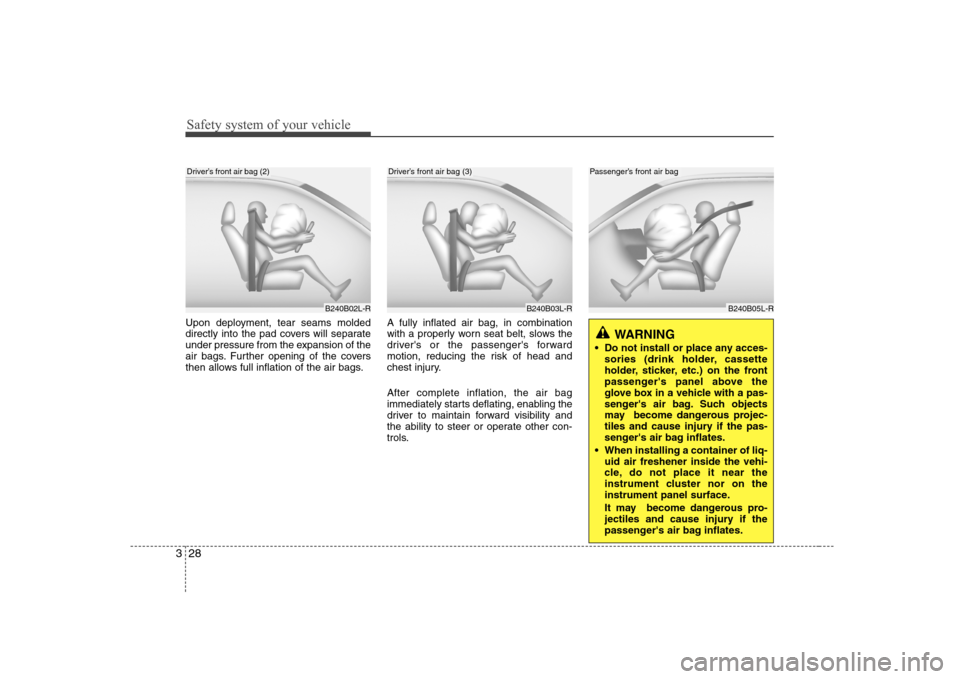
Upon deployment, tear seams molded
directly into the pad covers will separate
under pressure from the expansion of the
air bags. Further opening of the covers
then allows full inflation of the air bags. A fully inflated air bag, in combination
with a properly worn seat belt, slows the
driver's or the passenger's forward
motion, reducing the risk of head and
chest injury. After complete inflation, the air bag
immediately starts deflating, enabling the
driver to maintain forward visibility and
the ability to steer or operate other con-
trols.
B240B02L-RB240B03L-R
Driver’s front air bag (2)Driver’s front air bag (3)
WARNING
Do not install or place any acces- sories (drink holder, cassette
holder, sticker, etc.) on the front
passenger's panel above the
glove box in a vehicle with a pas-
senger's air bag. Such objects
may become dangerous projec-
tiles and cause injury if the pas-
senger's air bag inflates.
When installing a container of liq- uid air freshener inside the vehi-
cle, do not place it near the
instrument cluster nor on the
instrument panel surface.
It may become dangerous pro-
jectiles and cause injury if the
passenger's air bag inflates.
B240B05L-R
Passenger’s front air bag
Page 56 of 308
4
Keys / 4-2 Remote keyless entry / 4-4Theft-alarm system / 4-6
Door locks / 4-8Boot / 4-12
Windows / 4-13Bonnet / 4-17
Fuel filler lid / 4-19
Sunroof / 4-22
Steering wheel / 4-26
Mirrors / 4-29
Instrument cluster / 4-33
Hazard warning flasher / 4-45Lighting / 4-46
Wipers and washers / 4-49
Interior light / 4-51
Defroster / 4-54
Manual climate control system / 4-55
Automatic climate control system / 4-64
Windshield defrosting and defogging / 4-72
Storage compartment / 4-75
Interior features / 4-77Audio system / 4-82
Features of your vehicle
Page 88 of 308
433
Features of your vehicle
INSTRUMENT CLUSTER
1. Tachometer
2. Turn signal indicators
3. Speedometer
4. Warning and indicator lights
5. Shift position indicator (Automatic transaxle only)
6. Odometer/Trip odometer
7. Fuel gauge
OHD049500R
Page 89 of 308

Features of your vehicle
34
4
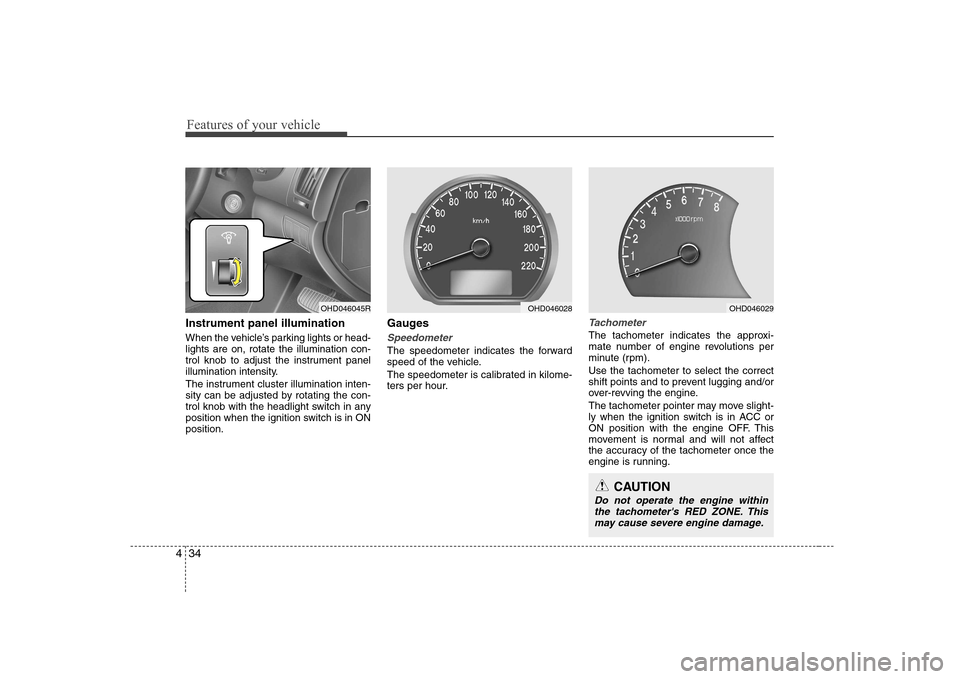
Instrument panel illumination
When the vehicle’s parking lights or head- lights are on, rotate the illumination con-
trol knob to adjust the instrument panel
illumination intensity.
The instrument cluster illumination inten-
sity can be adjusted by rotating the con-
trol knob with the headlight switch in any
position when the ignition switch is in ONposition. Gauges
Speedometer
The speedometer indicates the forward
speed of the vehicle.
The speedometer is calibrated in kilome-
ters per hour.
Tachometer
The tachometer indicates the approxi-
mate number of engine revolutions per
minute (rpm). Use the tachometer to select the correct
shift points and to prevent lugging and/or
over-revving the engine.
The tachometer pointer may move slight-
ly when the ignition switch is in ACC or
ON position with the engine OFF. This
movement is normal and will not affect
the accuracy of the tachometer once the
engine is running.
OHD046045ROHD046028OHD046029
CAUTION
Do not operate the engine within
the tachometer's RED ZONE. This may cause severe engine damage.
Page 100 of 308

445
Features of your vehicle
Cruise SET indicator The indicator light illuminates when the
cruise function switch (COAST/SET or
RES/ACCEL) is ON.
The cruise SET indicator light in the
instrument cluster is illuminated when
the cruise control switch (COAST/SET or
RES/ACCEL) is pushed. The cruise SETindicator light does not illuminate when
the cruise control switch (CANCEL) ispushed or the system is disengaged.
Key reminder warning chime (if equipped)
If the driver’s door is opened while the
ignition key is left in the ignition switch
(ACC or LOCK position), the key
reminder warning chime will sound. This
is to prevent you from locking your keys
in the vehicle. The chime sounds until the
key is removed from the ignition switch or
the driver’s door is closed.
Electronic power steering (EPS) system warning light
This indicator light comes on after the
ignition key is turned to the ON positionand then it will go out. This light also comes on when the EPS
has some troubles. If it comes on while
driving, have your vehicle inspected by
an authorised Hyundai dealer.
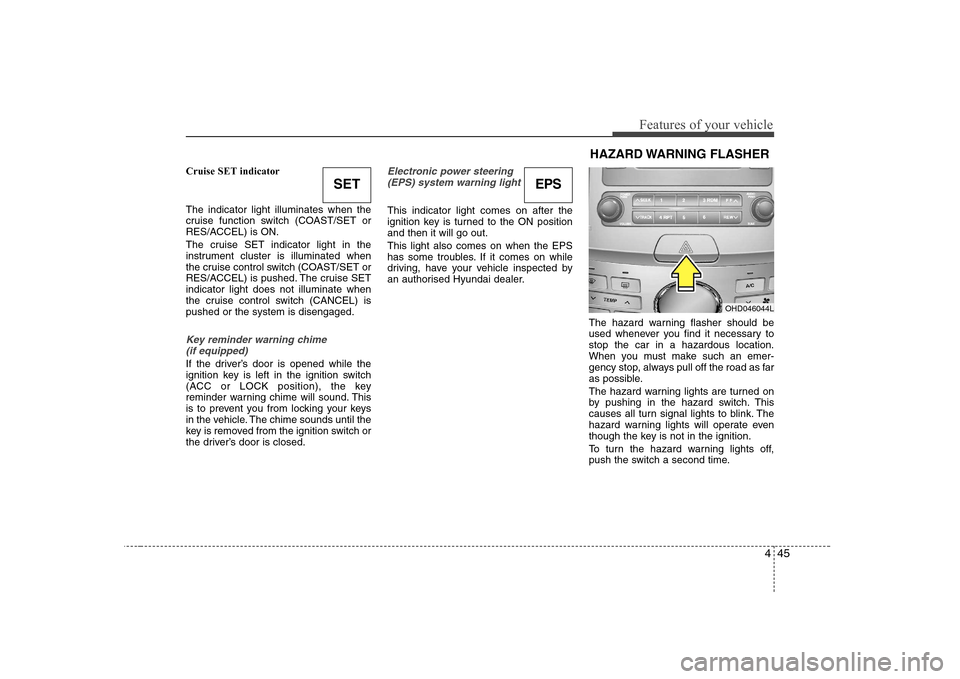
The hazard warning flasher should be
used whenever you find it necessary tostop the car in a hazardous location.
When you must make such an emer-
gency stop, always pull off the road as far
as possible.
The hazard warning lights are turned on
by pushing in the hazard switch. This
causes all turn signal lights to blink. The
hazard warning lights will operate even
though the key is not in the ignition.
To turn the hazard warning lights off,
push the switch a second time.
SETEPS
OHD046044L
HAZARD WARNING FLASHER