2009 Hyundai Accent oil
[x] Cancel search: oilPage 211 of 266

6
DO-IT-YOURSELF MAINTENANCE6
!
CAUTION:
Slowly pour the recommended oil by
using a funnel. Do not overfill so as not
to damage engine.
!
WARNING:
Be very careful not to touch the radia-
tor hose when adding the engine oil as
it may be hot enough to burn you.
G030D02MC-AATAdding OilIf the oil level is close to or below the "L"
mark, add oil until it reaches the "F" mark.
To add oil:
1. Remove the oil filler cap by turning it
counterclockwise.
2. Add oil, then check the level again. Do
not overfill.
3. Replace the cap by turning it clock-
wise.
The distance between the "F" and "L"
marks is equal to about 1 quart of oil.
OMC059004
NOTE:
o It is recommended that the engine oil
and filter should be changed by an
authorized Hyundai dealer.
o Always dispose of used engine oil in
an environmentally acceptable man-
ner. It is suggested that it be placed
in a sealed container and taken to a
service station for reclaimation. Do
not pour the oil on the ground or put
it into the household trash.
!
PROPOSITION 65 WARNING:
Engine oil contains chemicals known to
the State of California to cause cancer,
birth defects and reproductive harm.
Used engine oil may cause irritation or
cancer of the skin if left in contact with
the skin for prolonged periods of time.
Used engine oil contains chemicals that
have caused cancer in laboratory ani-
mals. Always protect your skin by
washing your hands thoroughly with
soap and warm water as soon as pos-
sible after handling used oil.
Page 214 of 266

6
DO-IT-YOURSELF MAINTENANCE
9
WINDSHIELD WIPER
BLADESG080A02A-AATThe wiper blades should be carefully
inspected from time to time and cleaned
to remove accumulations of road film or
other debris. To clean the wiper blades
and arms, use a clean sponge or cloth
with a mild soap or detergent and water.
If the wipers continue to streak or smear
the glass, replace them with genuine
Hyundai replacement parts or their
equivalent.
CAUTION:
o Do not operate the wipers on dry
glass. This can result in more rapid
wear of the wiper blades and may
scratch the glass.
o Keep the blade rubber out of contact
with petroleum products such as
engine oil, gasoline, etc.
!
2. Raise the wiper blade lightly and pull
up it.
HHR5049
G080B01HR-GATReplacing the Wiper BladesTo replace the wiper blades, raise the
wiper to the vertical.To remove the wiper blade1. Push down the wiper blade with the
locking clip (1) pressed to detach it
from the wiper arm.
HHR5048
(1)
Page 216 of 266

6
DO-IT-YOURSELF MAINTENANCE
11
!
G100A01MC-GATTransaxle lubricant in the manual
transaxle should be checked at those
intervals specified in the vehicle mainte-
nance schedule in Section 5.
!CHECKING THE TRANSAXLE
OIL (MANUAL)
!
CAUTION:
o Radiator anti-freeze (engine coolant)
should not be used in the washer
system because it will damage the
car's finish.
o The washer should not be operated
if the washer reservoir is empty.
This can damage the washer fluid
pump.WARNING:
It is always better to check the transaxle
oil level when the engine is cool or cold.
If the engine is hot, you should exercise
great caution to avoid burning yourself
on hot engine or exhaust parts.
WARNING:
o Windshield washer fluid agents con-
tain some amounts of alcohol and
can be flammable under certain cir-
cumstances. Do not allow sparks or
flame to contact the washer fluid or
the washer fluid reservoir. Damage
to the vehicle or its occupants could
occur.
o Windshield washer fluid is poison-
ous to humans and animals. Do not
drink windshield washer fluid. Seri-
ous injury or death could occur.NOTE:
It is recommended that the manual
transaxle fluid should be checked by an
authorized Hyundai dealer.
G110A01MC-AATTransaxle fluid in the automatic transaxle
should be checked at those intervals
specified in the vehicle maintenance
schedule in Section 5.
NOTE:
Automatic transaxle fluid is basically a
red color. As driving distance increases,
the fluid color turns darkish red gradu-
ally. It is a normal condition and you
should not judge the need to replace
based upon the changing color.
You must replace the automatic
transaxle fluid in accordance with inter-
vals specified in the vehicle mainte-
nance schedule in section 5.CHECKING THE TRANSAXLE
FLUID (AUTOMATIC)
Page 224 of 266

6
DO-IT-YOURSELF MAINTENANCE
19
CHECKING THE BATTERY!
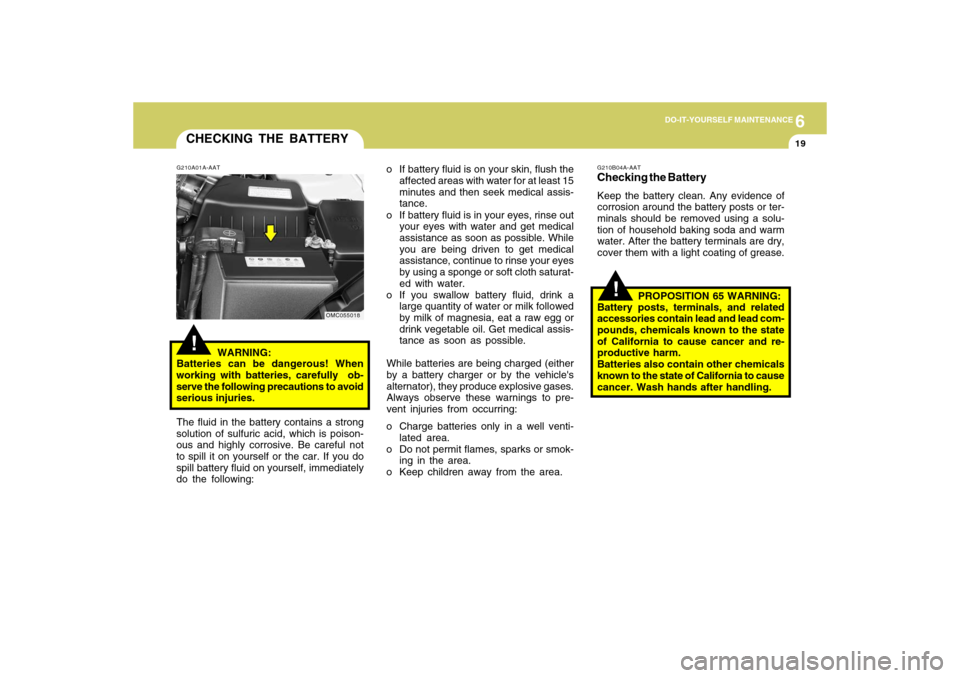
G210A01A-AAT
WARNING:
Batteries can be dangerous! When
working with batteries, carefully ob-
serve the following precautions to avoid
serious injuries.o If battery fluid is on your skin, flush the
affected areas with water for at least 15
minutes and then seek medical assis-
tance.
o If battery fluid is in your eyes, rinse out
your eyes with water and get medical
assistance as soon as possible. While
you are being driven to get medical
assistance, continue to rinse your eyes
by using a sponge or soft cloth saturat-
ed with water.
o If you swallow battery fluid, drink a
large quantity of water or milk followed
by milk of magnesia, eat a raw egg or
drink vegetable oil. Get medical assis-
tance as soon as possible.
While batteries are being charged (either
by a battery charger or by the vehicle's
alternator), they produce explosive gases.
Always observe these warnings to pre-
vent injuries from occurring:
o Charge batteries only in a well venti-
lated area.
o Do not permit flames, sparks or smok-
ing in the area.
o Keep children away from the area.
OMC055018
The fluid in the battery contains a strong
solution of sulfuric acid, which is poison-
ous and highly corrosive. Be careful not
to spill it on yourself or the car. If you do
spill battery fluid on yourself, immediately
do the following:
G210B04A-AATChecking the BatteryKeep the battery clean. Any evidence of
corrosion around the battery posts or ter-
minals should be removed using a solu-
tion of household baking soda and warm
water. After the battery terminals are dry,
cover them with a light coating of grease.
!
PROPOSITION 65 WARNING:
Battery posts, terminals, and related
accessories contain lead and lead com-
pounds, chemicals known to the state
of California to cause cancer and re-
productive harm.
Batteries also contain other chemicals
known to the state of California to cause
cancer. Wash hands after handling.
Page 226 of 266

6
DO-IT-YOURSELF MAINTENANCE
21
G240A01A-AATPOWER STEERING HOSESIt is suggested that you check the power
steering hose connections for fluid leak-
age at those intervals specified in the
vehicle maintenance schedule in Section
5.
The power steering hoses should be re-
placed if there is severe surface cracking,
pulling, scuffing or worn spots. Deteriora-
tion of the hose could cause premature
failure.
POWER STEERING FLUID
LEVELG230A01MC-AAT(If Installed)The power steering fluid level should be
checked regularly. To check the power
steering fluid level, be sure the engine is
"OFF", then check to make certain that the
power steering fluid level is between the
"MAX" and "MIN" level markings on the
fluid reservoir.NOTE:
o Grinding noise from the power steer-
ing pump may be heard immediately
after the engine is started in ex-
tremely cold conditions (below -4°F).
If the noise stops during warm up,
there is no abnormal function in the
system. It is due to a power steering
fluid characteristic in extremely cold
conditions.
o Do not start the engine when the
power steering oil reservoir is empty.
OMC055014
FOR MORE INFORMATION
ABOUT YOUR HYUNDAIG250A01A-AATIf you desire additional information about
maintaining and servicing your Hyundai,
you may purchase a factory Shop Manual
at your Hyundai dealer's parts depart-
ment. This is the same manual used by
dealership technicians and while it is
highly technical it can be useful in obtain-
ing a better understanding of your car
and how it works.
Page 227 of 266

6
DO-IT-YOURSELF MAINTENANCE
22
Headlight
1. Allow the bulb to cool. Wear eye pro-
tection.
2. Open the engine hood and disconnect
the negative (-) post of the battery.
3. Always grasp the bulb by its plastic
base, avoid touching the glass.
4. Disconnect the power cord from the
back of the headlight.
REPLACEMENT OF LIGHT
BULBS!
G260A01MC-AATBefore attempting to replace a light bulb,
be sure the switch is turned to the "OFF"
position.
The next paragraph shows how to reach
the light bulbs so they may be changed.
Be sure to replace the burned-out bulb
with one of the same number and watt-
age rating.
See page 6-27 for the wattage descrip-
tions.
CAUTION:
o Keep the lamps out of contact with
petroleum products, such as oil,
gasoline, etc.
o If you don't have necessary tools,
the correct bulbs and the expertise,
consult your authorized Hyundai
dealer.
G270A02MC-GATHeadlight, Front Turn Signal Light
and Front Fog Light
CAUTION:
o The headlight aiming should be
checked by an authorized Hyundai
dealer after replacing the headlight
bulbs.
!
OMC055021
Turn signal
light
Headlight
Fog light
o After heavy, driving rain or washing,
headlight and taillight lenses could
appear frosty. This condition is
caused by the temperature differ-
ence between the lamp inside and
outside. This is similar to the con-
densation on your windows inside
your vehicle during the rain and
doesn’t indicate a problem with your
vehicle. If the water leaks into the
lamp bulb circuitry, have the vehicle
checked by an authorized Hyundai
dealer.
Page 233 of 266

6
DO-IT-YOURSELF MAINTENANCE
28
FUSE PANEL DESCRIPTION
FUSE RATING
125A
50A
40A
40A
40A
40A
30A
30A
30A
30A
30A
20A
15A
10A
10A
10A
10A
10A
30A
G200C01MC-AATEngine CompartmentNOTE:
Not all fuse panel descriptions in this manual may be applicable to your vehicle. It is accurate at the time of printing. When you
inspect the fuse box on your vehicle, refer to the fuse box label.
CIRCUIT PROTECTED
Generator
I/P Junction Box
Blower Relay, Blower Motor
ABS Control Module, Multipurpose Check Connector
ABS Control Module, Multipurpose Check Connector
Star t Relay, Ignition Switch
Ignition Switch
I/P Junction Box, Tail Lamp Relay
I/P Junction Box, Power Window Relay
Radiator Fan Relay
Main Relay, Fuel Pump Relay
ECM, PCM
Injector #1, #2, #3, #4, CVVT Oil Control Valve, Immobilizer Control Module,Purge
Control Solenoid Valve, Idle Speed Control Actuator, Fuel Pump Relay
A/Con Relay
A/C Control Module
ECM, PCM
Horn Relay, Burglar Alarm Horn Relay
A/Con Relay, Rad Fan Relay, Cond Fan Relay #1, #2, Camshaft Position
Sensor,Oxygen Sensor(UP, DOWN), Mass Air Flow Sensor
Condenser Fan Relay #1
MAIN
BATT #1
BLOWER
ABS #1
ABS #2
IGN #2
IGN #1
BATT #2
P/WDW
RAD
ECU A
ECU C
INJ
A/CON #1
A/CON #2
ECU B
HORN
SNSR
CONDFUSE
G200C01MC
Page 235 of 266

6
DO-IT-YOURSELF MAINTENANCE
30
FUSE RATING
10A
20A
10A
10A
15A
10A
10A
20A
10A
10A
15A
15A
10A
10A
10A
10ACIRCUIT PROTECTED
Front Fog Lamp Switch, Front Fog Lamp LH, Front Fog Lamp RH, Front Fog
Lamp Relay
Sunroof Motor
Hazard Switch
Overdrive Switch, Vehicle Speed Sensor
Data Link Connector, Stop Lamp Switch, P/WDW Relay,Multipurpose Check
Connector
Instrument Cluster
ECM, PCM
Driver Door Lock Actuator, Assist Door Lock Actuator, BCM,Rear Door Lock
Actuator LH, Rear Door Lock Actuator RH,Driver Power Window Switch, Tail
Gate Lock Actuator
Star t Relay, Burglar Alarm Relay
BCM, Instrument Cluster, Generator, DRL Control Module, Tire Pressure
Monitoring Module, Pre-excitation Resistor
Ignition Coil #1, #2, #3, #4, Condenser
Audio
Luggage Lamp, Room Lamp, Vanity Lamp Switch, Digital Clock,Overhead
Console Lamp, A/C Control Module, Instrument Cluster, Door Warning Switch,
BCM, Tire Pressure Monitoring Module
ABS Control Module, Multipurpose Check Connector
Back-up Lamp Switch, Transaxle Range Switch, Multipurpose Check Connector
DRL Control Module
FR FOG LP
S/ROOF
T/SIG LP
TCU
STOP LP
A/BAG IND
ECU
C/DR LOCK
START
CLUSTER
IGN COIL
AUDIO(Power Connector)MULT B/UP(Power Connector)
ABS
B/UP LP
DRLFUSE