Page 207 of 268
Put on the spare tire. Put the
wheel nuts back on f inger-tight,
then tighten them in a crisscross
pattern with the wheel nut wrench
until the wheel is f irmly against
the hub. Do not try to tighten the
wheel nuts f ully.Lower the vehicle to the ground,
and remove the jack.
Tighten the wheel nuts securely in
a crisscross pattern. Have the
wheel nut torque checked at the
nearest automotive service f acility.
Tighten the wheel nuts to:
11.
12.13.
Changing a Flat Tire
204
80 lbf·ft (108 N·m , 11 kgf·m)
2009 S2000
Page 208 of 268
Put the flat tire in the trunk well
vertically as shown.
Remove the tool box f rom the
trunk well, and replace the jack,
wheel wrench, and extension in
the tool box.
Place the tool box into the spare
tire shelf in the trunk.
Replacethesparetirecover.
Secure it with the three clips. Push
each clip in securely, and pivot the
ring down f lat.Your vehicle’s original tire has a
tire pressure monitoring system
sensor. To replace a tire, ref er to (see
page ). 155
17.
18.
16.
14.
15.
Changing a Flat Tire
Changing a T ire with T PMS
T aking Care of t he Unexpect ed
205
CLIPS
SPARETIRECOVER
TOOL BOX
2009 S2000
Page 209 of 268

If you have a f lat tire while driving,
stop in a saf e place, set the parking
brake, and thoroughly examine the
tire f or a puncture or other damage.
If a puncture is wider than 3/16ths
of an inch (4 mm), or outside of the
tire tread, do not attempt to repair
the tire. Have your vehicle towed to
a Honda service center.
If the damage is smaller than
3/16ths of an inch (4 mm) and
within the tire tread, proceed with
the f ollowing instructions.
When making a temporary repair,
caref ully f ollow all instructions in
this owner’s manual and in the
instructions that came with the kit. The wheel rim is not damaged.
The puncture is located within the
tread.
The puncture is smaller than
3/16ths of an inch (4 mm).
Only one tire is f lat.
To reduce weight, your vehicle is
equipped with a tire repair kit
instead of a spare tire. This kit will
allow you to temporarily repair a f lat
tire under the f ollowing conditions:
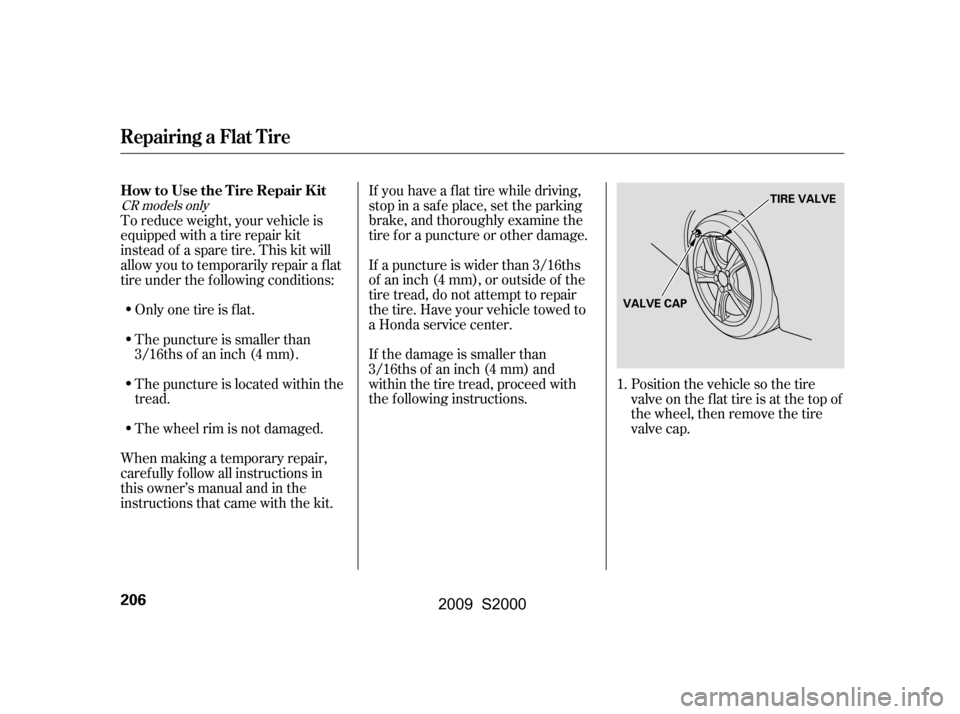
Position the vehicle so the tire
valve on the flat tire is at the top of
the wheel, then remove the tire
valve cap.
1.
CR models only
Repairing a Flat T ire
HowtoUsetheTireRepairKit
206
TIRE VALVE
VALVE CAP
2009 S2000
Page 262 of 268

�Î
�Î
CONT INUED
..........
Taillights, Changing Bulbs .183
.
Taking Care of the Unexpected .199
Technical Descriptions
....
DOT Tire Quality Grading .236
.....
Emissions Control Systems .242
Three Way Catalytic
...............................
Converter .244
.......................
Temperature Gauge .55
.................................
Saf ety Features .7
...........................................
Airbags .9
.......................................
Seat Belts .8
.............
Saf ety Labels, Location of .42
..............................
Saf ety Messages .iii
.....................................
Seat Belts .8,16
...............
Additional Information .16
.....
Advice f or Pregnant Women .14
Automatic Seat Belt
...............................
Tensioners .18
.....................................
Cleaning .184
......................
Lap/Shoulder Belt .17
................................
Maintenance .18
Reminder Indicator and ................................
Beeper .16,46
...................
System Components .16
...............
Use During Pregnancy .14
........................
Seats, Adjusting the .69
...............................
Serial Number .232
...................
Service Intervals .167,168
...........................
Service Manual .251
.........
Service Station Procedures .129
............................
Setting the Clock .56
Shif ting ..............
Manual Transmission .147 Side Turn Signal, Bulb
..............................
Replacement .182
...............................
Signaling Turns .59
.....................................
Snow Tires .194
................................
Sound System .104
Spare Tire ......................................
Inf lating .190
............................
Specif ications .235
....................................
Spark Plugs .234
................................
Specif ications .234
................................
Speed Control .124
................................
Speed Limiter .148
..........
SRS, Additional Inf ormation .20
...
Additional Safety Precautions .28
.............................
Airbag Service .27
......
Airbag System Components .20
How the SRS Indicator
.......................................
Works .25
How Your Airbags .........................................
Work .22
.............................
SRS Indicator .25,47
...................................
Start Button .146
.......................
Starting the Engine .146
In Cold Weather at High ..................................
Altitude .146
................
With a Dead Battery .214 ..............
State Emissions Testing .245
........
Steam Coming f rom Engine .215
Steering Wheel
.............
Anti-theft Column Lock .64
...................
Stereo Sound System .104
....................
Storing Your Vehicle .198
................................
Stuck Vehicle .228
...............................
Summer Tires .194
Supplemental Restraint System ..................................
Servicing .27
.........................
SRS Indicator .25,47
...................
System Components .20
..................................
Synthetic Oil .171
Index
T
INDEX
VII
2009 S2000