Page 180 of 578
The courtesy light between the f ront
map lights comes on when you turn
the parking lights on. To adjust its
brightness, turn the instrument
panel brightness control dial on the
dashboard (see page ).The courtesy lights in all f our doors
come on when you open any door.
The light around the ignition switch
only come on when you open the
driver’s door. Af ter you close the
door, the ignition switch light stays
on f or several seconds.
To change the ‘‘INTERIOR LIGHT
DIMMING TIME’’ setting, see page
.
The cargo area light has a three-
position switch. In the OFF position,
the light does not come on. In the
center position, the light comes on
when you open the tailgate or the
glass hatch. In the ON position, the
light stays on continuously.
129 109
On Touring models
Individual Interior L ights
Cargo Area Light
Interior Lights
176
ON
OFF
COURTESY LIGHT
�����—�����—�
���y�
������
��
���y���
�(�/���������y���
���
�y
2009 Pilot
Page 188 of 578
To use an accessory power socket,
the ignition switch must be in the
ACCESSORY (I) or ON (II) position.
Each socket is intended to supply
power f or 12 volt DC accessories
that are rated 120 watts or less (10
amps).
Your vehicle has a seat under tray
located under the f ront passenger
seat. Use the tray by pulling on the
f ront center edge of the tray.
Your vehicle has four accessory
power sockets. These are located on
the instrument panel, in the console
compartment, back of the center
console box, or behind the third row
seat on the passenger’s side.On Touring models
Interior Convenience Items
A ccessory Power Sockets
Seat Under T ray
184
�����—�����—�
���y�
�������������y���
�(�/���������y���
�����y
2009 Pilot
Page 189 of 578
CONT INUED
There is a 115 volt AC power outlet
inside the f ront console
compartment. To use the AC power
outlet, open the lids and open the
outlet cover. Insert the plug into the
receptacle slightly, turn it 90°
clockwise, then push in the plug all
the way.
None of the sockets will power an
automotive type cigarette lighter
element. Always run the engine when you use
the AC power outlet.
The maximum capacity f or this
power outlet is 115 volt AC at 100
watts or less. If you use an appliance
which requires more than 100 watts,
it automatically stops supplying the
power. If this happens, turn the
ignition switch of f and turn it on
again.
On vehicles with rear entertainment
system and on Touring models
Interior Convenience Items
AC Power Outlet
Inst rument s and Cont rols
185
REAR
�����—�����—�
���y�
�������������y���
�(�/���������y���
�����y
2009 Pilot
Page 203 of 578

When you press a f an control button,
the fan is taken out of AUTO mode. When you set the temperature to its
lower limit ( ) or its upper limit
( ), the system runs at f ull
cooling or heating only. It does not
regulate the interior temperature.In the Auto mode, the vehicle’s
interior temperature is
independently regulated f or the
driver, f ront passenger, and rear
passengers according to each
adjusted temperature. The system
also regulates each temperature
basedontheinformationof thesun
light sensor and the sun position
which is updated automatically by
the navigation’s global positioning
system (GPS). For example, if the
driver’s side of the vehicle getting
too much sun, the system will adjust
to a lower temperature.When you turn the ignition switch to
the ON (II) position, the temperature
of the rear passenger compartment
is synchronized to the driver’s side
set temperature. You will see SYNC
on the system display of the rear
control panel. Changing the
temperature of the rear passenger
compartment takes the system out
of synchronized mode. This causes
thewordSYNCinthedisplaytogo
out and displays the rear
temperature in the f ront display.
When you turn the ignition switch to
the ON (II) position and see LOCK
on the system display of the f ront
and rear control panels, the
temperature of the rear passenger
compartment is not synchronized to
the driver’s side set temperature.
On vehicles with navigation system
RR (Rear) L ock But t on
Climate Control System
Features
199
�����—�����—�
���y�
�������������y���
�(�/���������y���������y
2009 Pilot
Page 213 of 578

�µ
�µ �µ
The ignition switch must be in the
ACCESSORY (I) or ON (II) position.
Turn the system on by pushing the
power/volume knob or the AM or
FM button. Adjust the volume by
turning the power/volume knob.
The band and f requency that the
radio was last tuned to is displayed.
To change bands, press the AM or
FM button. On the FM band, ST will
be displayed if the station is broad-
castinginstereo.Stereo
reproduction on AM is not available.
On the AM band, AM noise
reduction turns on automatically. You can use any of f ive methods to
f ind radio stations on the selected
band: tune, skip, scan, the preset
buttons, and auto select.
On the FM band, you can also use
the f eatures provided by the radio
data system (RDS). For more
inf ormation on the RDS, see page
.
Use the TUNE knob to
tune the radio to a desired f requency.
Turn the knob to the right to tune to
a higher f requency, and turn it to the
lef t to tune to a lower f requency.
The skip f unction searches
up and down f rom the current
f requency to f ind a station with a
strong signal. To activate it, press
either of the SKIP buttons ( or ), then release it. The scan f unction samples
all stations with strong signals on the
selected band. To activate it, press
the SCAN button, then release it.
You will see SCAN in the display.
The system will scan f or a station
with a strong signal. When it f inds
one, it will stop and play that station
f or about 10 seconds.
If you do nothing, the system will
then scan f or the next strong station
and play it f or 10 seconds. When it
plays a station you want to listen to,
press the SCAN button again.
211
CONT INUED
To Select a Station
To Play the FM/AM Radio
TUNE
SK IPSCAN
Playing the FM/AM Radio (LX model)
Features
209
�����—�����—�
���y�
�������������y���
�(�/���������y�����
���y
2009 Pilot
Page 221 of 578

�µ �µ
�µ �µ
To load or play a disc, the ignition
switch must be in the ACCESSORY
(I) or ON (II) position. The specif ications f or compatible
MP3 f iles are:
Bitrate:
32/40/48/56/64/80/96/112/128/
160/192/224/256/320 kbps
(MPEG1)
8/16/24/32/40/48/56/64/80/96/
112/128/160 kbps (MPEG2)
Compatible with variable bit rate
and multi-session
Maximum layers
(including ROOT): 8 layers
This audio system can also play
CD-Rs and CD-RWs compressed in
MP3 or WMA f ormats. When
playing a disc in MP3, you will see
‘‘MP3’’ in the display. In WMA
f ormat, ‘‘WMA’’ will appear in the
display. You can select up to 99
f olders, or up to 255 tracks/f iles.
You operate the disc player with the
same controls used f or the radio. To
select the disc player, press the CD
button. You will see ‘‘CD’’ in the
display. Sampling f requency:
32/44.1/48 kHz (MPEG1)
16/22.05/24 kHz (MPEG2)
If you have a disc that is a
combination of CD-DA tracks and
MP3/WMA f iles, you can choose the
f ormat to listen by pressing and
holding CD button until you hear a
beep.
NOTE:
If a f ile on an MP3 or WMA disc is
protected by digital rights
management (DRM), the audio unit
displays UNSUPPORTED, and then
skips to the next f ile.
Video CDs and DVD discs do not
work in this unit.
CONT INUED
To Play a Disc
Playing a Disc (L X model)
Features
217
Do not use discs with adhesive labels.
The label can curl up and cause the
disc to jam in the unit.
�����—�����—�
���y�
�������������y���
�(�/���������y���������y
2009 Pilot
Page 226 of 578
If you turn the system of f while a
disc is playing, either with the
power/volume knob or by turning
of f the ignition switch, the disc will
stay in the drive. When you turn the
system back on, the disc will begin
playing where it lef t of f .
For inf ormation on how to handle
and protect compact discs, see page.
Press the eject button ( ) to
remove the disc. If you eject the disc,
but do not remove it f rom the slot,
the system will automatically reload
the disc af ter 10 seconds and begin
playing.
You can also eject the disc when the
ignition switch is of f .
To play the radio when a disc is
playing, press the AM or FM button.
Press the CD button again to switch
back to the disc player.
283
Protecting Discs
To Stop Playing a Disc
Playing a Disc (L X model)
222
�����—�����—�
���y�
�������������y���
�(�/���������y���������y
2009 Pilot
Page 228 of 578

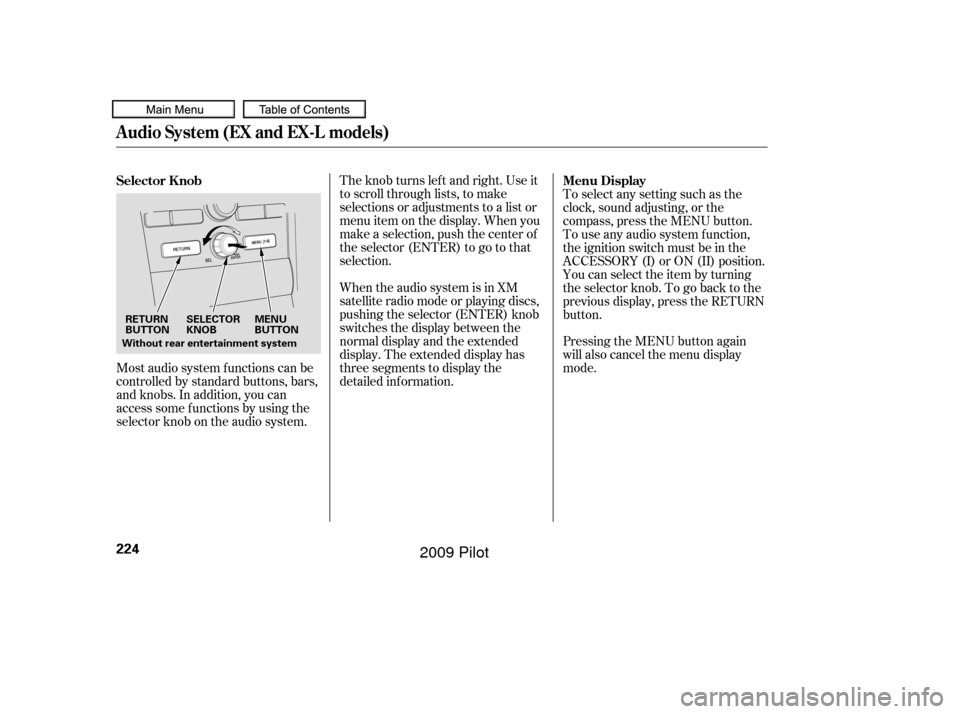
Most audio system f unctions can be
controlled by standard buttons, bars,
and knobs. In addition, you can
access some f unctions by using the
selector knob on the audio system.The knob turns lef t and right. Use it
to scroll through lists, to make
selections or adjustments to a list or
menu item on the display. When you
make a selection, push the center of
the selector (ENTER) to go to that
selection.
When the audio system is in XM
satellite radio mode or playing discs,
pushing the selector (ENTER) knob
switches the display between the
normal display and the extended
display. The extended display has
three segments to display the
detailed inf ormation.
Pressing the MENU button again
will also cancel the menu display
mode. To select any setting such as the
clock, sound adjusting, or the
compass, press the MENU button.
To use any audio system f unction,
the ignition switch must be in the
ACCESSORY (I) or ON (II) position.
You can select the item by turning
the selector knob. To go back to the
previous display, press the RETURN
button.
Selector K nob
Menu Display
Audio System (EX and EX-L models)
224
SELECTOR
KNOBMENU
BUTTON
RETURN
BUTTON
Without rear entertainment system
�����—�����—�
���y�
�������������y���
�(�/���������y���������y
2009 Pilot