Page 88 of 578
 position. This
inf ormation helps to keep you a")
The inf ormation display in the
instrument panel shows you the
engine oil lif e and maintenance
service items when the ignition
switch is in the ON (II) position. This
inf ormation helps to keep you aware
of the periodic maintenance your
vehicle needs f or continued trouble-
f ree driving. Ref er to page f or
more inf ormation.Your vehicle’s onboard diagnostic
system will detect a loose or missing
f uel f ill cap as an evaporative system
leak. The f irst time a leak is detected
a ‘‘CHECK FUEL CAP’’ message
appears on the information display.
Turn the engine of f , and conf irm the
f uel f ill cap is installed. If it is, loosen
it, then retighten it until it clicks at
least once. The message should go
off after several days of normal
driving once you tighten or replace
the f uel f ill cap. To scroll to another
display, press the select/reset knob.
The ‘‘CHECK FUEL CAP’’ message
will appear each time you restart the
engine until the system turns the
message of f .If the system still detects a leak in
your vehicle’s evaporative emissions
system, the malf unction indicator
lamp (MIL) comes on. If the f uel f ill
cap was not already tightened, turn
the engine of f , and check or
retighten the f uel f ill cap until it
clicks at least once. The MIL should
go off after several days of normal
driving once the cap is tightened or
replaced. If the MIL does not go of f ,
have your vehicle inspected by a
dealer. For more inf ormation, see
page .
459
526
Gauges
Maintenance MinderCheck Fuel Cap Message
84
�����—�����—�
���y�
�������������y���
�(�/���������y���������y
2009 Pilot
Page 89 of 578
buttononthesteering
wheel repeatedly until the main
menu appears (see page ). With the ignition switch in the ON
(II) position, the multi-")
�Û�Ý�Û�Ý
�Û�Ý
To change the display, press the
INFO( / )buttononthesteering
wheel repeatedly until the main
menu appears (see page ). With the ignition switch in the ON
(II) position, the multi-inf ormation
display changes as shown in the
next
page each time you press the INFO
( / ) button or SEL/RESET
button.
When you turn the ignition switch to
the ON (II) position, what you last
selected is displayed.
In the multi-information display, the
system message is also displayed
(see page ) and you can
customize your vehicle control
settings (see page ).
The multi-inf ormation display in the
instrument panel displays various
inf ormation and messages when the
ignition switch is in the ON (II)
position. Some of the messages help
you operate your vehicle more
comf ortably.
Others help to keep you aware of the
periodic maintenance your vehicle
needs f or continued trouble-f ree
driving.
When you open the driver’s door, a
‘‘Welcome’’ message is shown on the
multi-inf ormation display.
You can also change the display by
pressing the select/reset knob in the
instrument panel.86
92
95
CONT INUED
On Touring models
Multi-Inf ormation Display
Inst rument s and Cont rols
85
INFO ( / )
BUTTON
SEL/
RESET
BUTTON
�����—�����—�
���y�
���������
���y���
�(�/���������y���������y
2009 Pilot
Page 95 of 578
 or kilometer")
This shows the estimated distance
you can travel on the fuel remaining
in the f uel tank. This distance is
estimated f rom the f uel economy
you received over the last several
miles(U.S.) or kilometers (Canada),
so it will vary with changes in speed,
traf f ic, etc.
This shows the average speed you
are traveling in miles per hour (mph)
forU.S.modelsorkilometersper
hour (km/h) f or Canadian models.This shows the time passed traveled
since you last reset it. When you turn
the ignition switch to the ON (II)
position, ELAPSED TIME is reset.
You can customize the TRIP A INFO
(Trip A, AVERAGE FUEL A,
ELAPSED TIME A, and AVERAGE
SPEED A) reset condition in the
multi-inf ormation display (see page
).
This shows your current f uel
mileage.
This shows your vehicle’s average
f uel economy in mpg (U.S. models)
or liter/100 km (Canadian models)
since you last reset the Trip A or
Trip B.
104
RANGE
AVERAGE SPEED A/B EL A PSED T IME A /B
INST A NT FUEL MPG (U.S.
models)/INST A NT FUEL L /100 km(Canadian models)
AVERAGE FUEL A/B
Multi-Inf ormation Display
Inst rument s and Cont rols
91
�����—�����—�
���y�
�����������
�y���
�(�/���������y���������y
2009 Pilot
Page 99 of 578

When the main menu displays
‘‘Keyless Memory Settings ,’’ you
can customize some vehicle control
settings.
To enter the customizing mode,
press the SEL/RESET button.If you turn the ignition switch to the
ACCESSORY (I) or the LOCK (0)
position, or move the shif t lever out
of Park, the display will change to
the normal screen.
You can customize some vehicle
control settings f or ‘‘DRIVER 1’’ and
‘‘DRIVER 2’’ separately. If ‘‘DRIVER
1’’ or ‘‘DRIVER 2’’ is not displayed,
customizing is not possible.
To have the driver’s ID detected,
make sure your remote transmitter
is linked to the system (see Keyless
Memory Settings on page ).
If you want the settings as they were
when the vehicle lef t the f actory,
select DEFAULT ALL, as described
on page .
Ref er to the table on the f ollowing
pages about the settings you want to
customize. If you want to change any vehicle
control settings, select CHG
SETTING, then press the SEL/
RESET button.
To change the settings, the ignition
switch must be in the ON (II)
position, and the vehicle must be
stopped with the transmission in
Park. 151
98
CONT INUED
Multi-Inf ormation Display
Customize Settings
Inst rument s and Cont rols
95
TM TM
�����—�����—�
���y�
�������������y���
�(�/���������y���
�����y
2009 Pilot
Page 108 of 578
�µ�µ
�µ �Û�Ý�Û�Ý
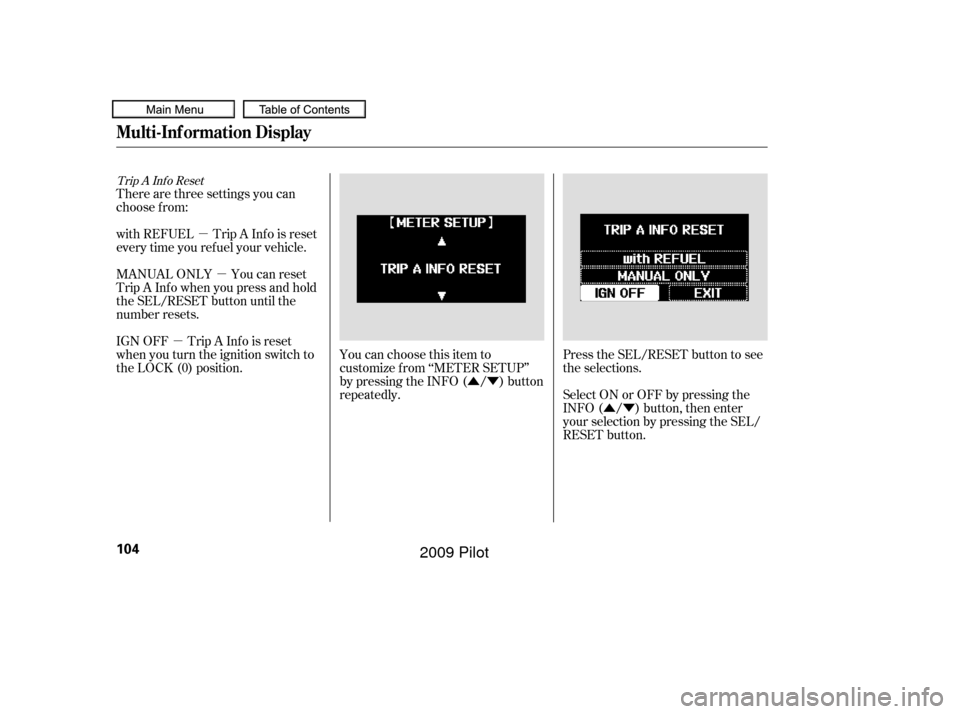
There are three settings you can
choose f rom:
with REFUEL Trip A Inf o is reset
every time you ref uel your vehicle.
MANUAL ONLY You can reset
Trip A Inf o when you press and hold
the SEL/RESET button until the
number resets.
IGN OFF Trip A Inf o is reset
when you turn the ignition switch to
the LOCK (0) position.
You can choose this item to
customize f rom ‘‘METER SETUP’’
by pressing the INFO ( / ) button
repeatedly.Press the SEL/RESET button to see
the selections.
Select ON or OFF by pressing the
INFO ( / ) button, then enter
your selection by pressing the SEL/
RESET button.
Trip A Inf o Reset
Multi-Inf ormation Display
104
�����—�����—�
���y�
������
������y���
�(�/���������y���
�����y
2009 Pilot
Page 114 of 578
�Û
�Ý �Û�Ý
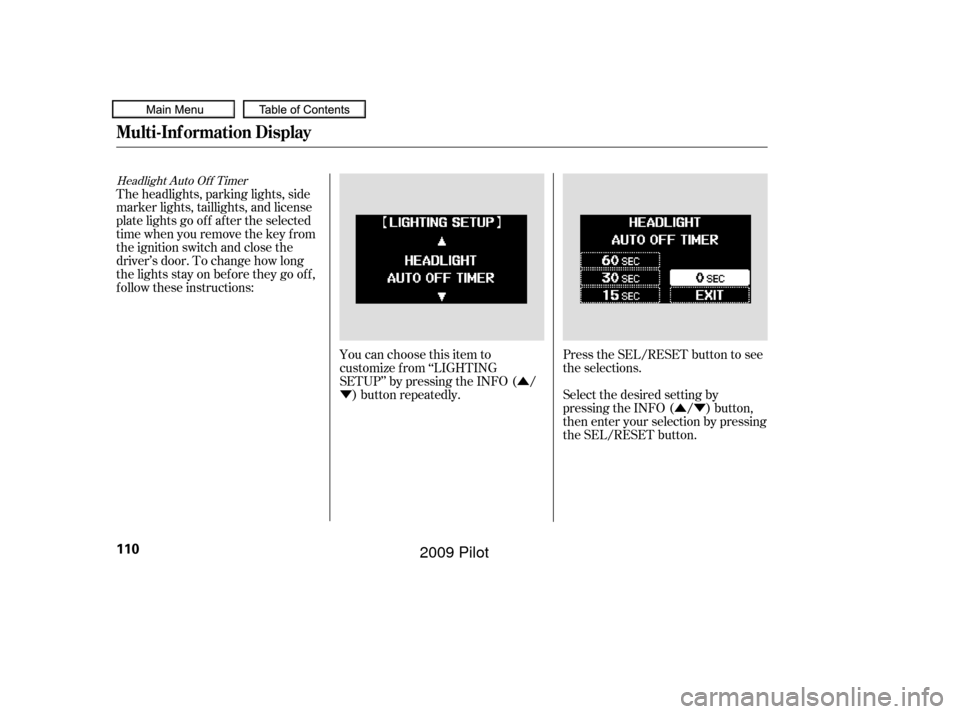
Headlight Auto Of f Timer
You can choose this item to
customize f rom ‘‘LIGHTING
SETUP’’ by pressing the INFO ( /) button repeatedly. Press the SEL/RESET button to see
the selections.
Select the desired setting by
pressing the INFO ( / ) button,
then enter your selection by pressing
the SEL/RESET button.
The headlights, parking lights, side
marker lights, taillights, and license
plate lights go of f af ter the selected
time when you remove the key f rom
the ignition switch and close the
driver’s door. To change how long
thelightsstayonbeforetheygooff,
f ollow these instructions:
Multi-Inf ormation Display
110
�����—�����—�
���y�
�������������y���
�(�/���������y���
�
���y
2009 Pilot
Page 119 of 578
�Û�Ý
�µ �µ
�µ
CONT INUED
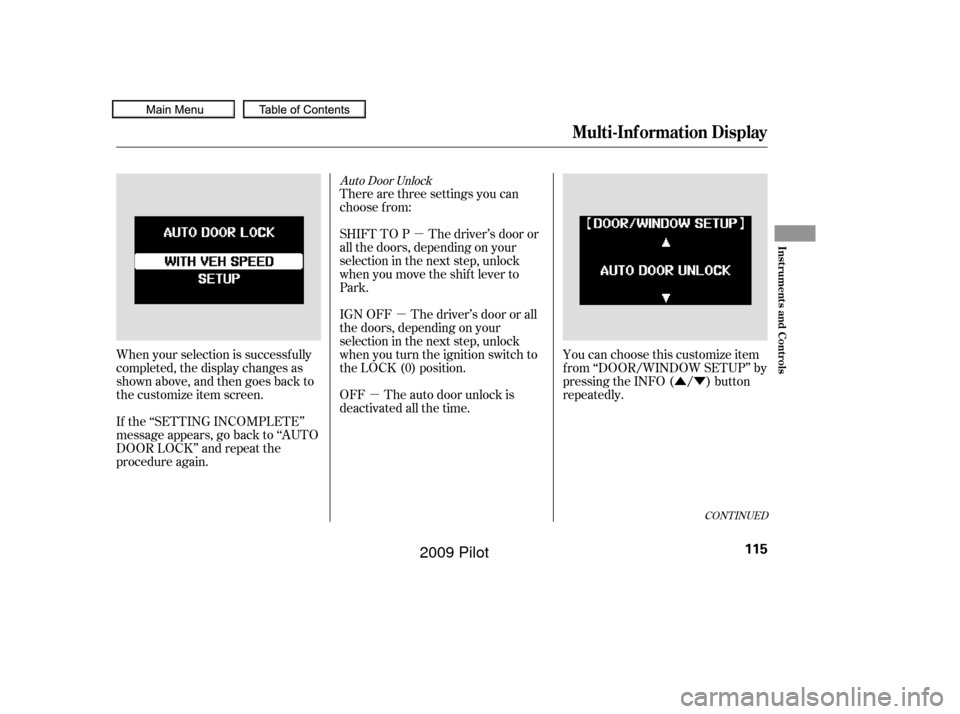
Auto Door Unlock
There are three settings you can
choose f rom:
You can choose this customize item
f rom ‘‘DOOR/WINDOW SETUP’’ by
pressing the INFO ( / ) button
repeatedly.
When your selection is successf ully
completed, the display changes as
shown above, and then goes back to
the customize item screen.
If the ‘‘SETTING INCOMPLETE’’
message appears, go back to ‘‘AUTO
DOOR LOCK’’ and repeat the
procedure again. OFF The auto door unlock is
deactivated all the time. SHIFT TO P The driver’s door or
all the doors, depending on your
selection in the next step, unlock
when you move the shif t lever to
Park.
IGN OFF The driver’s door or all
the doors, depending on your
selection in the next step, unlock
when you turn the ignition switch to
the LOCK (0) position.
Multi-Inf ormation Display
Inst rument s and Cont rols
115
�����—�����—�
���y�
���������
���y���
�(�/���������y���
�����y
2009 Pilot
Page 128 of 578

�µ�µ �µ
�Î
�Î
�Î
Push down on the
lever to signal a lef t turn and up to
signal a right turn. To signal a lane
change, push lightly on the lever,
and hold it. The lever will return to
center when you release it or
complete a turn.
Turning the
switch to the ‘‘ ’’ position turns
on the parking lights, taillights,
instrument panel lights, side-marker
lights, and rear license plate lights.
Turning the switch to the ‘‘ ’’
position turns on the headlights. If
you leave the lights on with the key
removed f rom the ignition switch,
you will hear a reminder chime when
you open the driver’s door. This indicator stays on if you leave
the lights on and turn the ignition
switch to the ACCESSORY (I) or
LOCK (0) position. When the light switch is in either of
these positions, the lights on
indicator comes on as a reminder.
To switch f rom low
beams to high beams, push the lef t
lever f orward until you hear a click.
The blue high beam indicator will
come on (see page ). Pull it back
to return to low beams. To flash the
high beams, pull the lever back
lightly, then release it. The high
beamsstayonaslongasyouhold
the lever back.
Turn signal
Of f
Parking and indicator lights
AUTO
Headlights on
High beams
Flashhighbeams
Fog lights of f
Fog lights on
1.
2.
3.
4.
5.
6.
7.
8.
9.
: If equipped 76
Turn Signal
Headlights On
High Beams
Turn Signals and Headlights
124
�����—�����—�
���y�
�����������
�y���
�(�/���������y���
�����y
2009 Pilot