Page 423 of 578

�µ�µ�µ
CONT INUED
Use this position f or
your normal driving. The
transmission automatically selects a
suitable gear (1 through 5) f or your
speed and acceleration. You may
notice the transmission shif ting up at
higher engine speeds when the
engine is cold. This helps the engine
warm up f aster. To use D , press the
D button when the shif t lever is in
the ‘‘D’’ position. This position is simi-
lartoD,exceptonlythefirstthree
gears are selected instead of all f ive.
Use D when towing a trailer in hilly
terrain, or to provide engine braking
when going down a steep hill. D can
also keep the transmission f rom
cycling between third and f ourth
gears in stop-and-go driving. This position locks
the transmission in second gear. It
does not downshif t to f irst gear
when you come to a stop.
Use second gear: For more power when climbing.
To increase engine braking when
going down steep hills.
For starting out on a slippery
surf ace or in deep snow.
When driving downhill with a
trailer.3
3
3 3
Automatic Transmission
Drive (D) Drive (D ) Second (2)3
Driving
419
�����—�����—�
���y�
�������������y���
�(�/���������y���������y
2009 Pilot
Page 424 of 578

�µIf you exceed the maximum speed
f or the gear you are in, the engine
speed will enter into the tachometer’s
red zone. If this occurs, you may f eel
the engine cut in and out. This is
caused by a limiter in the engine’s
computer controls. The engine will
run normally when you reduce the
rpm below the red zone.
Bef ore downshif ting, make sure the
engine will not go into the
tachometer’s red zone. This allows you to move the shif t
lever out of Park if the normal
method of pushing on the brake
pedal and pressing the release
button does not work.
Remove the key from the ignition
switch. Set the parking brake.
To shif t f rom second to
first, press the release button on the
side of the shif t lever. This position
locks the transmission in f irst gear.
By upshif ting and downshif ting
through 1, 2, D , and D, you can
operate the transmission much like a
manual transmission without a
clutch pedal. 1.
2.
3
Engine Speed Limiter
Shift Lock Release
First (1)
Automatic Transmission
420
�����—�����—�
���y�
���������
���y���
�(�/���������y���������y
2009 Pilot
Page 425 of 578
Insert the built-in key into the shift
lock release slot.
Put a cloth on the edge of the shif t
lock release slot cover. Use a small
f lat-tipped screwdriver or metal
f ingernail f ile to caref ully pry up
the edge of the cover and remove
it f rom the slot. Push down on the key while you
pressthereleasebuttononthe
shif t lever and move the shif t lever
out of Park to neutral.Remove the key from the shift
lock release slot, then install the
cover. Make sure the notch on the
cover is on the underside.
Return the key to the ignition
switch, press the brake pedal, and
restart the engine.
If you need to use the shif t lock
release, it means your vehicle is
developing a problem. Have the
vehicle checked by a dealer.
3. 4.
5.6.
Automatic Transmission
Driving
421
COVER
RELEASE BUTTON
SHIFT LOCK RELEASE SLOT
�����—�����—�
���y�
���������
���y���
�(�/���������y���������y
2009 Pilot
Page 426 of 578

The vehicle must be stopped with
the engine running.do
any of the f ollowing: Press the VTM-4 LOCK button.
Move the shift lever to D or D .
Move the shift lever to first (1),
second (2), or reverse (R) gear.
Turn the ignition switch to the
LOCK (0) position.
Press the VTM-4 LOCK button.
The indicator in the button comes
on.
The VTM-4 Lock will temporarily
disengage when the vehicle speed
exceeds 18 mph (30 km/h). The
indicator in the button will remain on.
To get unstuck, apply light pressure
to the accelerator pedal. Do not spin
the f ront tires f or more than a f ew
seconds. Because of the amount of
torque applied to the rear tires, they
should not spin. This is normal. If
you are not able to move the vehicle,
stop and reverse direction.
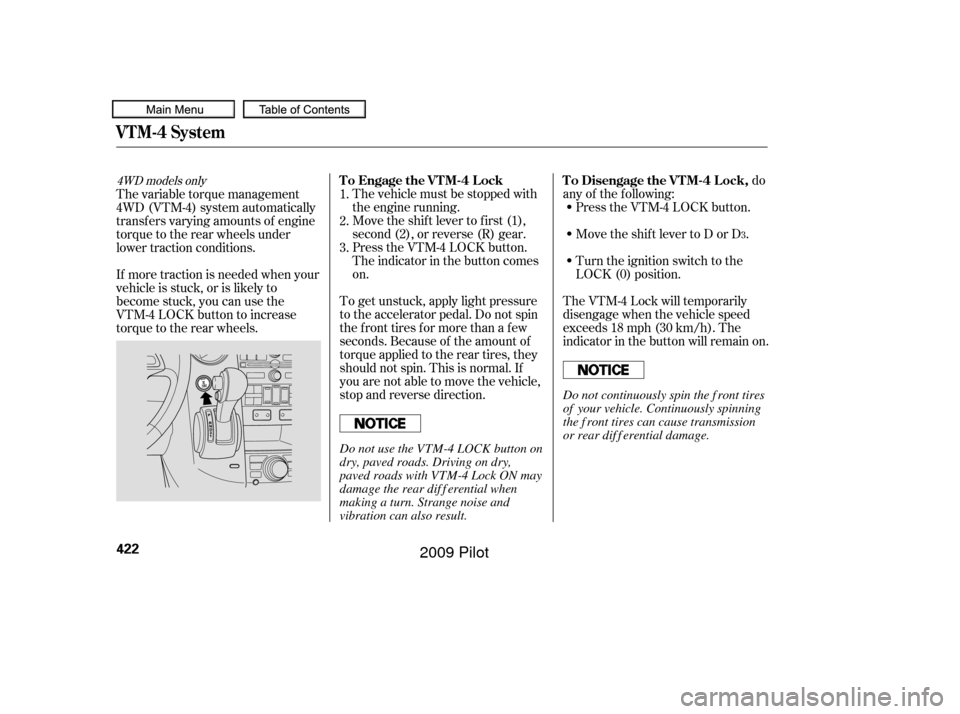
If more traction is needed when your
vehicle is stuck, or is likely to
become stuck, you can use the
VTM-4 LOCK button to increase
torque to the rear wheels. The variable torque management
4WD (VTM-4) system automatically
transf ers varying amounts of engine
torque to the rear wheels under
lower traction conditions.
1.
2.
3.
3
4WD models onlyTo Engage the VTM-4 Lock To Disengage the VTM-4 Lock,
VTM-4 System
422
Do not continuously spin the f ront tires
of your vehicle. Continuously spinning
the f ront tires can cause transmission
or rear dif f erential damage.
Do not use the VTM-4 LOCK button on
dry, paved roads. Driving on dry,
paved roads with VTM-4 Lock ON may
damage the rear dif f erential when
making a turn. Strange noise and
vibration can also result.
�����—�����—�
���y�
�������������y���
�(�/���������y���������y
2009 Pilot
Page 456 of 578

When climbing hills, closely watch
your temperature gauge. If it nears
the red (Hot) mark, turn the air
conditioning of f , reduce speed and, if
necessary, pull to the side of the
road to let the engine cool.Always drive slowly and have
someone guide you when backing up.
Grip the of the steering wheel,
then turn the wheel to the left to get
the trailer to move to the lef t. Turn
the wheel to the right to move the
trailer to the right.
Follow all normal precautions when
parking, including putting the
transmission in Park and f irmly
setting the parking brake. Also, place
wheel chocks at each of the trailer’s
tires. Crosswinds and air turbulence
caused by passing trucks can disrupt
your steering and cause the trailer to
sway. When being passed by a large
vehicle, keep a constant speed, and
steer straight ahead. Do not try to
make quick steering or braking
corrections.If the vehicle’s tires slip when
retrieving a boat f rom the water,
shif t to f irst gear, and turn on VTM-4
lock (see page ). Disengage
VTM-4 lock as soon as the boat is
out of the water to prevent damage
to the VTM-4 system.
Your vehicle is not designed to be
towed behind a motor home. If your
vehicle needs to be towed in an
emergency, see page .
If the automatic transmission shif ts
f requently while going up a hill, shif t
to D .
When driving down hills, reduce
your speed and shif t down to D . Do
not ‘‘ride’’ the brakes. If you must stop when f acing uphill,
use the f oot brake or parking brake.
Do not try to hold the vehicle in
placebypressingontheaccelerator,
as this can cause the automatic
transmission to overheat.
535
422
bottom
3
3
Driving on Hills Handling Crosswinds and Buf f et ing
Backing UpParking Ret rieving a Boat
Towing a Trailer
Towing Your Vehicle
Remember, it
takes longer to slow down and
stop when towing a trailer.
452
�����—�����—�
���y�
�������������y���
�(�/���������y���������y
2009 Pilot
Page 461 of 578

This section explains why it is
important to keep your vehicle well
maintained and how to f ollow basic
maintenance saf ety precautions.
This section also includes
instructions on how to read the
maintenance minder messages on
the inf ormation display or multi-
inf ormation display (depending on
models), and instructions f or simple
maintenance tasks you may want to
take care of yourself .
If you have the skills and tools to
perf orm more complex maintenance
tasks on your vehicle, you may want
to purchase the service manual. See
page f or inf ormation on how to
obtain a copy, or see your dealer.......................
Maintenance Saf ety .458
....................
Maintenance Minder . 459
..............................
Fluid Locations .474
......
Engine Compartment Covers . 475
........................
Adding Engine Oil .476
Changing the Engine Oil and ...........................................
Filter .477
..............................
Engine Coolant .479
....................
Windshield Washers .481
....
Automatic Transmission Fluid . 482
.................
Rear Dif f erential Fluid . 484
.............
Transf er Assembly Fluid . 484
....................................
Brake Fluid .485
....................
Power Steering Fluid . 486
....................................
Timing Belt .486
.............................................
Lights .487
..................
Dust and Pollen Filter . 494
................
Cleaning the Seat Belts . 494
.....................................
Floor Mats .495
.................................
Wiper Blades .496
...............................................
Tires .500
...................
Checking the Battery . 508
.............................
Vehicle Storage .510
469
Maintenance
Maint enance
457
�����—�����—�
���y�
�������������y���
�(�/���������y���������y
2009 Pilot
Page 475 of 578

�Ì�µ
�µ�µ
We recommend the use of Honda
parts and f luids whenever you have
maintenance done. These are
manuf actured to the same high-
quality standards as the original
components, so you can be conf ident
of their perf ormance and durability.
U.S. Vehicles:
According to state and federal
regulations, f ailure to perf orm
maintenance on the items marked
with will not void your emissions
warranties. However, all
maintenance services should be
perf ormed in accordance with the
intervals indicated by the odometer/
trip meter display or the multi-
inf ormation display.Youshouldcheckthefollowing
items at the specif ied intervals. If
you are unsure of how to perf orm
any check, turn to the appropriate
page listed.
Engine oil level Check every
time you fill the fuel tank. See
page .
Engine coolant level Check the
radiator reserve tank every time
you f ill the f uel tank. See page .
Automatic transmission Check
the f luid level monthly. See page .402
402
482
CONT INUED
Maintenance Minder
Maintenance, replacement, or
repair of emissions control
devices and systems may be done
by any automotive repair
establishment or individual using
parts that are ‘‘certif ied’’ to EPA
standards. Owner’s Maintenance Checks
Maint enance
471
�����—�����—�
���y�
������
��
���y���
�(�/���������y���������y
2009 Pilot
Page 478 of 578
Fluid Locations
474
WASHER FLUID
(Blue cap)RADIATOR CAP
ENGINE OIL DIPSTICK
(Orange loop)
AUTOMATIC
TRANSMISSION
FLUID DIPSTICK
(Yellow loop)
POWER STEERING FLUID
(Red cap)
ENGINE COOLANT
RESERVOIR
ENGINE OIL FILL CAPBRAKE FLUID
(Black cap)
�����—�����—�����y�
���������
���y���
�(�/���������y���������y
2009 Pilot