Page 46 of 532

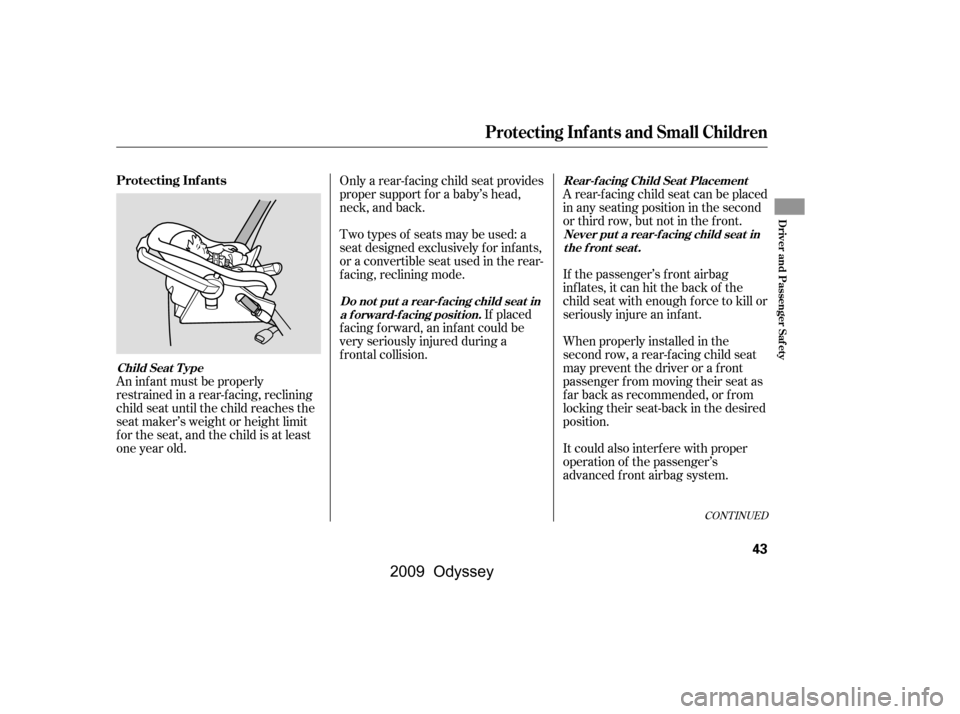
An inf ant must be properly
restrained in a rear-f acing, reclining
child seat until the child reaches the
seat maker’s weight or height limit
f or the seat, and the child is at least
one year old.If the passenger’s front airbag
inflates, it can hit the back of the
child seat with enough f orce to kill or
seriously injure an inf ant.
When properly installed in the
second row, a rear-f acing child seat
maypreventthedriverorafront
passenger f rom moving their seat as
f ar back as recommended, or f rom
locking their seat-back in the desired
position.
If placed
f acing f orward, an inf ant could be
very seriously injured during a
f rontal collision.
Two types of seats may be used: a
seat designed exclusively f or inf ants,
or a convertible seat used in the rear-
f acing, reclining mode.
Only a rear-f acing child seat provides
proper support f or a baby’s head,
neck, and back. A rear-f acing child seat can be placed
in any seating position in the second
or third row, but not in the f ront.
It could also interf ere with proper
operation of the passenger’s
advanced front airbag system.
CONT INUED
Protecting Inf ants
Child Seat T ype Do not put a rear-f acing child seat in
a f orward-f acing position. Rear-f acing Child Seat Placement
Never put a rear-f acing child seat inthe front seat.
Protecting Inf ants and Small Children
Driver and Passenger Saf ety
43
�\f���—�\f���—���
�y�
�
��
����
���y���
�(���������\f�y�\f�\f�����y
2009 Odyssey
Page 51 of 532

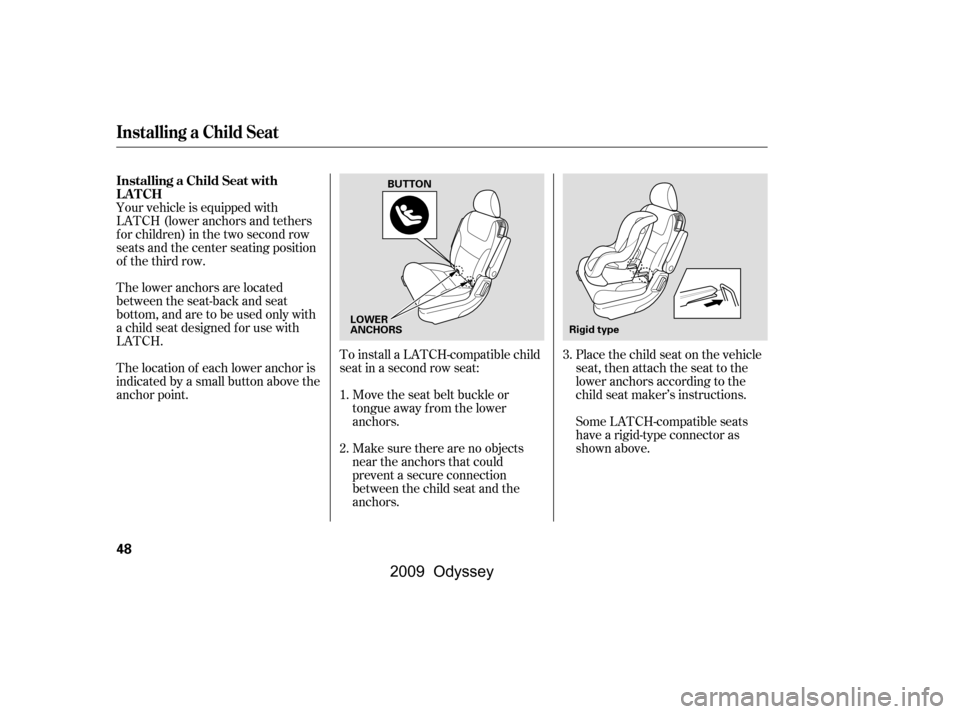
Place the child seat on the vehicle
seat, then attach the seat to the
lower anchors according to the
child seat maker’s instructions.
The lower anchors are located
between the seat-back and seat
bottom, and are to be used only with
a child seat designed f or use with
LATCH.
The location of each lower anchor is
indicated by a small button above the
anchor point.
Some LATCH-compatible seats
have a rigid-type connector as
shown above.
To install a LATCH-compatible child
seat in a second row seat:
Make sure there are no objects
near the anchors that could
prevent a secure connection
between the child seat and the
anchors.
Move the seat belt buckle or
tongue away f rom the lower
anchors.
Your vehicle is equipped with
LATCH (lower anchors and tethers
f or children) in the two second row
seats and the center seating position
of the third row.
1.
2.3.
Installing a Child Seat with
LATCH
Installing a Child Seat
48
LOWER
ANCHORS BUTTON
Rigid type
�\f���—�\f���—���
�y�
�
��
��������y���
�(���������\f�y�\f�\f�����y
2009 Odyssey
Page 54 of 532

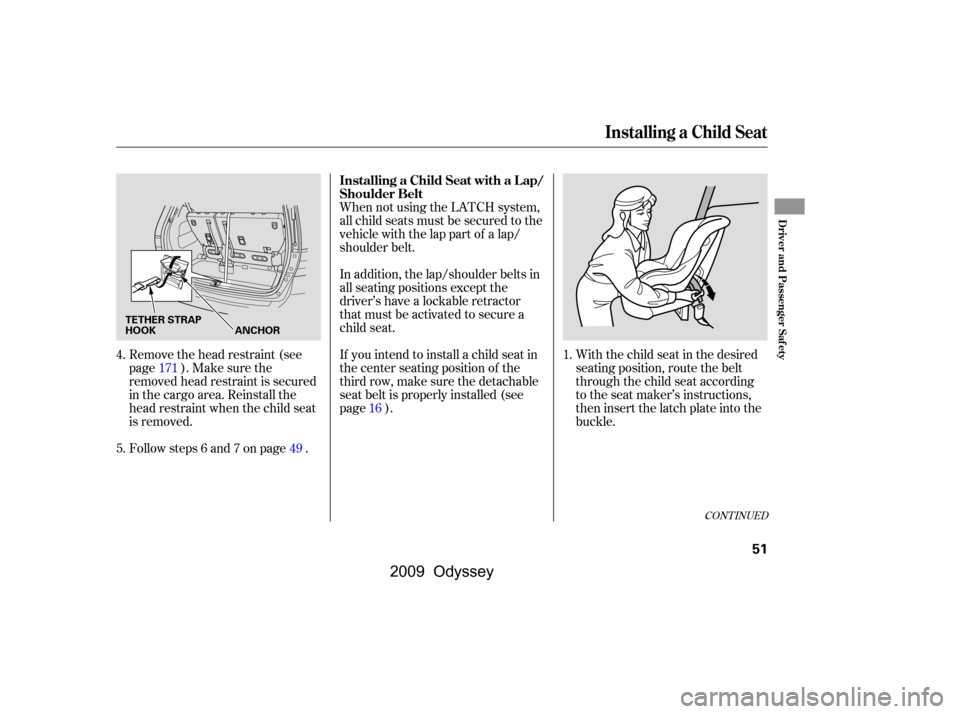
With the child seat in the desired
seating position, route the belt
through the child seat according
to the seat maker’s instructions,
then insert the latch plate into the
buckle.
When not using the LATCH system,
all child seats must be secured to the
vehicle with the lap part of a lap/
shoulder belt.
In addition, the lap/shoulder belts in
all seating positions except the
driver’s have a lockable retractor
that must be activated to secure a
child seat.
If you intend to install a child seat in
the center seating position of the
thirdrow,makesurethedetachable
seat belt is properly installed (see
page ).
Remove the head restraint (see
page ). Make sure the
removed head restraint is secured
in the cargo area. Reinstall the
head restraint when the child seat
is removed.
Followsteps6and7onpage . 1.
4.
5. 4916
171
CONT INUED
Installing a Child Seat
Installing a Child Seat with a L ap/
Shoulder Belt
Driver and Passenger Saf ety
51
TETHER STRAP
HOOK
ANCHOR
�\f���—�\f���—���
�y�
�
����\f��
���y���
�(���������\f�y�\f�\f�����y
2009 Odyssey
Page 56 of 532
Each second row bucket seat has a
tether anchorage point at the bottom
of the seat-back.Af ter properly securing the child
seat (see page ), lif t the head
restraint, then route the tether
strap over the seat-back and
through the head restraint legs.
A child seat with a tether can be
installed in any seating position in
the second or third row seats.
Since a tether can provide additional
security to the lap/shoulder belt
installation, we recommend using a
tether whenever one is required or
available.
1.51
CONT INUED
Installing a Child Seat with a
TetherSecond Row Inst allat ion
Installing a Child Seat
Driver and Passenger Saf ety
53
TETHER ANCHORAGE POINT TETHER
STRAP
�����—�����—���
�y�
�
�����������y���
�(�����������y���������y
2009 Odyssey
Page 170 of 532
There are bucket seats with
armrests for two front passengers,
bucket seats with armrests for two
passengers in the second row, and a
bench seat f or three passengers in
the third row.
For greater cargo capacity, the seats
in the second row can be removed,
andthebenchseatinthethirdrow
can be f olded into the f loor.
Your vehicle has a second row plus-
one seat that can be installed
between the second row bucket
seats when needed. The plus-one
seat can also be used as a second
row center console.
Except U.S. LX and Canadian DXmodels
Passenger Seating
Convert ible Second Row BucketSeat s
Seats
Inst rument s and Cont rols
167
�\f���—�\f���—���
�y�
�
�����������y���
�(���������\f�y�\f�
�����y
2009 Odyssey
Page 171 of 532

�µ
See pages f or important saf ety
inf ormation and warnings about how toproperly position the seats and seat-backs. 1312
The third row seats do not adjust
f orward and backward.
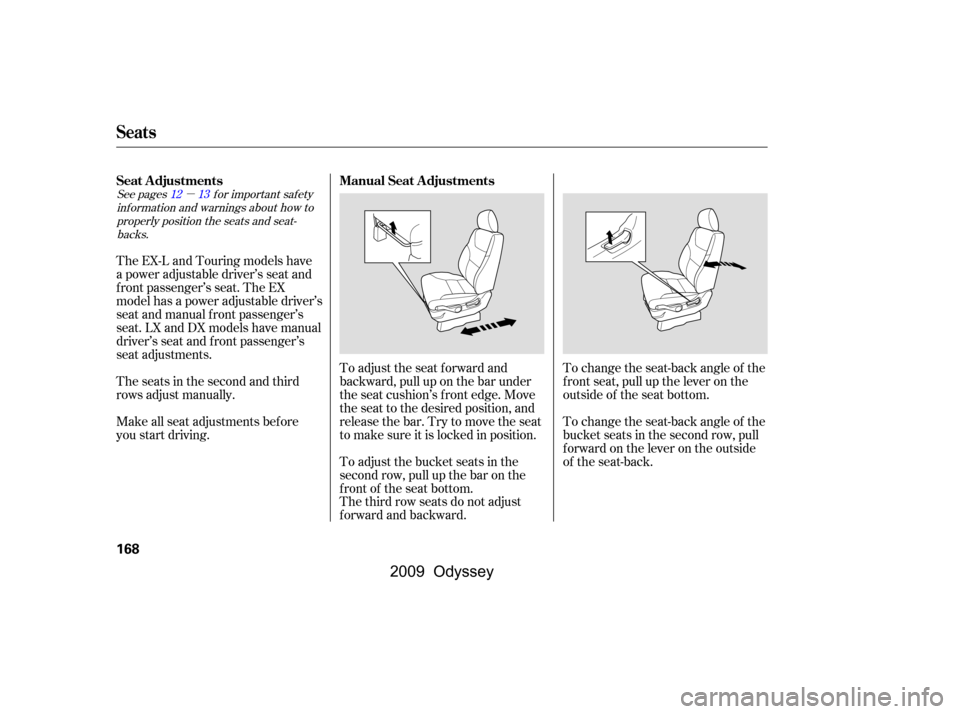
To adjust the seat forward and
backward, pull up on the bar under
the seat cushion’s f ront edge. Move
the seat to the desired position, and
releasethebar.Trytomovetheseat
to make sure it is locked in position.
To adjust the bucket seats in the
second row, pull up the bar on the
front of the seat bottom. To change the seat-back angle of the
f ront seat, pull up the lever on the
outside of the seat bottom.
To change the seat-back angle of the
bucket seats in the second row, pull
forwardontheleverontheoutside
of the seat-back.
The EX-L and Touring models have
a power adjustable driver’s seat and
f ront passenger’s seat. The EX
model has a power adjustable driver’s
seat and manual f ront passenger’s
seat. LX and DX models have manual
driver’s seat and f ront passenger’s
seat adjustments.
The seats in the second and third
rows adjust manually.
Make all seat adjustments bef ore
you start driving.
Seat Adjustments Manual Seat Adjustments
Seats
168
�\f���—�\f���—���
�y�
�
�����������y���
�(���������\f�y�\f�
�����y
2009 Odyssey
Page 175 of 532
To remove a head restraint f or
cleaning or repair, pull it up as f ar as
it will go. Push the release button,
then pull the restraint out of the seat-
back.
The f ront and rear head restraints
adjust f or height. You need both
hands to adjust the restraint. Do not
attempt to adjust it while driving. To
raise it, pull upward. To lower the
restraint, push the release button
and push the restraint down.
When reinstalling a head restraint,
put the legs back in place. Then
adjust it to the appropriate height
while pressing the release button.
Make sure the removed head
restraints are securely stored.
Removing t he Head Rest raintA djust ing t he Head Rest raint
Seats
172
RELEASE BUTTONLEGSEAT BACK
RELEASEBUTTON
CUSHION
Front and Second row seatThird row seat
Failure to reinstall the head
restraints can result in severe
injury during a crash.
Always replace the head
restraints before driving.
�����—�����—���
�y�
�
�����������y���
�(�����������y���
�����y
2009 Odyssey
Page 177 of 532
To get into or out of the third row
seat, walk between the second row
seats.When the seat on the passenger’s
side is moved to the center, walk
through the passenger’s side to get
into or out of the third row seat.
You need to remove the plus-one
seat (see page ) bef ore you can
make this seat arrangement.To get into or out of the third row
seat, pull up the release lever on the
shoulder of each second row bucket
seat. The seat-back will tilt forward
and the whole seat will slide f orward.
178
T hird Row Seat A ccess
Seats
174
RELEASE LEVER
�\f���—�\f���—���
�y�
�
�����������y���
�(���������\f�y�\f�
�����y
2009 Odyssey