2009 HONDA FIT air condition
[x] Cancel search: air conditionPage 276 of 352

To safely operate your vehicle, your
tires must be the proper type and
size, in good condition with adequate
tread, and correctly inflated.
The following pages give more
detailed information on how to take
care of your tires and what to do
when they need to be replaced.
Using tires that are excessively
worn or improperly inflated can
cause a crash in which you can
be seriously hurt or killed.
Follow all instructions in this
owner's manual regarding tire
inflation and maintenance.Inflation Guidelines
Keeping the tires properly inflated
provides the best combination of
handling, tread life, and riding
comfort.
●Underinflated tires wear unevenly,
adversely affect handling and fuel
economy, and are more likely to
fail from being overheated.●Overinflated tires can make your
vehicle ride more harshly, are
more prone to damage from road
hazards, and wear unevenly.
The tire pressure monitoring system
(TPMS)
ꭧwarns you when a tire
pressure is low. See page 235for
more information.
ꭧ : If equipped Even though your vehicle is
equipped with TPMS, we
recommend that you visually check
your tires every day. If you think a
tire might be low, check it
immediately with a tire gauge.
Use a gauge to measure the air
pressure in each tire at least once a
month. Even tires that are in good
condition may lose 1 to 2 psi (10 to
20 kPa, 0.1 to 0.2 kgf/cm
2) per
month. Remember to check the
spare tire (if equipped) at the same
time.
Check the air pressures when the
tires are cold. This means the vehicle
has been parked for at least 3 hours,
or driven less than 1 mile (1.6 km).
Add or release air, if needed, to
match the recommended cold tire
pressures.CONTINUED
Tires
273
Maintenance
2009 Fit
Page 277 of 352
![HONDA FIT 2009 2.G Owners Manual If you check air pressures when the
tires are hot [driven for several miles
(kilometers)], you will see readings 4
to 6 psi (30 to 40 kPa, 0.3 to 0.4
kgf/cm
2) higher than the cold
readings. This is n HONDA FIT 2009 2.G Owners Manual If you check air pressures when the
tires are hot [driven for several miles
(kilometers)], you will see readings 4
to 6 psi (30 to 40 kPa, 0.3 to 0.4
kgf/cm
2) higher than the cold
readings. This is n](/manual-img/13/5919/w960_5919-276.png)
If you check air pressures when the
tires are hot [driven for several miles
(kilometers)], you will see readings 4
to 6 psi (30 to 40 kPa, 0.3 to 0.4
kgf/cm
2) higher than the cold
readings. This is normal. Do not let
air out to match the recommended
cold air pressure. The tire will be
underinflated.
You should get your own tire
pressure gauge and use it whenever
you check your tire pressures. This
will make it easier for you to tell if a
pressure loss is due to a tire problem
and not due to a variation between
gauges.
While tubeless tires have some
ability to self-seal if they are
punctured, you should look closely
for punctures if a tire starts losing
pressure. Recommended Tire Pressures
The following charts show the
recommended cold tire pressures for
most normal and high-speed driving
conditions.
All models except Sport
Tire Size
Cold Tire Pressure
for Normal Driving
175/65R15 84S Front/Rear: 32 psi (220 kPa,
2.2 kgf/cm
2)
Sport model
Tire SizeCold Tire Pressure
for Normal Driving
185/55R16 83H Front/Rear: 33 psi (230 kPa,
2.3 kgf/cm
2)
If equippedThe compact spare tire pressure is:
60 psi (420 kPa, 4.2 kgf/cm
2)
For convenience, the recommended
tire sizes and cold tire pressures are
on a label on the driver's doorjamb.
For additional information about your
tires, see page323.
Tires274
2009 Fit
Page 294 of 352

How to Use the Tire Repair KitAll Canadian models with automatictransmissionTo reduce weight, your vehicle is
equipped with a tire repair kit instead
of a spare tire. This kit will allow you
to temporarily repair a flat tire under
the following conditions:●Only one tire is flat.●The puncture is smaller than 3/
16ths of an inch (4 mm).●The puncture is located within the
tread.●The wheel rim is not damaged.●The tire bead is seated.
When making a temporary repair,
carefully follow all instructions in this
owner's manual and in the
instructions that came with the kit. If you have a flat tire while driving,
park the vehicle on a level surface in
a safe place, put the transmission in
Park (P), set the parking brake, and
turn the hazard lights on.
Thoroughly examine the tire for a
puncture or other damage.
If a puncture is wider than 3/16ths of
an inch (4 mm), or is located in the
tire sidewall, do not attempt to repair
the tire. Have your vehicle towed to a
Honda service center. In Canada or
the continental U.S.A. simply call 1-
800-465-PLUS (7587) for Honda Plus
Roadside Assistance.
If the damage is smaller than 3/16ths
of an inch (4 mm) and within the tire
tread, proceed with the following
instructions.
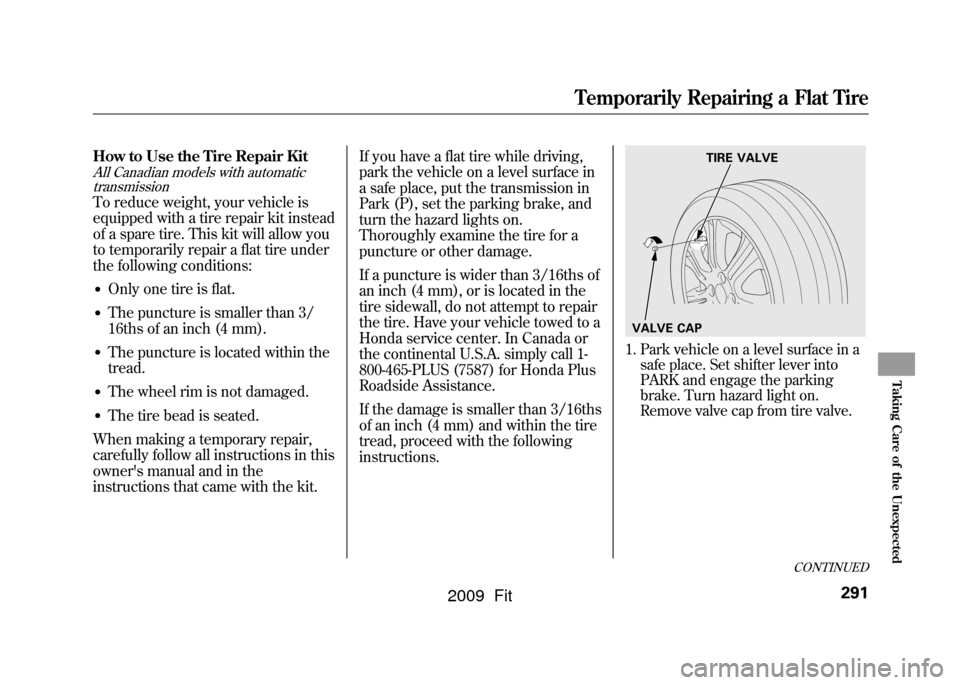
1. Park vehicle on a level surface in a
safe place. Set shifter lever into
PARK and engage the parking
brake. Turn hazard light on.
Remove valve cap from tire valve.
TIRE VALVE
VALVE CAP
CONTINUED
Temporarily Repairing a Flat Tire
291
Taking Care of the Unexpected
2009 Fit
Page 297 of 352

In freezing temperatures, turn the
engine on and leave it running
while the flat tire is being serviced.
Prolonged exposure to the cold
may cause the vehicle's battery to
weaken. Under cold conditions,
safely start the vehicle's engine and
keep the engine running at idle
when operating the air pump.Running the engine with the
vehicle in an enclosed or even
partly enclosed area can cause
a rapid build-up of toxic carbon
monoxide.
Breathing this colorless,
odorless gas can cause
unconsciousness and even
death. Only run the engine to
power the air pump with the
vehicle outdoors.
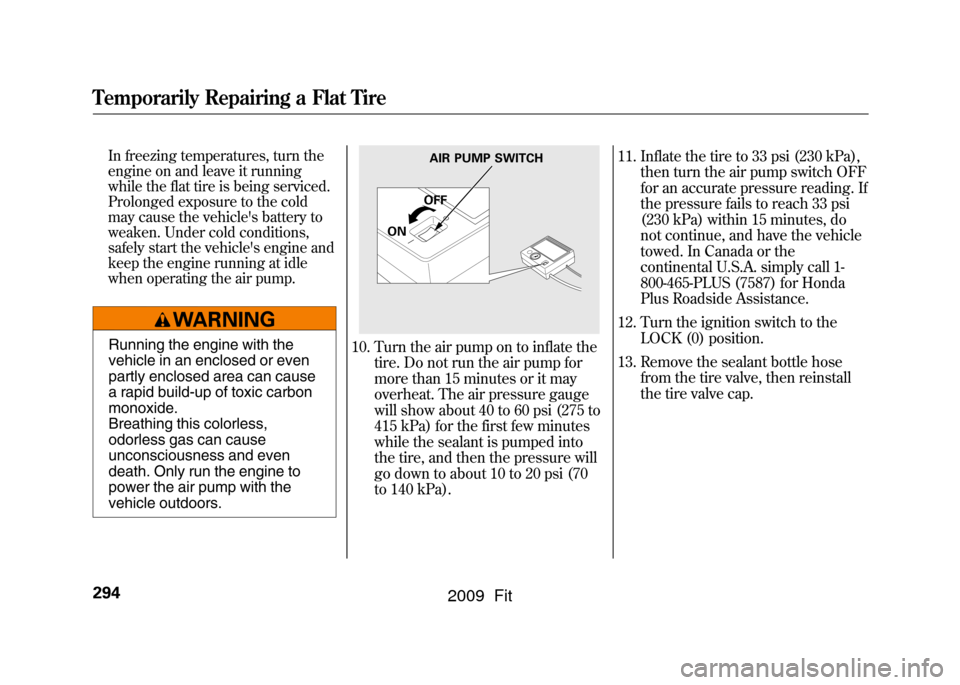
10. Turn the air pump on to inflate thetire. Do not run the air pump for
more than 15 minutes or it may
overheat. The air pressure gauge
will show about 40 to 60 psi (275 to
415 kPa) for the first few minutes
while the sealant is pumped into
the tire, and then the pressure will
go down to about 10 to 20 psi (70
to 140 kPa). 11. Inflate the tire to 33 psi (230 kPa),
then turn the air pump switch OFF
for an accurate pressure reading. If
the pressure fails to reach 33 psi
(230 kPa) within 15 minutes, do
not continue, and have the vehicle
towed. In Canada or the
continental U.S.A. simply call 1-
800-465-PLUS (7587) for Honda
Plus Roadside Assistance.
12. Turn the ignition switch to the LOCK (0) position.
13. Remove the sealant bottle hose from the tire valve, then reinstall
the tire valve cap.
AIR PUMP SWITCH
OFF
ON
Temporarily Repairing a Flat Tire294
2009 Fit
Page 307 of 352

If this indicator comes on
while driving, it means one
of the engine's emissions control
systems may have a problem. Even
though you may feel no difference in
your vehicle's performance, it can
reduce your fuel economy and cause
increased emissions. Continued
operation may cause serious damage.
If you have recently refueled your
vehicle, the indicator coming on
could be due to a loose or missing
fuel fill cap. You will also see a
‘‘ CHECK FUEL CAP ’’message on
the information display. Tighten the
cap until it clicks at least once.
Tightening the cap will not turn the
indicator off immediately; it can take
several days of normal driving. If the indicator comes on repeatedly,
even though it may go off as you
continue driving, have your vehicle
checked by a dealer as soon as
possible.
If you keep driving with the malfunction
indicator lamp on, you can damage
your vehicle's emissions controls and
engine. Those repairs may not be
covered by your vehicle's warranties.
If your vehicle has an automatic
transmission, the malfunction
indicator lamp may also come on
with the
‘‘D ’’indicator. Readiness Codes
Your vehicle has certain
‘‘readiness
codes ’’that are part of the on-board
diagnostics for the emissions
systems. In some states, part of the
emissions testing is to make sure
these codes are set. If they are not
set, the test cannot be completed.
If the battery in your vehicle has
been disconnected or gone dead,
these codes are erased. It can take
several days of driving under various
conditions to set the codes again.
To check if they are set, turn the
ignition switch to the ON (II)
position, without starting the engine.
The malfunction indicator lamp will
come on for 20 seconds. If it then
goes off, the readiness codes are set.
If it blinks five times, the readiness
codes are not set. If possible, do not
take your vehicle for an emissions
test until the readiness codes are set.
Refer to Emissions Testing for
more information (see page329).
Malfunction Indicator Lamp304
2009 Fit
Page 308 of 352

U.S. Canada
Brake System
Indicator (Red)
The brake system indicator (red)
normally comes on when you turn
the ignition switch to the ON (II)
position, and as a reminder to check
the parking brake. It will stay on if
you do not fully release the parking
brake.
If the brake system indicator (red)
comes on while driving, the brake
fluid level is probably low. Press
lightly on the brake pedal to see if it
feels normal. If it does, check the
brake fluid level the next time you
stop at a service station (see page
261).
If the fluid level is low, take your
vehicle to a dealer, and have the
brake system inspected for leaks or
worn brake pads/shoes. However, if the brake pedal does not
feel normal, you should take
immediate action. A problem in one
part of the system's dual circuit
design will still give you braking at
two wheels. You will feel the brake
pedal go down much farther before
the vehicle begins to slow down, and
you will have to press harder on the
pedal.
Slow down by shifting to a lower
gear, and pull to the side of the road
when it is safe. Because of the long
distance needed to stop, it is
hazardous to drive the vehicle. You
should have it towed and repaired as
soon as possible (see
Emergency
Towing on page 311).
If you must drive the vehicle a short
distance in this condition, drive
slowly and carefully. If the ABS indicator and the VSA
system indicator (if equipped) come
on with the brake system indicator,
have your vehicle inspected by your
dealer immediately.
Brake System Indicator
305
Taking Care of the Unexpected
2009 Fit
Page 322 of 352

CapacitiesFuel tank Approx.
10.6 US gal (40 L)
Engine oil Change
ꭧ1Including
filter 3.8 US qt (3.6 L)
Without filter 3.6 US qt (3.4 L)
Total 4.4 US qt (4.2 L)
Engine
coolant Automatic
transmission
Changeꭧ2
1.19 US gal (4.5 L)
Total 1.32 US gal (5.0 L)
Manual transmission
Change
ꭧ2
1.16 US gal (4.4 L)
Total 1.29 US gal (4.9 L)
Automatic
transmission
fluid Change
2.6 US qt (2.5 L)
Total 6.18 US qt (5.85 L)
Manual
transmisson fluid Change
1.6 US qt (1.5 L)
Total 1.7 US qt (1.6 L)
Windshield
washer reservoir U.S. Vehicles 2.6 US qt (2.5 L)
Canada Vehicles 4.8 US qt (4.5 L)
ꭧ 1: Excluding the oil remaining in the engine
ꭧ 2: Including the coolant in the reserve tank and that remaining in the engine
Reserve tank capacity:
0.116 US gal (0.44 L)
Air Conditioning
Refrigerant type HFC-134a (R-134a)
Charge quantity 13.1-14.8 oz
(370 -420 g)
Lubricant type SP-10
Lights Headlights High/Low 12 V -60/55W (HB2)
Front turn signal lights 12 V-21W (Amber)
Parking lights/side marker
lights 12 V
-3.8W (Amber)
Fog lights
ꭧ
12 V -55W (H11)
Rear turn signal lights 12 V-21W (Amber)
Stop/Taillights 12 V-21/5W
Back-up lights 12 V-16W
License plate lights 12 V-5W
Ceiling light 12 V-8W
Cargo area light 12 V-5W
Map light
ꭧ
12 V -8W
High-mount brake light LED
ꭧ : For some types
Specifications
319
Technical Information
2009 Fit
Page 329 of 352

The burning of gasoline in your
vehicle's engine produces several
byproducts. Some of these are
carbon monoxide (CO), oxides of
nitrogen (NOx), and hydrocarbons
(HC). Gasoline evaporating from the
tank also produces hydrocarbons.
Controlling the production of NOx,
CO, and HC is important to the
environment. Under certain
conditions of sunlight and climate,
NOx and HC react to form
photochemical‘‘smog. ’’Carbon
monoxide does not contribute to
smog creation, but it is a poisonous
gas.
The Clean Air Act
The United States Clean Air Act
ꭧ
sets standards for automobile
emissions. It also requires that
automobile manufacturers explain to
owners how their emissions controls
work and what to do to maintain
them. This section summarizes how
the emissions controls work.
ꭧIn Canada, Honda vehicles comply
with the Canadian emission
requirements, as specified in an
agreement with Environment
Canada, at the time they are
manufactured.
Crankcase Emissions Control
System
Your vehicle has a positive crankcase
ventilation system. This keeps
gasses that build up in the engine's
crankcase from going into the
atmosphere. The positive crankcase
ventilation valve routes them from
the crankcase back to the intake
manifold. They are then drawn into
the engine and burned. Evaporative Emissions Control
System
As gasoline evaporates in the fuel
tank, an evaporative emissions
control canister filled with charcoal
adsorbs the vapor. It is stored in this
canister while the engine is off. After
the engine is started and warmed up,
the vapor is drawn into the engine
and burned during driving.
Onboard Refueling Vapor
Recovery
The onboard refueling vapor
recovery (ORVR) system captures
the fuel vapors during refueling. The
vapors are adsorbed in a canister
filled with activated carbon. While
driving, the fuel vapors are drawn
into the engine and burned off.
Emissions Controls326
2009 Fit