Page 287 of 352

Except all Canadian models withautomatic transmissionUse the compact spare tire as a
temporary replacement only. Get
your regular tire repaired or
replaced, and put it back on your
vehicle as soon as you can.
Check the inflation pressure of the
compact spare tire every time you
check the other tires. It should be
inflated to:
60 psi (420 kPa, 4.2 kgf/cm
2) Follow these precautions:
●Never exceed 50 mph (80 km/h).●This tire gives a harsher ride and
less traction on some road
surfaces. Use greater caution while
driving.●Do not mount tire chains on the
compact spare tire.●Do not use your compact spare tire
on another vehicle unless it is the
same make and model.●On vehicles with the TPMS
system, the low tire pressure
indicator comes on and stays on
after you replace the flat tire with
the compact spare tire. After
several miles (kilometers) driving
with the compact spare tire, the
TPMS indicator comes on and the
low tire pressure indicator goes
off.
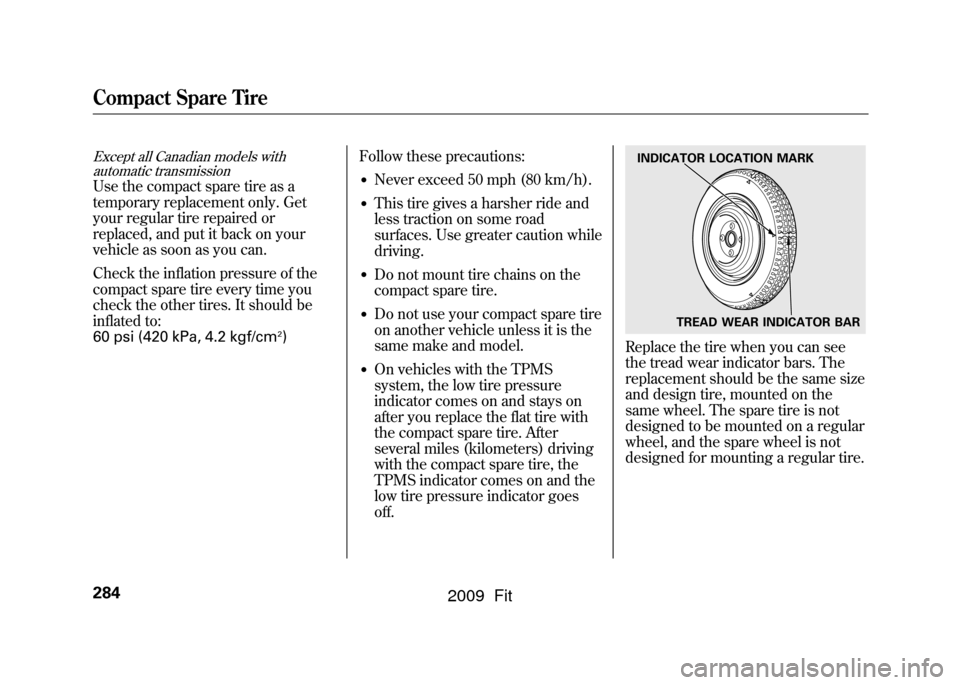
Replace the tire when you can see
the tread wear indicator bars. The
replacement should be the same size
and design tire, mounted on the
same wheel. The spare tire is not
designed to be mounted on a regular
wheel, and the spare wheel is not
designed for mounting a regular tire.INDICATOR LOCATION MARK
TREAD WEAR INDICATOR BAR
Compact Spare Tire284
2009 Fit
Page 288 of 352

Except all Canadian models withautomatic transmissionIf you have a flat tire while driving,
stop in a safe place to change it.
Drive slowly along the shoulder until
you get to an exit or an area to stop
that is far away from the traffic lanes.
The vehicle can easily roll off
the jack, seriously injuring
anyone underneath.
Follow the directions for
changing a tire exactly, and
never get under the vehicle
when it is supported only by the
jack.
1. Park the vehicle on firm, level, and non-slippery ground. Put the
transmission in Park (automatic)
or reverse (manual). Apply the
parking brake.
2. Turn on the hazard warning lights, and turn the ignition switch to the
LOCK (0) position. Have all
passengers get out of the vehicle
while you change the tire.
3. Lift the rear center head restraint.
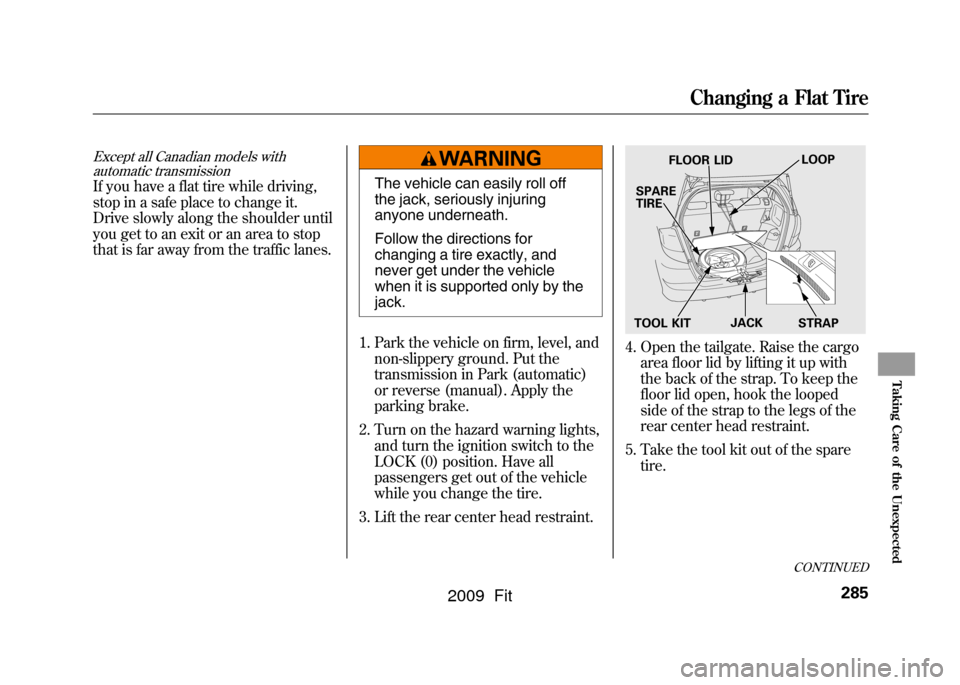
4. Open the tailgate. Raise the cargo area floor lid by lifting it up with
the back of the strap. To keep the
floor lid open, hook the looped
side of the strap to the legs of the
rear center head restraint.
5. Take the tool kit out of the spare tire.
FLOOR LID LOOP
SPARE
TIRE
TOOL KIT JACK
STRAP
CONTINUED
Changing a Flat Tire
285
Taking Care of the Unexpected
2009 Fit
Page 289 of 352
6. Take the jack out of the cargo area.Turn the jack's end bracket
counterclockwise to loosen it, then
remove the jack by lifting it
straight up.
7. Unscrew the wing bolt and take the spare tire out of its well.
8. On all models except Sport andCanadian LX model with manual
transmission, remove the wheel
cover by carefully prying under its
edge with the flat tip of the
extension.
9. Loosen each wheel nut 1/2 turnwith the wheel nut wrench.
EXTENSION WHEEL NUT
WHEEL COVER
WHEEL NUT WRENCH
Changing a Flat Tire286
2009 Fit
Page 290 of 352
10. Place the jack under the jackingpoint nearest the tire you need to
change. It is pointed to by a △
mark molded into the underside of
the body (Sport model). Turn the
end bracket clockwise until the top
of the jack contacts the jacking
point. Make sure the jacking point
tab is resting in the jack notch.
11. Use the extension and the wheel nut wrench as shown to raise the
vehicle until the flat tire is off the
ground.
12. Remove the wheel nuts, then remove the flat tire. Handle the
wheel nuts carefully; they may be
hot from driving. Place the flat tire
on the ground with the outside
surface facing up.
13. Before mounting the spare tire,wipe any dirt off the mounting
surface of the wheel and hub with
a clean cloth. Wipe the hub
carefully; it may be hot from
driving.
JACKING POINT
EXTENSION
WHEEL NUT WRENCH
BRAKE HUB
CONTINUED
Changing a Flat Tire
287
Taking Care of the Unexpected
2009 Fit
Page 291 of 352
14. Put on the spare tire. Put thewheel nuts back on finger-tight,
then tighten them in a crisscross
pattern with the wheel nut wrench
until the wheel is firmly against the
hub. Do not try to tighten the
wheel nuts fully.
15. Lower the vehicle to the ground, and remove the jack.
16. Tighten the wheel nuts securely in the same crisscross pattern. Have
the wheel nut torque checked at
the nearest automotive service
facility.
Tighten the wheel nuts to:
80 lbf·ft (108 N·m, 11 kgf·m)
17.
On Sport model and Canadian LX model with manual transmission:Remove the center cap before
storing the flat tire.
18. Remove the strap loop from the legs of the head restraint and
lower the cargo area floor lid.
19. Pull the floor lid toward you and remove the tabs.
20. Pull the floor lid out.
TAB
FLOOR LID
Changing a Flat Tire288
2009 Fit
Page 292 of 352
21. Place the flat tire face down in thespare tire well.
22. Secure the flat tire by screwing the wing bolt back into its hole. 23. Store the jack. Place the tool kit in
the center of the flat tire.
Loose items can fly around the
interior in a crash and could
seriously injure the occupants.
Store the wheel, jack, and tools
securely before driving. 24. Place the floor lid in the cargo
area.
25. Store the wheel cover or center cap in the cargo area. Make sure
will not get scratched or damaged.
26. Close the tailgate.
27.
On U.S. modelsYour vehicle's original tire has a
tire pressure monitoring system
sensor. To replace a tire, refre to
Changing a Tire with TPMS (see
page237).
For
nomal
tire For
spare
tire
CONTINUED
Changing a Flat Tire
289
Taking Care of the Unexpected
2009 Fit
Page 294 of 352

How to Use the Tire Repair KitAll Canadian models with automatictransmissionTo reduce weight, your vehicle is
equipped with a tire repair kit instead
of a spare tire. This kit will allow you
to temporarily repair a flat tire under
the following conditions:●Only one tire is flat.●The puncture is smaller than 3/
16ths of an inch (4 mm).●The puncture is located within the
tread.●The wheel rim is not damaged.●The tire bead is seated.
When making a temporary repair,
carefully follow all instructions in this
owner's manual and in the
instructions that came with the kit. If you have a flat tire while driving,
park the vehicle on a level surface in
a safe place, put the transmission in
Park (P), set the parking brake, and
turn the hazard lights on.
Thoroughly examine the tire for a
puncture or other damage.
If a puncture is wider than 3/16ths of
an inch (4 mm), or is located in the
tire sidewall, do not attempt to repair
the tire. Have your vehicle towed to a
Honda service center. In Canada or
the continental U.S.A. simply call 1-
800-465-PLUS (7587) for Honda Plus
Roadside Assistance.
If the damage is smaller than 3/16ths
of an inch (4 mm) and within the tire
tread, proceed with the following
instructions.
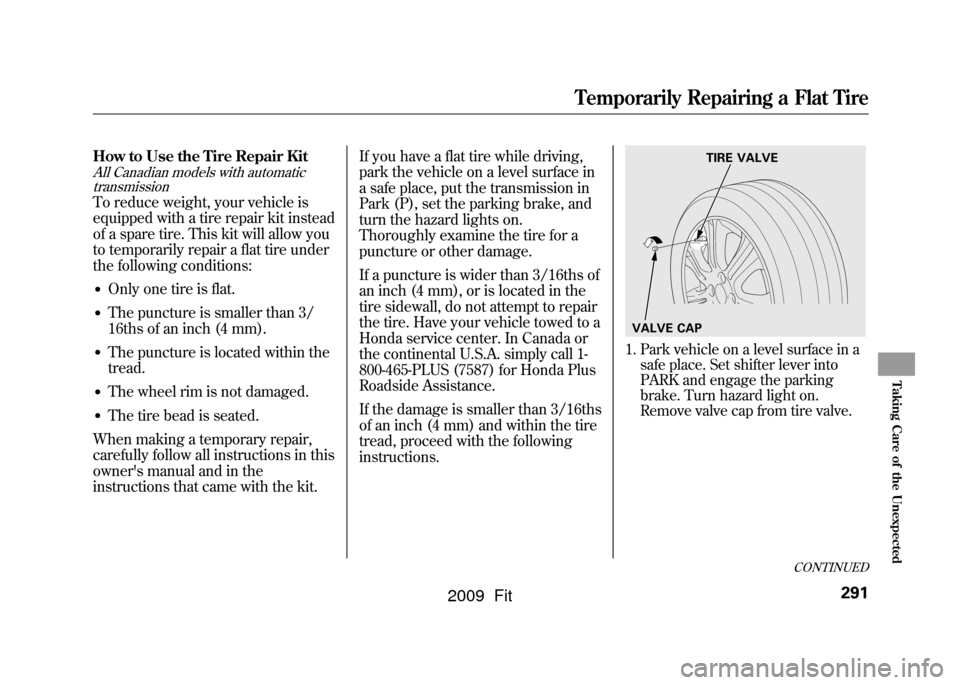
1. Park vehicle on a level surface in a
safe place. Set shifter lever into
PARK and engage the parking
brake. Turn hazard light on.
Remove valve cap from tire valve.
TIRE VALVE
VALVE CAP
CONTINUED
Temporarily Repairing a Flat Tire
291
Taking Care of the Unexpected
2009 Fit
Page 323 of 352
BatteryCapacity 12 V-32 AH/5 HR
12 V -34 AH/5 HR
12 V -40 AH/20 HR
Fuses Interior See page309or the fuse label
attached to the dashboard.
Under-hood See page310or the fuse box cover.
Alignment Toe-in Front 0.0 in (0 mm)
Rear 0.10 in (2.5 mm)
Camber Front 0°
Rear -1°
Caster Front 3°20'Tires
Size Front/Rear 175/65R15 84S
ꭧ1
185/55R16 83H
ꭧ2
Spare T125/70D15 95M
ꭧ3
T135/80D15 99M
ꭧ4
Pressure Front/Rear 32 psi (220 kPa,
2.2 kgf/cm
2)ꭧ 1
33 psi (230 kPa,
2.3 kgf/cm
2)ꭧ 2
Spare 60 psi (420 kPa,
4.2 kgf/cm
2)
ꭧ 1: All models except Sport
ꭧ 2: Sport model
ꭧ 3: On models without VSA system and all Canadian models with
manual transmission
ꭧ 4: On models with VSA system
Specifications320
2009 Fit