Page 196 of 352

On Sport modelThe security system helps to protect
your vehicle and valuables from
theft. The horn sounds and a
combination of headlights, parking/
side marker lights and taillights
flashes if someone attempts to break
into your vehicle or remove the audio
unit. This alarm continues for 2
minutes, then the system resets. To
reset an activated system before the
2 minutes have elapsed, unlock the
driver's door with the key or the
remote transmitter.
The security system automatically
sets 15 seconds after you lock the
doors, hood, and the tailgate. For the
system to activate, you must lock the
doors and the tailgate from the
outside with the key, driver's lock
tab, door lock master switch, or
remote transmitter. The security
system indicator on the instrument
panel starts blinking immediately to
show you the system is setting itself.
Once the security system is set,
opening any door, the tailgate, or the
hood without using the key or the
remote transmitter, will cause it to
alarm. It also alarms if the radio is
removed from the dashboard or the
wiring is cut.
The alarm will also be activated if a
passenger inside the locked vehicle
turns the ignition switch on.The security system will not set if the
hood, tailgate, or any door is not fully
closed. If the system will not set,
check the door and tailgate open
indicator on the instrument panel
(see page
62)to see if the doors and
tailgate are fully closed. Since it is
not part of the monitor display,
manually check the hood.
NOTE: To see if the system is set
after you exit the vehicle, press the
LOCK button on the remote
transmitter within 5 seconds. If the
system is set, the horn will beep
once.
Do not attempt to alter this system or
add other devices to it.
SECURITY SYSTEM INDICATOR
Security System
193
Features
2009 Fit
Page 200 of 352
Before you begin driving your
vehicle, you should know what
gasoline to use and how to check the
levels of important fluids. You also
need to know how to properly store
luggage or packages. The
information in this section will help
you. If you plan to add any
accessories to your vehicle, please
read the information in this section
first.Break-in Period
...........................
198
Fuel Recommendation
................
198
Service Station Procedures
.........
199
Refueling
.................................
199
Opening and Closing the Hood
...................................
200
Oil Check
................................
201
Engine Coolant Check
............
202
Fuel Economy
.............................
203
Accessories and Modifications
..........................
206
Carrying Cargo
...........................
208
Before Driving
197
Before Driving
2009 Fit
Page 203 of 352
Gasoline is highly flammable
and explosive. You can be
burned or seriously injured
when handling fuel.●Stop the engine, and keep
heat, sparks, and flame
away.●Handle fuel only outdoors.●Wipe up spills immediately.
5. Screw the fuel fill cap back on until it clicks at least once. If you do not
properly tighten the cap, the
malfunction indicator lamp may
come on (see page304).You will
also see a ‘‘CHECK FUEL CAP ’’
message on the information
display.
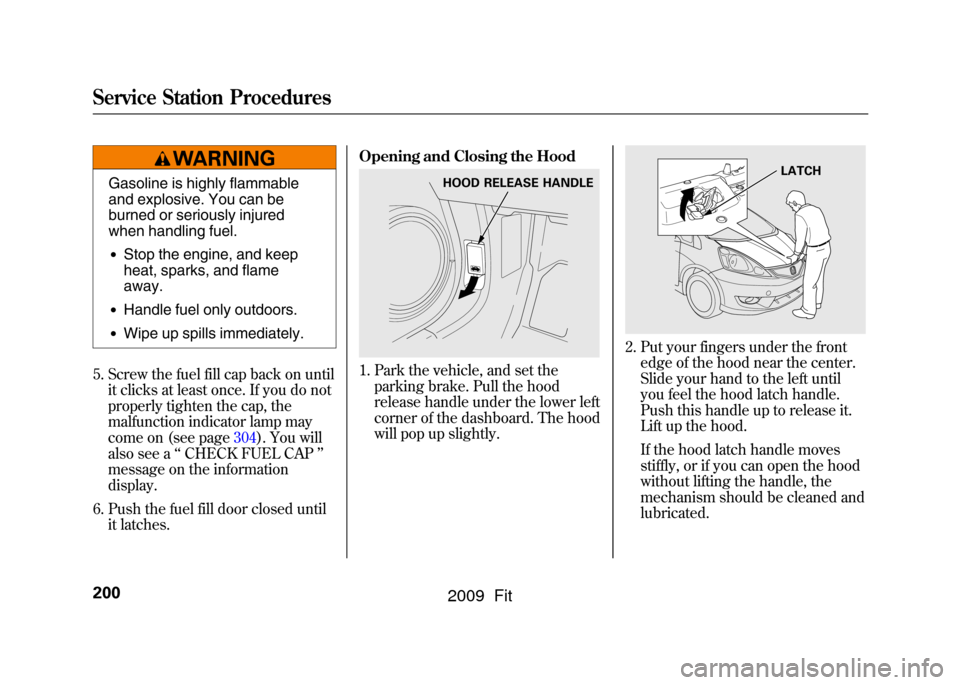
6. Push the fuel fill door closed until it latches. Opening and Closing the Hood
1. Park the vehicle, and set the
parking brake. Pull the hood
release handle under the lower left
corner of the dashboard. The hood
will pop up slightly.
2. Put your fingers under the frontedge of the hood near the center.
Slide your hand to the left until
you feel the hood latch handle.
Push this handle up to release it.
Lift up the hood.
If the hood latch handle moves
stiffly, or if you can open the hood
without lifting the handle, the
mechanism should be cleaned and
lubricated.
HOOD RELEASE HANDLE
LATCH
Service Station Procedures200
2009 Fit
Page 257 of 352
Synthetic Oil
You may use a synthetic motor oil if
it meets the same requirements
given for a conventional motor oil, it
displays the API Certification Seal,
and it is the proper weight. You must
follow the oil and filter change
intervals shown on the information
display.
Engine Oil Additives
Your vehicle does not require any oil
additives. Additives may adversely
affect the engine or transmission
performance and durability.Changing the Engine Oil and
Filter
Always change the oil and filter
according to the maintenance
messages shown on the information
display. The oil and filter collect
contaminants that can damage your
engine if they are not removed
regularly.
Changing the oil and filter requires
special tools and access from
underneath the vehicle. The vehicle
should be raised on a service station-
type hydraulic lift for this service.
Unless you have the knowledge and
proper equipment, you should have
this maintenance done by a skilled
mechanic.
1. Run the engine until it reaches
normal operating temperature,
then shut it off.
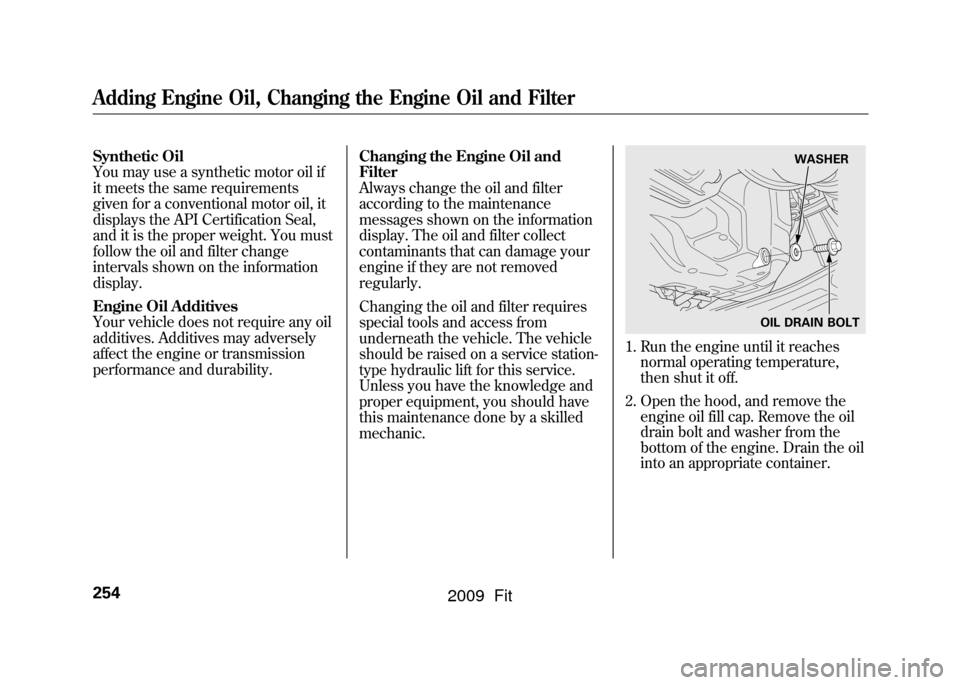
2. Open the hood, and remove the engine oil fill cap. Remove the oil
drain bolt and washer from the
bottom of the engine. Drain the oil
into an appropriate container.
WASHER
OIL DRAIN BOLT
Adding Engine Oil, Changing the Engine Oil and Filter254
2009 Fit
Page 261 of 352
Check the fluid level in the
windshield washer reservoir at least
monthly during normal use. This
reservoir supplies the windshield and
rear window washers.
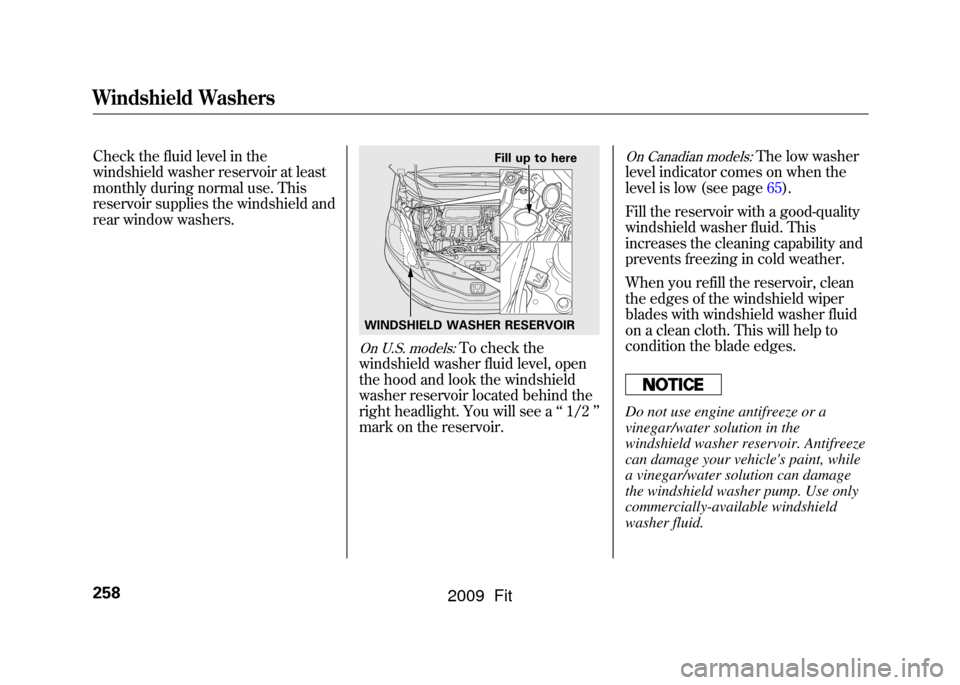
On U.S. models:
To check the
windshield washer fluid level, open
the hood and look the windshield
washer reservoir located behind the
right headlight. You will see a ‘‘1/2 ’’
mark on the reservoir.
On Canadian models:
The low washer
level indicator comes on when the
level is low (see page65).
Fill the reservoir with a good-quality
windshield washer fluid. This
increases the cleaning capability and
prevents freezing in cold weather.
When you refill the reservoir, clean
the edges of the windshield wiper
blades with windshield washer fluid
on a clean cloth. This will help to
condition the blade edges.
Do not use engine antifreeze or a
vinegar/water solution in the
windshield washer reservoir. Antifreeze
can damage your vehicle's paint, while
a vinegar/water solution can damage
the windshield washer pump. Use only
commercially-available windshield
washer fluid.
WINDSHIELD WASHER RESERVOIR Fill up to here
Windshield Washers258
2009 Fit
Page 265 of 352
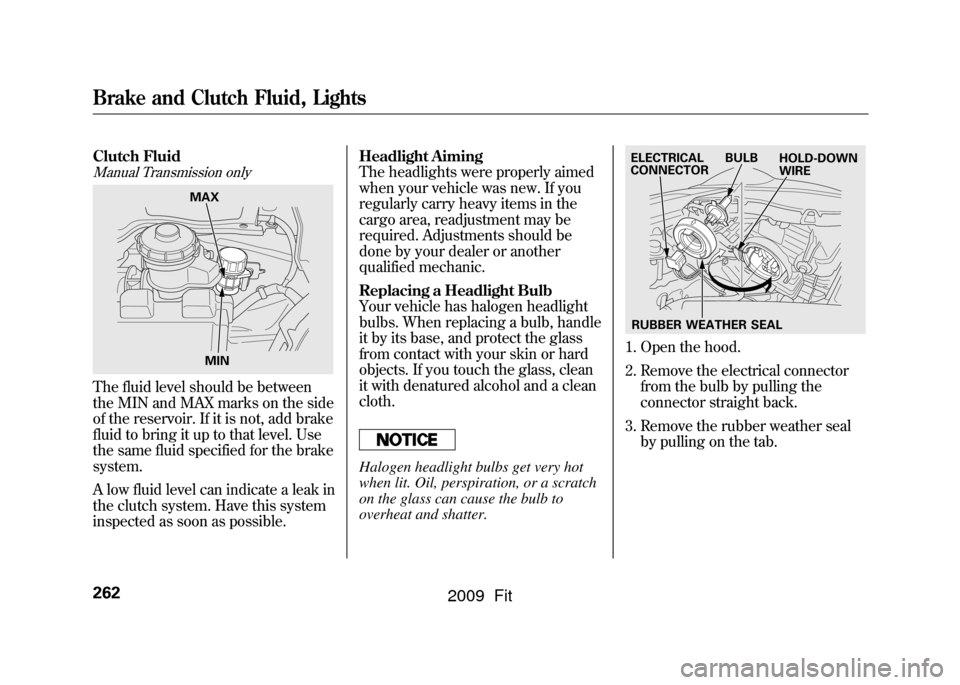
Clutch FluidManual Transmission onlyThe fluid level should be between
the MIN and MAX marks on the side
of the reservoir. If it is not, add brake
fluid to bring it up to that level. Use
the same fluid specified for the brake
system.
A low fluid level can indicate a leak in
the clutch system. Have this system
inspected as soon as possible.Headlight Aiming
The headlights were properly aimed
when your vehicle was new. If you
regularly carry heavy items in the
cargo area, readjustment may be
required. Adjustments should be
done by your dealer or another
qualified mechanic.
Replacing a Headlight Bulb
Your vehicle has halogen headlight
bulbs. When replacing a bulb, handle
it by its base, and protect the glass
from contact with your skin or hard
objects. If you touch the glass, clean
it with denatured alcohol and a clean
cloth.
Halogen headlight bulbs get very hot
when lit. Oil, perspiration, or a scratch
on the glass can cause the bulb to
overheat and shatter.
1. Open the hood.
2. Remove the electrical connector
from the bulb by pulling the
connector straight back.
3. Remove the rubber weather seal by pulling on the tab.
MAX
MIN
BULB
ELECTRICAL
CONNECTOR
RUBBER WEATHER SEAL HOLD-DOWN
WIRE
Brake and Clutch Fluid, Lights262
2009 Fit
Page 266 of 352
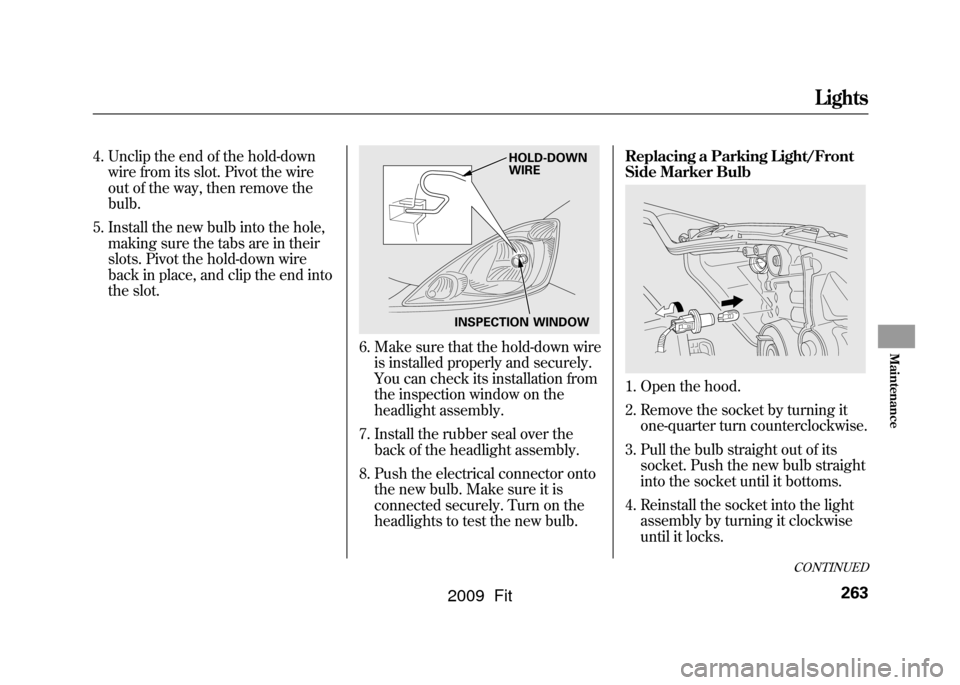
4. Unclip the end of the hold-downwire from its slot. Pivot the wire
out of the way, then remove the
bulb.
5. Install the new bulb into the hole, making sure the tabs are in their
slots. Pivot the hold-down wire
back in place, and clip the end into
the slot.
6. Make sure that the hold-down wireis installed properly and securely.
You can check its installation from
the inspection window on the
headlight assembly.
7. Install the rubber seal over the back of the headlight assembly.
8. Push the electrical connector onto the new bulb. Make sure it is
connected securely. Turn on the
headlights to test the new bulb. Replacing a Parking Light/Front
Side Marker Bulb
1. Open the hood.
2. Remove the socket by turning it
one-quarter turn counterclockwise.
3. Pull the bulb straight out of its socket. Push the new bulb straight
into the socket until it bottoms.
4. Reinstall the socket into the light assembly by turning it clockwise
until it locks.
INSPECTION WINDOW HOLD-DOWN
WIRE
CONTINUED
Lights
263
Maintenance
2009 Fit
Page 267 of 352
5. Turn on the lights to make surethe new bulb is working.
Replacing a Front Turn Signal
Light Bulb1. Open the hood.
2. Remove the socket by turning it one-quarter turn counterclockwise.
3. Remove the bulb from the socket by pushing the bulb in and turning
it counterclockwise until it unlocks.
4. Install the new bulb in the socket. Turn it clockwise to lock it in place. 5. Reinstall the socket into the light
assembly by turning it clockwise
until it locks.
6. Turn on the lights to make sure the new bulb is working.
Lights264
2009 Fit