2009 GMC SIERRA 1500 trailer
[x] Cancel search: trailerPage 205 of 602

Reading Lamps
For vehicles with reading lamps, they are located on the
overhead console.
To turn on the reading lamps, press the button located
next to each lamp. To turn them off, press the button
again.
The vehicle may also have reading lamps in other
locations. To turn the lamps on or off, press the button
located next to the lamp.
If the vehicle has a DVD Rear Seat Entertainment (RSE)
system, press the lamp lenses to turn the lamps on or off.
The lamps are �xed and cannot be adjusted.
Cargo Lamp
The cargo lamps come on by turning the instrument panel
brightness control knob to the farthest clockwise position.
This knob is located on the instrument panel and also
turns on the dome lamps.
The cargo lamp can be used if more light is needed
in the cargo area of the vehicle or in the top-box
storage units.
Electric Power Management
The vehicle has Electric Power Management (EPM) that
estimates the battery’s temperature and state of charge.
It then adjusts the voltage for best performance and
extended life of the battery.
When the battery’s state of charge is low, the voltage is
raised slightly to quickly bring the charge back up. When
the state of charge is high, the voltage is lowered slightly
to prevent overcharging. If the vehicle has a voltmeter
gage or a voltage display on the Driver Information
Center (DIC), you may see the voltage move up or down.
This is normal. If there is a problem, an alert will be
displayed.
The battery can be discharged at idle if the electrical
loads are very high. This is true for all vehicles. This is
because the generator (alternator) may not be spinning
fast enough at idle to produce all the power that is
needed for very high electrical loads.
A high electrical load occurs when several of the following
are on, such as: headlamps, high beams, fog lamps, rear
window defogger, climate control fan at high speed,
heated seats, engine cooling fans, trailer loads, and loads
plugged into accessory power outlets.
3-21
Page 230 of 602

If the check engine light comes on and stays on, while
the engine is running, this indicates that there is an
OBD II problem and service is required.
Malfunctions often are indicated by the system before any
problem is apparent. Being aware of the light can prevent
more serious damage to the vehicle. This system assists
the service technician in correctly diagnosing any
malfunction.
Notice:If the vehicle is continually driven with this
light on, after a while, the emission controls might
not work as well, the vehicle’s fuel economy might
not be as good, and the engine might not run as
smoothly. This could lead to costly repairs that
might not be covered by the vehicle warranty.
Notice:Modi�cations made to the engine,
transmission, exhaust, intake, or fuel system of the
vehicle or the replacement of the original tires with
other than those of the same Tire Performance
Criteria (TPC) can affect the vehicle’s emission
controls and can cause this light to come on.
Modi�cations to these systems could lead to
costly repairs not covered by the vehicle warranty.
This could also result in a failure to pass a
required Emission Inspection/Maintenance test.
SeeAccessories and Modifications on page 5-4.This light comes on during a malfunction in one of
two ways:
Light Flashing:A mis�re condition has been detected.
A mis�re increases vehicle emissions and could damage
the emission control system on the vehicle. Diagnosis
and service might be required.
To prevent more serious damage to the vehicle:
Reduce vehicle speed.
Avoid hard accelerations.
Avoid steep uphill grades.
If towing a trailer, reduce the amount of cargo being
hauled as soon as it is possible.
If the light continues to �ash, when it is safe to do so, stop
the vehicle. Find a safe place to park the vehicle. Turn the
key off, wait at least 10 seconds, and restart the engine.
If the light is still �ashing, follow the previous steps and
see your dealer/retailer for service as soon as possible.
3-46
Page 238 of 602

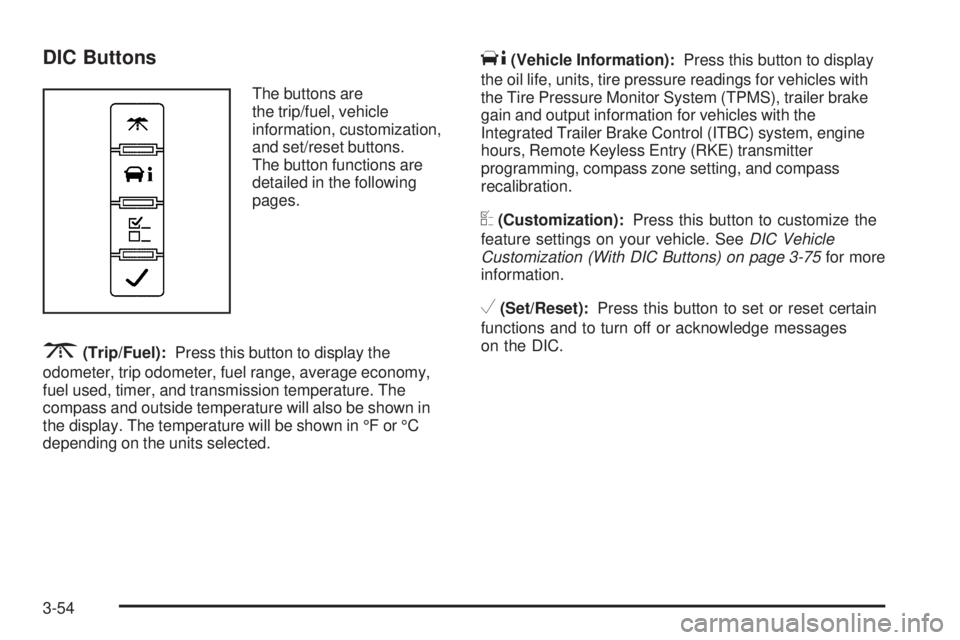
DIC Buttons
The buttons are
the trip/fuel, vehicle
information, customization,
and set/reset buttons.
The button functions are
detailed in the following
pages.
3(Trip/Fuel):Press this button to display the
odometer, trip odometer, fuel range, average economy,
fuel used, timer, and transmission temperature. The
compass and outside temperature will also be shown in
the display. The temperature will be shown in °F or °C
depending on the units selected.
T(Vehicle Information):Press this button to display
the oil life, units, tire pressure readings for vehicles with
the Tire Pressure Monitor System (TPMS), trailer brake
gain and output information for vehicles with the
Integrated Trailer Brake Control (ITBC) system, engine
hours, Remote Keyless Entry (RKE) transmitter
programming, compass zone setting, and compass
recalibration.
U(Customization):Press this button to customize the
feature settings on your vehicle. SeeDIC Vehicle
Customization (With DIC Buttons) on page 3-75for more
information.
V(Set/Reset):Press this button to set or reset certain
functions and to turn off or acknowledge messages
on the DIC.
3-54
Page 242 of 602

Tire Pressure
If your vehicle has the Tire Pressure Monitor System
(TPMS), the pressure for each tire can be viewed in the
DIC. The tire pressure will be shown in either pounds per
square inch (psi) or kilopascals (kPa). Press the vehicle
information button until the DIC displays FRONT TIRES
PSI (kPa) LEFT ## RIGHT ##. Press the vehicle
information button again until the DIC displays REAR
TIRES PSI (kPa) LEFT ## RIGHT ##.
If a low or high tire pressure condition is detected by the
system while driving, a message advising you to check
the pressure in a speci�c tire will appear in the display.
SeeInflation - Tire Pressure on page 5-76andDIC
Warnings and Messages on page 3-66for more
information.
If the tire pressure display shows dashes instead of a
value, there may be a problem with your vehicle. If this
consistently occurs, see your dealer/retailer for service.
Trailer Gain and Output
On vehicles with the Integrated Trailer Brake Control
(ITBC) system, the trailer brake display appears in the
DIC. Press the vehicle information button until TRAILER
GAIN and OUTPUT display.TRAILER GAIN shows the trailer gain setting. This
setting can be adjusted from 0.0 to 10.0 with either a
trailer connected or disconnected. To adjust this setting,
see “Integrated Trailer Brake Control System” under
Towing a Trailer on page 4-53for more information.
OUTPUT shows the power output to the trailer anytime
a trailer with electric brakes is connected. Output is
displayed in 0 to 10 bars. Dashes may appear in
the OUTPUT display. See “Integrated Trailer Brake
Control System” underTowing a Trailer on page 4-53
for more information.
Engine Hours
Press the vehicle information button until ENGINE
HOURS displays. This display shows the total number
of hours the engine has run.
Relearn Remote Key
This display allows you to match Remote Keyless Entry
(RKE) transmitters to your vehicle. To match an RKE
transmitter to your vehicle:
1. Press the vehicle information button until PRESS
V
TO RELEARN REMOTE KEY displays.
2. Press the set/reset button until REMOTE KEY
LEARNING ACTIVE is displayed.
3-58
Page 243 of 602

3. Press and hold the lock and unlock buttons on the
�rst transmitter at the same time for about
15 seconds.
On vehicles with memory recall seats, the �rst
transmitter learned will match driver 1 and
the second will match driver 2.
A chime will sound indicating that the transmitter is
matched.
4. To match additional transmitters at this time, repeat
Step 3.
Each vehicle can have a maximum of eight
transmitters matched to it.
5. To exit the programming mode, you must cycle the
key to LOCK/OFF.
Compass Zone Setting
This display allows for setting the compass zone. See
DIC Compass on page 3-63for more information.
Compass Recalibration
This display allows for calibrating the compass. SeeDIC
Compass on page 3-63for more information.
Blank Display
This display shows no information.
DIC Operation and Displays
(Without DIC Buttons)
If your vehicle does not have DIC buttons, the
information below explains the operation of this system.
The DIC has different displays which can be accessed
by pressing the trip odometer reset stem located on the
instrument panel cluster. Pressing the trip odometer reset
stem will also turn off, or acknowledge, DIC messages.
The DIC displays trip and vehicle system information,
and warning messages if a system problem is detected.
If your vehicle does not have DIC buttons, you can use
the trip odometer reset stem to view the following
displays: odometer, engine hours, trip odometer,
transmission temperature, trailer brake gain and output
information for vehicles with the Integrated Trailer Brake
Control (ITBC) system, compass zone setting, compass
recalibration, oil life, Tire Pressure Monitor System
(TPMS) programming for vehicles with the TPMS,
Remote Keyless Entry (RKE) transmitter programming,
and display language.
If your vehicle has DIC buttons, you can use the trip
odometer reset stem to view the following displays:
odometer, engine hours, trip odometer, and display
language.
3-59
Page 245 of 602

Trailer Gain and Output
On vehicles with the Integrated Trailer Brake Control
(ITBC) system, the trailer brake display appears in the
DIC. Press the trip odometer reset stem until TRAILER
GAIN and OUTPUT display.
TRAILER GAIN shows the trailer gain setting. This
setting can be adjusted from 0.0 to 10.0 with either a
trailer connected or disconnected. To adjust this setting,
see “Integrated Trailer Brake Control System” under
Towing a Trailer on page 4-53for more information.
OUTPUT shows the power output to the trailer anytime
a trailer with electric brakes is connected. Output is
displayed in 0 to 10 bars. Dashes may appear in
the OUTPUT display. See “Integrated Trailer Brake
Control System” underTowing a Trailer on page 4-53
for more information.
Compass Zone Setting
This display allows for setting the compass zone. See
DIC Compass on page 3-63for more information.
Compass Recalibration
This display allows for calibrating the compass. SeeDIC
Compass on page 3-63for more information.
Oil Life
To access this display, the vehicle must be in P (Park).
Press the trip odometer reset stem until OIL LIFE
REMAINING displays. This display shows an estimate of
the oil’s remaining useful life. If you see 99% OIL LIFE
REMAINING on the display, that means 99% of the
current oil life remains. The engine oil life system will alert
you to change the oil on a schedule consistent with your
driving conditions.
When the remaining oil life is low, the CHANGE ENGINE
OIL SOON message will appear on the display. See
“CHANGE ENGINE OIL SOON” underDIC Warnings
and Messages on page 3-66. You should change the
oil as soon as you can. SeeEngine Oil on page 5-17.
In addition to the engine oil life system monitoring the oil
life, additional maintenance is recommended in the
Maintenance Schedule in this manual. SeeScheduled
Maintenance (Gasoline Engine) on page 6-4for more
information.
Remember, you must reset the OIL LIFE display yourself
after each oil change. It will not reset itself. Also, be
careful not to reset the OIL LIFE display accidentally at
any time other than when the oil has just been changed.
It cannot be reset accurately until the next oil change.
To reset the engine oil life system, seeEngine Oil Life
System on page 5-20.
3-61
Page 251 of 602

CHECK TRAILER WIRING
On vehicles with the Integrated Trailer Brake Control
(ITBC) system, this message may display and a chime
may sound when one of the following conditions exists:
A trailer with electric brakes becomes disconnected
from the vehicle.
� If the disconnect occurs while the vehicle is
stopped, this message clears itself after a
short time.
� If the disconnect occurs while the vehicle is
moving, this message stays on until the ignition
is turned off.
There is a short in the wiring to the electric trailer
brakes.
When this message displays, power is no longer
available to the trailer brakes.
As soon as it is safe to do so, carefully pull your vehicle
over to the side of the road and turn the ignition off.
Check the wiring connection to the trailer and turn the
ignition back on. This message clears if the trailer
is reconnected. This message also clears if you
acknowledge it. If this message still displays, either
your vehicle or the trailer needs service. See your
dealer/retailer.
See “Integrated Trailer Brake Control System” under
Towing a Trailer on page 4-53for more information.
DRIVER DOOR OPEN
This message displays and a chime sounds if the driver
door is not fully closed and the vehicle is shifted out of
P (Park). Stop and turn off the vehicle, check the door for
obstructions, and close the door again. Check to see if
the message still appears on the DIC.
ENGINE HOT A/C (Air Conditioning)
TURNED OFF
This message displays when the engine coolant
becomes hotter than the normal operating temperature.
SeeEngine Coolant Temperature Gage (US-Canada)
on page 3-44. To avoid added strain on a hot engine,
the air conditioning compressor automatically turns
off. When the coolant temperature returns to normal, the
air conditioning compressor turns back on. You can
continue to drive your vehicle.
If this message continues to appear, have the system
repaired by your dealer/retailer as soon as possible
to avoid damage to the engine.
ENGINE OIL HOT IDLE ENGINE
This message displays when the engine oil becomes
hotter than the normal operating temperature. Stop and
allow the vehicle to idle until it cools down. SeeEngine
Coolant Temperature Gage (US-Canada) on page 3-44.
3-67
Page 257 of 602

SERVICE TRAILER BRAKE SYSTEM
On vehicles with the Integrated Trailer Brake Control
(ITBC) system, this message displays and a chime
sounds when there is a problem with the ITBC system.
When this message displays, power is no longer
available to the trailer brakes.
As soon as it is safe to do so, carefully pull your vehicle
over to the side of the road and turn the ignition off.
Check the wiring connection to the trailer and turn the
ignition back on. If this message still displays, either
your vehicle or the trailer needs service. See your
dealer/retailer.
See “Integrated Trailer Brake Control System” under
Towing a Trailer on page 4-53for more information.
STABILITRAK OFF
If your vehicle has StabiliTrak, this message displays
when you turn off StabiliTrak, or when the stability control
has been automatically disabled. To limit wheel spin and
realize the full bene�ts of the stability enhancement
system, you should normally leave StabiliTrak on.
However, you should turn StabiliTrak off if your vehicle
gets stuck in sand, mud, ice, or snow and you want to
rock your vehicle to attempt to free it, or if you are drivingin extreme off-road conditions and require more wheel
spin. SeeIf Your Vehicle is Stuck in Sand, Mud, Ice, or
Snow on page 4-32. To turn the StabiliTrak system on or
off, seeStabiliTrak
®System on page 4-6.
There are several conditions that can cause this
message to appear.
One condition is overheating, which could occur if
StabiliTrak®activates continuously for an extended
period of time.
The message also displays if the brake system
warning light is on. SeeBrake System Warning
Light on page 3-42.
The message could display if the stability system
takes longer than usual to complete its diagnostic
checks due to driving conditions.
The message displays if an engine or vehicle
related problem has been detected and the vehicle
needs service. See your dealer/retailer.
The message also displays if the vehicle is shifted
into 4LO.
The message turns off as soon as the conditions that
caused the message to be displayed are no longer
present.
3-73