2009 GMC SAVANA PASSENGER fuel pressure
[x] Cancel search: fuel pressurePage 4 of 406
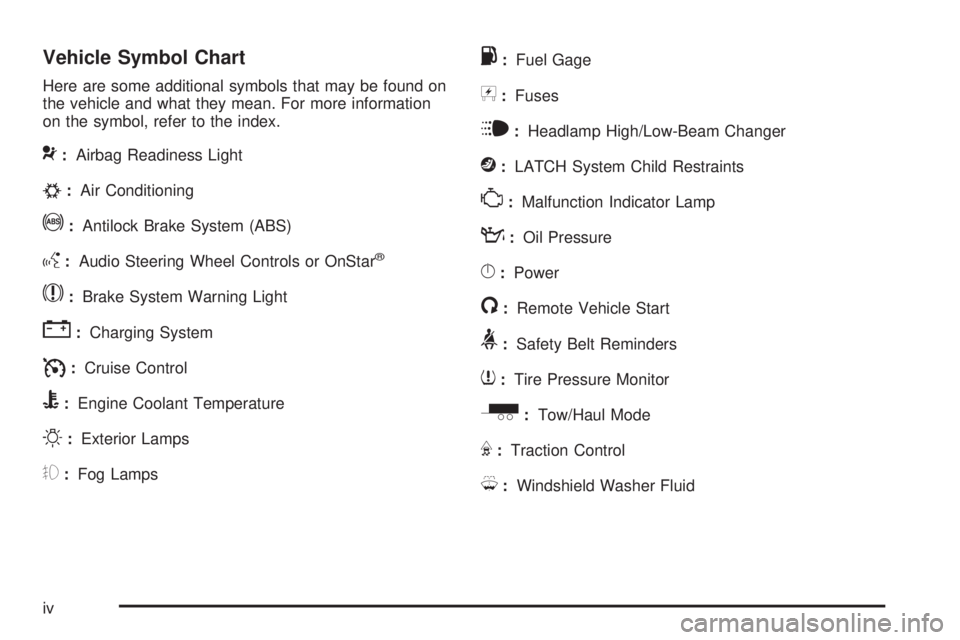
Vehicle Symbol Chart
Here are some additional symbols that may be found on
the vehicle and what they mean. For more information
on the symbol, refer to the index.
9:Airbag Readiness Light
#:Air Conditioning
!:Antilock Brake System (ABS)
g:Audio Steering Wheel Controls or OnStar®
$:Brake System Warning Light
":Charging System
I:Cruise Control
B:Engine Coolant Temperature
O:Exterior Lamps
#:Fog Lamps
.:Fuel Gage
+:Fuses
i:Headlamp High/Low-Beam Changer
j:LATCH System Child Restraints
*:Malfunction Indicator Lamp
::Oil Pressure
}:Power
/:Remote Vehicle Start
>:Safety Belt Reminders
7:Tire Pressure Monitor
_:Tow/Haul Mode
F:Traction Control
M:Windshield Washer Fluid
iv
Page 152 of 406

Tire Pressure Light
For vehicles with a tire
pressure monitoring
system, this light comes on
briefly when the engine
is started.
It provides information about tire pressures and the Tire
Pressure Monitoring System.
When the Light is On Steady
This indicates that one or more of the tires is significantly
underinflated.
A tire pressure message in the Driver Information
Center (DIC), can accompany the light. SeeDIC
Warnings and Messages on page 3-48for more
information. Stop and check the tires as soon as it is
safe to do so. If a tire is underinflated, inflate to the
proper pressure. SeeTires on page 5-55for more
information.
When the Light Flashes First and Then is
On Steady
This indicates that there could be a problem with the
Tire Pressure Monitor System. The light flashes
for about a minute and stays on steady for the remainder
of the ignition cycle. This sequence repeats with
every ignition cycle. SeeTire Pressure Monitor System
on page 5-65for more information.
Malfunction Indicator Lamp
Check Engine Light
A computer system called OBD II (On-Board
Diagnostics-Second Generation) monitors operation
of the fuel, ignition, and emission control systems.
It ensures that emissions are at acceptable levels for
the life of the vehicle, helping to produce a cleaner
environment.
This light should come on
when the ignition is on, but
the engine is not running,
as a check to show it
is working. If it does not,
have the vehicle serviced
by your dealer/retailer.
3-34
Page 160 of 406
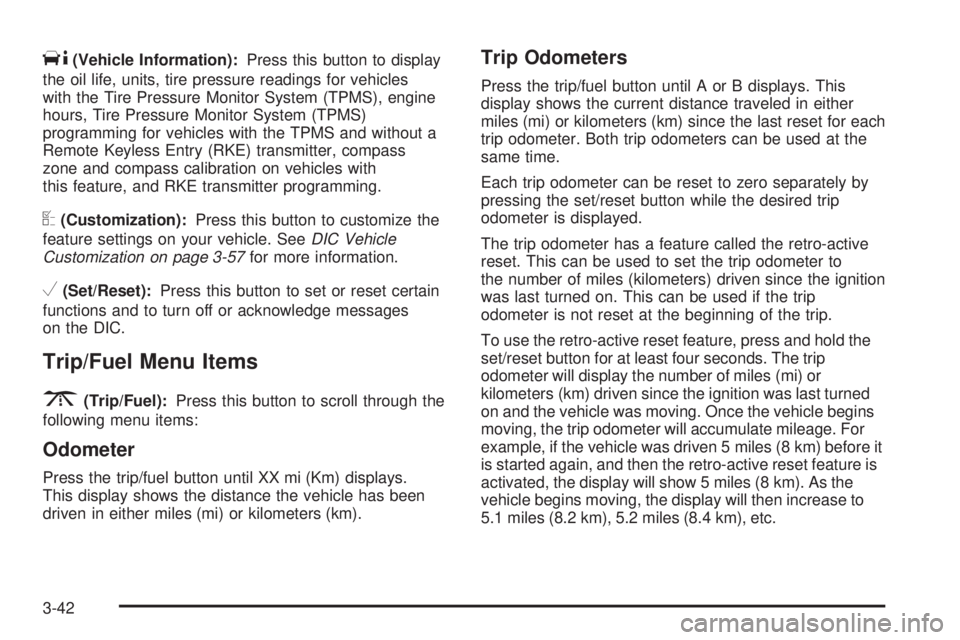
T(Vehicle Information):Press this button to display
the oil life, units, tire pressure readings for vehicles
with the Tire Pressure Monitor System (TPMS), engine
hours, Tire Pressure Monitor System (TPMS)
programming for vehicles with the TPMS and without a
Remote Keyless Entry (RKE) transmitter, compass
zone and compass calibration on vehicles with
this feature, and RKE transmitter programming.
U(Customization):Press this button to customize the
feature settings on your vehicle. SeeDIC Vehicle
Customization on page 3-57for more information.
V(Set/Reset):Press this button to set or reset certain
functions and to turn off or acknowledge messages
on the DIC.
Trip/Fuel Menu Items
3
(Trip/Fuel):Press this button to scroll through the
following menu items:
Odometer
Press the trip/fuel button until XX mi (Km) displays.
This display shows the distance the vehicle has been
driven in either miles (mi) or kilometers (km).
Trip Odometers
Press the trip/fuel button until A or B displays. This
display shows the current distance traveled in either
miles (mi) or kilometers (km) since the last reset for each
trip odometer. Both trip odometers can be used at the
same time.
Each trip odometer can be reset to zero separately by
pressing the set/reset button while the desired trip
odometer is displayed.
The trip odometer has a feature called the retro-active
reset. This can be used to set the trip odometer to
the number of miles (kilometers) driven since the ignition
was last turned on. This can be used if the trip
odometer is not reset at the beginning of the trip.
To use the retro-active reset feature, press and hold the
set/reset button for at least four seconds. The trip
odometer will display the number of miles (mi) or
kilometers (km) driven since the ignition was last turned
on and the vehicle was moving. Once the vehicle begins
moving, the trip odometer will accumulate mileage. For
example, if the vehicle was driven 5 miles (8 km) before it
is started again, and then the retro-active reset feature is
activated, the display will show 5 miles (8 km). As the
vehicle begins moving, the display will then increase to
5.1 miles (8.2 km), 5.2 miles (8.4 km), etc.
3-42
Page 174 of 406

TIGHTEN GAS CAP
This message may display and a chime may be heard
along with the check engine light on the instrument
panel cluster if the vehicle’s fuel cap is not tightened
properly. SeeMalfunction Indicator Lamp on page 3-34.
Reinstall the fuel cap fully. SeeFilling the Tank on
page 5-10. The diagnostic system can determine if
the fuel cap has been left off or improperly installed.
A loose or missing fuel cap allows fuel to evaporate
into the atmosphere. A few driving trips with the
cap properly installed should turn this light and
message off.
TIRE LEARNING ACTIVE
If your vehicle has the Tire Pressure Monitor System
(TPMS), this message displays when the system
is re-learning the tire positions on your vehicle.
SeeDIC Operation and Displays on page 3-41for more
information. The tire positions must be re-learned
after rotating the tires or after replacing a tire or sensor.
SeeTire Inspection and Rotation on page 5-70,
Tire Pressure Monitor System on page 5-65, and
Inflation - Tire Pressure on page 5-63for more
information.
TRACTION CONTROL OFF
If your vehicle has StabiliTrak, this message displays
when the Traction Control System (TCS) is turned
off. Adjust your driving accordingly. SeeStabiliTrak
®
System on page 4-6for more information.
TRANSMISSION HOT IDLE ENGINE
Notice:If you drive your vehicle while the
transmission �uid is overheating and the
transmission temperature warning is displayed on
the instrument panel cluster and/or DIC, you
can damage the transmission. This could lead to
costly repairs that would not be covered by
your warranty. Do not drive your vehicle with
overheated transmission �uid or while the
transmission temperature warning is displayed.
This message displays along with a chime if the
transmission fluid in the vehicle gets hot. Driving with
the transmission fluid temperature high can cause
damage to the vehicle. Stop the vehicle and let it idle to
allow the transmission to cool. This message clears
and the chime stops when the fluid temperature reaches
a safe level.
TURN SIGNAL ON
This message displays and a chime sounds if a turn
signal is left on for 3/4 of a mile (1.2 km). Move the turn
signal/multifunction lever to the off position.
3-56
Page 215 of 406
Hydroplaning
Hydroplaning is dangerous. Water can build up under
your vehicle’s tires so they actually ride on the
water. This can happen if the road is wet enough and
you are going fast enough. When your vehicle is
hydroplaning, it has little or no contact with the road.
There is no hard and fast rule about hydroplaning.
The best advice is to slow down when the road is wet.
Other Rainy Weather Tips
Besides slowing down, other wet weather driving tips
include:
•Allow extra following distance.
•Pass with caution.
•Keep windshield wiping equipment in good shape.
•Keep the windshield washer fluid reservoir filled.
•Have good tires with proper tread depth. SeeTires
on page 5-55.
•Turn off cruise control.
Before Leaving on a Long Trip
To prepare your vehicle for a long trip, consider having it
serviced by your dealer/retailer before departing.
Things to check on your own include:
•Windshield Washer Fluid:Reservoir full? Windows
clean — inside and outside?
•Wiper Blades:In good shape?
•Fuel, Engine Oil, Other Fluids:All levels checked?
•Lamps:Do they all work and are lenses clean?
•Tires:Are treads good? Are tires inflated to
recommended pressure?
•Weather and Maps:Safe to travel? Have
up-to-date maps?
4-13
Page 224 of 406
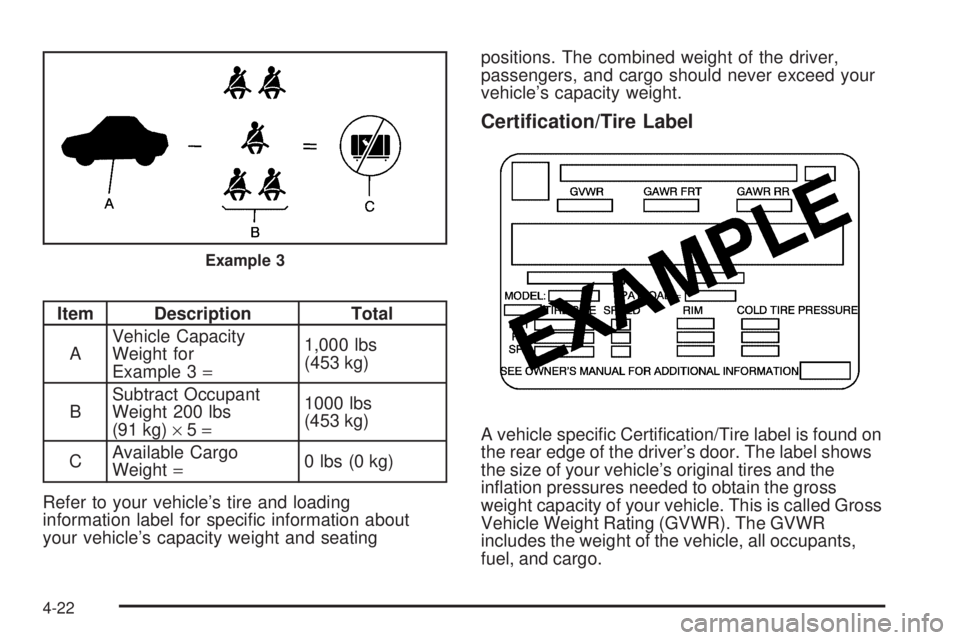
Item Description Total
AVehicle Capacity
Weight for
Example 3=1,000 lbs
(453 kg)
BSubtract Occupant
Weight 200 lbs
(91 kg)×5=1000 lbs
(453 kg)
CAvailable Cargo
Weight=0 lbs (0 kg)
Refer to your vehicle’s tire and loading
information label for specific information about
your vehicle’s capacity weight and seatingpositions. The combined weight of the driver,
passengers, and cargo should never exceed your
vehicle’s capacity weight.
Certi�cation/Tire Label
A vehicle specific Certification/Tire label is found on
the rear edge of the driver’s door. The label shows
the size of your vehicle’s original tires and the
inflation pressures needed to obtain the gross
weight capacity of your vehicle. This is called Gross
Vehicle Weight Rating (GVWR). The GVWR
includes the weight of the vehicle, all occupants,
fuel, and cargo.
Example 3
4-22
Page 243 of 406
Service............................................................5-3
Accessories and Modifications..........................5-3
California Proposition 65 Warning.....................5-4
California Perchlorate Materials Requirements.....5-4
Doing Your Own Service Work.........................5-4
Adding Equipment to the Outside of the
Vehicle......................................................5-5
Fuel................................................................5-5
Gasoline Octane............................................5-6
Gasoline Specifications....................................5-6
California Fuel...............................................5-6
Additives.......................................................5-7
Fuel E85 (85% Ethanol)..................................5-8
Fuels in Foreign Countries...............................5-9
Filling the Tank............................................5-10
Filling a Portable Fuel Container.....................5-12
Checking Things Under the Hood....................5-12
Hood Release..............................................5-13
Engine Compartment Overview.......................5-14
Engine Oil...................................................5-15
Engine Oil Life System..................................5-18
Engine Air Cleaner/Filter................................5-20
Automatic Transmission Fluid.........................5-21
Cooling System............................................5-24
Engine Coolant.............................................5-25Radiator Pressure Cap..................................5-31
Engine Overheating.......................................5-31
Engine Fan Noise.........................................5-33
Power Steering Fluid.....................................5-34
Windshield Washer Fluid................................5-35
Brakes........................................................5-36
Battery........................................................5-39
Jump Starting...............................................5-40
All-Wheel Drive..............................................5-45
Rear Axle
.......................................................5-46
Front Axle......................................................5-46
Noise Control System.....................................5-47
Tampering with Noise Control System
Prohibited.................................................5-47
Bulb Replacement..........................................5-49
Halogen Bulbs..............................................5-49
Headlamps..................................................5-49
Front Turn Signal, Sidemarker and
Parking Lamps..........................................5-51
Center High-Mounted Stoplamp (CHMSL).........5-52
Taillamps.....................................................5-52
Replacement Bulbs.......................................5-53
Windshield Wiper Blade Replacement..............5-54
Section 5 Service and Appearance Care
5-1
Page 257 of 406
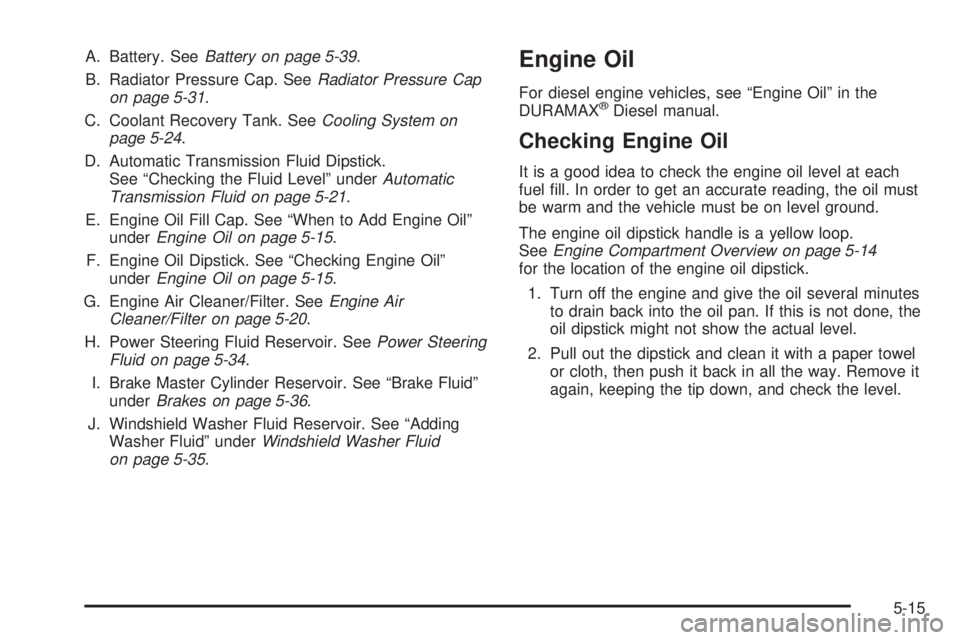
A. Battery. SeeBattery on page 5-39.
B. Radiator Pressure Cap. SeeRadiator Pressure Cap
on page 5-31.
C. Coolant Recovery Tank. SeeCooling System on
page 5-24.
D. Automatic Transmission Fluid Dipstick.
See “Checking the Fluid Level” underAutomatic
Transmission Fluid on page 5-21.
E. Engine Oil Fill Cap. See “When to Add Engine Oil”
underEngine Oil on page 5-15.
F. Engine Oil Dipstick. See “Checking Engine Oil”
underEngine Oil on page 5-15.
G. Engine Air Cleaner/Filter. SeeEngine Air
Cleaner/Filter on page 5-20.
H. Power Steering Fluid Reservoir. SeePower Steering
Fluid on page 5-34.
I. Brake Master Cylinder Reservoir. See “Brake Fluid”
underBrakes on page 5-36.
J. Windshield Washer Fluid Reservoir. See “Adding
Washer Fluid” underWindshield Washer Fluid
on page 5-35.Engine Oil
For diesel engine vehicles, see “Engine Oil” in the
DURAMAX®Diesel manual.
Checking Engine Oil
It is a good idea to check the engine oil level at each
fuel fill. In order to get an accurate reading, the oil must
be warm and the vehicle must be on level ground.
The engine oil dipstick handle is a yellow loop.
SeeEngine Compartment Overview on page 5-14
for the location of the engine oil dipstick.
1. Turn off the engine and give the oil several minutes
to drain back into the oil pan. If this is not done, the
oil dipstick might not show the actual level.
2. Pull out the dipstick and clean it with a paper towel
or cloth, then push it back in all the way. Remove it
again, keeping the tip down, and check the level.
5-15