2009 GMC SAVANA PASSENGER park assist
[x] Cancel search: park assistPage 104 of 406
Retained Accessory Power (RAP)
These vehicle accessories can be used for up to
10 minutes after the engine is turned off:
•Audio System
•Power Windows (if equipped)
These features will work when the ignition key is in
ON/RUN or ACC/ACCESSORY. Once the key is turned
from ON/RUN to LOCK/OFF, power to the radio will
continue to work 10 minutes or until the driver door is
opened. The power windows will continue to work for up
to 10 minutes or until any door is opened.
Starting the Engine
If the vehicle has the DURAMAX®Diesel engine, see
the DURAMAX®Diesel manual for more information.
To place the transmission in the proper gear:
Move the shift lever to P (Park) or N (Neutral). The
engine will not start in any other position. To restart the
engine when the vehicle is already moving, use
N (Neutral) only.
Starting Procedure
1. With your foot off the accelerator pedal, turn the
ignition key to START. When the engine starts,
let go of the key. The idle speed will go down as
your engine gets warm. Do not race the engine
immediately after starting it. Operate the engine and
transmission gently to allow the oil to warm up
and lubricate all moving parts.
The vehicle has a Computer-Controlled Cranking
System. This feature assists in starting the engine
and protects components. If the ignition key is turned
to the START position, and then released when the
engine begins cranking, the engine will continue
cranking for a few seconds or until the vehicle starts.
If the engine does not start and the key is held in
START for many seconds, cranking will be stopped
after 15 seconds to prevent cranking motor damage.
To prevent gear damage, this system also prevents
cranking if the engine is already running. Engine
cranking can be stopped by turning the ignition
switch to the ACC/ACCESSORY or LOCK/OFF
position.
Notice:Cranking the engine for long periods of
time, by returning the key to the START position
immediately after cranking has ended, can overheat
and damage the cranking motor, and drain the
battery. Wait at least 15 seconds between each try,
to let the cranking motor cool down.
2-20
Page 109 of 406
2 (Second):This position reduces vehicle speed even
more than 3 (Third) without using the brakes. You
can use 2 (Second) on hills. It can help control vehicle
speed as you go down steep mountain roads, but
then you would also want to use the brakes off and on.
You may use this feature for reducing torque to the
rear wheels when you are trying to start the vehicle from
a stop on slippery road surfaces.
1 (First):This position reduces vehicle speed even
more than 2 (Second) without using the brakes. You can
use it on very steep hills, or in deep snow or mud. If
the shift lever is put in 1 (First) while the vehicle
is moving forward, the transmission will not shift into
first gear until the vehicle is going slowly enough.
Notice:Spinning the tires or holding the vehicle in
one place on a hill using only the accelerator
pedal may damage the transmission. The repair will
not be covered by the vehicle warranty. If you
are stuck, do not spin the tires. When stopping on a
hill, use the brakes to hold the vehicle in place.Tow/Haul Mode
Tow/haul is designed to assist while the vehicle is
pulling a large or heavy load or trailer. Tow/haul is most
useful while pulling such a load in rolling terrain, in
stop-and-go traffic, or when you need improved
low-speed control, such as when parking. The purpose
of the tow/haul mode is to:
•Reduce the frequency and improve the predictability
of transmission shifts,
•provide the same solid shift feel when pulling a
heavy load as when the vehicle is unloaded,
•improve control of vehicle speed while requiring
less throttle pedal activity.
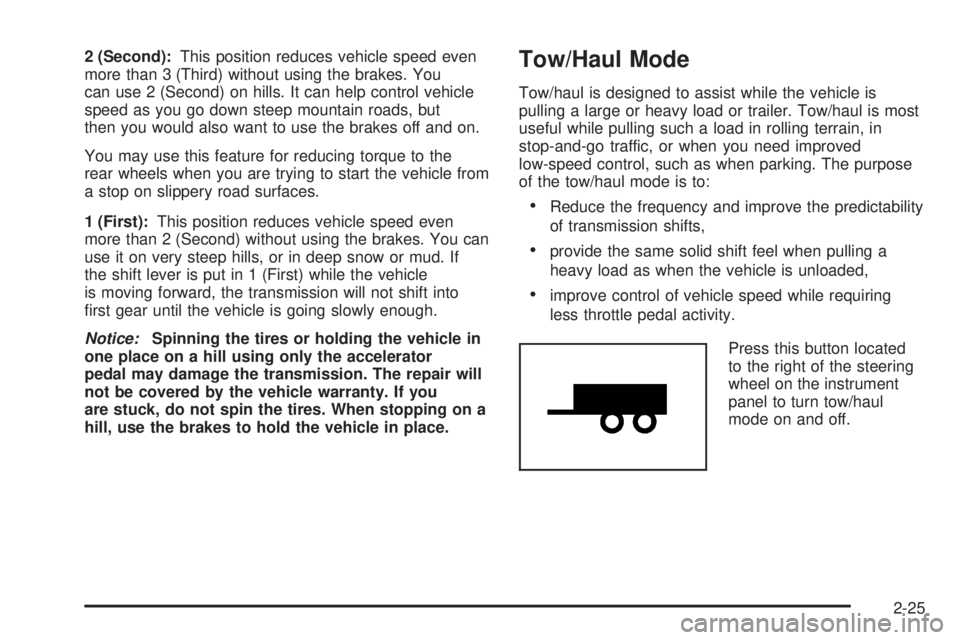
Press this button located
to the right of the steering
wheel on the instrument
panel to turn tow/haul
mode on and off.
2-25
Page 153 of 406

If the check engine light comes on and stays on, while
the engine is running, this indicates that there is an
OBD II problem and service is required.
Malfunctions often are indicated by the system before
any problem is apparent. Being aware of the light
can prevent more serious damage to the vehicle.
This system assists the service technician in correctly
diagnosing any malfunction.
Notice:If the vehicle is continually driven with this
light on, after a while, the emission controls
might not work as well, the vehicle’s fuel economy
might not be as good, and the engine might not
run as smoothly. This could lead to costly repairs
that might not be covered by the vehicle warranty.
Notice:Modi�cations made to the engine,
transmission, exhaust, intake, or fuel system of the
vehicle or the replacement of the original tires with
other than those of the same Tire Performance
Criteria (TPC) can affect the vehicle’s emission
controls and can cause this light to come on.
Modi�cations to these systems could lead to costly
repairs not covered by the vehicle warranty. This
could also result in a failure to pass a required
Emission Inspection/Maintenance test. See
Accessories and Modifications on page 5-3.This light comes on during a malfunction in one of
two ways:
Light Flashing:A misfire condition has been detected.
A misfire increases vehicle emissions and could
damage the emission control system on the vehicle.
Diagnosis and service might be required.
To prevent more serious damage to the vehicle:
•Reduce vehicle speed.
•Avoid hard accelerations.
•Avoid steep uphill grades.
•If towing a trailer, reduce the amount of cargo being
hauled as soon as it is possible.
If the light continues to flash, when it is safe to do so,
stop the vehicle. Find a safe place to park the vehicle.
Turn the key off, wait at least 10 seconds, and restart
the engine. If the light is still flashing, follow the previous
steps and see your dealer/retailer for service as soon
as possible.
Light On Steady:An emission control system
malfunction has been detected on the vehicle. Diagnosis
and service might be required.
3-35
Page 216 of 406
Highway Hypnosis
Always be alert and pay attention to your surroundings
while driving. If you become tired or sleepy, find a safe
place to park your vehicle and rest.
Other driving tips include:
•Keep the vehicle well ventilated.
•Keep interior temperature cool.
•Keep your eyes moving — scan the road ahead
and to the sides.
•Check the rearview mirror and vehicle instruments
often.
Hill and Mountain Roads
Driving on steep hills or through mountains is different
than driving on flat or rolling terrain. Tips for driving
in these conditions include:
•Keep the vehicle serviced and in good shape.
•Check all fluid levels and brakes, tires, cooling
system, and transmission.
•Going down steep or long hills, shift to a
lower gear.
{CAUTION:
If you do not shift down, the brakes could get so
hot that they would not work well. You would then
have poor braking or even none going down a hill.
You could crash. Shift down to let the engine
assist the brakes on a steep downhill slope.
4-14
Page 273 of 406
Radiator Pressure Cap
The radiator pressure cap is located near the center of
the engine compartment. SeeEngine Compartment
Overview on page 5-14for more information on location.
Notice:If the pressure cap is not tightly installed,
coolant loss and possible engine damage may
occur. Be sure the cap is properly and tightly
secured.
Engine Overheating
If your vehicle has the DURAMAX Diesel engine, see
the DURAMAX Diesel manual for more information.
The vehicle has an indicator to warn of engine
overheating.
You will find an engine coolant temperature gage on
your vehicle’s instrument panel. SeeEngine Coolant
Temperature Gage on page 3-33for more information.You may decide not to lift the hood when this warning
appears, but instead get service help right away.
SeeRoadside Assistance Program on page 7-7.
If you do decide to lift the hood, make sure the vehicle
is parked on a level surface.
Then check to see if the engine cooling fans are
running. If the engine is overheating, both fans should
be running. If they are not, do not continue to run
the engine and have the vehicle serviced.
See if the engine cooling fan speed increases when idle
speed is doubled by pushing the accelerator pedal down.
If it does not, your vehicle needs service. Turn off the
engine.
Notice:Engine damage from running the engine
without coolant is not covered by the warranty.
Notice:If the engine catches �re because of being
driven with no coolant, your vehicle can be badly
damaged. The costly repairs would not be covered
by the vehicle warranty.
5-31
Page 322 of 406
Changing a Flat Tire
If a tire goes flat, avoid further tire and wheel damage
by driving slowly to a level place. Turn on the hazard
warning flashers. SeeHazard Warning Flashers
on page 3-6.
{CAUTION:
Changing a tire can be dangerous. The vehicle
can slip off the jack and roll over or fall on you or
other people. You and they could be badly injured
or even killed. Find a level place to change your
tire. To help prevent the vehicle from moving:
1. Set the parking brake firmly.
2. Put the shift lever in P (Park).
3. Turn off the engine and do not restart while
the vehicle is raised.
4. Do not allow passengers to remain in the
vehicle.
CAUTION: (Continued)
CAUTION: (Continued)
To be even more certain the vehicle will not move,
you should put blocks at the front and rear of the
tire farthest away from the one being changed.
That would be the tire, on the other side, at the
opposite end of the vehicle.
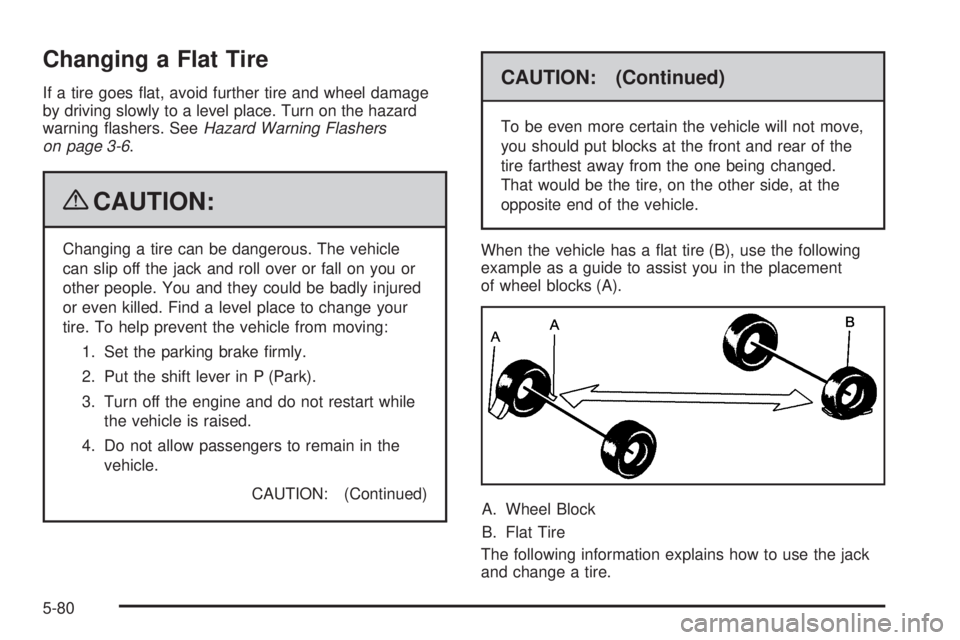
When the vehicle has a flat tire (B), use the following
example as a guide to assist you in the placement
of wheel blocks (A).
A. Wheel Block
B. Flat Tire
The following information explains how to use the jack
and change a tire.
5-80
Page 404 of 406
Reporting Safety Defects
Canadian Government..................................7-15
General Motors...........................................7-16
United States Government............................7-15
Restraint System Check
Checking the Restraint Systems....................1-79
Replacing Restraint System Parts
After a Crash..........................................1-80
Retained Accessory Power...............................2-20
Roadside
Assistance Program....................................... 7-7
Rocking Your Vehicle to Get it Out....................4-18
Routing, Engine Drive Belt...............................6-17
Running the Vehicle While Parked.....................2-30
S
Safety Belt Reminders.....................................3-26
Safety Belts
Care of ......................................................5-98
How to Wear Safety Belts Properly................1-15
Lap-Shoulder Belt........................................1-24
Safety Belt Extender....................................1-30
Safety Belt Use During Pregnancy.................1-30
Safety Belts Are for Everyone.......................1-10
Safety Warnings and Symbols.............................. iii
Scheduled Maintenance..................................... 6-4Seats
Power Seat.................................................. 1-3
Rear Seat Operation...................................... 1-6
Reclining Seatbacks...................................... 1-4
Secondary Latch System.................................5-91
Securing a Child Restraint
Rear Seat Position......................................1-47
Right Front Seat Position......................1-50, 1-54
Security Light.................................................3-39
Service........................................................... 5-3
Accessories and Modifications......................... 5-3
Adding Equipment to the Outside of
the Vehicle................................................ 5-5
California Perchlorate Materials Requirements . . . 5-4
California Proposition 65 Warning.................... 5-4
Doing Your Own Work................................... 5-4
Engine Soon Lamp......................................3-34
Publications Ordering Information...................7-16
Service, Scheduling Appointments.....................7-10
Servicing Your Airbag-Equipped Vehicle..............1-77
Setting the Clock............................................3-65
Sheet Metal Damage.....................................5-101
Shifting
Out of Park................................................2-29
Shift Lock Manual Release...........................2-29
Shifting Into Park............................................2-27
Signals, Turn and Lane-Change.......................... 3-7
Sliding Side Door............................................. 2-9
10