2009 GMC SAVANA PASSENGER automatic transmission
[x] Cancel search: automatic transmissionPage 85 of 406
Keys...............................................................2-2
Remote Keyless Entry (RKE) System................2-3
Remote Keyless Entry (RKE) System Operation . . .2-4
Doors and Locks.............................................2-6
Door Locks....................................................2-6
Power Door Locks..........................................2-7
Cargo Door Relocking.....................................2-7
Delayed Locking.............................................2-7
Programmable Automatic Door Locks................2-7
Automatic Door Lock.......................................2-8
Automatic Door Unlock....................................2-8
Rear Door Security Locks................................2-8
Lockout Protection..........................................2-9
Sliding Side Door...........................................2-9
60/40 Swing-Out Side Door............................2-10
Rear Doors..................................................2-12
Windows........................................................2-13
Manual Windows..........................................2-13
Power Windows............................................2-14
Swing-Out Windows......................................2-15
Enhanced Technology Glass..........................2-16
Sun Visors...................................................2-16
Theft-Deterrent Systems..................................2-16
PASS-Key
®III+ Electronic Immobilizer.............2-16
PASS-Key®III+ Electronic Immobilizer
Operation.................................................2-17Starting and Operating Your Vehicle................2-18
New Vehicle Break-In....................................2-18
Ignition Positions..........................................2-19
Retained Accessory Power (RAP)...................2-20
Starting the Engine.......................................2-20
Fast Idle System..........................................2-21
Engine Coolant Heater..................................2-22
Automatic Transmission Operation...................2-23
Tow/Haul Mode............................................2-25
Parking Brake..............................................2-26
Shifting Into Park..........................................2-27
Shifting Out of Park......................................2-29
Parking Over Things That Burn.......................2-29
Engine Exhaust............................................2-30
Running the Vehicle While Parked..................2-30
Mirrors...........................................................2-31
Manual Rearview Mirror.................................2-31
Outside Manual Mirrors..................................2-31
Outside Towing Mirrors..................................2-32
Outside Power Mirrors...................................2-32
Outside Convex Mirror...................................2-33
Outside Heated Mirrors..................................2-33
Storage Areas................................................2-33
Section 2 Features and Controls
2-1
Page 92 of 406
Automatic Door Lock
The doors will automatically lock when the shift lever is
moved out of P (Park). The automatic door locking
feature cannot be disabled.
Automatic Door Unlock
The doors will automatically unlock when the shift
lever is moved into P (Park).
The automatic unlock feature can be disabled or
programmed in different ways if the vehicle has an
automatic transmission. For more information on
programming, seeDIC Vehicle Customization on
page 3-57.
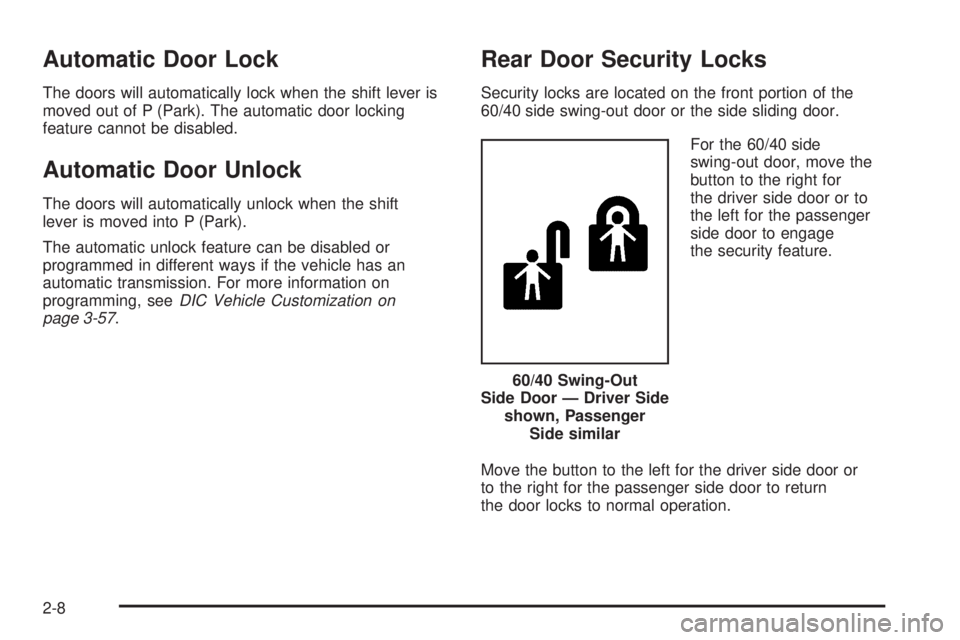
Rear Door Security Locks
Security locks are located on the front portion of the
60/40 side swing-out door or the side sliding door.
For the 60/40 side
swing-out door, move the
button to the right for
the driver side door or to
the left for the passenger
side door to engage
the security feature.
Move the button to the left for the driver side door or
to the right for the passenger side door to return
the door locks to normal operation.60/40 Swing-Out
Side Door — Driver Side
shown, Passenger
Side similar
2-8
Page 107 of 406
The length of time the heater should remain plugged in
depends on several factors. Ask a dealer/retailer in
the area where you will be parking the vehicle for the
best advice on this.
Automatic Transmission Operation
There are several different positions for your shift lever.
P (Park):This position locks your rear wheels. It is
the best position to use when you start the engine
because the vehicle cannot move easily.
{CAUTION:
It is dangerous to get out of the vehicle if the shift
lever is not fully in P (Park) with the parking brake
firmly set. The vehicle can roll.
Do not leave the vehicle when the engine is
running unless you have to. If you have left the
engine running, the vehicle can move suddenly.
You or others could be injured. To be sure the
vehicle will not move, even when you are on fairly
level ground, always set the parking brake and
move the shift lever to P (Park). SeeShifting Into
Park on page 2-27. If you are pulling a trailer, see
Towing a Trailer on page 4-28.
Make sure the shift lever is fully in P (Park) before
starting the engine. The vehicle has an automatic
transmission shift lock control system. You must first
press the brake pedal before you can shift from P (Park)
with the ignition in ON/RUN.
If you cannot shift out of P (Park), ease pressure on the
shift lever and push the shift lever all the way into
P (Park) as you maintain brake application. Then move
the shift lever into another gear. SeeShifting Out of
Park on page 2-29.
2-23
Page 110 of 406
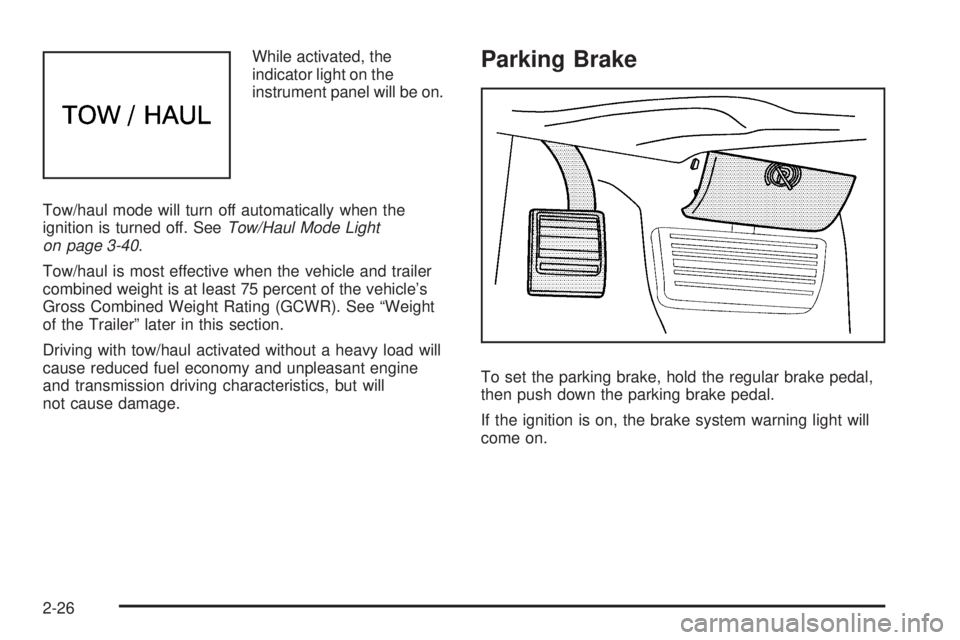
While activated, the
indicator light on the
instrument panel will be on.
Tow/haul mode will turn off automatically when the
ignition is turned off. SeeTow/Haul Mode Light
on page 3-40.
Tow/haul is most effective when the vehicle and trailer
combined weight is at least 75 percent of the vehicle’s
Gross Combined Weight Rating (GCWR). See “Weight
of the Trailer” later in this section.
Driving with tow/haul activated without a heavy load will
cause reduced fuel economy and unpleasant engine
and transmission driving characteristics, but will
not cause damage.Parking Brake
To set the parking brake, hold the regular brake pedal,
then push down the parking brake pedal.
If the ignition is on, the brake system warning light will
come on.
2-26
Page 113 of 406
Shifting Out of Park
The vehicle has an automatic transmission shift lock
control system. You have to fully apply the brakes before
you can shift from P (Park) when the ignition is in
ON/RUN. SeeAutomatic Transmission Operation on
page 2-23.
The shift lock control system is designed to do the
following:
•Prevent the ignition key from being removed unless
the shift lever is in P (Park).
•Prevent movement of the shift lever out of P (Park),
unless the ignition is in ON/RUN and the regular
brake pedal is applied.
The shift lock control system is always functional except
in the case of a dead battery or low voltage (less
than 9 V) battery.
If the vehicle has an uncharged battery or a battery with
low voltage, try charging or jump starting the battery.
SeeJump Starting on page 5-40for more information.
To shift out of P (Park) use the following:
1. Apply the brake pedal.
2. Move the shift lever to the desired position.If you still are unable to shift out of P (Park):
1. Ease the pressure on the shift lever.
2. While holding down the brake pedal, push the shift
lever all the way into P (Park)
3. Move the shift lever to the desired position.
If you are still having a problem shifting, then have the
vehicle serviced.
Parking Over Things That Burn
{CAUTION:
Things that can burn could touch hot exhaust
parts under the vehicle and ignite. Do not park
over papers, leaves, dry grass, or other things that
can burn.
2-29
Page 115 of 406
{CAUTION:
It can be dangerous to get out of the vehicle if the
automatic transmission shift lever is not fully in
P (Park) with the parking brake firmly set. The
vehicle can roll. Do not leave the vehicle when the
engine is running unless you have to. If you have
left the engine running, the vehicle can move
suddenly. You or others could be injured. To be
sure the vehicle will not move, even when you are
on fairly level ground, always set the parking
brake and move the shift lever to P (Park).
Follow the proper steps to be sure the vehicle will not
move. SeeShifting Into Park on page 2-27.
If parking on a hill and pulling a trailer, seeTowing a
Trailer on page 4-28.
Mirrors
Manual Rearview Mirror
Hold the inside rearview mirror in the center to move it for
a clearer view behind your vehicle. Adjust the mirror to
avoid glare from the headlamps behind. Push the tab
forward for daytime use and pull it for nighttime use.
If you have a cargo van without the rear door glass,
the vehicle may not have an inside rearview mirror.
Outside Manual Mirrors
Adjust the mirrors by pressing the mirror up and down
and left and right so you can see a little of the side of your
vehicle, and have a clear view of objects behind you.
The mirrors can be manually folded in or out.
On the lower portion of each mirror is an auxiliary
convex mirror. A convex mirror’s surface is curved so
you can see more from the driver seat. The auxiliary
convex mirrors can be adjusted manually by pressing
the mirror.
2-31
Page 132 of 406

Daytime Running Lamps (DRL)
Daytime Running Lamps (DRL) can make it easier for
others to see the front of your vehicle during the
day. Fully functional daytime running lamps are required
on all vehicles first sold in Canada.
The DRL system comes on in daylight when the
following conditions are met:
•The ignition is on.
•The exterior lamps control is in the AUTO position.
•The shift lever is not in P (Park).
•The light sensor determines it is daytime.
When the DRL are on, the taillamps, sidemarker,
instrument panel and other lamps will not be on.
The automatic headlamp system automatically switches
from DRL to the headlamps depending on the
darkness of the surroundings.
To turn off the DRL, turn the exterior lamp control to the
off position and then release it. For vehicles first sold
in Canada, the transmission must be in the P (Park)
position, before the DRL can be turned off.
Automatic Headlamp System
When it is dark enough outside and the headlamp
switch is in AUTO, the automatic headlamp system turns
on the headlamps, along with the taillamps, sidemarker,
parking lamps, roof marker lamps, and the instrument
panel lights. The radio lights will also be dim.
To turn off the automatic headlamp system, turn the
exterior lamps switch to the off position and then
release. For vehicles first sold in Canada, the
transmission must be in the P (Park) position, before
the automatic headlamp system can be turned off.
The vehicle has a light sensor located on the top of the
instrument panel. Do not cover the sensor or the
system will come on whenever the ignition is on.
The system may also turn on the headlamps when
driving through a parking garage or tunnel.
There is a delay in the transition between the daytime
and nighttime operation of the Daytime Running
Lamps (DRL) and the automatic headlamp systems so
that driving under bridges or bright overhead street
lights does not affect the system. The DRL and
automatic headlamp system is only affected when the
light sensor sees a change in lighting lasting longer than
the delay.
3-14
Page 209 of 406
To turn on the StabiliTrak system, press the StabiliTrak
button again. StabiliTrak will automatically turn back on
when the vehicle speed exceeds 20 mph (32 km/h).
One chime is heard and the StabiliTrak light will turn off.
When the StabiliTrak system has been turned off,
system noises may still be heard as a result of the
brake-traction control coming on.
It is recommended to leave the system on for normal
driving conditions, but it may be necessary to turn
the system off if the vehicle is stuck in sand, mud, ice or
snow, and you want to “rock” the vehicle to attempt to
free it. SeeIf Your Vehicle is Stuck in Sand, Mud, Ice, or
Snow on page 4-17.
StabiliTrak System Operation
The StabiliTrak system is normally on, except when the
system is initializing or has been disabled with the
StabiliTrak button. The StabiliTrak system will
automatically activate to assist the driver in maintaining
vehicle directional control in most driving conditions.
When activated, the StabiliTrak system may reduce
engine power to the wheels and apply braking to
individual wheels as necessary to assist the driver with
vehicle directional control. If cruise control is being
used when StabiliTrak activates, the cruise control
automatically disengages. The cruise control can be
re-engaged when road conditions allow. SeeCruise
Control on page 3-9.The StabiliTrak system may also turn off automatically if
it determines that a problem exists with the system.
If the problem does not clear itself after restarting the
vehicle, see your dealer/retailer for service.
Traction Control Operation
The traction control system is part of the StabiliTrak
system. Traction control limits wheel spin by reducing
engine power to the wheels and by applying brakes to
each individual wheel as necessary.
If the brake-traction control system activates constantly
or if the brakes have heated up due to high speed
braking, the brake-traction control will be automatically
disabled. The system will come back on after the brakes
have cooled. This can take up to two minutes or longer
depending on brake usage.
The traction control system may activate on dry or rough
roads or under conditions such as heavy acceleration
while turning or abrupt upshifts/downshifts of the
transmission. When this a reduction in acceleration
may be noticed, or a noise or vibration may be heard.
This is normal.
Adding non-dealer/non-retailer accessories can affect
the vehicle’s performance. SeeAccessories and
Modifications on page 5-3for more information.
4-7