2009 GMC CANYON light
[x] Cancel search: lightPage 257 of 414

{CAUTION:
Fuel can spray out on you if you open the fuel
cap too quickly. If you spill fuel and then something
ignites it, you could be badly burned. This spray can
happen if the tank is nearly full, and is more likely in
hot weather. Open the fuel cap slowly and wait for
any hiss noise to stop. Then unscrew the cap all
the way.
Be careful not to spill fuel. Do not top off or over�ll the
tank and wait a few seconds after you have �nished
pumping before removing the nozzle. Clean fuel
from painted surfaces as soon as possible.
SeeWashing Your Vehicle on page 5-103.
When replacing the fuel cap, turn it clockwise until it
clicks. Make sure the cap is fully installed. The diagnostic
system can determine if the fuel cap has been left off or
improperly installed. This would allow fuel to evaporate
into the atmosphere. If the fuel cap is not properlyinstalled, the FUEL CAP message appears on the Driver
Information Center (DIC) and the check engine light will
be lit on the instrument panel cluster. SeeDIC Warnings
and Messages on page 3-38andMalfunction Indicator
Lamp on page 3-30for more information.
{CAUTION:
If a �re starts while you are refueling, do not
remove the nozzle. Shut off the �ow of fuel by
shutting off the pump or by notifying the station
attendant. Leave the area immediately.
Notice:If you need a new fuel cap, be sure to get
the right type. Your dealer/retailer can get one
for you. If you get the wrong type, it may not �t
properly. This may cause the malfunction indicator
lamp to light and may damage the fuel tank and
emissions system. SeeMalfunction Indicator Lamp
on page 3-30.
5-9
Page 286 of 414
Brake Wear
This vehicle has front disc brakes and rear drum brakes.
Disc brake pads have built-in wear indicators that make
a high-pitched warning sound when the brake pads
are worn and new pads are needed. The sound
can come and go or be heard all the time the vehicle is
moving, except when applying the brake pedal �rmly.
{CAUTION:
The brake wear warning sound means that soon
the brakes will not work well. That could lead to an
accident. When the brake wear warning sound is
heard, have the vehicle serviced.
Notice:Continuing to drive with worn-out brake
pads could result in costly brake repair.
Some driving conditions or climates can cause a brake
squeal when the brakes are �rst applied or lightly applied.
This does not mean something is wrong with the brakes.Properly torqued wheel nuts are necessary to help
prevent brake pulsation. When tires are rotated, inspect
brake pads for wear and evenly tighten wheel nuts in
the proper sequence to torque speci�cations in
Capacities and Specifications on page 5-115.
Rear drum brakes do not have wear indicators, but if you
ever hear a rear brake rubbing noise, have the rear brake
linings inspected immediately. Also, the rear brake drums
should be removed and inspected each time the tires are
removed for rotation or changing. When you have the
front brake pads replaced, have the rear brakes
inspected, too.
Brake linings should always be replaced as complete
axle sets.
Brake Pedal Travel
See your dealer/retailer if the brake pedal does not
return to normal height, or if there is a rapid increase in
pedal travel. This could be a sign that brake service
might be required.
Brake Adjustment
Every brake stop, the brakes adjust for wear.
5-38
Page 288 of 414
Jump Starting
If the vehicle battery has run down, you may want to use
another vehicle and some jumper cables to start your
vehicle. Be sure to use the following steps to do it safely.
{CAUTION:
Batteries can hurt you. They can be dangerous
because:
They contain acid that can burn you.
They contain gas that can explode or ignite.
They contain enough electricity to burn you.
If you do not follow these steps exactly, some or
all of these things can hurt you.
Notice:Ignoring these steps could result in costly
damage to your vehicle that would not be covered
by your warranty.
Trying to start your vehicle by pushing or pulling it
will not work, and it could damage your vehicle.
1. Check the other vehicle. It must have a 12-volt
battery with a negative ground system.Notice:If the other vehicle’s system is not a 12-volt
system with a negative ground, both vehicles can
be damaged. Only use vehicles with 12-volt systems
with negative grounds to jump start your vehicle.
2. Get the vehicles close enough so the jumper cables
can reach, but be sure the vehicles are not touching
each other. If they are, it could cause a ground
connection you do not want. You would not be able
to start your vehicle, and the bad grounding
could damage the electrical systems.
To avoid the possibility of the vehicles rolling, set
the parking brake �rmly on both vehicles involved in
the jump start procedure. Put an automatic
transmission in P (Park) or a manual transmission
in Neutral before setting the parking brake.
If you have a four-wheel-drive vehicle, be sure the
transfer case is not in Neutral.
Notice:If you leave the radio or other accessories
on during the jump starting procedure, they could be
damaged. The repairs would not be covered by the
warranty. Always turn off the radio and other
accessories when jump starting the vehicle.
3. Turn off the ignition on both vehicles. Unplug
unnecessary accessories plugged into the cigarette
lighter or the accessory power outlets. Turn off
the radio and all lamps that are not needed.
This will avoid sparks and help save both batteries.
And it could save the radio!
5-40
Page 289 of 414
4. Open the hoods and locate the positive (+) and
negative (−) terminal locations on the other vehicle.
Your vehicle has a remote positive (+) and a remote
negative (−) jump starting terminal. SeeEngine
Compartment Overview on page 5-12for more
information on the terminal locations.
{CAUTION:
Using a match near a battery can cause battery
gas to explode. People have been hurt doing this,
and some have been blinded. Use a �ashlight if
you need more light.
Be sure the batteries have enough water. You
do not need to add water to the ACDelco
®battery
(or batteries) installed in your new vehicle. But if a
battery has �ller caps, be sure the right amount of
�uid is there. If it is low, add water to take care of
that �rst. If you do not, explosive gas could be
present.
Battery �uid contains acid that can burn you. Do not
get it on you. If you accidentally get it in your eyes
or on your skin, �ush the place with water and get
medical help immediately.
{CAUTION:
Fans or other moving engine parts can injure you
badly. Keep your hands away from moving parts
once the engine is running.
5. Check that the jumper cables do not have loose or
missing insulation. If they do, you could get a
shock. The vehicles could be damaged too.
Before you connect the cables, here are some
basic things you should know. Positive (+) will go to
positive (+) or to a remote positive (+) terminal if the
vehicle has one. Negative (−) will go to a heavy,
unpainted metal engine part or to a remote
negative (−) terminal if the vehicle has one.
Do not connect positive (+) to negative (−)oryou
will get a short that would damage the battery
and maybe other parts too. And do not connect the
negative (−) cable to the negative (−) terminal on
the dead battery because this can cause sparks.
5-41
Page 307 of 414
Curb Weight:The weight of a motor vehicle with
standard and optional equipment including the
maximum capacity of fuel, oil, and coolant,
but without passengers and cargo.
DOT Markings
:A code molded into the sidewall
of a tire signifying that the tire is in compliance
with the U.S. Department of Transportation (DOT)
motor vehicle safety standards. The DOT code
includes the Tire Identi�cation Number (TIN),
an alphanumeric designator which can also identify
the tire manufacturer, production plant, brand,
and date of production.
GVWR
:Gross Vehicle Weight Rating. SeeLoading
the Vehicle on page 4-33.
GAWR FRT
:Gross Axle Weight Rating for the
front axle. SeeLoading the Vehicle on page 4-33.
GAWR RR
:Gross Axle Weight Rating for the
rear axle. SeeLoading the Vehicle on page 4-33.
Intended Outboard Sidewall
:The side of an
asymmetrical tire, that must always face outward
when mounted on a vehicle.
Kilopascal (kPa)
:The metric unit for air pressure.Light Truck (LT-Metric) Tire
:A tire used on light
duty trucks and some multipurpose passenger
vehicles.
Load Index
:An assigned number ranging from
1 to 279 that corresponds to the load carrying
capacity of a tire.
Maximum In�ation Pressure
:The maximum air
pressure to which a cold tire can be in�ated.
The maximum air pressure is molded onto the
sidewall.
Maximum Load Rating
:The load rating for a tire
at the maximum permissible in�ation pressure
for that tire.
Maximum Loaded Vehicle Weight
:The sum of
curb weight, accessory weight, vehicle capacity
weight, and production options weight.
Normal Occupant Weight
:The number of
occupants a vehicle is designed to seat multiplied
by 150 lbs (68 kg). SeeLoading the Vehicle on
page 4-33.
Occupant Distribution
:Designated seating
positions.
5-59
Page 308 of 414
Outward Facing Sidewall:The side of an
asymmetrical tire that has a particular side that
faces outward when mounted on a vehicle. The
side of the tire that contains a whitewall, bears
white lettering, or bears manufacturer, brand,
and/or model name molding that is higher or deeper
than the same moldings on the other sidewall of
the tire.
Passenger (P-Metric) Tire
:A tire used on
passenger cars and some light duty trucks and
multipurpose vehicles.
Recommended In�ation Pressure
:Vehicle
manufacturer’s recommended tire in�ation pressure
as shown on the tire placard. SeeInflation - Tire
Pressure on page 5-61andLoading the Vehicle on
page 4-33.
Radial Ply Tire
:A pneumatic tire in which the
ply cords that extend to the beads are laid at
90 degrees to the centerline of the tread.
Rim
:A metal support for a tire and upon which
the tire beads are seated.
Sidewall
:The portion of a tire between the tread
and the bead.
Speed Rating
:An alphanumeric code assigned to
a tire indicating the maximum speed at which a
tire can operate.Traction
:The friction between the tire and the
road surface. The amount of grip provided.
Tread
:The portion of a tire that comes into
contact with the road.
Treadwear Indicators
:Narrow bands, sometimes
called wear bars, that show across the tread of
a tire when only 1/16 inch (1.6 mm) of tread
remains. SeeWhen It Is Time for New Tires on
page 5-69.
UTQGS (Uniform Tire Quality Grading
Standards)
:A tire information system that
provides consumers with ratings for a tire’s
traction, temperature, and treadwear. Ratings
are determined by tire manufacturers using
government testing procedures. The ratings are
molded into the sidewall of the tire. SeeUniform
Tire Quality Grading on page 5-72.
Vehicle Capacity Weight
:The number of
designated seating positions multiplied by 150 lbs
(68 kg) plus the rated cargo load. SeeLoading
the Vehicle on page 4-33.
Vehicle Maximum Load on the Tire
:Load on an
individual tire due to curb weight, accessory weight,
occupant weight, and cargo weight.
5-60
Page 313 of 414
Tire Pressure Monitor Operation
This vehicle may have a Tire Pressure Monitor System
(TPMS). The TPMS is designed to warn the driver when
a low tire pressure condition exists. TPMS sensors
are mounted onto each tire and wheel assembly on your
vehicle, excluding the spare tire. The TPMS sensors
monitor the air pressure in your vehicle’s tires and
transmit the tire pressure readings to a receiver located
in the vehicle.
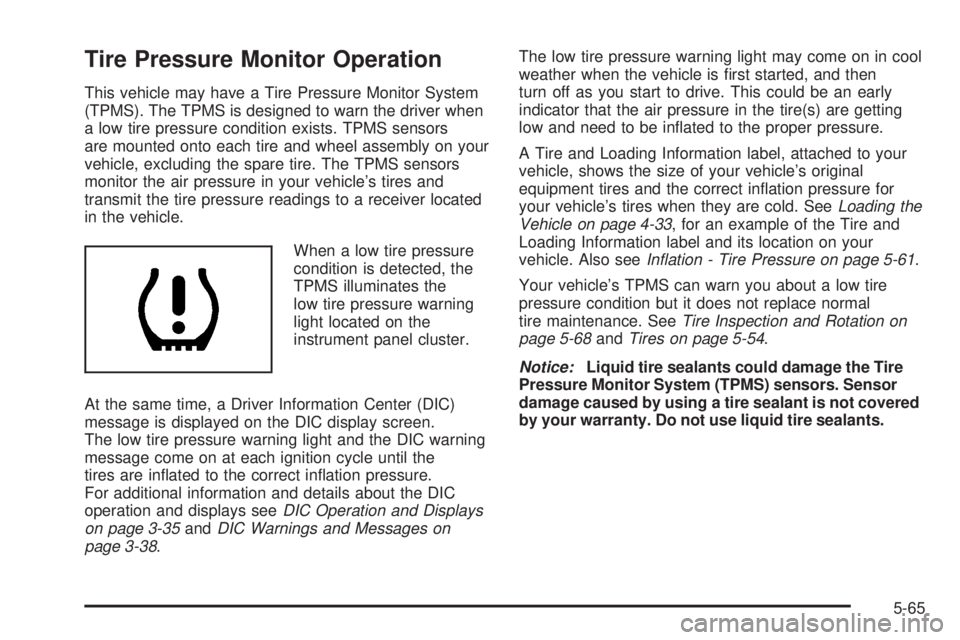
When a low tire pressure
condition is detected, the
TPMS illuminates the
low tire pressure warning
light located on the
instrument panel cluster.
At the same time, a Driver Information Center (DIC)
message is displayed on the DIC display screen.
The low tire pressure warning light and the DIC warning
message come on at each ignition cycle until the
tires are in�ated to the correct in�ation pressure.
For additional information and details about the DIC
operation and displays seeDIC Operation and Displays
on page 3-35andDIC Warnings and Messages on
page 3-38.The low tire pressure warning light may come on in cool
weather when the vehicle is �rst started, and then
turn off as you start to drive. This could be an early
indicator that the air pressure in the tire(s) are getting
low and need to be in�ated to the proper pressure.
A Tire and Loading Information label, attached to your
vehicle, shows the size of your vehicle’s original
equipment tires and the correct in�ation pressure for
your vehicle’s tires when they are cold. SeeLoading the
Vehicle on page 4-33, for an example of the Tire and
Loading Information label and its location on your
vehicle. Also seeInflation - Tire Pressure on page 5-61.
Your vehicle’s TPMS can warn you about a low tire
pressure condition but it does not replace normal
tire maintenance. SeeTire Inspection and Rotation on
page 5-68andTires on page 5-54.
Notice:Liquid tire sealants could damage the Tire
Pressure Monitor System (TPMS) sensors. Sensor
damage caused by using a tire sealant is not covered
by your warranty. Do not use liquid tire sealants.
5-65
Page 314 of 414
TPMS Malfunction Light and Message
The TPMS will not function properly if one or more of the
TPMS sensors are missing or inoperable. When the
system detects a malfunction, the low tire warning light
�ashes for about one minute and then stays on for
the remainder of the ignition cycle. A DIC warning
message is also displayed. The low tire warning light
and DIC warning message come on at each ignition
cycle until the problem is corrected. Some of the
conditions that can cause the malfunction light and DIC
message to come on are:
One of the road tires has been replaced with the
spare tire. The spare tire does not have a TPMS
sensor. The TPMS malfunction light and DIC
message should go off once you re-install the road
tire containing the TPMS sensor.
The TPMS sensor matching process was started
but not completed or not completed successfully
after rotating the vehicle’s tires. The DIC message
and TPMS malfunction light should go off once
the TPMS sensor matching process is performed
successfully. See “TPMS Sensor Matching Process”
later in this section.
One or more TPMS sensors are missing or
damaged. The DIC message and the TPMS
malfunction light should go off when the TPMS
sensors are installed and the sensor matching
process is performed successfully. See your
dealer/retailer for service.
Replacement tires or wheels do not match your
vehicle’s original equipment tires or wheels. Tires
and wheels other than those recommended for your
vehicle could prevent the TPMS from functioning
properly. SeeBuying New Tires on page 5-70.
Operating electronic devices or being near facilities
using radio wave frequencies similar to the TPMS
could cause the TPMS sensors to malfunction.
If the TPMS is not functioning it cannot detect or signal a
low tire condition. See your dealer/retailer for service if
the TPMS malfunction light and DIC message comes on
and stays on.
TPMS Sensor Matching Process
Each TPMS sensor has a unique identi�cation code.
Any time you replace one or more of the TPMS sensors
or rotate your vehicle’s tires, the identi�cation codes need
to be matched to the new tire/wheel position. The sensors
are matched to the tire/wheel positions in the following
order: driver side front tire, passenger side front tire,
passenger side rear tire, and driver side rear tire using a
TPMS diagnostic tool. See your dealer/retailer for service.
The TPMS sensors can also be matched to each
tire/wheel position by increasing or decreasing the tire’s
air pressure. If increasing the tire’s air pressure, do not
exceed the maximum in�ation pressure indicated on the
tire’s sidewall. To let air-pressure out of a tire you can use
the pointed end of the valve cap, a pencil-style air
pressure gage, or a key.
5-66