Page 45 of 336
Radio Display Condition Action Required
NO TEXT Song title information
not available.Song title information
not available at this
time on this channel.
The system is working
properly.
NO TEXT Category information
not available.Category information
not available at this
time on this channel.
The system is working
properly.
NO SIGNAL Loss of signal from
the SIRIUS satellite or
SIRIUS tower to the
vehicle antenna.You are in a location
that is blocking the
SIRIUS signal (i.e.,
tunnel, under an
overpass, dense foliage,
etc). The system is
working properly. When
you move into an open
area, the signal should
return.
UPDATING Update of channel
programming in
progress.No action required. The
process may take up to
three minutes.
CALL SIRIUS
1–888–539–7474Satellite service has
been deactivated by
SIRIUS Satellite
Radio.Call SIRIUS at
1–888–539–7474 to
re-activate or resolve
subscription issues.
FAMILY ENTERTAINMENT DVD SYSTEM (IF EQUIPPED)
WARNING:Driving while distracted can result in loss of vehicle
control, accident and injury. Ford strongly recommends that
drivers use extreme caution when using any device that may take their
focus off the road. The driver’s primary responsibility is the safe
operation of their vehicle. Only use cell phones and other devices not
essential to the driving task when it is safe to do so.
2009 Taurus(500)
Owners Guide, 1st Printing
USA(fus)
Entertainment Systems
45
Page 68 of 336

The B headphone jack (5) is located
on the right side of the DVD system.
Plug in wired headphones (not
included) here.
Note:The B headphones can only access DVD and AUX modes. They
cannot access radio sources.
Audio displays
Your DVD system interacts closely with the front audio system. Status
messages will appear in the radio display showing the DVD status. Some
possible radio display messages:
•SINGLE PLAY or DUAL PLAY
•DVD LOAD
•DVD MENU
•DVD STOP
Audio interaction
You can then also use the front audio controls to advance, reverse, play
and pause a DVD. While a DVD is playing you may use the following
controls on the front radio:
•SEEK:Press to advance to the previous (
) or next () DVD
chapters.
•
: Press to play a DVD or to pause the DVD.
When the radio displays “DVD MENU”, press PLAY on the radio
(memory preset #6), to play the disc.
Parental control for the DVD system
Your Family Entertainment System (FES) allows you to have control
over the rear seat controls in a few different ways. The DVD system is
automatically activated when the vehicle ignition is ON, which allows the
rear seat passengers to use the DVD system.
There are three levels of control of
the FES buttons. The states are
FULL (enabled), LOCAL or
LOCKED (disabled). To change the level of control, press the memory
2009 Taurus(500)
Owners Guide, 1st Printing
USA(fus)
Entertainment Systems
68
Page 69 of 336
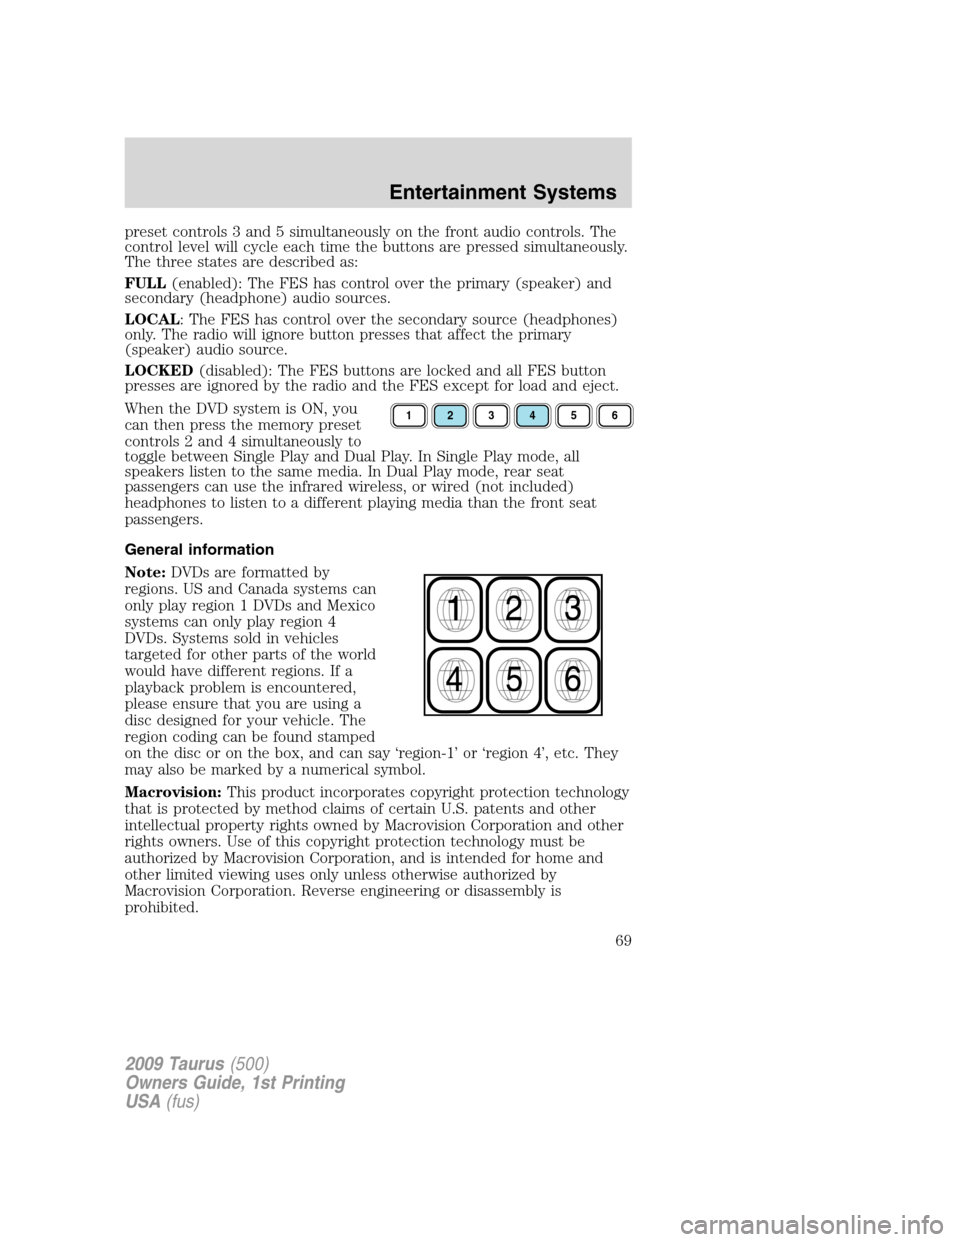
preset controls 3 and 5 simultaneously on the front audio controls. The
control level will cycle each time the buttons are pressed simultaneously.
The three states are described as:
FULL(enabled): The FES has control over the primary (speaker) and
secondary (headphone) audio sources.
LOCAL: The FES has control over the secondary source (headphones)
only. The radio will ignore button presses that affect the primary
(speaker) audio source.
LOCKED(disabled): The FES buttons are locked and all FES button
presses are ignored by the radio and the FES except for load and eject.
When the DVD system is ON, you
can then press the memory preset
controls 2 and 4 simultaneously to
toggle between Single Play and Dual Play. In Single Play mode, all
speakers listen to the same media. In Dual Play mode, rear seat
passengers can use the infrared wireless, or wired (not included)
headphones to listen to a different playing media than the front seat
passengers.
General information
Note:DVDs are formatted by
regions. US and Canada systems can
only play region 1 DVDs and Mexico
systems can only play region 4
DVDs. Systems sold in vehicles
targeted for other parts of the world
would have different regions. If a
playback problem is encountered,
please ensure that you are using a
disc designed for your vehicle. The
region coding can be found stamped
on the disc or on the box, and can say ‘region-1’ or ‘region 4’, etc. They
may also be marked by a numerical symbol.
Macrovision:This product incorporates copyright protection technology
that is protected by method claims of certain U.S. patents and other
intellectual property rights owned by Macrovision Corporation and other
rights owners. Use of this copyright protection technology must be
authorized by Macrovision Corporation, and is intended for home and
other limited viewing uses only unless otherwise authorized by
Macrovision Corporation. Reverse engineering or disassembly is
prohibited.
123456
2009 Taurus(500)
Owners Guide, 1st Printing
USA(fus)
Entertainment Systems
69
Page 85 of 336
Note:If the battery is disconnected, discharged, or a new battery is
installed, the dimmer switch requires re-calibration. Rotate the dimmer
switch from the full dim position to the full dome/on position to reset.
This will ensure that your displays are visible under all lighting
conditions.
AIMING THE HEADLAMPS
The headlamps on your vehicle are properly aimed at the assembly plant.
If your vehicle has been in an accident, the alignment of your headlamps
should be checked by your authorized dealer.
Vertical aim adjustment
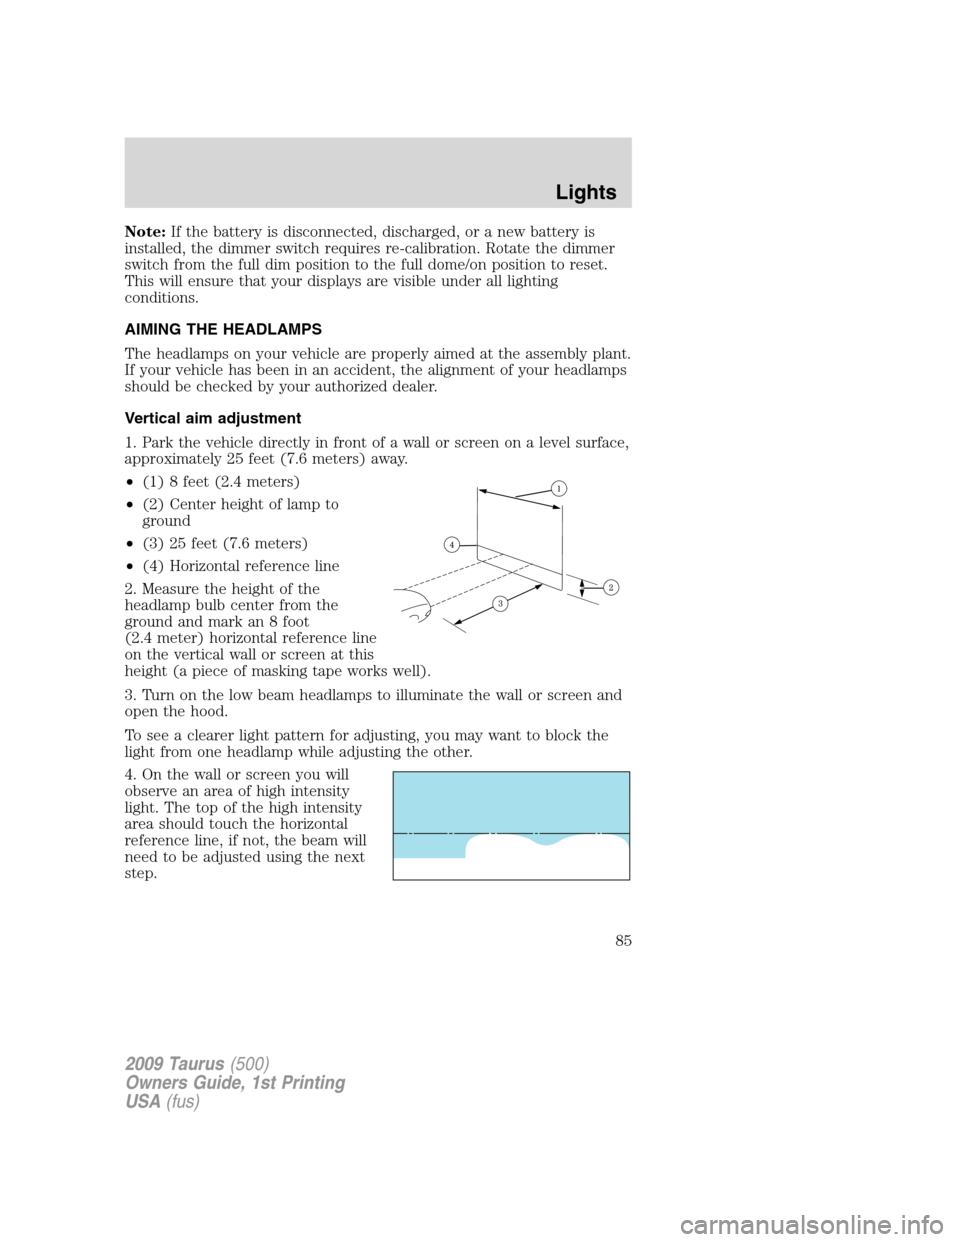
1. Park the vehicle directly in front of a wall or screen on a level surface,
approximately 25 feet (7.6 meters) away.
•(1) 8 feet (2.4 meters)
•(2) Center height of lamp to
ground
•(3) 25 feet (7.6 meters)
•(4) Horizontal reference line
2. Measure the height of the
headlamp bulb center from the
ground and mark an 8 foot
(2.4 meter) horizontal reference line
on the vertical wall or screen at this
height (a piece of masking tape works well).
3. Turn on the low beam headlamps to illuminate the wall or screen and
open the hood.
To see a clearer light pattern for adjusting, you may want to block the
light from one headlamp while adjusting the other.
4. On the wall or screen you will
observe an area of high intensity
light. The top of the high intensity
area should touch the horizontal
reference line, if not, the beam will
need to be adjusted using the next
step.
2009 Taurus(500)
Owners Guide, 1st Printing
USA(fus)
Lights
85
Page 86 of 336
5. Locate the vertical adjuster on
each headlamp. Using a Phillips #2
screwdriver, turn the adjuster either
clockwise (to adjust down) or
counterclockwise (to adjust up).
The horizontal edge of the brighter
light should touch the horizontal
reference line.
6. Close the hood and turn off the lamps.
HORIZONTAL AIM IS NOT REQUIRED FOR THIS VEHICLE AND IS
NON-ADJUSTABLE.
TURN SIGNAL CONTROL
•Push down to activate the left
turn signal.
•Push up to activate the right turn
signal.
INTERIOR LAMPS
Dome lamps and map lamps
The map lamps are located on the
overhead console. Press the controls
on either side of each map lamp to
turn on the lamps.
2009 Taurus(500)
Owners Guide, 1st Printing
USA(fus)
Lights
86
Page 89 of 336
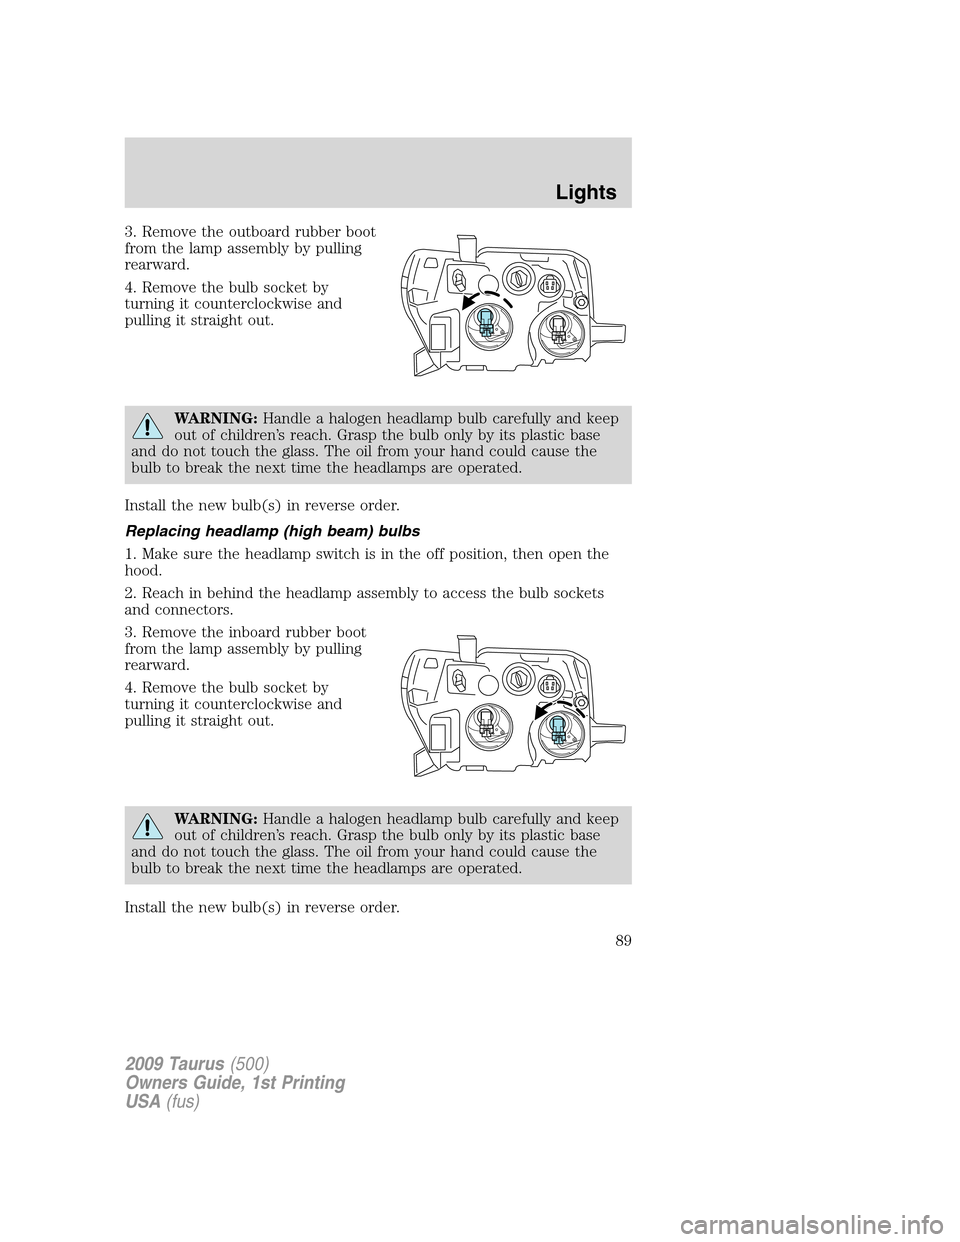
3. Remove the outboard rubber boot
from the lamp assembly by pulling
rearward.
4. Remove the bulb socket by
turning it counterclockwise and
pulling it straight out.
WARNING:Handle a halogen headlamp bulb carefully and keep
out of children’s reach. Grasp the bulb only by its plastic base
and do not touch the glass. The oil from your hand could cause the
bulb to break the next time the headlamps are operated.
Install the new bulb(s) in reverse order.
Replacing headlamp (high beam) bulbs
1. Make sure the headlamp switch is in the off position, then open the
hood.
2. Reach in behind the headlamp assembly to access the bulb sockets
and connectors.
3. Remove the inboard rubber boot
from the lamp assembly by pulling
rearward.
4. Remove the bulb socket by
turning it counterclockwise and
pulling it straight out.
WARNING:Handle a halogen headlamp bulb carefully and keep
out of children’s reach. Grasp the bulb only by its plastic base
and do not touch the glass. The oil from your hand could cause the
bulb to break the next time the headlamps are operated.
Install the new bulb(s) in reverse order.
2009 Taurus(500)
Owners Guide, 1st Printing
USA(fus)
Lights
89
Page 90 of 336
Replacing front parking lamp/turn signal/sidemarker bulbs
1. Make sure headlamp switch is in the off position, then open the hood.
2. Reach in behind the headlamp assembly to access the bulb sockets
and connectors.
3. Locate the parking/turn signal
lamp electrical connector and
remove it by pulling it straight off.
4. Remove the bulb socket by
turning it counterclockwise and
pulling it straight out.
5. To remove the bulb, pull it
straight out of the bulb socket.
Install the new bulb(s) in reverse order.
Replacing rear brake/tail/turn/backup and side marker lamp bulbs
The brake/tail/turn/backup and side marker lamp bulbs are located in the
tail lamp assembly. Follow the same steps to replace either bulb.
•(1)Backup lamp
•(2)Brake/tail/turn lamp
•(3)Side marker lamp
1. Make sure the headlamp switch is in the off position and open the
trunk.
2009 Taurus(500)
Owners Guide, 1st Printing
USA(fus)
Lights
90
Page 91 of 336
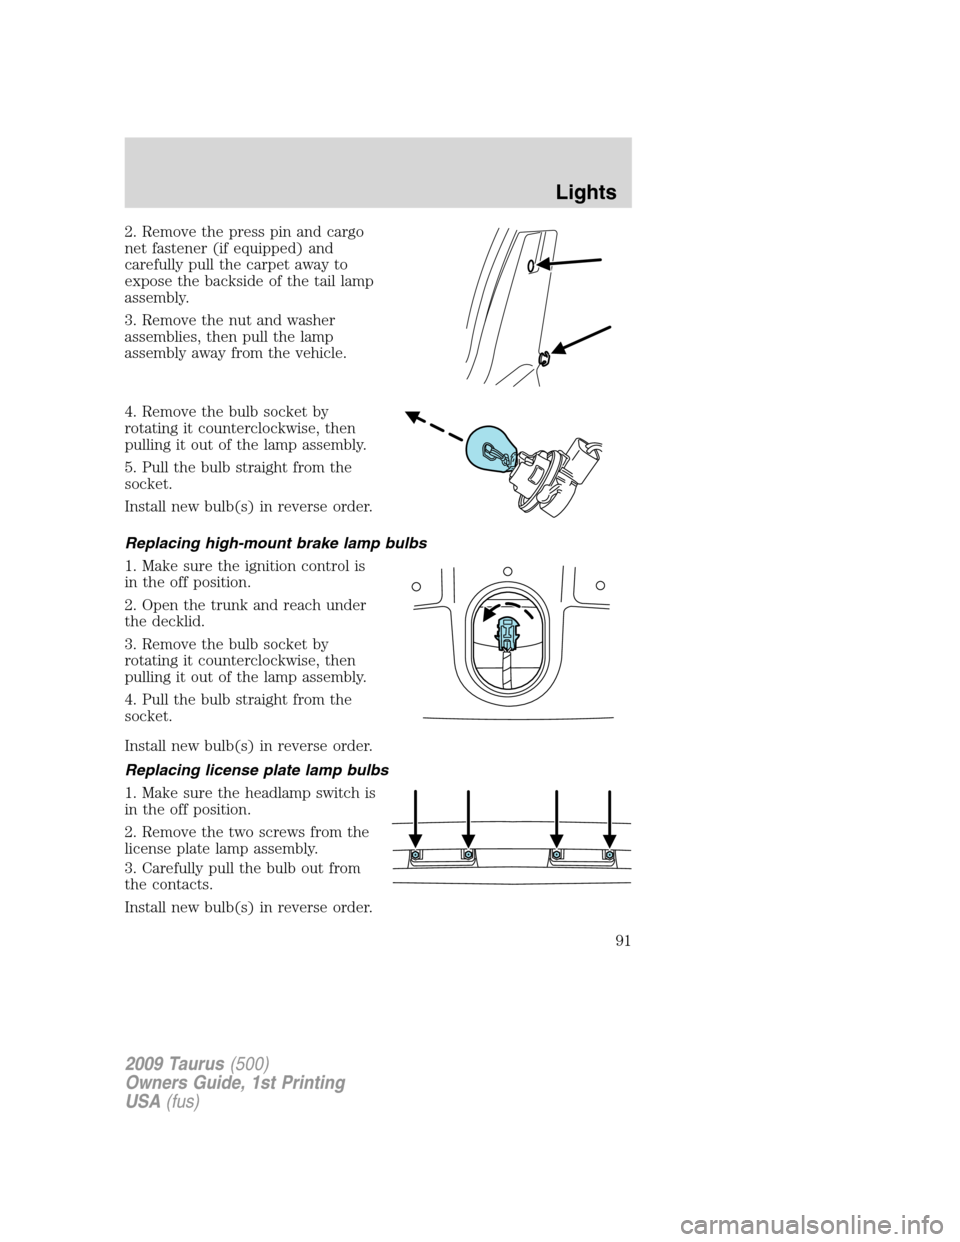
2. Remove the press pin and cargo
net fastener (if equipped) and
carefully pull the carpet away to
expose the backside of the tail lamp
assembly.
3. Remove the nut and washer
assemblies, then pull the lamp
assembly away from the vehicle.
4. Remove the bulb socket by
rotating it counterclockwise, then
pulling it out of the lamp assembly.
5. Pull the bulb straight from the
socket.
Install new bulb(s) in reverse order.
Replacing high-mount brake lamp bulbs
1. Make sure the ignition control is
in the off position.
2. Open the trunk and reach under
the decklid.
3. Remove the bulb socket by
rotating it counterclockwise, then
pulling it out of the lamp assembly.
4. Pull the bulb straight from the
socket.
Install new bulb(s) in reverse order.
Replacing license plate lamp bulbs
1. Make sure the headlamp switch is
in the off position.
2. Remove the two screws from the
license plate lamp assembly.
3. Carefully pull the bulb out from
the contacts.
Install new bulb(s) in reverse order.
2009 Taurus(500)
Owners Guide, 1st Printing
USA(fus)
Lights
91